
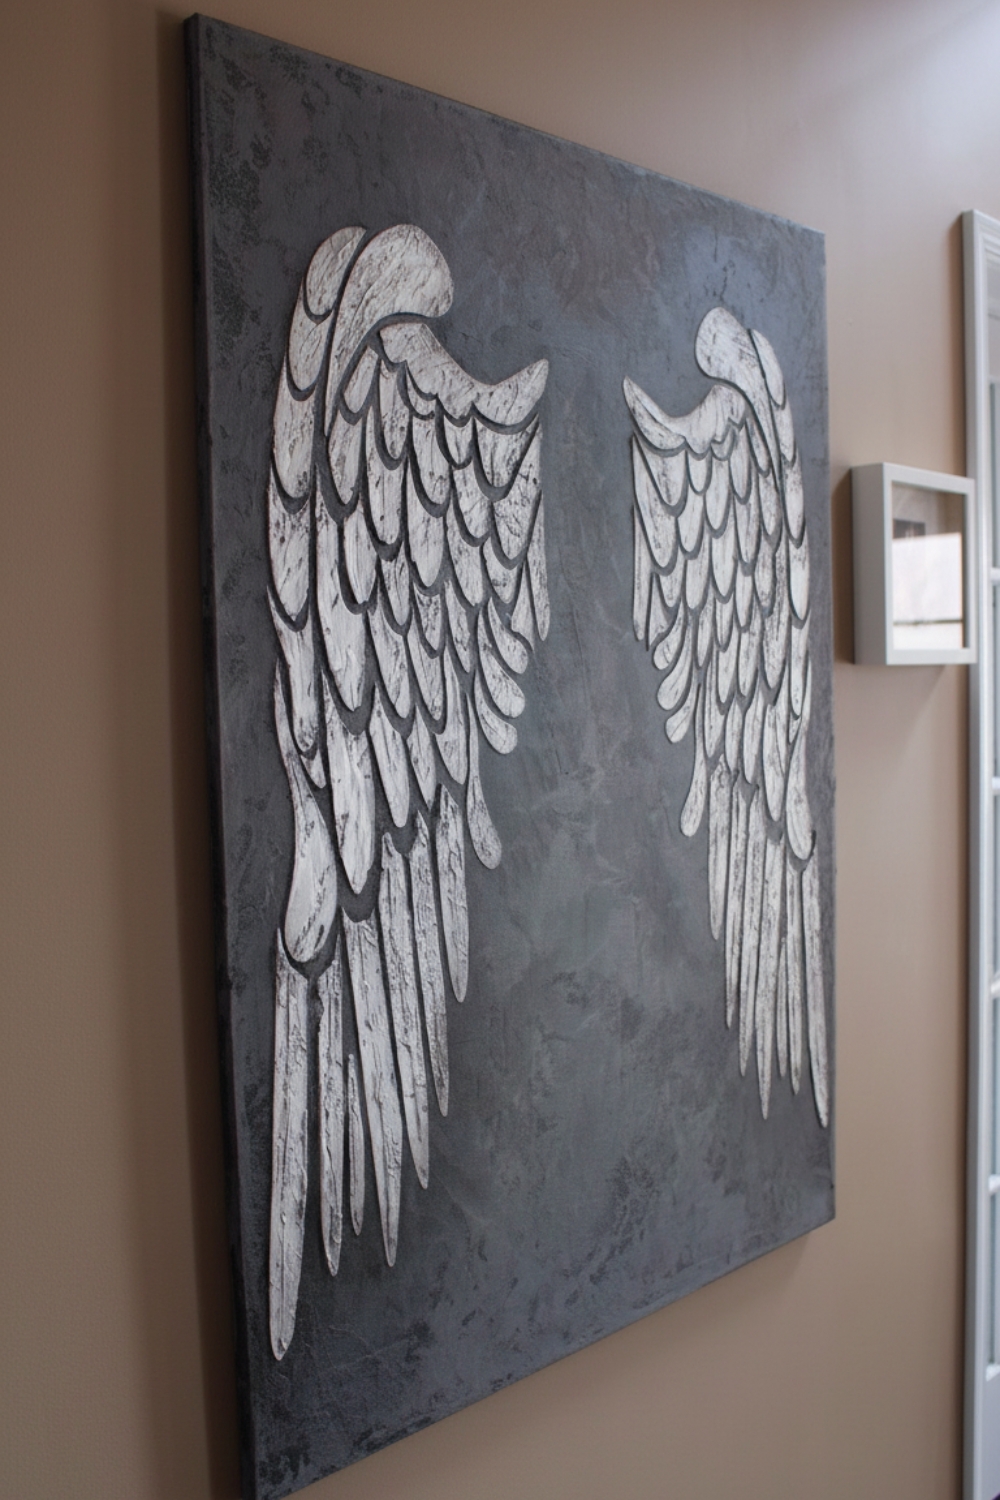
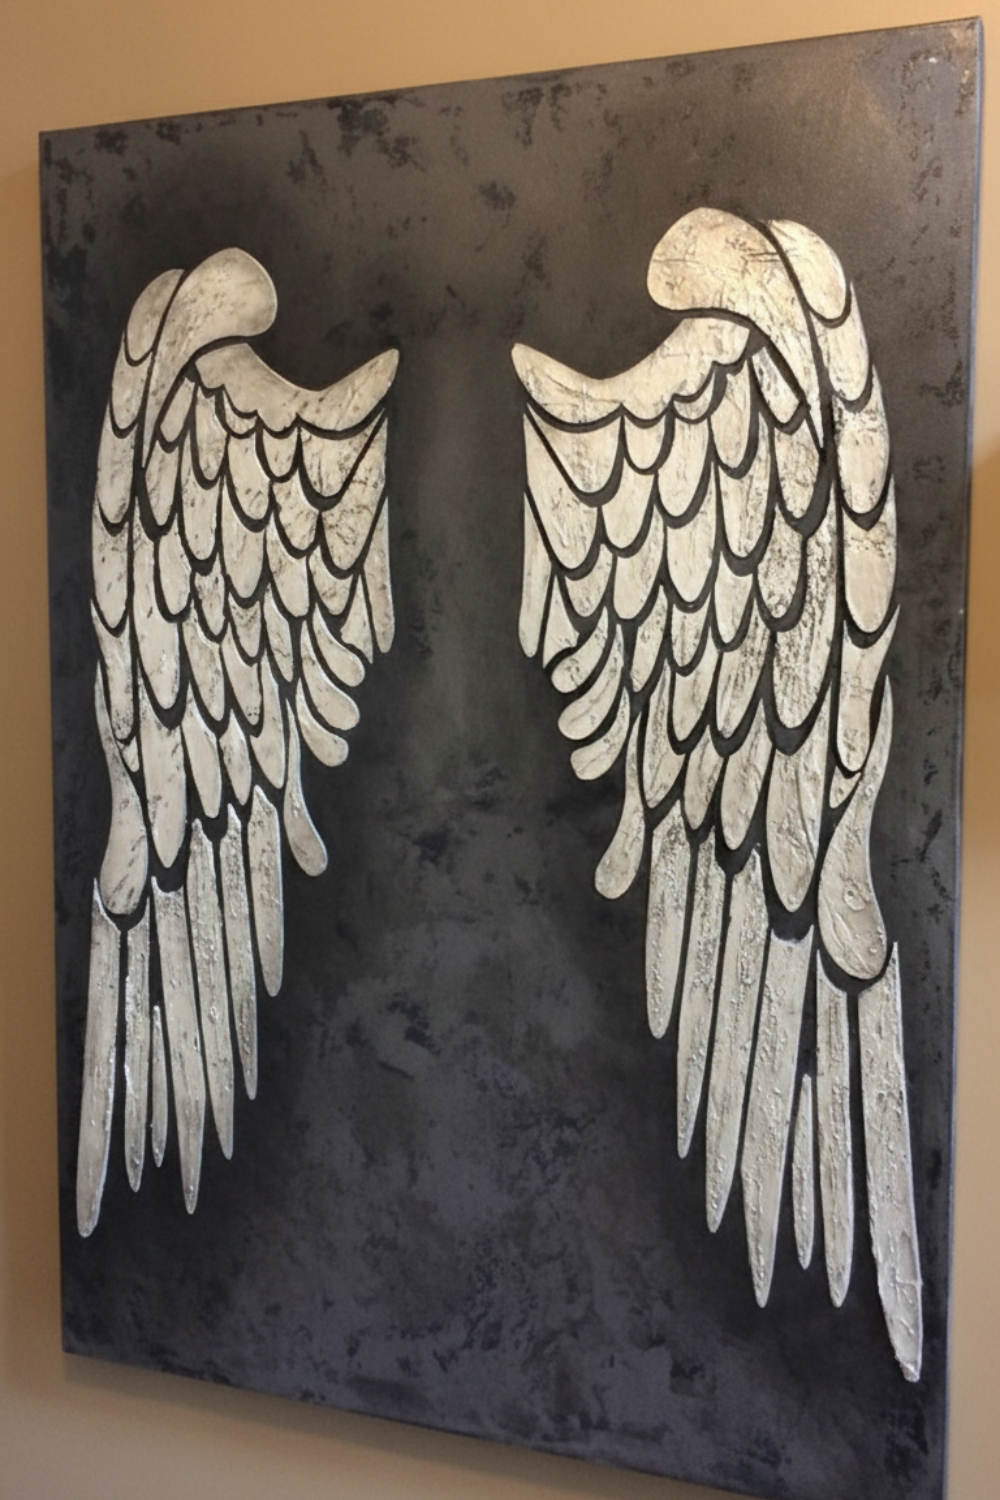
DIY Textured Canvas Wall Art for a Large Entryway
Sometimes a space in your home feels unfinished, but it's hard to figure out exactly what it needs. Large walls-especially in entryways or dining rooms-can be particularly challenging. Small decor pieces often feel lost, while store-bought artwork doesn't always reflect your personal style.
DIY Textured Canvas Wall Art
One of the most satisfying solutions is creating your own large-scale wall art. Not only can it be customized to your space, but it also brings personality and character that mass-produced decor simply can't match.
Today's project comes from Dorrie, a creative DIY enthusiast who loves transforming ordinary spaces with handmade details. Her goal is simple: make her home feel less "big box store" and more personal.
This textured canvas art project is a beautiful example of how a simple canvas, a stencil, and a little creativity can completely transform a blank wall.
Starting with a Blank Wall
Like many homes, the entryway in Dorrie's house had plenty of potential but felt unfinished and uninspiring. Large walls can easily feel empty, and finding artwork large enough to balance the space can be difficult.
Instead of searching for something to buy, she decided to create a custom piece that would fill the wall and add texture and dimension to the space.
Large DIY wall art can make a dramatic impact while still feeling simple and neutral enough to work with different decorating styles.
Materials Used
This project uses a few basic materials that are easy to find at most craft or home improvement stores.
Supplies
- Large canvas (36 × 48 inches works well for statement art)
- Mineral paint or acrylic paint for the base coat
- Texture medium or plaster
- Decorative stencil
- Spray adhesive
- Trowel or palette knife
- Sandpaper (around 220 grit)
- Metallic paint for highlights
- Glaze for finishing
These materials allow you to build layers of texture and subtle color variations that give the finished piece depth and character.
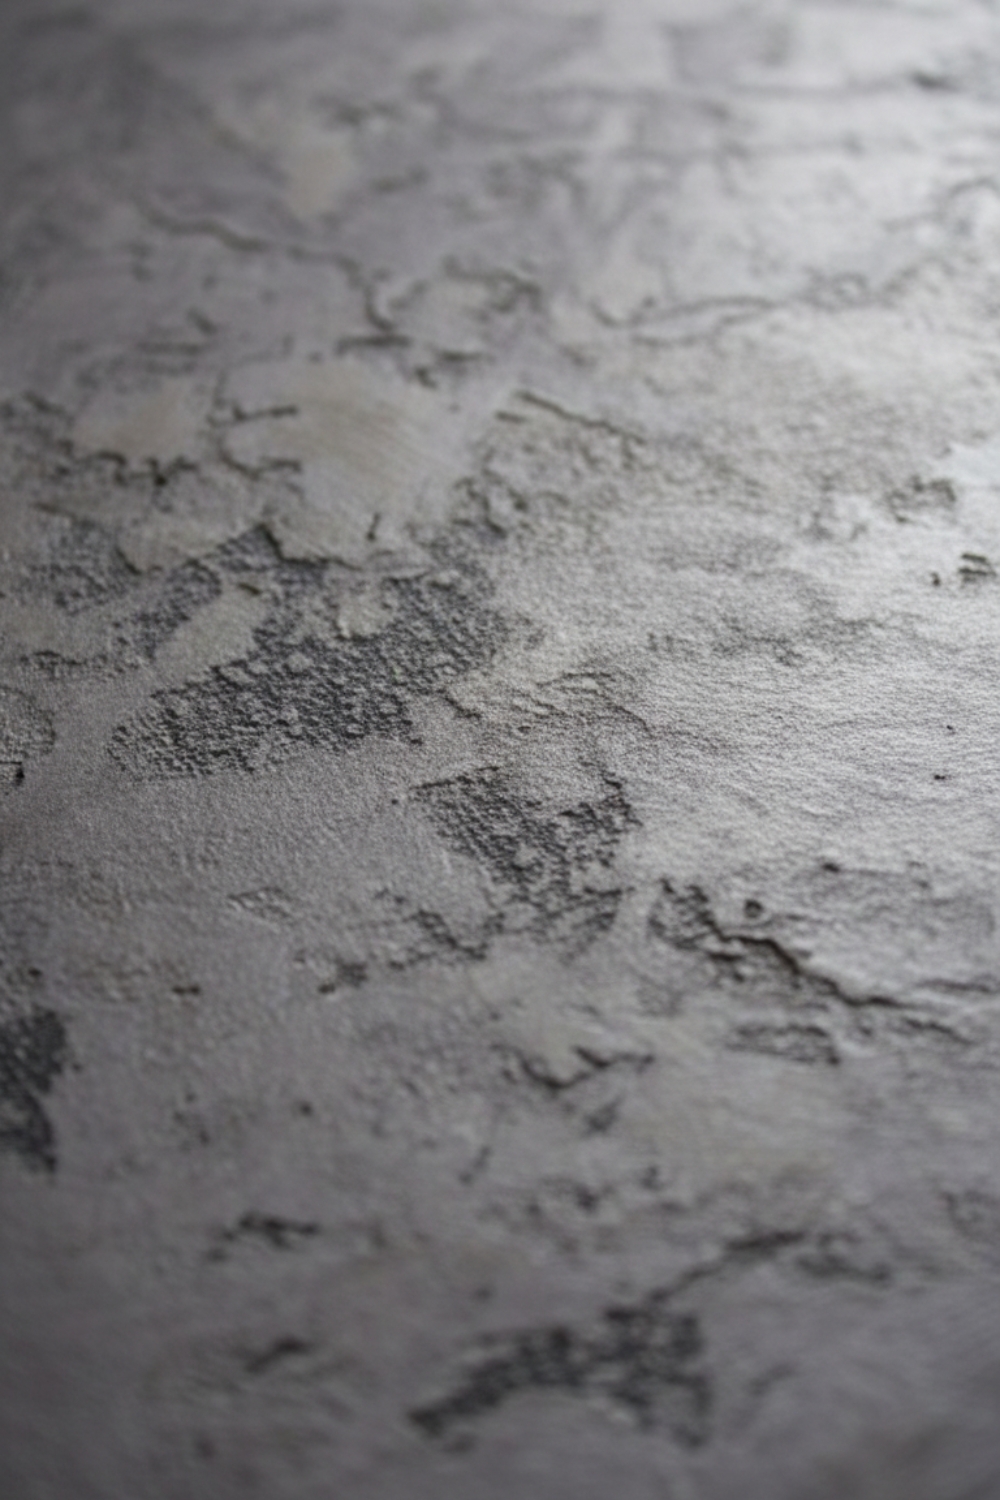
Step 1: Paint the Canvas Base
Start by painting the entire canvas with a neutral base color.
A soft gray tone works especially well because it adds depth while still allowing the texture layers to stand out. Allow the base coat to dry completely before moving on to the next step.
Adding a slightly textured paint finish at this stage can help create dimension in the final piece.
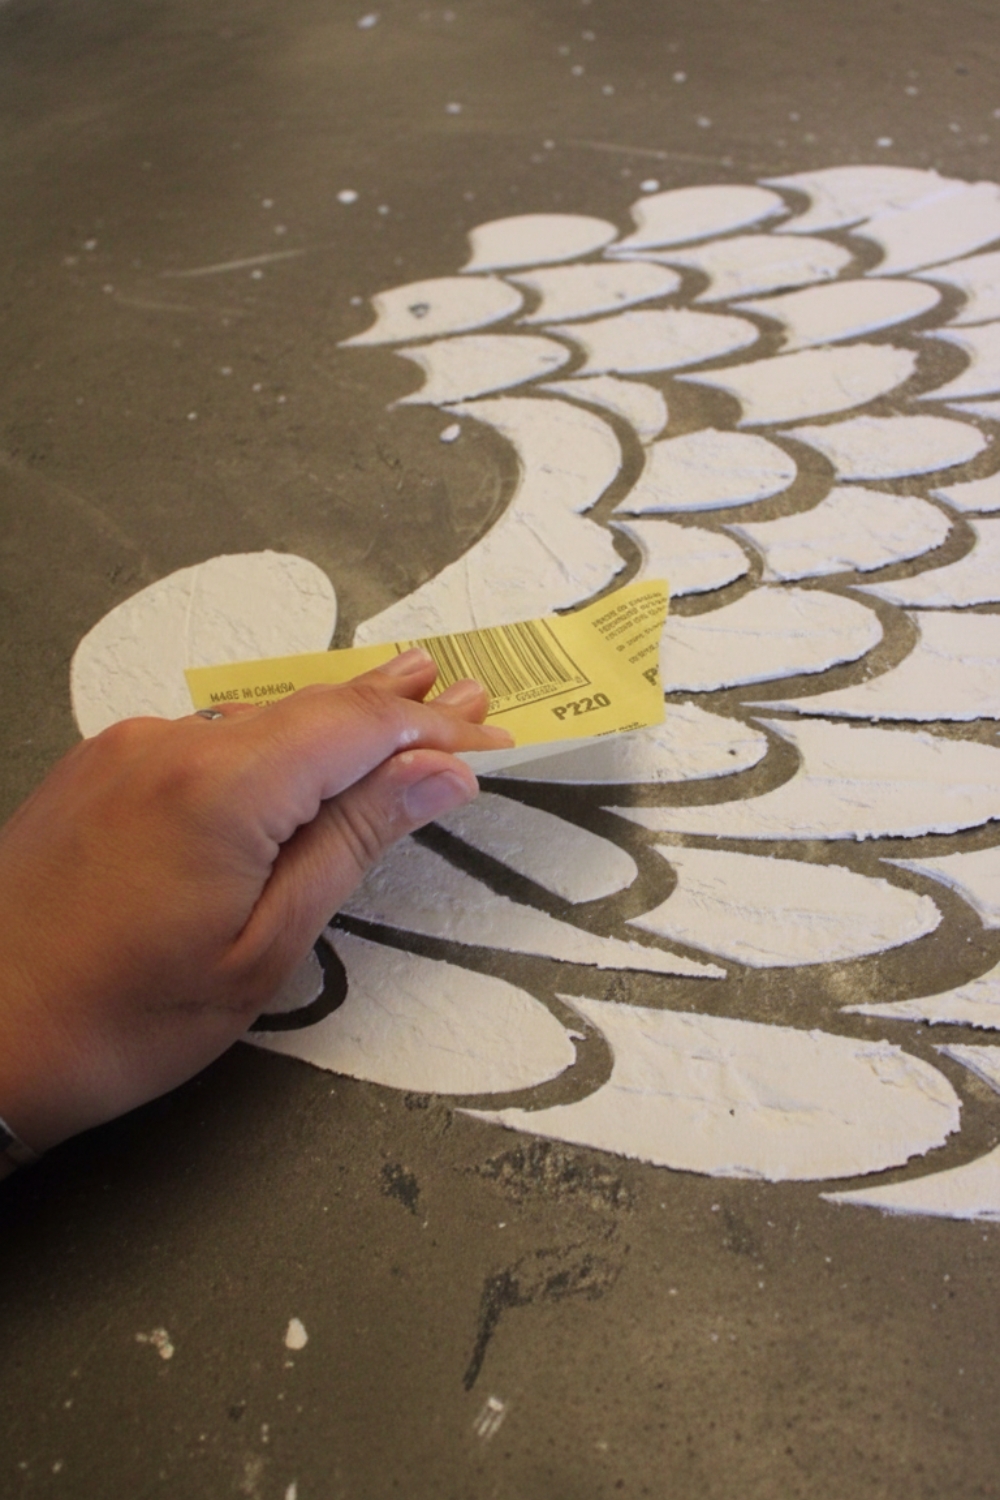
Step 2: Apply the Stencil
Next, position the stencil in the center of the canvas.
A light coat of spray adhesive helps hold the stencil in place so it doesn't shift during application. This is especially helpful when working with larger designs.
Once the stencil is secure, use a trowel or palette knife to spread the texture medium across the design.
Step 3: Remove the Stencil
After applying the texture, carefully remove the stencil immediately.
Leaving it on too long can cause the medium to dry and crack when the stencil is lifted. Removing it right away keeps the design clean and well defined.
Allow the textured design to dry completely before moving on.
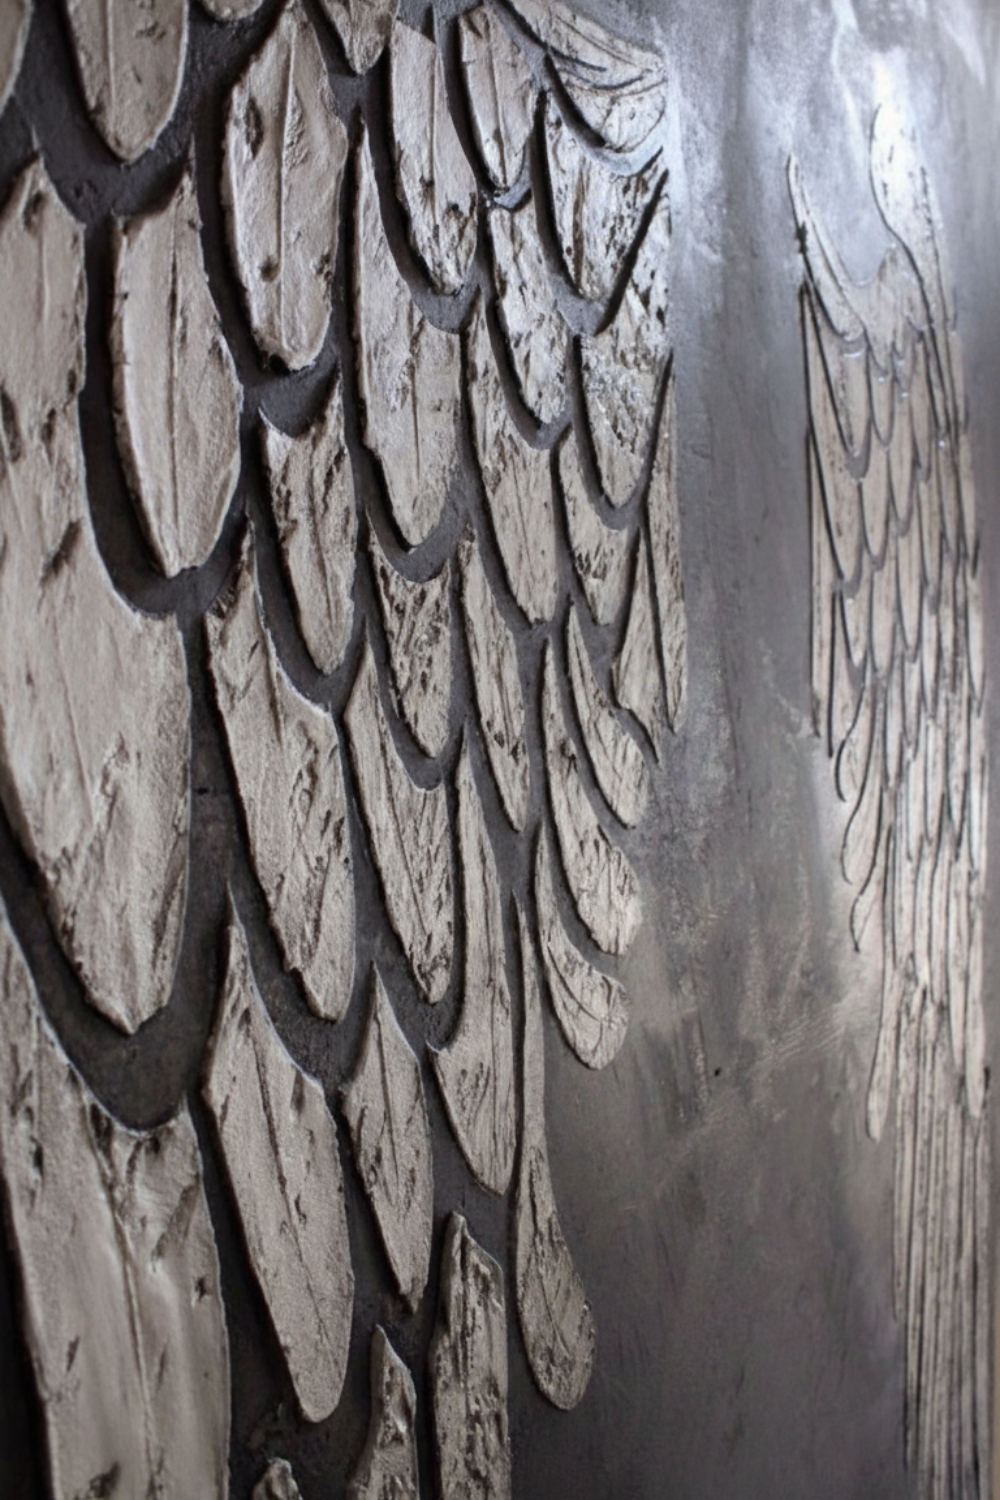
Step 4: Smooth the Texture
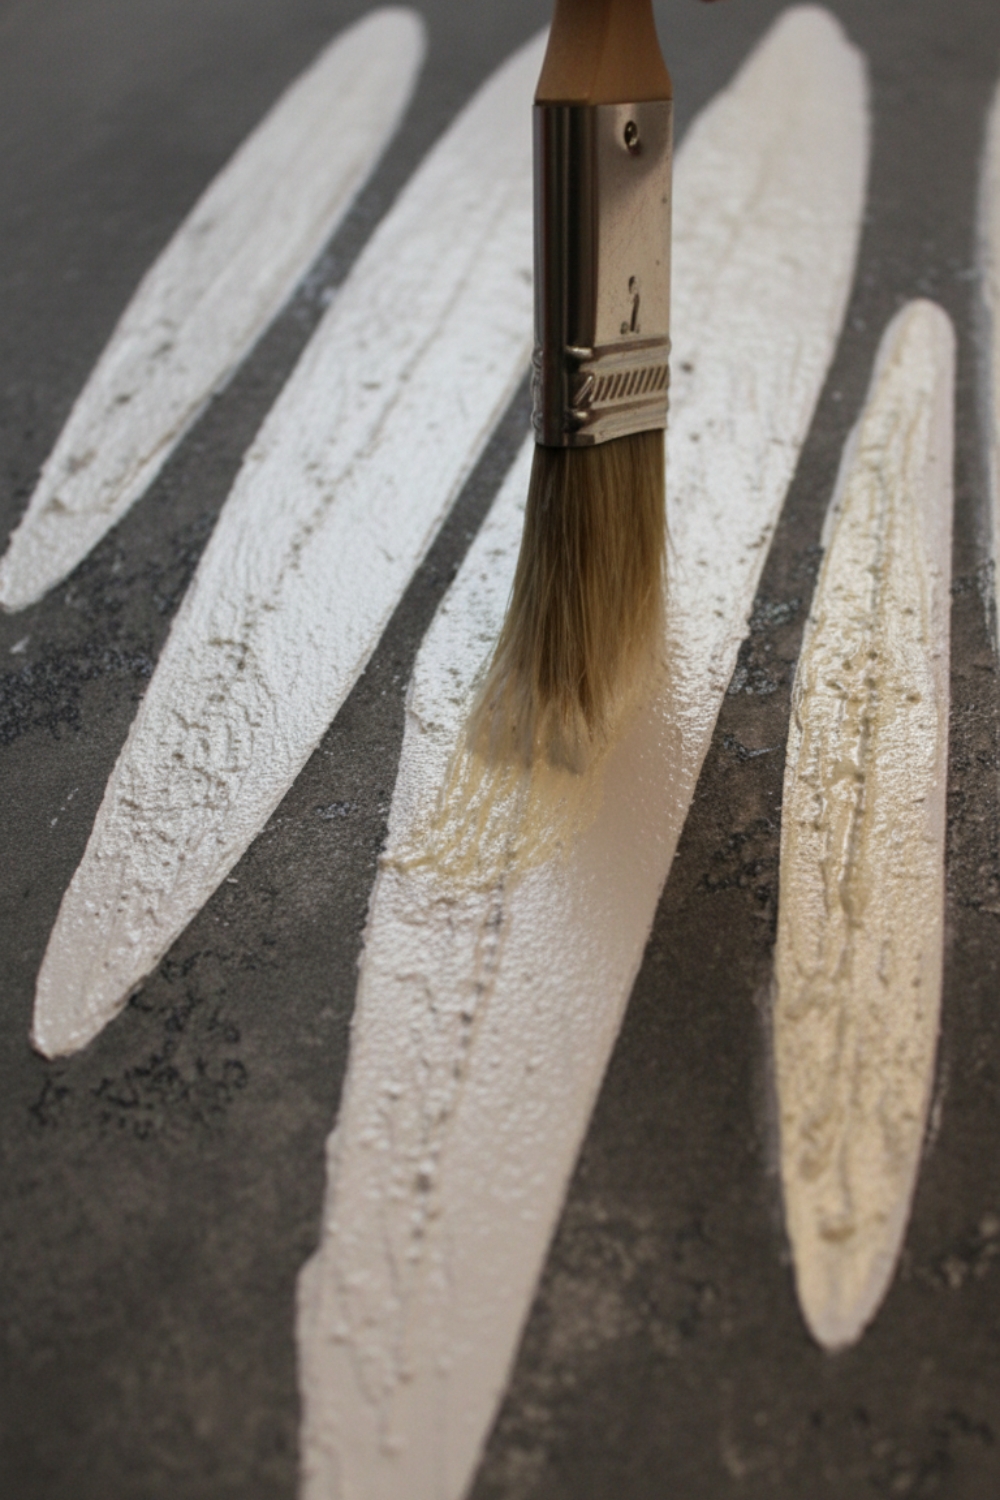
Once the texture is fully dry, lightly sand the raised areas using fine sandpaper.
This step softens any sharp peaks and creates a smoother, more refined finish while still preserving the dimensional look of the design.
Step 5: Add Metallic Highlights
To bring the design to life, metallic paint can be applied to selected areas.
Soft metallic tones-such as champagne or antique gold-add subtle shimmer without overpowering the neutral palette.
A light touch works best here. The goal is to highlight the texture rather than cover it.
Step 6: Finish with a Glaze
Finally, apply a thin glaze over the canvas.
Glazing helps blend the colors and adds a gentle aged effect that enhances the layered texture of the piece. It also softens any harsh edges in the paint and gives the artwork a more finished appearance.
Why Large DIY Wall Art Works So Well
Large statement pieces instantly anchor a space. In entryways, dining rooms, and living areas, they help balance furniture and create a focal point that draws the eye.
Handmade artwork also carries a sense of personality that store-bought pieces often lack. The subtle imperfections, textures, and layered finishes make each piece unique.
In this project, the neutral palette keeps the artwork versatile enough to work with a variety of decor styles throughout the year.
A Personal Touch for Your Home
One of the most rewarding parts of DIY decor is creating something meaningful for your own space. Whether it's a custom canvas, a handmade shelf, or a painted piece of furniture, projects like these help transform a house into a home.
Large DIY artwork is a perfect example of how a simple idea can make a big impact.