
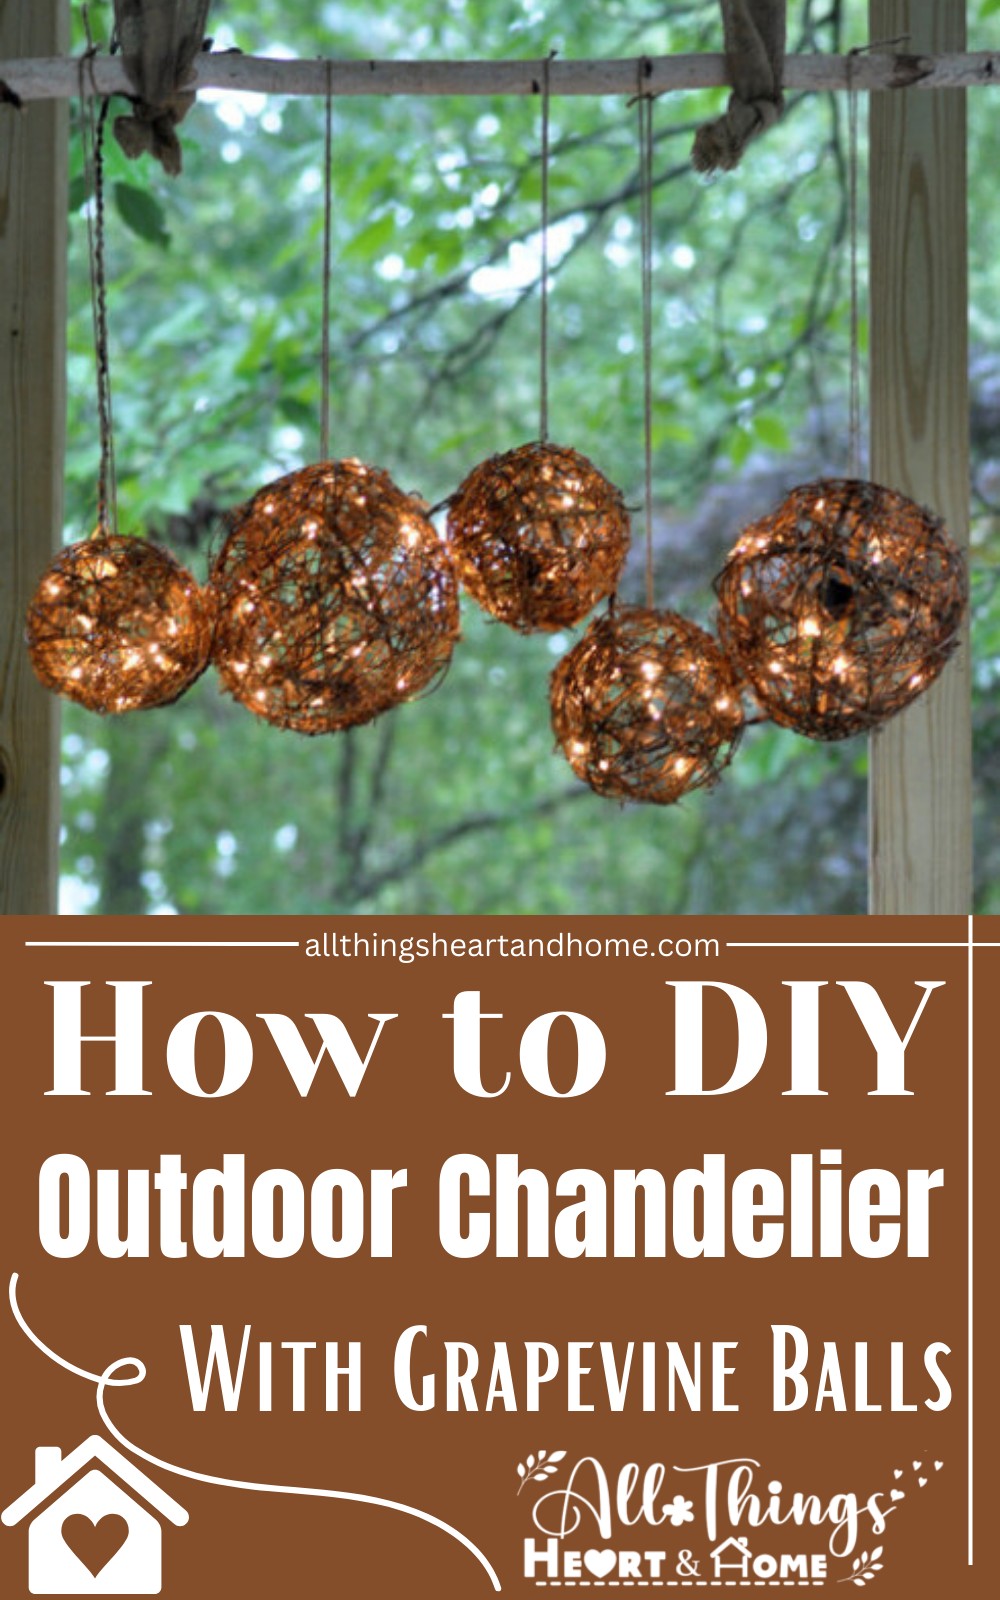
How to DIY Outdoor Chandelier With Grapevine Balls (Tutorial!)
An outdoor chandelier, when lit, can make that relaxing spot more special and beautiful. Luckily, it's easiest to DIY an outdoor chandelier using grapevine balls. That's why I am sharing a step-by-step tutorial in this respect.
It will be a hanging orb filled with tiny lights that will spread a warm, inviting glow in a garden, porch, or other area. I used materials belonging to nature for the sake of the outside, green spirit. So, be with me at the end of this string light project because you will learn to make the most beautiful thing to decorate your home.
How do you DIY a grapevine ball chandelier for outdoors?
Below are the detailed instructions on how to DIY an outdoor chandelier using the grapevine balls:
Step 1: Gather The Materials
It's pretty easy to recreate my chandelier idea. Just Go to the market or your craft drawer and collect the supplies and tools as given below before getting started:
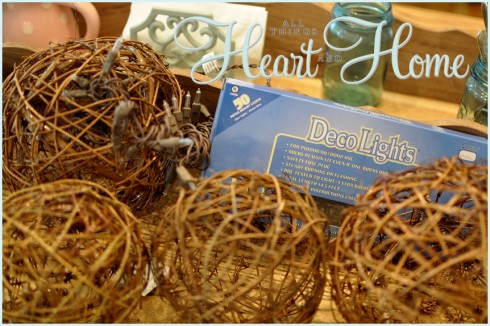
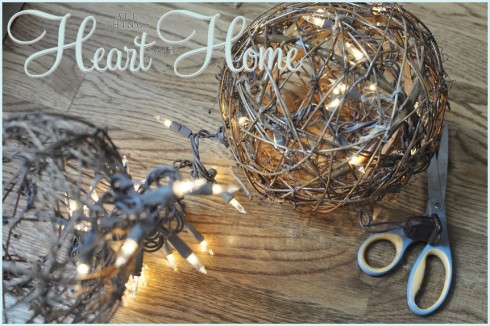
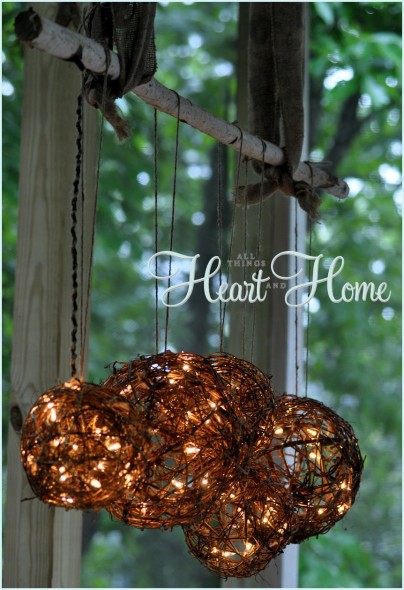
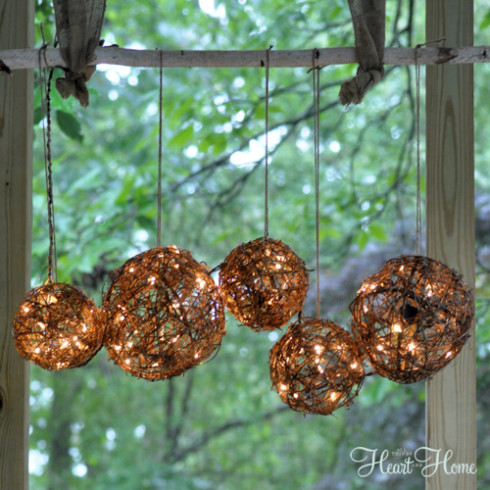
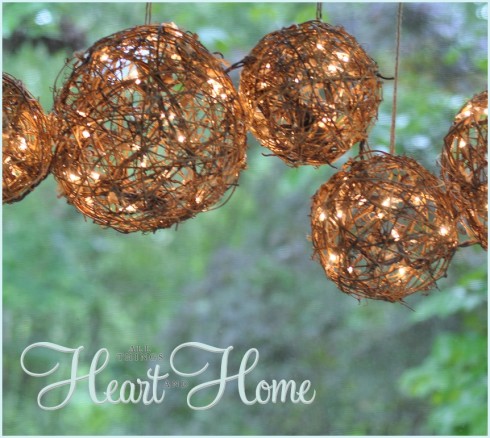
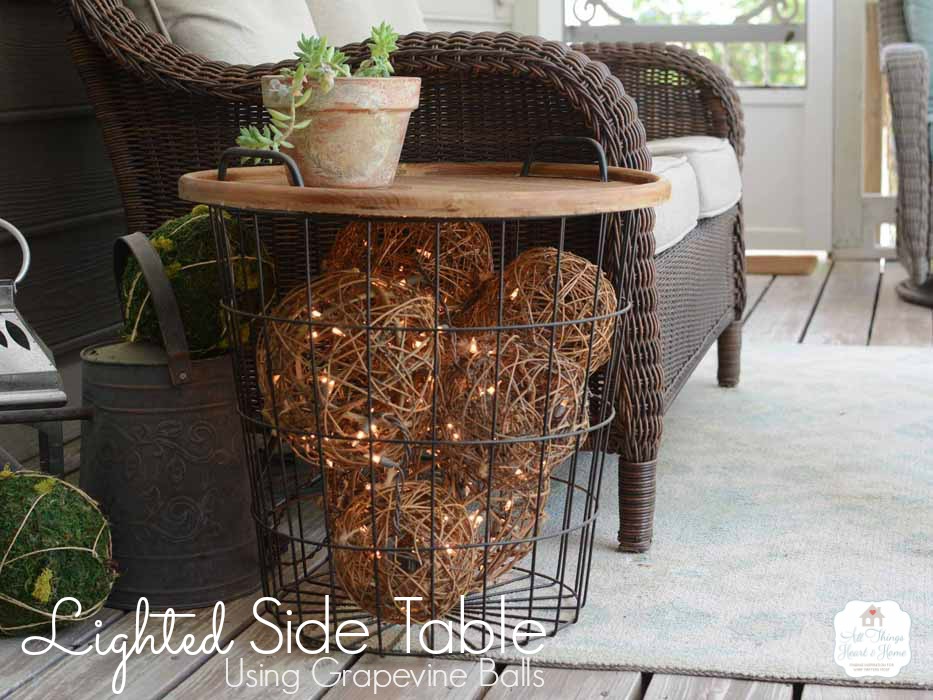
- Grapevine Balls: Excellent & relevant hollow structure for porch, garden, or any outside area chandeliers. I used 2 ready-made ones with sizes of 6 to 7″ and 4″(a total of 5!).
How Can I Make A Grapevine Ball?
Even though buying a grapevine orb is possible, you can also easily try hands-on kitting one using raw grapevine. But, instead of ruining your mind reading written instructions, I recommend you to watch the below tutorial by a crafter on YouTube for better understanding:
While crafter in video doesn't recommend, I would advise you to keep the grapevine dipped in mild hot water for few hours before to make it smooth to bend by your hands. Using the thin gloves is another good practice to prevent the accidential cuts.
- Warm Fairy Lights: Brown wires will match the grapevine ball color perfectly. The yellowish glow gives a soft, vintage, natural vibe. I used 2 sets of 50 lights in each string.
- Garden twine: Insiting Itty bitty string lights cannot stay in place without twine or rope ties. Garden twine again contributed to keeping the farmhouse look alive. Spare some more for hanging our chandelier.
- Birch branch: No need to harm a tree. You can buy online or from the market. I used it to hang all the chandeliers straight in series.
- Burlap ribbon: Only two small pieces will be enough to hang the birch branch.
- Scissors
Step 2: Insert The Lights Inside Grapevine Orb
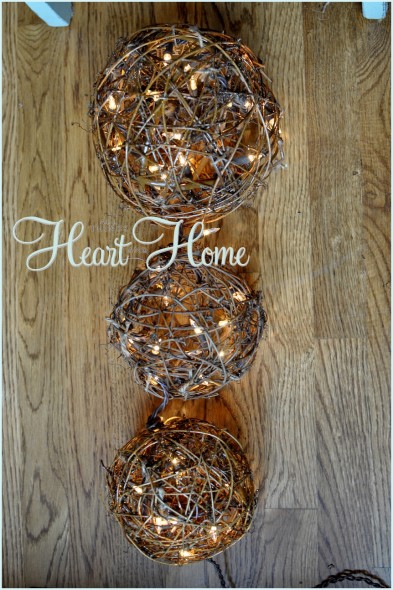
As mentioned, I had two sets of white light strings, each with 50 small lamps, to be filled in the 5 orbs - two larger and three medium. So, I needed to distribute the lights equally as I did in the mason jar hanging light idea. After a little math, I used about 25 lights inside each large ball & 17 or fewer lights inside each medium ball… that was (25 + 17 + 17 + 25 + 16 ). Here is how to insert the lights:
- Take the ball and find the most open part in each. If there is not, make a big hole by moving the vein with your fingers.
- Then, insert light string as needed into that opening.
Always avoid, cutting of light string. Try not to touch them when switched ON - I felt myself in danger to decently take the pictures. Also leave enough string out to easily attach the switch board.
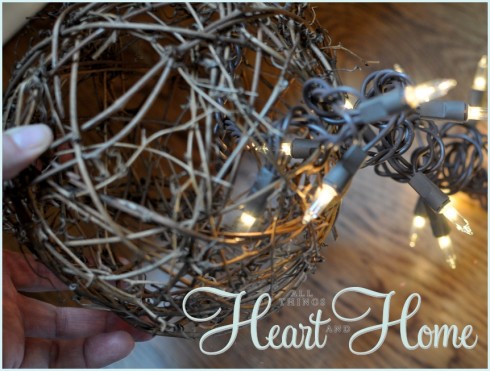
I tried this several ways, wrapped around outside…no. With the lights sticking out of the ball…, it looked like a porcupine, so that was a no. Finally, I settled on threading the lights inside the balls. You would also need to make some effort!
Step 3: Tie Inserted Lights In Place
You will notice the lights inside the ball will be unmanaged. I fixed it as follows:
- I took a length from the garden twine ball.
- The lights should be attached to the interior wall of the ball.
- So, I tied them in place with a bit of that length.
For this, I inserted my finger, picked up the string, and took it near the inner wall. Then I rolled some rope around the wall and the string and made a tie. I did it for the whole round.
Step 4: Attach the Chandeliers Together
I started inserting the light string in a big ball (25) first, then did in two mediums (17+17), then again a large (25), and ended with a medium (16). This method helped me to attach all the chandeliers together without using the rope. You can also follow that sequence, which looks great and makes the project less messy.
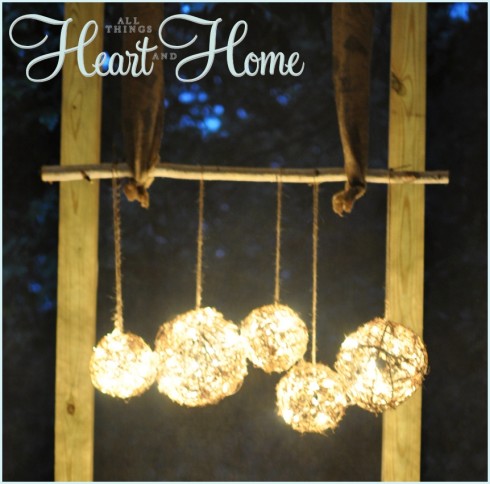
Step 5: Hanging the Chandeliers From Branch
I balanced the birch branch on several chairs while working on the placement. Because I didn't want any wiring to show, the balls had to touch and be fairly stationary.
- I hung each chandelier using the garden twine.
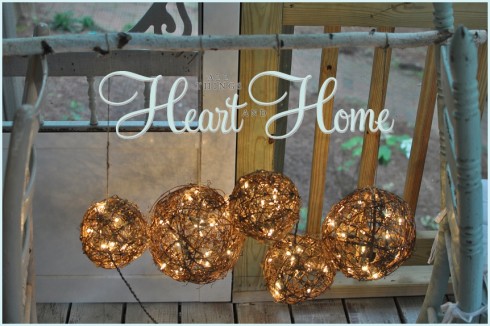
Step 6: Hanging The Chandeliers
I decided to hand the birch branch over to the dining table on my porch. I had pillars near that table, so I settled it there.
To hold them up, I screwed 2 white eye hooks into the ceiling and threaded the burlap ribbon through them, tying it off under the birch branch.
Here's what I ended up with…see the cord in the photo below. It's really not noticeable unless you look at it from this angle!
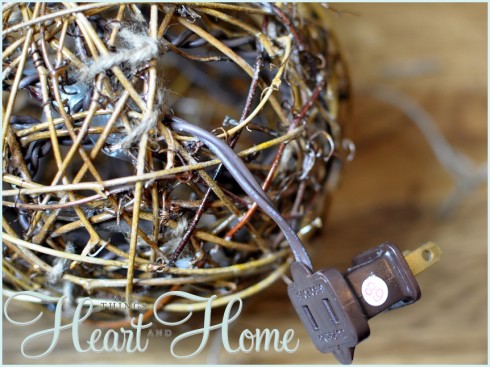
Step 7: Connecting Lights With Electricity
I have the lights connected to a white outdoor extension. The plugs of the two cords are hidden between one loop of burlap ribbon. The extension cord goes down the side of the porch and is hidden between the screen and the railing.
You can only see the wires running from one ball to another when you're up close and personal!
This was really easy, just a little time-consuming if you're compulsive…I kid you not, I carefully placed and tied off almost all those 100 tiny lights! But it was worth it 'cause those tiny lights give off such a nice glow at night.
HERE'S another idea to use these fun lighted spheres!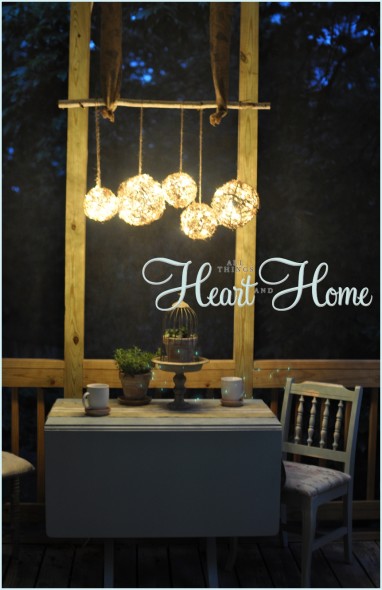
Have the best of Mondays, my friends!