
DIY Chicken Wire Cloche For Rustic And Seasonal Home Decor
A cloche is one of those decorative pieces that instantly makes a space feel styled. It creates a focal point, adds height, and gives you a simple way to showcase seasonal or everyday decor.
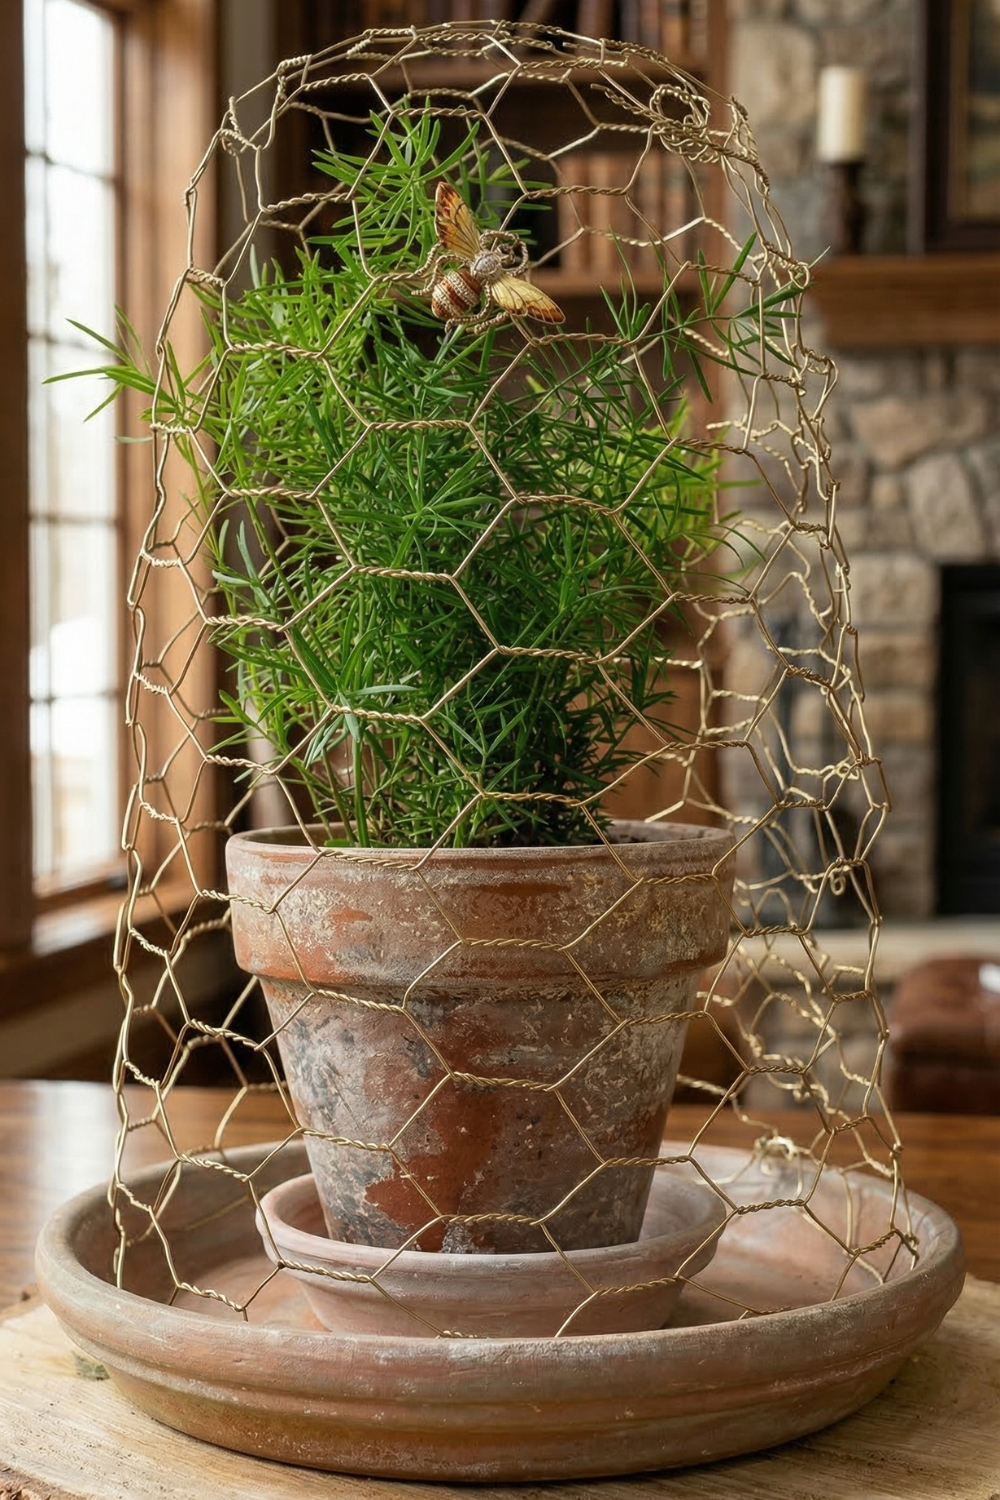
DIY Chicken Wire Cloche

This DIY version uses chicken wire to create a lightweight, textured dome with a subtle honeycomb effect. Once shaped and finished, it becomes a versatile piece you can reuse throughout the year-changing what's underneath to match your space or style.
What makes this project especially appealing is how adaptable it is. The structure stays the same, but the look can shift completely depending on how you style it.
Why Use Chicken Wire for a Cloche
Chicken wire might not sound like a decorative material at first, but its pattern creates a soft, honeycomb-like texture that works beautifully in rustic and modern spaces.
- Lightweight and easy to shape
- Inexpensive and widely available
- Adds texture without feeling heavy
- Works well with metallic finishes or natural tones
With a simple coat of spray paint, it can look polished while still keeping that handmade character.
Materials You'll Need
- Chicken wire (poultry netting)
- Strong scissors or wire snips
- Needle nose pliers
- Gloves (recommended for protection)
- A cloche, vase, or bowl (to use as a shaping mold)
- Small bowl (for forming the top)
- Spray paint (metallic or neutral finish)
Step 1: Measure and Cut the Wire
Start by measuring around your mold (cloche, vase, or similar object) to determine how much wire you'll need.
Cut the wire to size using sturdy scissors or snips.
Tip: Wear gloves-cut wire edges can be sharp and difficult to handle.
Step 2: Form the Dome Shape
Wrap the chicken wire around your mold to create the basic shape.
- Bring the edges together
- Use pliers to twist and secure the wire along the seam
- Work from the bottom upward to keep the structure even
Because the top narrows, you'll likely need to trim excess wire as you go.
Step 3: Shape the Top
Place a small bowl at the top to help form a rounded dome.
Cut a few small slits in the wire at the top edge. This allows you to fold the sections inward, similar to wrapping paper.
- Fold each section over the bowl
- Twist the wire ends together to secure
Once stable, remove the bowl and continue tightening the top until it holds its shape.
Step 4: Refine the Structure
Go over the entire cloche and:
- Tighten loose wires
- Smooth sharp edges
- Adjust the shape where needed
At this stage, the structure should feel stable and balanced.
Step 5: Paint the Cloche
Apply spray paint in light, even coats.
A metallic finish, like gold, highlights the honeycomb texture and gives the piece a more finished look. You can also use neutral tones for a softer, more understated style.
Allow it to dry completely before handling.
How to Style Your Cloche
One of the biggest advantages of this piece is how easily it can be restyled.
You can place underneath:
- Moss and small plants
- Candles
- Decorative objects or figurines
- Seasonal accents
Because the cloche acts as a frame, even simple items look more intentional when displayed inside.
Ways to Use It Year-Round
This isn't just a one-time decor piece-it adapts easily across different styles and settings.
- On a dining table as a centerpiece
- On a shelf or console for layered decor
- As part of a seasonal display
- In outdoor or porch styling
Switching out what's inside allows you to reuse the same piece without it feeling repetitive.
Helpful Tips for Working with Chicken Wire
- Always wear gloves to protect your hands
- Use pliers to secure connections tightly
- Trim sharp edges carefully
- Work slowly when shaping to maintain control
A Simple Project with Endless Styling Options
This DIY cloche is a good example of how a basic material can become something decorative with just a little shaping and finishing.
It's quick to make, easy to customize, and flexible enough to use in different ways throughout your home. Once you've made one, it's easy to experiment with different sizes, finishes, or styles depending on your space.