

Playhouses are the most special gifts for kids. But I think they would appreciate it more if you did it yourself for them. So, today, with this DIY playhouse guide, you can learn complete details to build one for yours and tour our cabinet indoor playing house as a practical example. Unlike outdoor playhouse ideas, it was cheaper, safe from bad weather conditions, and everything easily accessible (kids too!) and more spacious. So, follow this step-by-step woodworking tutorial for the happiness of kids.

Materials You Will Need To Follow Our Playhouse Plan
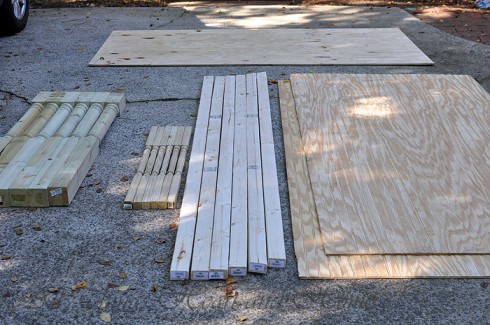
Below are the materials that you would need to build a playhouse:
- Siding Panels: We shall use the wooden siding with beautiful vertical panels as a background for the door wall of the DIY playhouse. Also, they will act as the floor in front of the door.
- Balusters: Needed for the railing of the porch in front of the door wall. The main pillars or columns will be long, while the smaller ones will be placed between the top and bottom railing. You would need 6 pillars and 6 railing balusters.
- Long Wooden Bars: For the bottom and top of the railing, you would need these long bars.
- Simple Wooden Sheet: Have the biggest piece of another wooden sheet to cut for the roof.
- Paint: Rhino colour paint for the door and the primer white colour for the rest.
- Cedar shingles: To traditionally cover the roof.
Tools You Will Need
- Saw
- Hammer
- Drill
- Paint Brush
- Strong Adhesive
What Is The Best Wood For Indoor DIY Playhouse?
Playhouses must be durable against the play of kiddos and easily stainable (or painted, for kid's sake!), lightweight and easy to work with.
We used beaded plywood for our DIY playhouse siding and outer floor. It can face the jumps of the little ones well and is pre-sanded, so it can be easily painted and give a great decorative look at a price.
We used cedar wood for shingles because it gave a great natural look as needed, and they were much more durable because of the density of cedar. I used very thin ones.
I preferred the pine for the long wooden bars because it was soft and easy to cut and work. It was also lightweight.

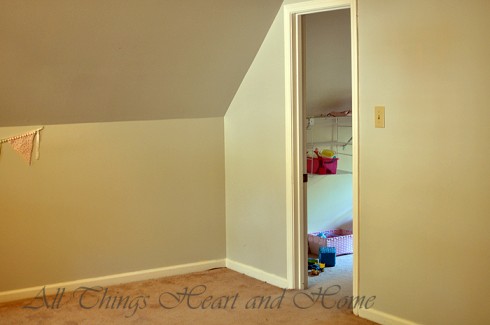
What Is Needed Before DIY Indoor Playhouse?
An indoor playhouse means you have to find a place in your house to devote to kids' fun activities. So, after gathering materials and before heading to start, clean up an empty room or cabinet within your home. Ensure the area is not too small, especially if you have more than one little one.
In our case, we had a cabinet in our house, and it was pretty nig, so we did not need to build one again. Because every closet will be different, we didn’t write out measurements but did show his process.
Tip: Building a playhouse may need many combined skills like perfect woordworking assembling painting, and decorating so you may call for a person who has a knowledge of these aspects. Like me, I called my husband. Even if you know all, working alone would be a real hardwork. Like while assembling the roof, there must atleast two persons for help.
How to DIY an Indoor playhouse?
For this homemade easy playhouse idea, we only need to find an unutilized room and add a gable roof outside it, a porch area, a railing, a door, and decorations outside. Below are the step-by-step instructions with pictures:
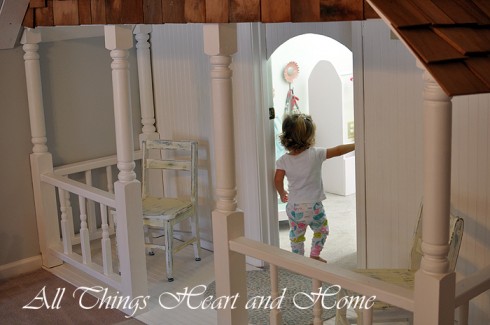
Porch Construction
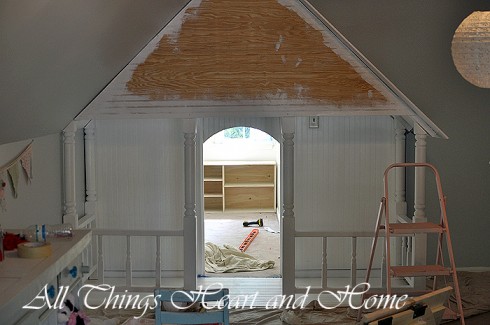
The porch is necessary if kids want a relaxing space for reading, talking, playing, painting, or more. I thought a front porch would be necessary because we planned the shotgun home structure. As the home space was already constructed, we needed to modify the look of the door wall to give a feel of a house porch. For this:
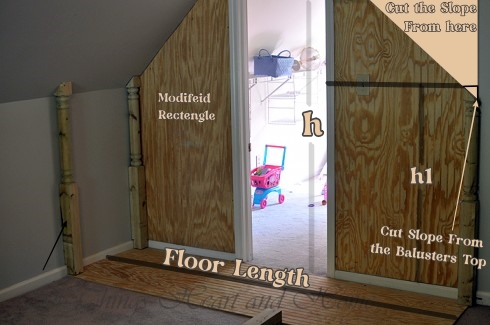
- Cut 2 Plywood Siding Sheets: According to the maximum height 'h' you want for the attic (the part below the roof!), cut 2 equal rectangles from the siding panels using a saw.
- Cut Slope: As we want an A-shaped or gable roof, cut the right triangle or slopes from the one-third part of each rectangle.
- Now, using the nails and the hammer or a strong adhesive, attach the first modified rectangle to the left side of the door hole on the door wall and the other to the right side.
Make sure there should not be already a door because we shall make a new one.
- Then, measure the distance from the first modified rectangle's starting point to the second's end. Also, measure the ground width you want for your porch.
- Then, according to these recordings, cut a long sheet from the siding panel sheet and place it on the floor near the ground level and connected wall.
- After that, take the four large Balusters and align them at the corner of the floor sheet using adhesive and some support, and join them to the floor sheet.
- Since they would also hold the roof, they should have a height of "h1", and you should cut a slope from the square part of each Baluster as follows so their slope is exactly aligned with the slope of the modified rectangle.
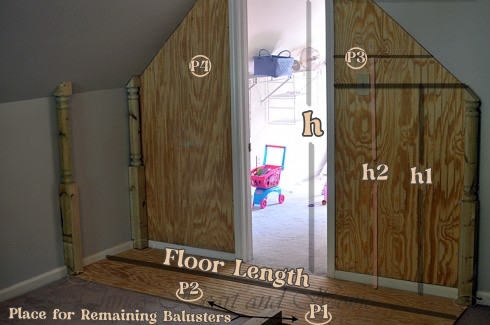
- Take the remaining 2 column balusters (should be a little larger in height!) and stand them at the regions "P1" and "P2" of the floor sheet facing the regions "P2" and "P4", respectively at maximum height "h2" (a few more inches than h1!). Make a connection of those balusters with the wall points (P3 & P4) using wooden bars between the wall and the balusters's squares and drill the nails.
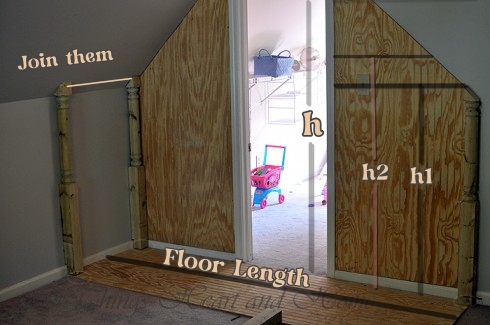
- Similarly, connect together the other 4 balusters (at corners!) two by two, facing each other using the bars. Make sure you first measure the distance between them.
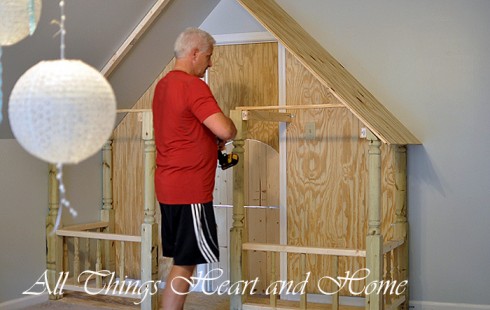
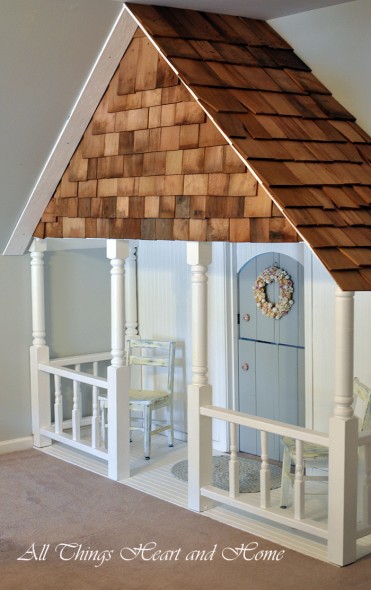
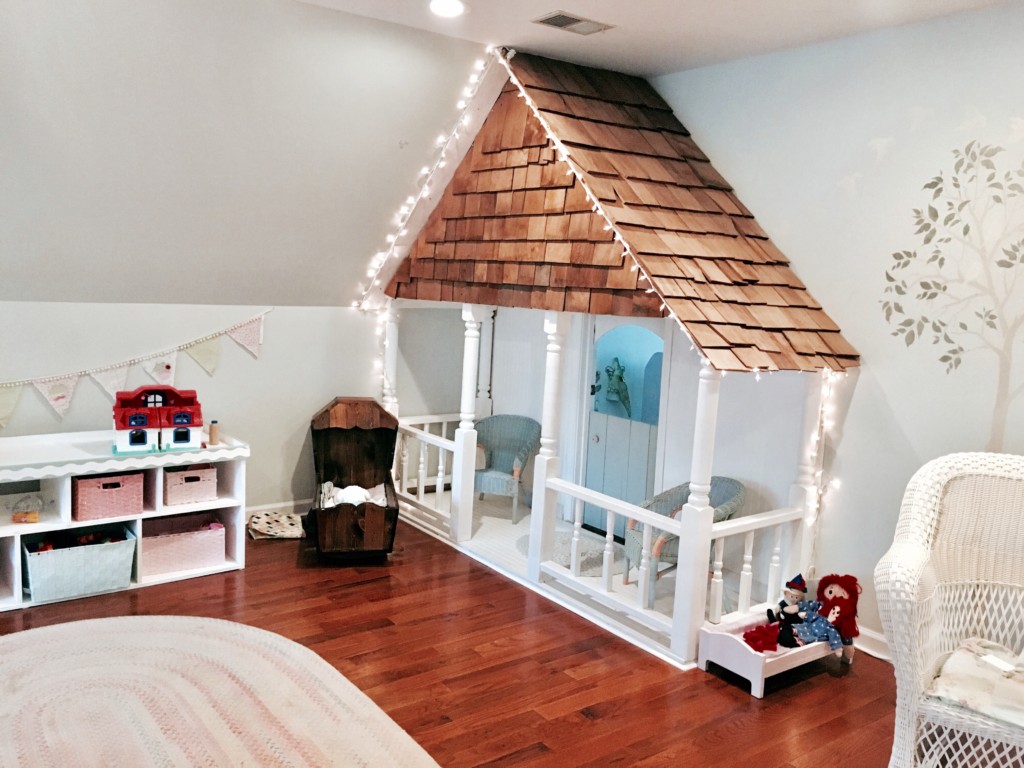
Roof Construction
Although the playhouse is inside, the look was incomplete without adding a new A-shaped roof over the porch. The natural roof line on one side of the cabinet was perfect for an A-frame.
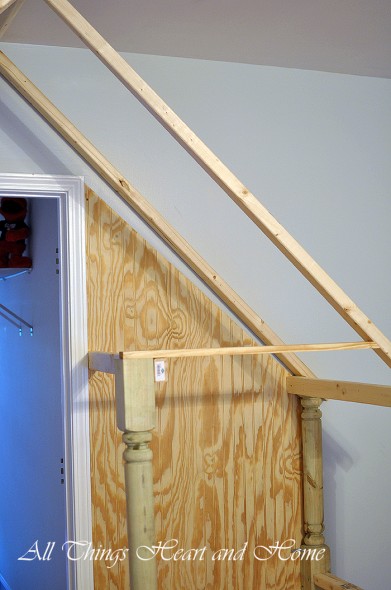
- Now, make a structure to place the roof. For This:
- Get the staircase, go up and measure the length from the starting of the sloped path followed by the slope of the modified rectangle using a large meter rule to the point you think it may be intersecting the path created by the slope of the other modified rectangle.
- Also, mark that intersecting point before you come down. You can double-check that mark by extending a bar at the center of the door hole from the ground level to the peak point. If the bar passes through that marked peek point, the measurement is right.
- Then go again up with a small cutting of wood (a straight bar!) and hammer it on that mark.
- Now, according to these measurements, cut the 4 long bars of wood all in the same length.
Placing the bars:
- Then, place the first bar extending from the starting slope of the baluster near the wall on the right side and place it over the nailed bar at the mark. Do the same for the other side. Then, nail these diagonal bars together.
- Now, extend the third bar from the baluster facing the largest column baluster on the right side, but you would not have to support this time. You can create this by connecting the top of the largest baluster with the bar by a wooden bar. You can do the same on the other side and then join both bars together. Now you would have a structure to place your roof.
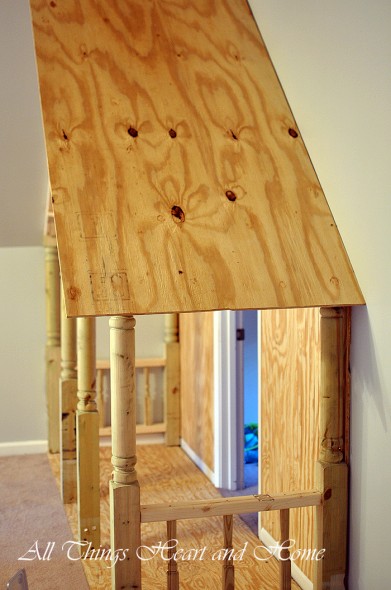
Place Roof
Now measure the width of the roof structure and, using the previous slope lengths, cut another two rectangles. Use strong adhesive and put them over the structure on both sides. You completed the roof.
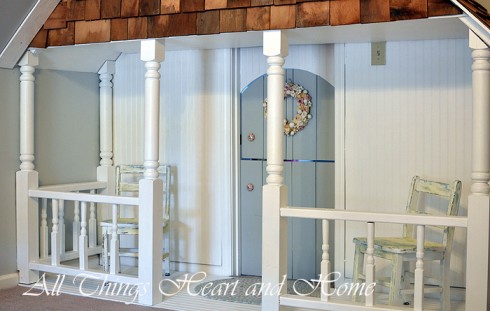
Railing Construction
The porch is incomplete without a railing. Here, Kids feel like their playhouse is safer. A railing is done around the porch except the door area.
- Measure the distance between the large balusters along the width on the right side. Now, make a wooden cutting and nail the three small railings to it in series. The bar will act as the railing top. Using adhesive, attach the small railing balusters between the balusters whose measure was taken on the floor sheet.
- Now measure the distance between the baluster at point P1 and the one in the corner of the sheet. Again, cut the bar and attach three small balusters with more distance between each. Using wood adhesive, again put attach. Do the same on the left side, and your railings will be ready.
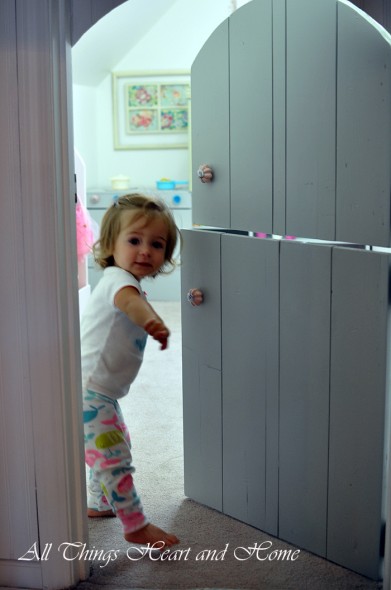
Door Construction
Doors are very important for the family play of kids where the guests will arrive at playing home. We wanted the door to be more cottage and less barn door, so you will need to cut an arc from thick wood. Then, attach the remaining part to the wall.
Attaching the Shingles
To attach the shingles throughout, we would need to cut a rectangle from the large sheet of siding and then place it in the front of the roof. Then we would apply the glue and place each one by one each shingel.
Painting
Cedar shingles and an arched Dutch door give it a bit of charm… We used whole white for the remaining rhino for the door and golden for the door handles. But first, we coated a primer, and before this, we cleaned the house. About two coats will be good.
Decorating
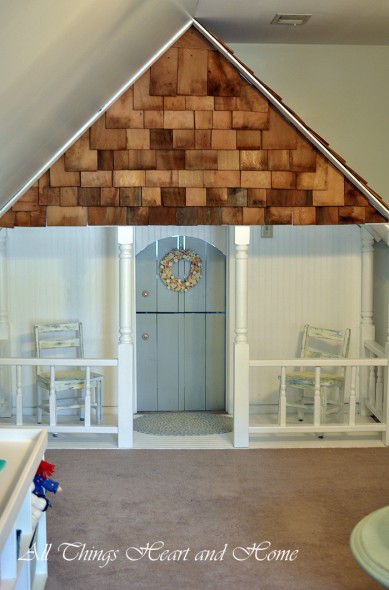
I have ordered a couple of rocking chairs for the front porch…he says he can make ’em. Also, I placed a beautiful wreath at the wall and a rug.
Hartley loves the indoor playhouse!
“Come play!” she says…I can’t wait to show you what The Husband made for the inside!!!
Ellie and I are so excited to decorate their little house for Christmas!


Leave a Reply