Crochet Hoshino Doll Amigurumi Free Pattern With Layered Skirt
Plan on a full day for the body and skirt of your crochet Hoshino doll amigurumi, then a second session for the hair, pinning every lavender strand before you glue it. Baby blue lace stars and a golden heart brooch finish her red bodice.
Star eyes and a bunny hair clip make this crochet hoshino doll amigurumi land with anime fans and older kids. Teen crafters especially. Anyone who likes dressing a doll will enjoy the crochet hoshino doll amigurumi, since the skirt tiers and hair colours can be swapped to match a favourite character.
Crochet Hoshino Doll Amigurumi
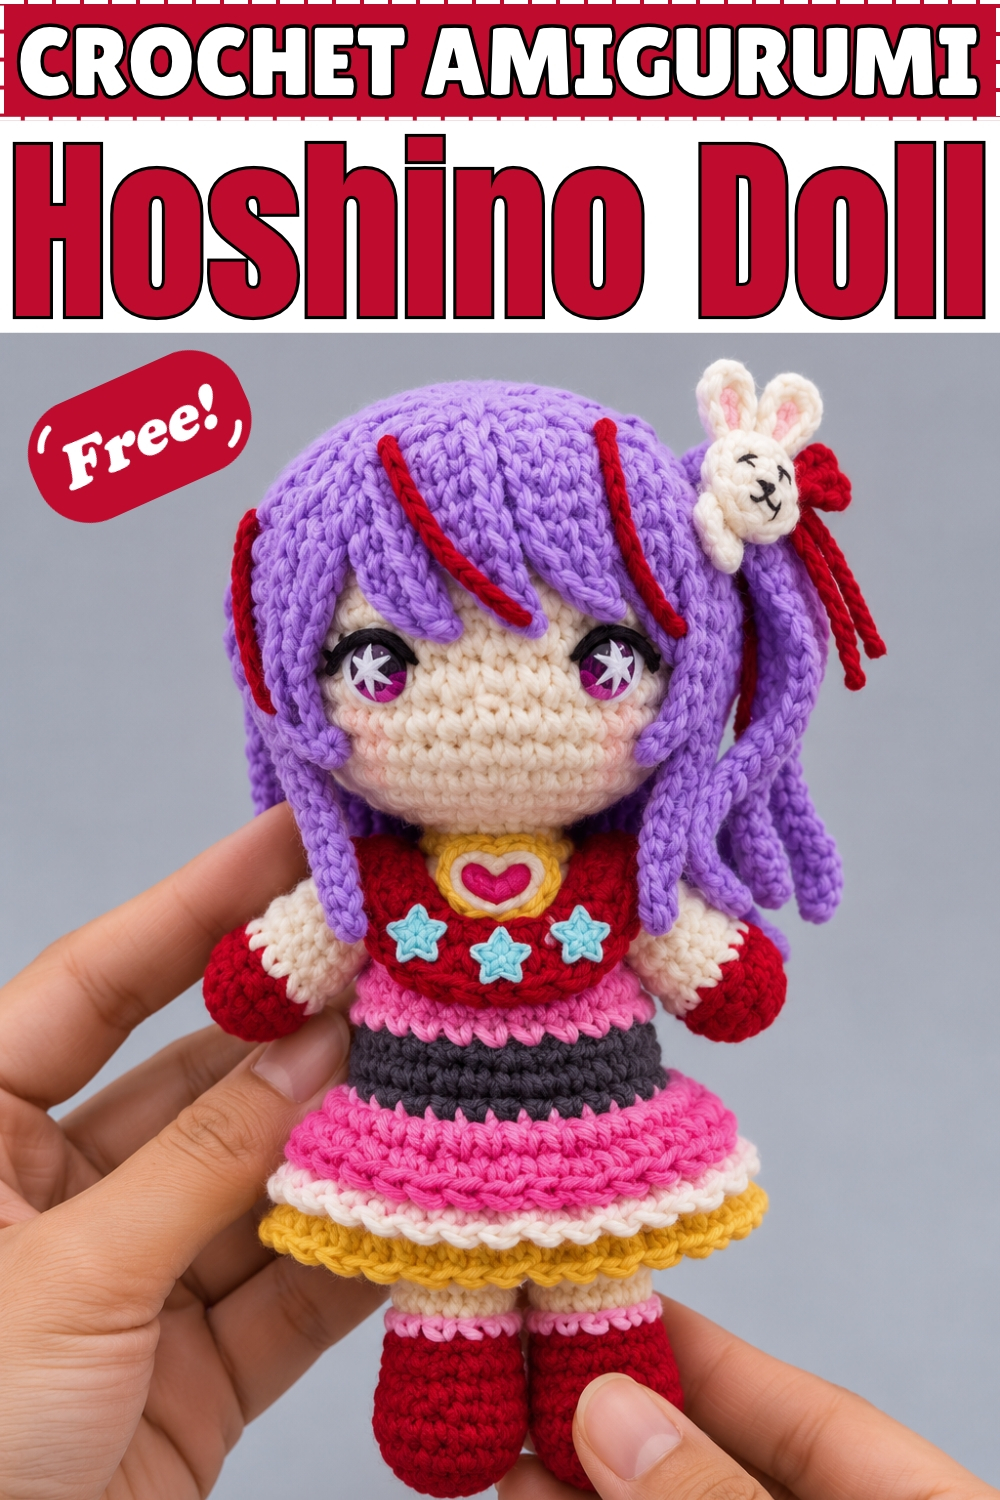
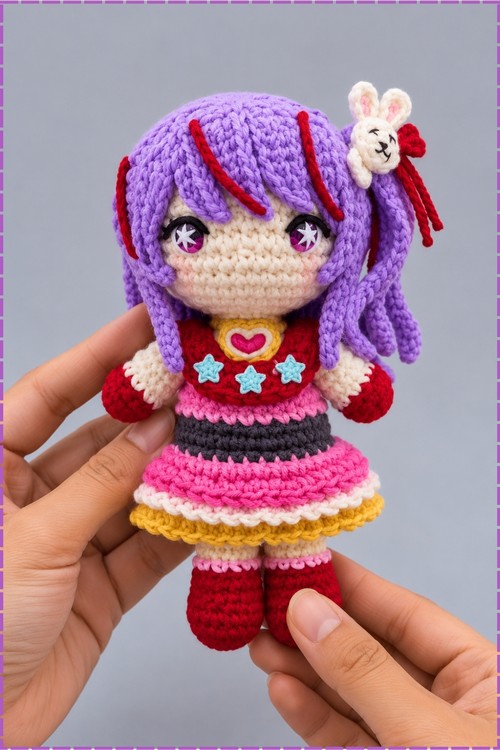
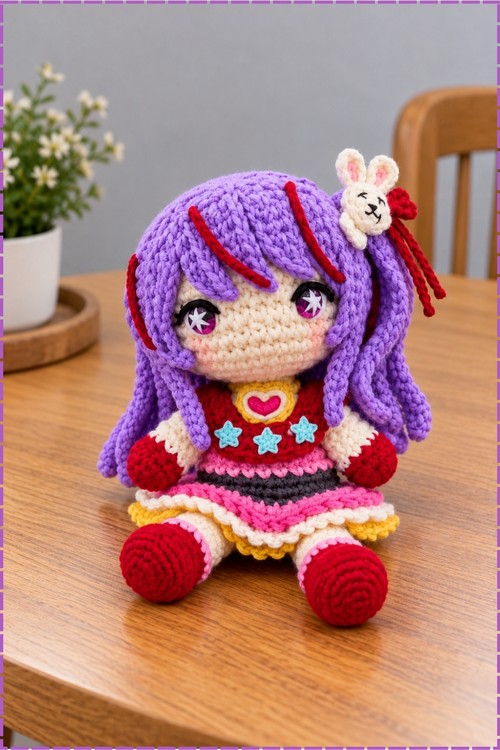
Colour changes do the costume work on this crochet Hoshino doll amigurumi, switching mid piece so the boots run into bare legs and the legs run into the underwear without a single seam between them. Separate pieces handle everything else: a three layer skirt joins at the waist, the torso stacks its colours upward, and the arms start as gloves before changing to skin. Painted eyes replace safety eyes entirely. Mine wears deep red boots and gloves, a red bodice with a heart brooch, and lavender hair streaked with red.
Materials and Tools
- Deep red yarn for the boots, gloves and bodice
- Pink yarn for the boot cuffs, glove cuffs and one skirt layer
- Cream or pale skin tone yarn for the head, arms, legs and one skirt layer
- White yarn for the underwear
- Hot pink and golden yellow yarn for the remaining skirt layers
- Dark navy or black yarn for the waistband
- Golden yellow and pink yarn for the heart brooch
- Lavender or grape yarn for the hair
- Red yarn for the hair highlights and the clip ribbon
- Baby blue lace yarn for the stars
- Ivory yarn for the bunny clip and black lace yarn for its face
- Fabric paint for the eyes in pink, purple, turquoise, yellow and white
- Fabric glue, sewing pins, stuffing, tapestry needle and scissors
Difficulty and Time
This is an advanced make, less for the stitches than for the sheer number of small parts and the painting. The body and skirt took me the best part of a day, and the hair alone took another long session. Those are my own timings and the hair in particular varies enormously with how many strands you pin.
Technique Notes
- Chain is written as ch, half double crochet as hdc, and slip stitch as sl st.
- Change colour on the final yarn over of the last stitch in the old shade, which keeps the boot and glove lines crisp instead of leaving half stitches of the wrong colour.
- Pin everything before you sew or glue. On a doll this detailed, hair strands, stars and the brooch all shift the look, and pins let you judge the whole face before anything is permanent.
- Work the hair strands with the wrong side of the stitch facing outward where the pattern says to, since that is what gives the strands their rounded, hair like surface.
- Keep the fabric glue sparing. A thick bead squeezes out past the yarn and dries shiny, which shows badly against matte cotton.
- Let each paint layer dry fully before adding the next. Wet layers blend into mud and the star sparkle in the centre of each eye only reads if it sits on dry colour.
- Stuff the body firmly and the limbs lightly, so the doll holds its shape but the arms and legs still sit naturally.
The Pattern
Boots, Legs and Lower Body
- Start crocheting the legs from the boots using your boot colour, which is deep red on my version.
- Add a pink cuff round at the top of each boot, which the plain pattern does not call for but my doll has at both the boots and the gloves.
- Colour change to the skin tone for the exposed thigh area above the boots.
- Change to white at the very top of the legs before joining them together to form the body.
- Work both legs to the same height before joining, since a mismatch here tilts the whole doll.
Three Layer Skirt and Torso
- Make the skirt as a separate three layered piece and attach it to the waistline.
- Work the top layer in pink.
- Work the middle layer in cream.
- Work the bottom layer in golden yellow.
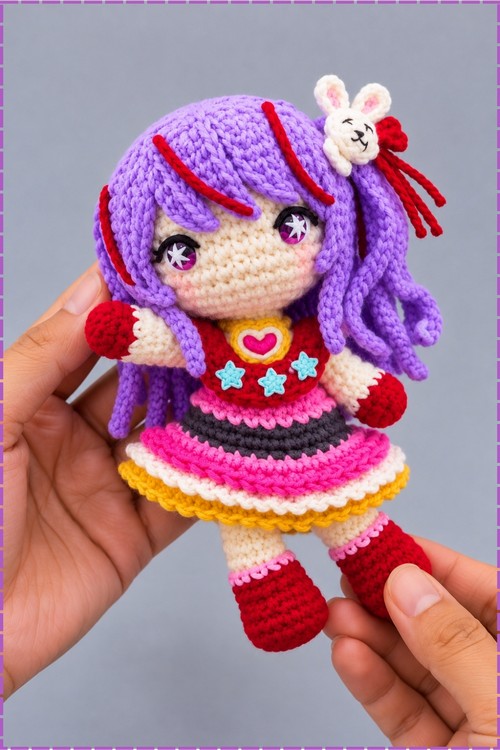
- My skirt reads as pink over cream over hot pink over gold, so add a fourth layer in hot pink between the middle and bottom if you want to match mine exactly.
- Let each layer sit slightly longer than the one above so all of them stay visible from the front.
- Add a dark navy waistband round between the skirt and the torso, which my version has above the skirt layers.
- Once the skirt is joined, work up the torso with the colour changes running in order: the lower torso, then the mid section, then the neckline.
- My torso is deep red through the body rather than the black, pink and butterscotch sequence the plain pattern gives, so the colour order is yours to choose.
- Keep the torso narrow relative to the skirt, since the flare of the layers is what gives the silhouette.
Arms and Gloves
- Start the arms using your glove colour, deep red on mine, and add a pink cuff round at the top edge of each glove.
- Crochet a tiny simple bow and attach it over the top edge of each glove.
- My gloves carry the pink cuff instead of a bow, so treat the bows as optional.
- Change yarn to the skin tone for the rest of the arm, since the dress is sleeveless.
- Attach the arms to the torso just below the neckline, angling them slightly forward.
Collar, Stars and Heart Brooch
- Crochet a flat strip for the collar, drape it over the shoulders so it covers the front and back of the neckline, and secure it with fabric glue.
- My doll has no separate collar strip, so this step is optional if you prefer the plain neckline.
- Crochet tiny stars using baby blue lace yarn and attach them to the outfit.
- Mine carries three blue stars across the chest below the brooch, spaced in a shallow arc.
- Tie a simple bow in yarn and trim the tails, then glue it to the chest.
- My brooch is a pink heart sitting inside a golden yellow outline rather than a bow, so work a small flat heart in pink and a slightly larger one in gold, layer them and glue the pair to the centre of the chest.
- Outline the heart shape with fabric glue and press silver yarn into the glue for metallic edges if you want the brooch framed that way.
Head and Painted Eyes
- Crochet the head using the skin tone yarn.
- Paint the eyes on with fabric paint instead of using safety eyes, layering pink, purple, turquoise and yellow.
- Add bright white sparkles in the middle of each eye once the colour layers are dry.
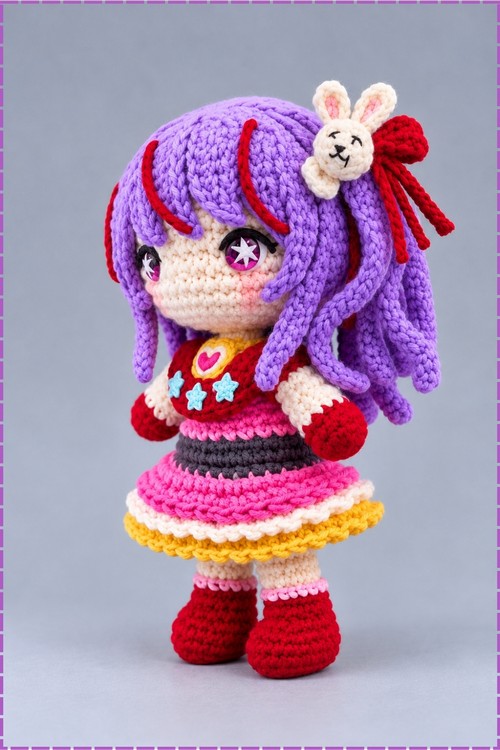
- My eyes use a white star shaped sparkle in the centre of each one, set high on the iris.
- Add a soft pink blush on each cheek and a small pink nose, which my doll has.
- Practise the eye shape on scrap fabric first, because paint cannot be undone on a finished head.
Hair Base and Bangs
- Using your hair colour, crochet a hair cap of 4 inner rounds and 4 outer rounds, then attach it to the head.
- Work the front bangs by chaining 8, making 4 of them, and pin them slanted directly over the eyes.
- Work the side bangs by chaining 10, pinning them to the very last round of the hair cap and curling them downward, then mirror this on the other side of the face.
- Create the bottom and back hair as strands made from slip stitches, attaching them to the bottom round of the hair cap with the wrong side of the stitch facing outward.
- Chain 12 for the long side and back strands and attach them right above the arms on both sides.
- Create half double crochet strands and line them along the back of the head, resting just above the lower details of the outfit.
- My hair falls to roughly shoulder length with the side strands curling forward past the face.\
Highlights and Side Ponytail
- Sew highlight yarn into the purple hair strands, adding it selectively and skipping spaces so the effect stays subtle.
- Place the highlights across the 8 chain, 10 chain and 12 chain strands.
- My highlights are red rather than hot pink, and several sit across the front bangs where they show most.
- Crochet a side ponytail in the hair colour, add highlights to it, and sew it onto the 3rd outer ring of the hair cap, slightly above the 10 chain side bangs.
- Bend the ponytail so it curves outward rather than hanging flat against the head.
Bunny Hair Clip
- Crochet a small ivory piece for the bunny face and glue small crocheted triangles to the sides for ears.
- Embroider the bunny face using black lace yarn, overlapping straight lines for the eyes, then adding the nose, mouth and eyebrows.
- Add a small red bow with trailing red streamers beside the bunny, which my clip has.
- Glue the finished bunny clip directly on top of the side ponytail.
- Press the clip down firmly and let it set before handling, since a half glued clip tilts and never sits straight again.
Yarn Substitution
Cotton suits this doll best because the stitch definition carries the skirt layers and the hair strands, both of which blur in anything fuzzy. Lace weight yarn matters for the stars and the bunny face embroidery, since a thicker strand will not hold those small shapes. Keep the body yarns all at one weight so the colour change joins stay flat, and use a smooth yarn for the hair so the strands hang rather than tangle.
Customization Ideas
- Swap the lavender hair for any colour and match the highlights to the outfit.
- Use safety eyes instead of paint if you are not comfortable painting, accepting a different look.
- Skip the bunny clip and use a crocheted bow or flower instead.
- Change the skirt to two layers for a simpler build, or add a fifth for more volume.
- Give the doll a second ponytail on the other side for a symmetrical style.
Frequently Asked Questions
Can I use safety eyes instead of painting? Yes, though the look changes significantly. Painted eyes give the layered anime iris with the star sparkle visible in my photo, which safety eyes cannot reproduce. Insert them before closing the head if you go that route.
How do I stop the hair strands from sticking out? Pin every strand and look at the head from all angles before sewing. Strands that sit flat when pinned stay flat when sewn, and the wrong side of the slip stitch facing outward is what keeps them lying smooth.
Will the glued pieces hold up to handling? Fabric glue holds for a display doll but not for a toy. Sew the collar, brooch and clip instead if the doll will be played with, since glue on yarn eventually peels under repeated handling.
- No hook size is stated anywhere in the source.
- No yardage is given for any colour.
- No finished height is stated, and the photo only shows the doll in two hands for scale.
- The legs, boots, torso, skirt layers, arms, head, stars, brooch, bows and bunny clip have no counts, rounds or shaping instructions in the source.
- No colour change round numbers are given, so the boot, thigh and underwear transitions cannot be placed precisely.
- The number of hair strands and star pieces is not specified.
- No stuffing quantity is given.