

Finding a baby gate that actually works for stairs—without looking bulky or getting in the way—can be surprisingly difficult. Standard pressure gates often feel temporary, and fixed gates can make daily movement awkward.
DIY Folding Baby Gate for Stairs

This folding, wall-mounted design solves both problems. It stays secure when closed, but folds flat against the wall when not in use, keeping the space open and uncluttered.
This project is straightforward if you’re comfortable with basic woodworking, and once installed, it feels like part of the home rather than an add-on.
What You’ll Need
Materials
- (2) 1 × 2 pine boards (8 ft, cut to your desired gate width)
- ⅜ inch wood dowels (13 per section; each dowel cut into two pieces)
4 hinges
- 2 heavy-duty/decorative hinges (wall mounting)
- 2 smaller hinges (joining gate sections)
1 × 6 fir board (approx. 20–24 inches long)
- Wood glue
- Screws
- Paint (to match your wall or trim)
Tools
- Saw
- Drill with ⅜ inch bit
- Clamps (recommended)
- Screwdriver
- Stud finder
Before You Start (Important Planning Step)
Measure the width of your stair opening carefully.
- Divide that measurement in half—this creates two folding sections
- Decide where the gate will mount (bottom step vs a few steps up)
- Ensure there’s a stud available for secure installation
Why this matters: A properly measured and anchored gate is what makes this design feel sturdy rather than temporary.
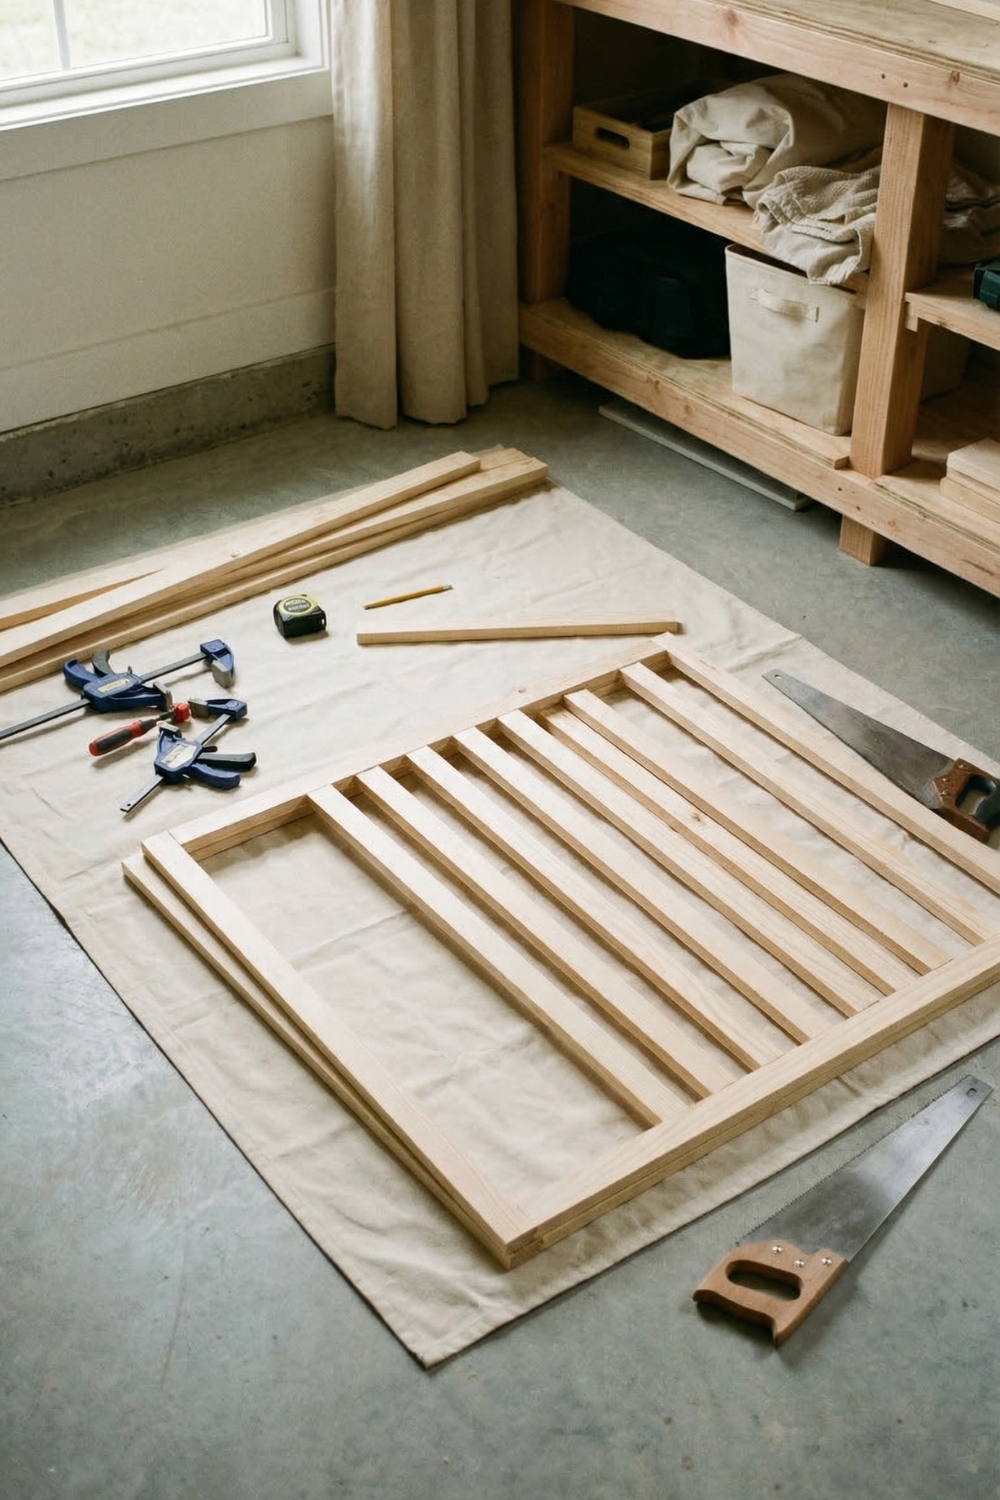
Step 1: Build the Frame Sections
Cut your 1 × 2 boards to size for each section.
Each section will have:
- Top rail
- Bottom rail
- Two side pieces
Step 2: Drill Holes for Dowels
Using a ⅜ inch drill bit:
- Drill evenly spaced holes into the top and bottom rails
- Depth should be at least ¼ inch
Tip: Keep spacing consistent so the finished gate looks balanced and professional.
Step 3: Cut and Insert Dowels
Cut dowels to your desired gate height, leaving about ¼ inch extra on both ends to fit into the drilled holes.
- Add a small amount of wood glue into each hole (don’t overfill)
- Insert dowels into the bottom rail first, twisting slightly for a tight fit
- Apply glue to the top rail holes and carefully align over the dowels

Press everything firmly into place.
Step 4: Complete the Frame
Attach the side pieces to connect the top and bottom rails.
- Drill and screw them into place
- Clamp the frame if possible and allow glue to dry for several hours
Repeat the entire process for the second section.
Step 5: Create the Wall Support
Cut your 1 × 6 board to about 20–24 inches.
- Adjust the angle if needed to match the slope of your stairs
- Locate a wall stud and securely anchor this board
Paint it to match your wall so it blends in visually.
Step 6: Attach Hinges and Assemble
- Use small hinges to connect the two gate sections in the middle
- Attach heavy-duty hinges to one end of the gate
- Mount the other side of those hinges onto the wall support board
Before painting, test the full setup to ensure smooth folding and alignment.

Step 7: Paint and Final Installation
- Remove the gate
- Paint all components
- Allow to dry fully
- Reinstall hardware and mount permanently
How the Folding Design Works
This gate is designed to fold inward on itself and sit flat against the wall when open.
Why this matters:
- Keeps stair access clear
- Reduces visual clutter
- Makes it easier to carry items up and down stairs
Safety and Practical Tips
- Always mount into a stud—this is critical for strength
- Check hinges regularly to ensure they stay tight
- Adjust spacing between dowels based on pet or child size
- Mount lower if needed, depending on your specific setup
Where This Works Best
- Homes with pets that need limited access
- Staircases where traditional gates feel bulky
- Spaces where you want a more built-in, permanent solution
Final Thoughts
This is one of those projects that looks custom because it is. Instead of working around a standard gate, you’re building something that fits your space exactly.
The folding feature is what really makes it practical—it gives you full access when you need it, without sacrificing safety when you don’t.


Leave a Reply