
DIY Fire Pit Cover That Turns Into a Table and Game Board
This DIY fire pit cover turns your backyard fire pit into a beautiful outdoor table and checkerboard game board. Easy woodworking project using outdoor wood and stain.
A backyard fire pit is a wonderful place to gather, but when the fire isn't burning it often leaves a large empty space in the middle of the yard or patio. A fire pit cover is a simple solution that keeps the pit protected while also making the space more useful.
DIY Fire Pit Cover
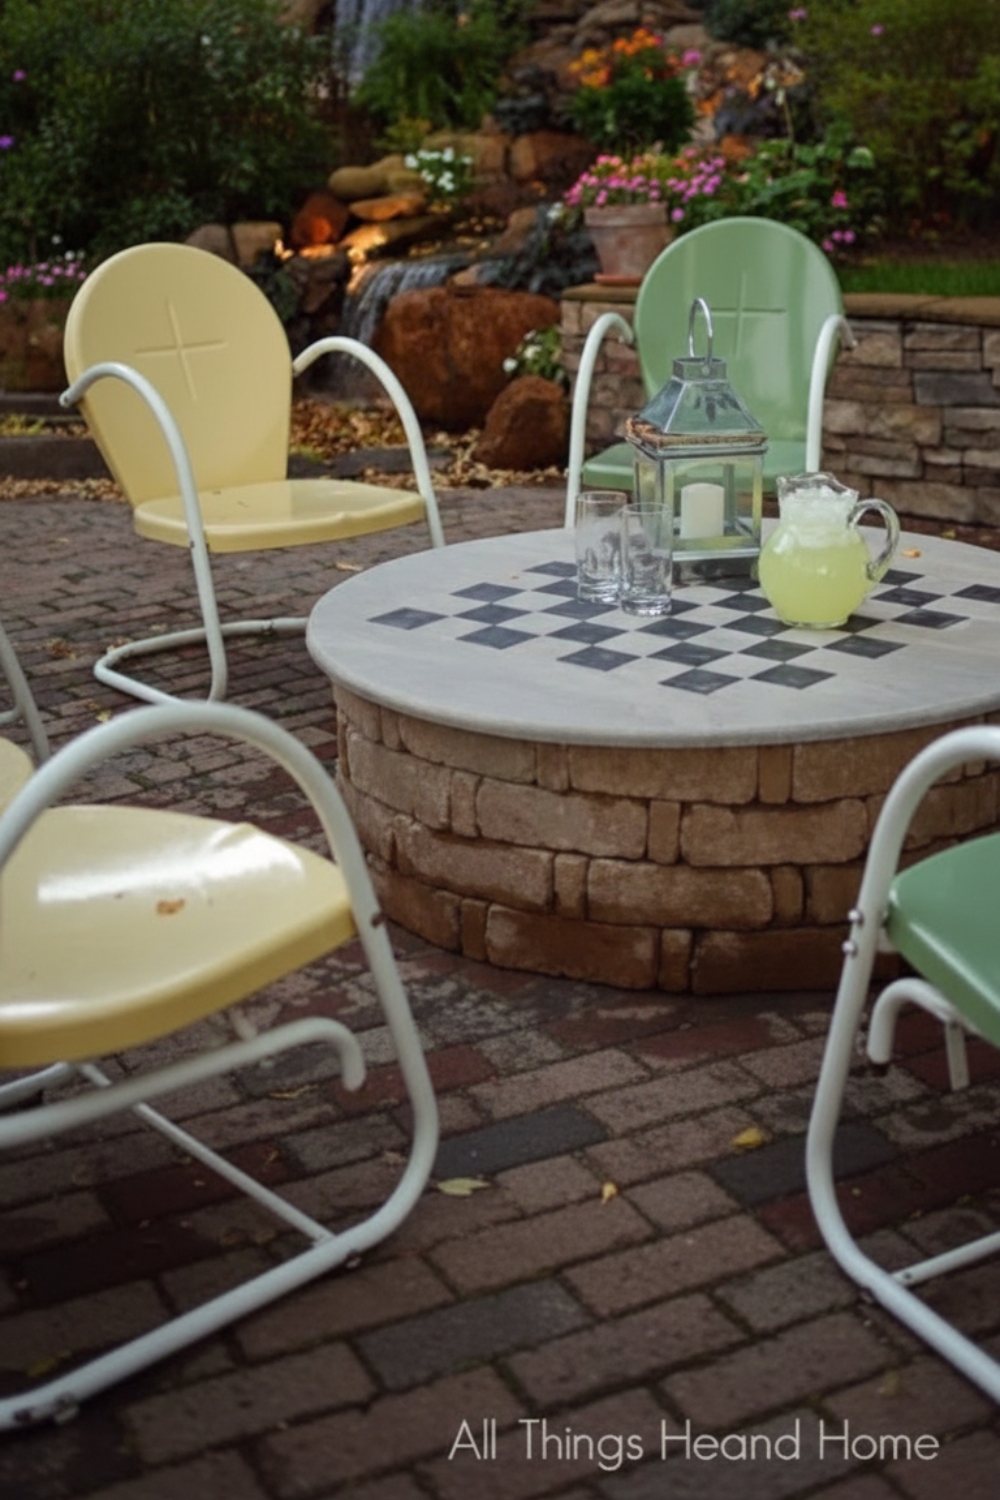
This DIY wooden fire pit cover transforms the fire pit into a functional surface that can be used as a table, a game board, or simply a decorative cover. The design uses durable outdoor wood and a simple checkerboard pattern, creating a piece that blends beautifully with outdoor furniture while adding an extra activity for family gatherings.
Because the cover lifts off easily, the fire pit can still be used anytime you want to light a fire or enjoy a night of roasting marshmallows.
Why Make a Fire Pit Cover
A wooden fire pit cover has several benefits:
- Protects the fire pit: Keeps debris, rain, and leaves out of the fire pit.
- Adds usable surface space: Turns the fire pit area into a table when the fire is not in use.
- Improves backyard aesthetics: Covers the empty pit opening and makes the area look finished.
- Adds extra function: With a painted checkerboard pattern, the cover doubles as a game board for outdoor gatherings.
Materials Needed
To build this DIY fire pit cover you will need:
- Cypress wood boards (amount depends on fire pit size)
- Wood screws
- Semi transparent exterior stain
- Exterior paint
- Sandpaper or sanding sheets
- Painter's tape
- Exterior urethane or clear protective finish
- Duct tape for sealing seams underneath
For the checkerboard game pieces
- Mason jar lids or round wooden discs
- Paint for the checker pieces
Cypress wood is ideal for outdoor projects because it naturally resists moisture and weather changes. Marine plywood is another good alternative if cypress is not available.
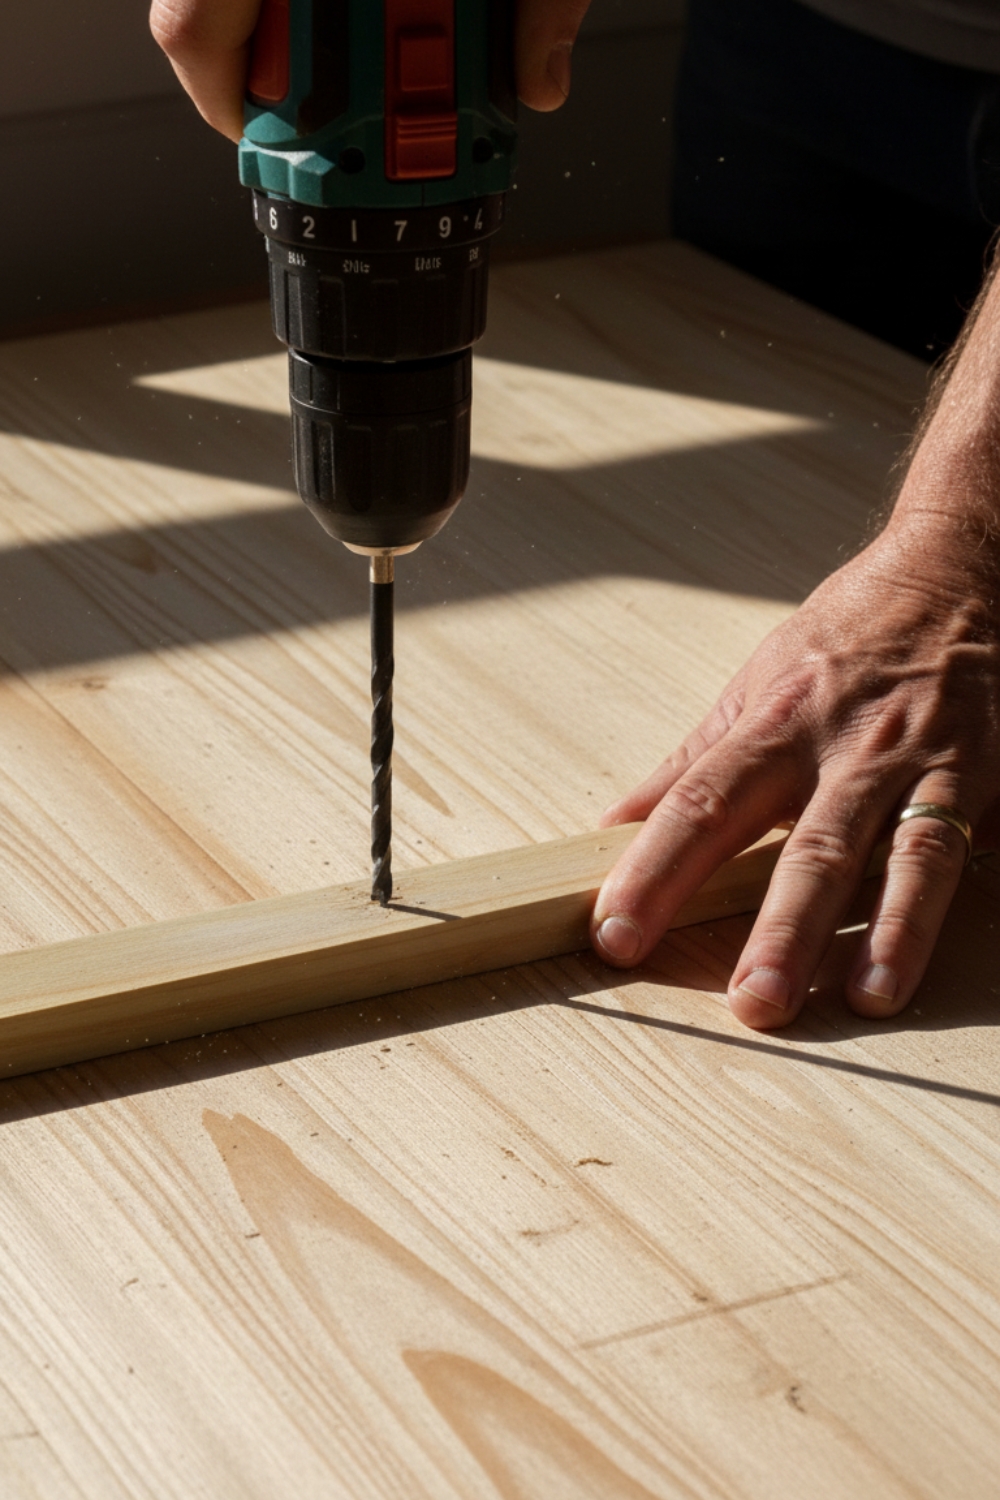
Step 1: Measure and Cut the Wood
Start by measuring the diameter or width of the fire pit opening.
Cut the wood planks so they can be joined together to form a square panel large enough to completely cover the pit.
Lay the boards side by side to form the tabletop surface.
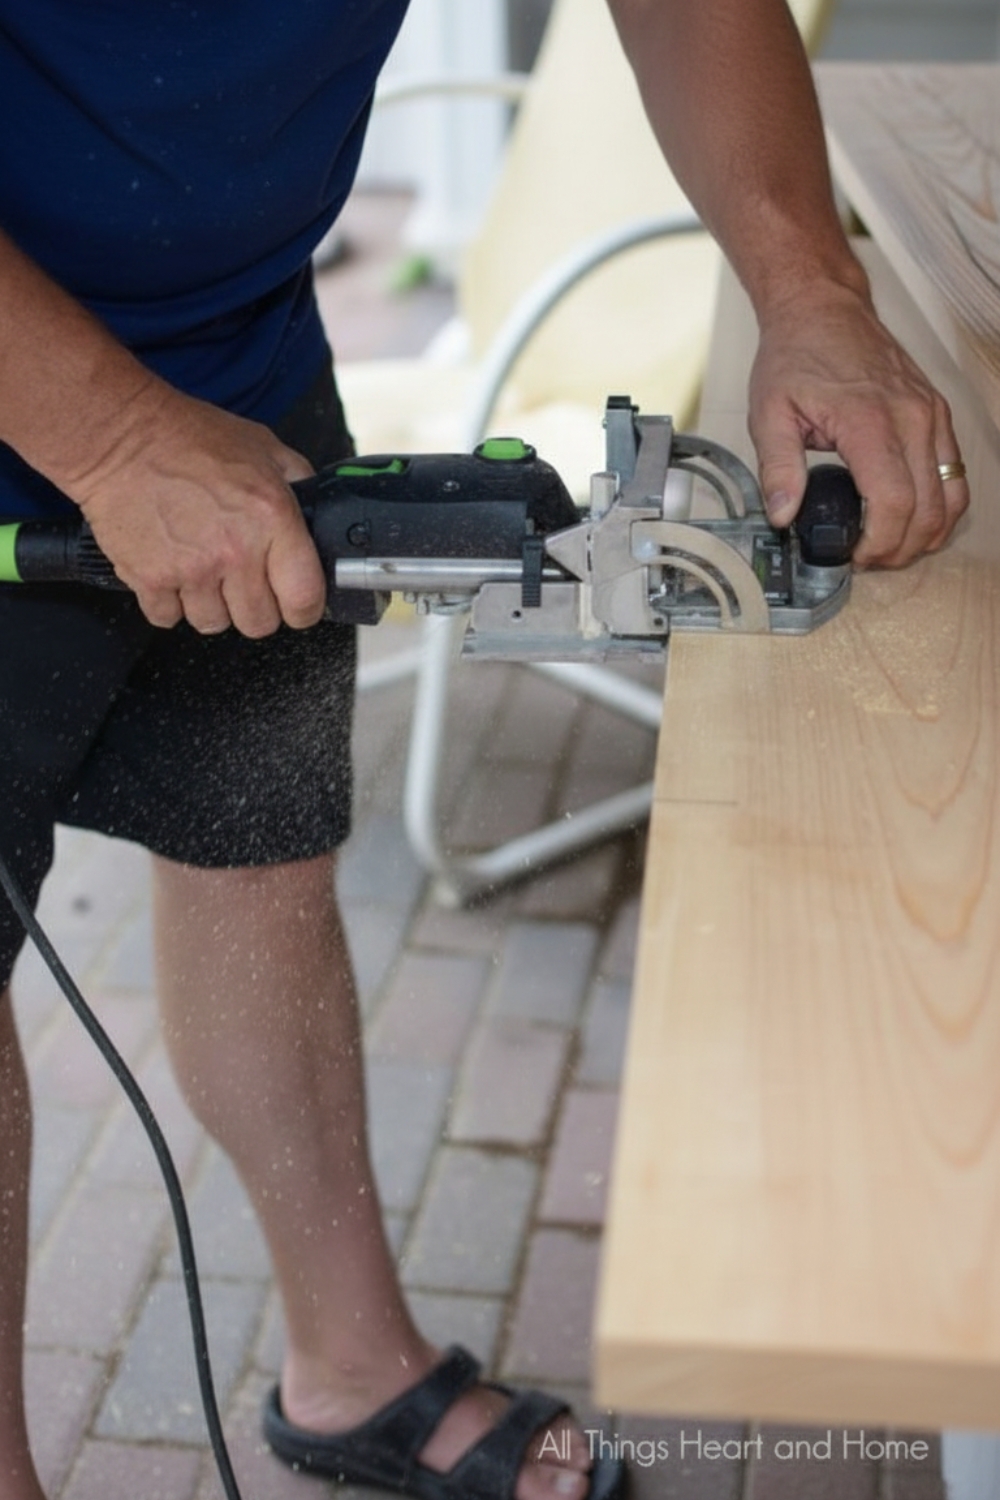
Step 2: Join the Wood Boards
There are several ways to join the boards.
Option 1: Wood Glue Method
Apply wood glue between each plank and clamp them together tightly until dry.
Option 2: Biscuit or Domino Joiner
If you have woodworking tools such as a biscuit joiner or domino joiner, these can be used to create stronger connections between the boards.
Once the glue is dry, remove the clamps.
Step 3: Mark and Cut the Circular Shape
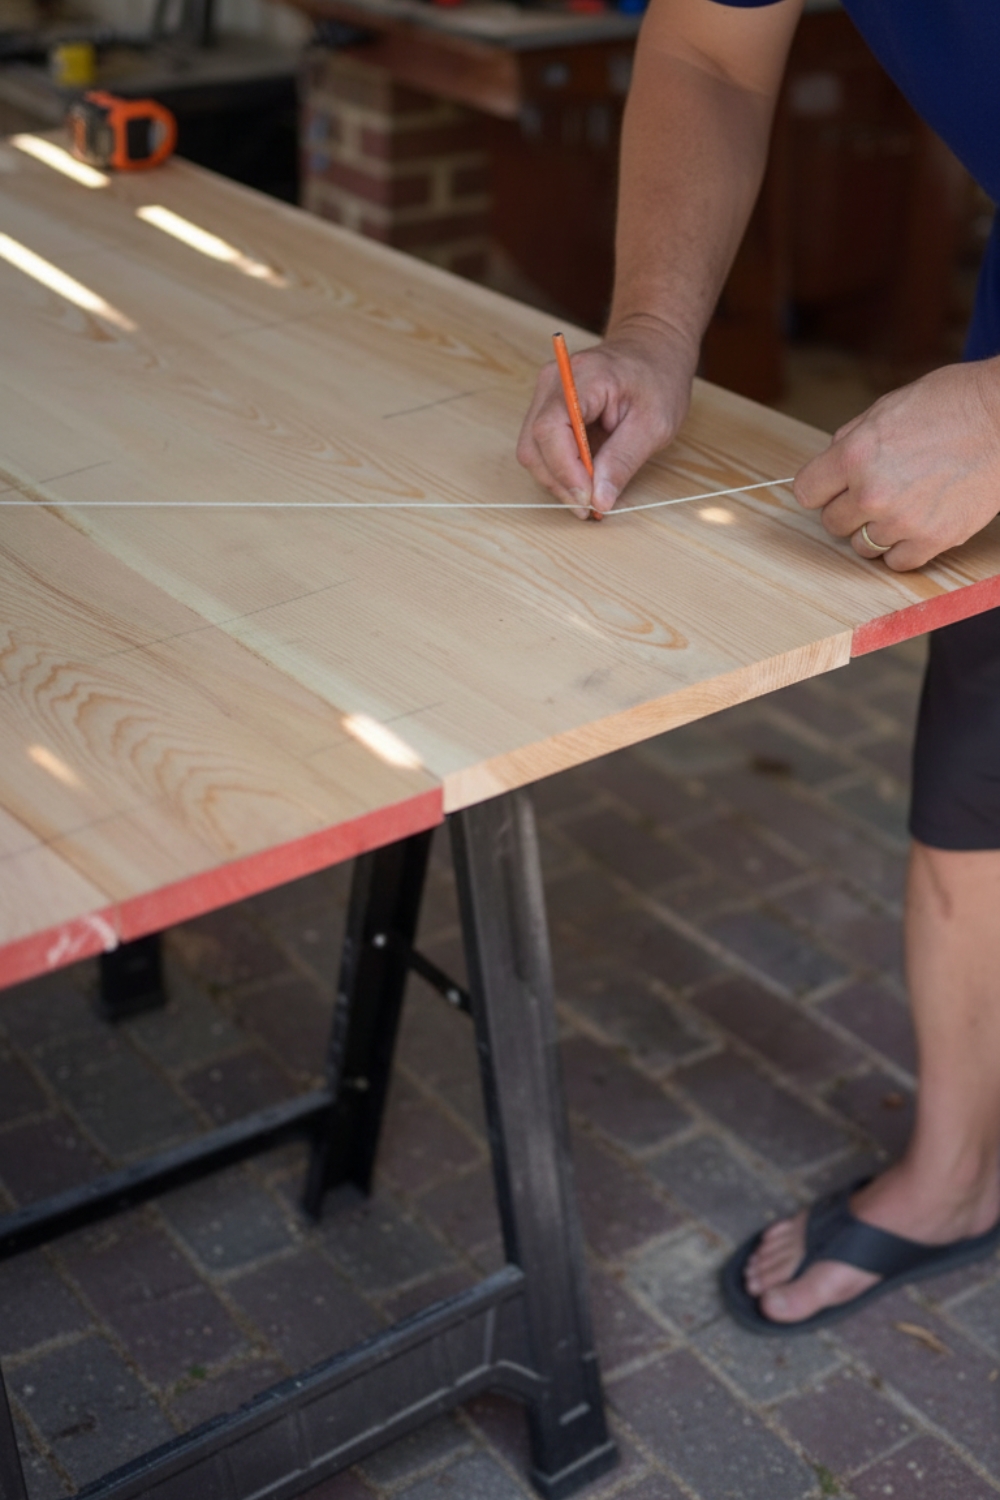
Flip the board over so you are working on the back.
- Find the center point and mark it with a pencil.
- Partially screw a wood screw into the center point.
- Tie a string to the screw and attach a pencil to the other end.
- Pull the string tight and draw a circle large enough to cover the fire pit opening.
Cut along the circle line using a jigsaw.
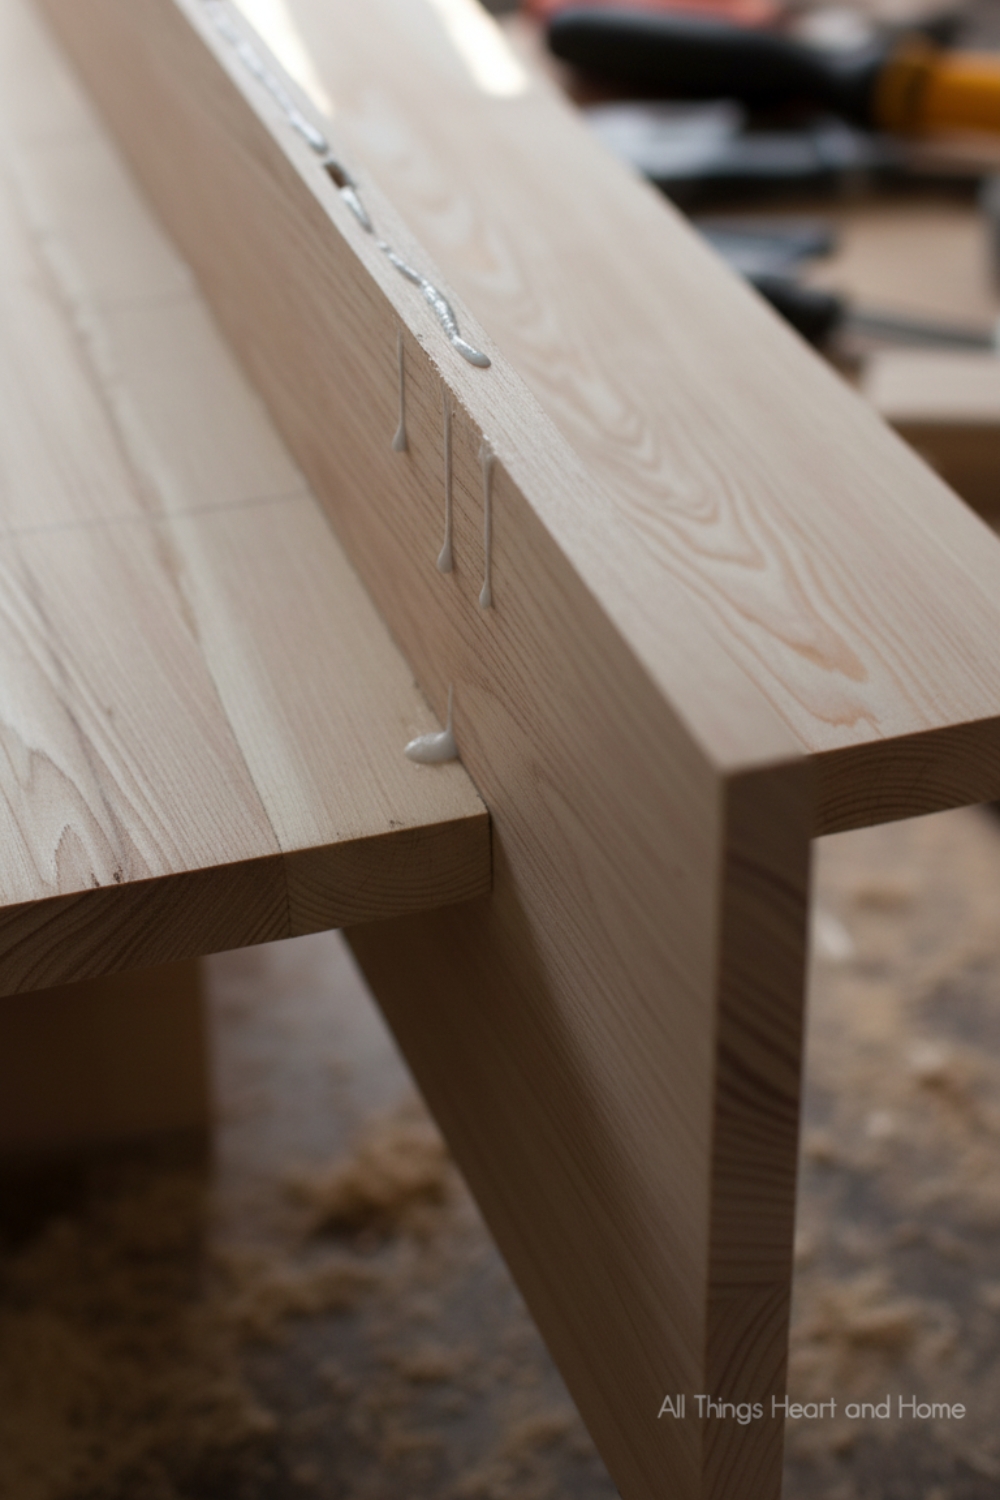
Step 4: Add Support Pieces
If you used only wood glue to join the boards, add two or three 1×2 support boards to the back of the cover.
These braces help stabilize the cover and keep it from flexing.
Position them so the cover rests securely on the fire pit without wobbling.
Step 5: Sand the Surface
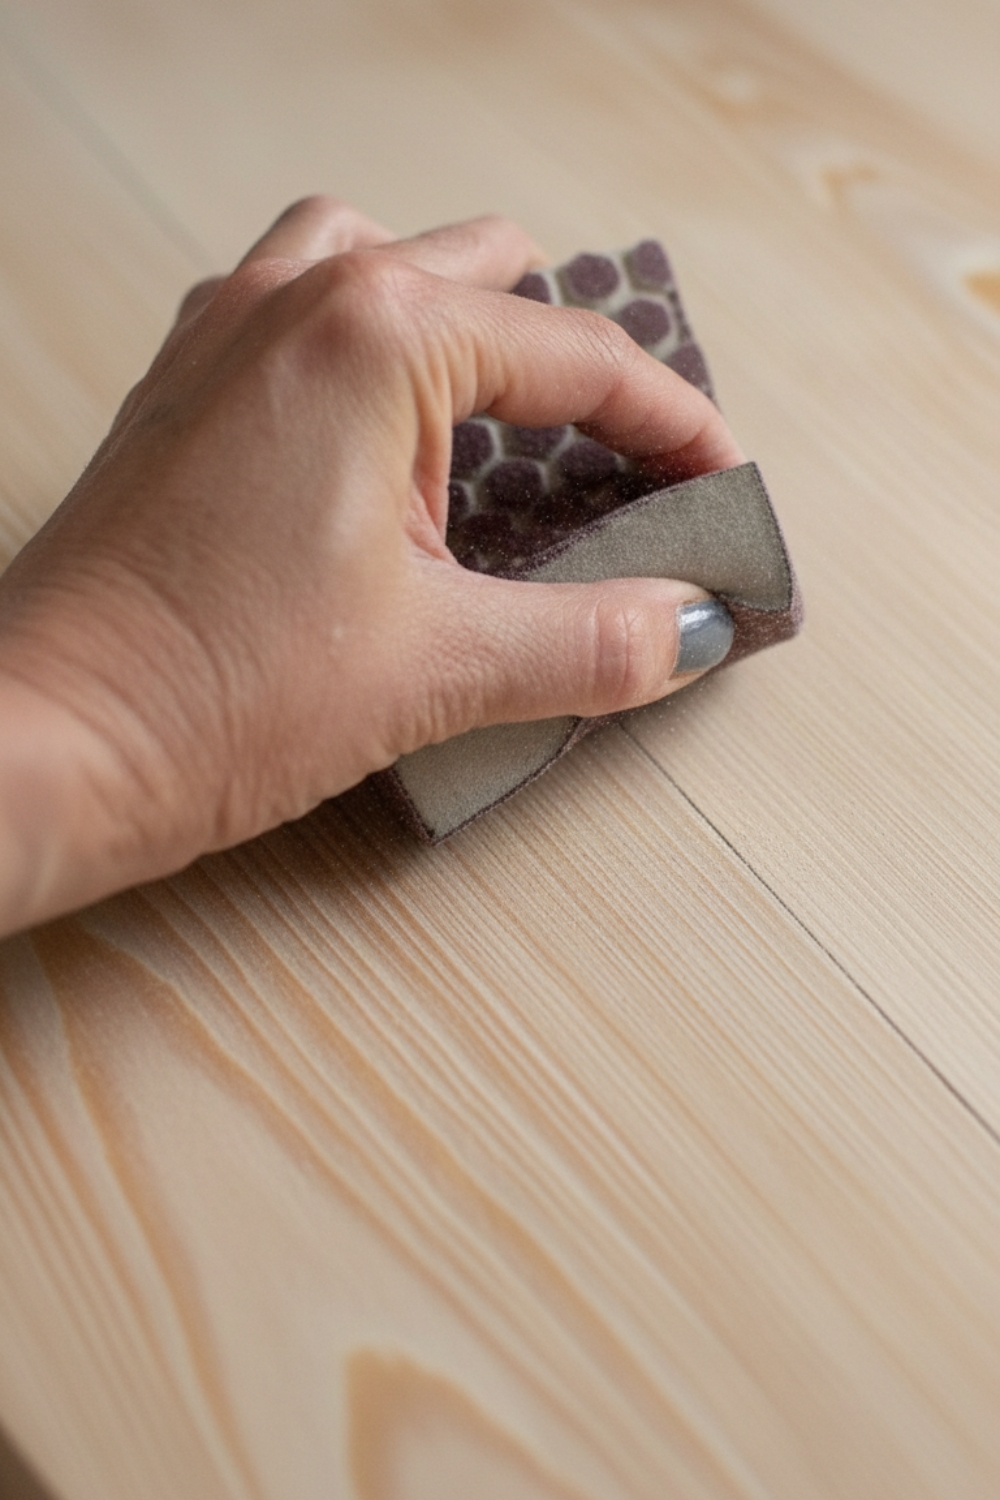
Sanding smooths the wood and prepares it for staining.
Start with 120 grit sandpaper using a hand sander for the large surfaces.
For edges and detailed areas, flexible sanding sheets or sanding sponges work well because they bend and conform to the shape of the wood.
Step 6: Apply Stain
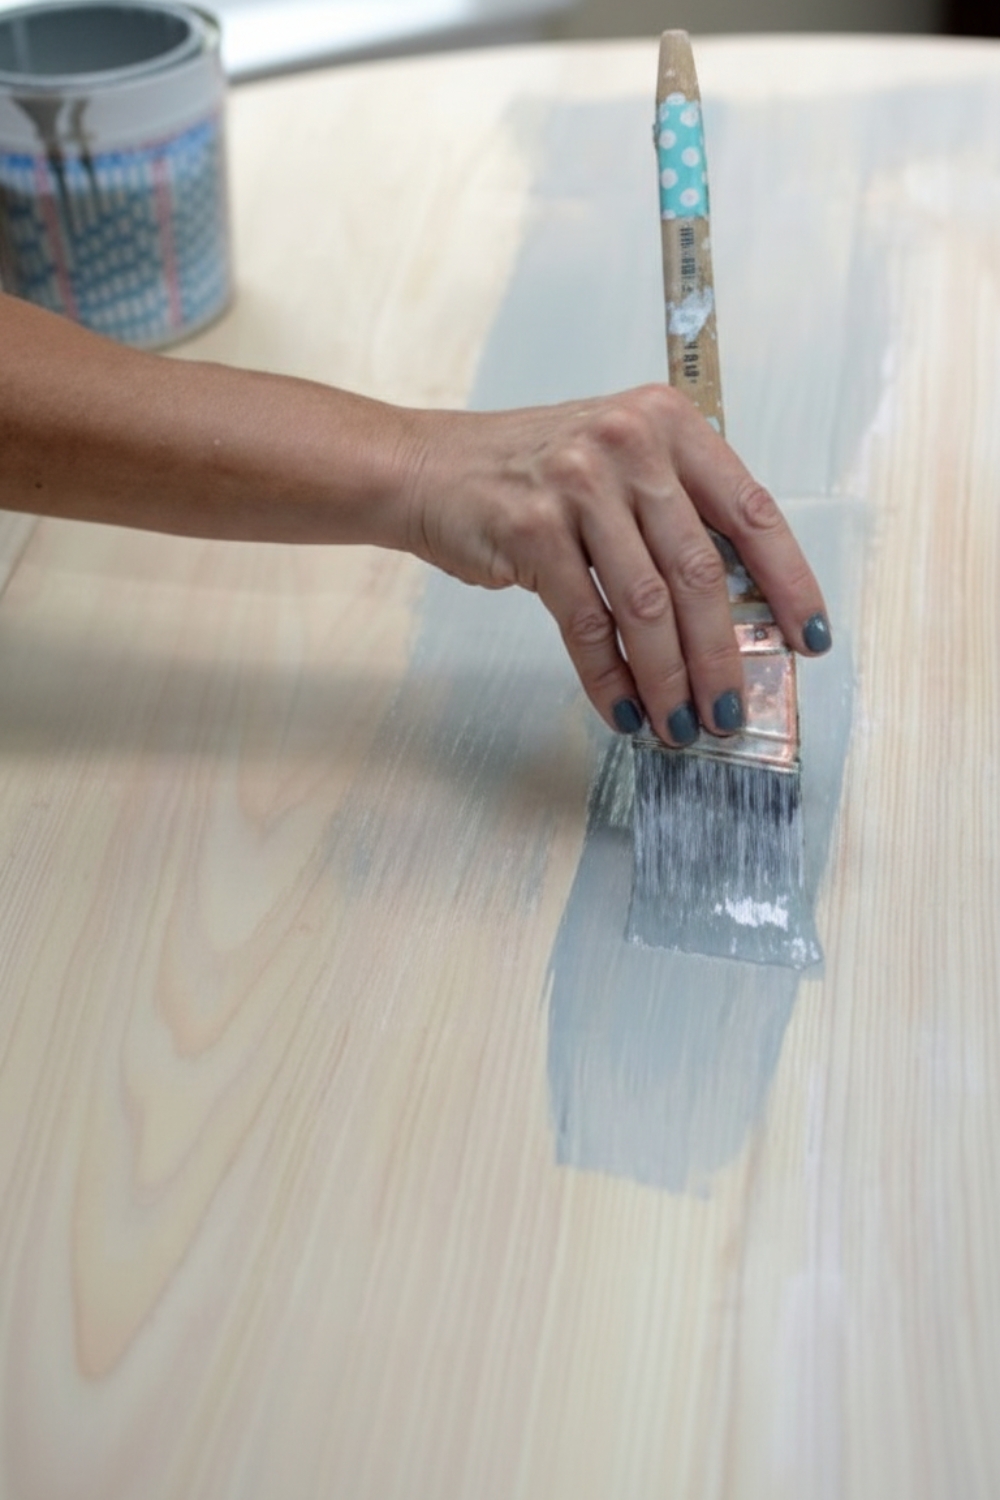
Choose an exterior semi transparent stain to protect the wood.
For a soft weathered look, mix two stain colors such as:
- White
- Dark gray
Brush the stain onto the wood, allow it to sit briefly, and then wipe off the excess with a cloth.
This technique allows the natural wood grain to remain visible while adding subtle color.
Step 7: Create the Checkerboard Pattern
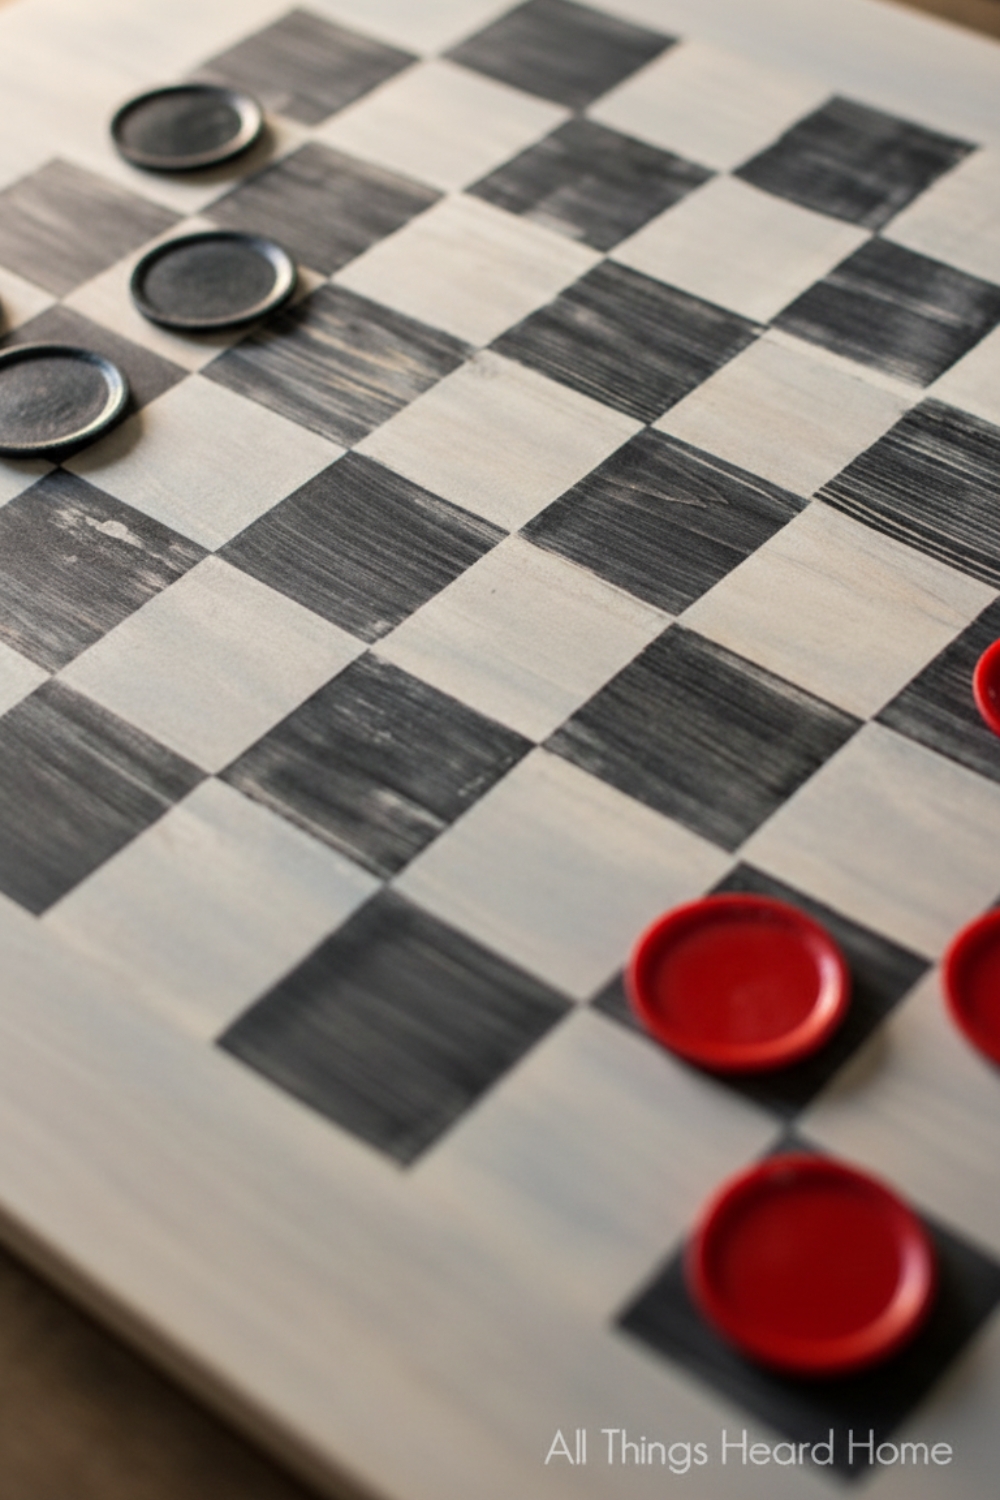
To turn the cover into a game board, paint a checkerboard pattern on the surface.
A checkerboard has 64 squares arranged in 8 rows of 8.
- Measure and mark the board using chalk and a yardstick.
- Tape off the squares using painter's tape.
- Paint every other square.
- Allow the paint to dry before moving to the next row.
For a rustic look, lightly sand the painted squares to create a weathered appearance.
Step 8: Seal the Surface
To protect the fire pit cover from outdoor conditions, apply two coats of exterior water based urethane.
This helps protect the wood from moisture and sun exposure.
Step 9: Seal the Back Seams
To prevent water from entering between the boards, apply strong duct tape along the seams on the underside of the cover.
This simple step helps keep the wood protected during rainy weather.
Final Result

The finished project is more than just a fire pit cover.
It becomes:
- A protective lid for the fire pit
- A functional outdoor table
- A checkerboard game surface for family gatherings
Because the cover lifts off easily, the fire pit can still be used anytime for fires, evening gatherings, or making s'mores under the stars.