
Indoor Closet Playhouse Reveal And How We Built It
If you've ever considered building a playhouse indoors, a closet is one of the easiest places to start. With a little creativity and some basic woodworking skills, an unused space can become something truly magical for children.
Indoor Closet Playhouse
Turning an unused closet into a tiny playhouse can completely transform a child's space. What begins as an ordinary storage area becomes a little world of imagination - a place for reading, pretend play, and quiet adventures.
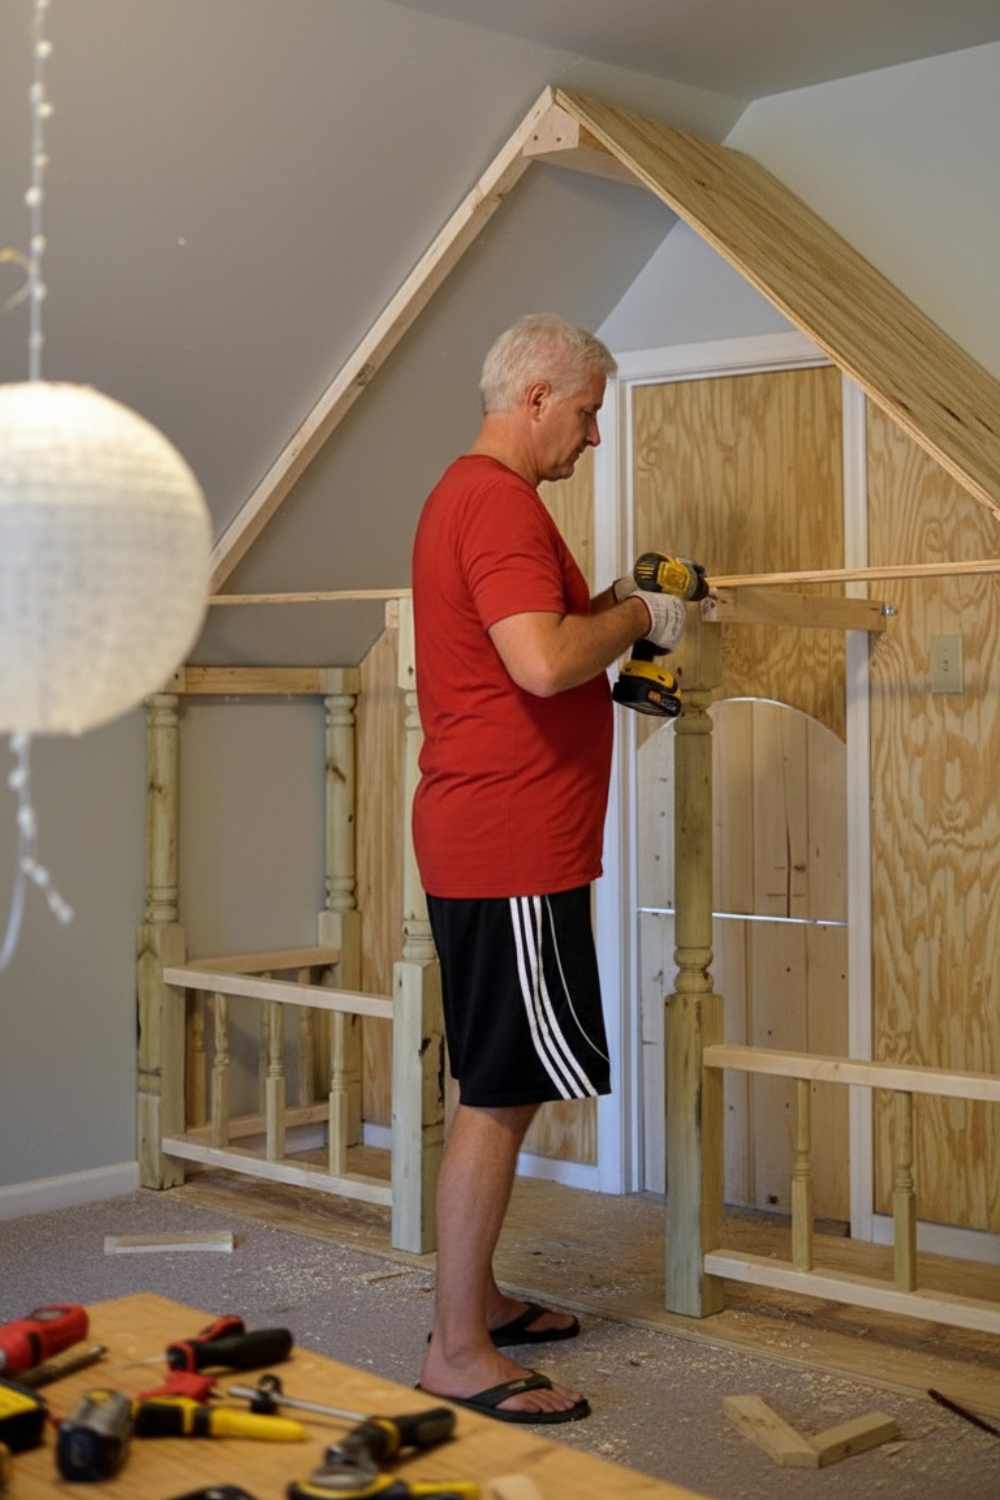
We recently finished building a new indoor closet playhouse for our granddaughters, and the result is even sweeter than we imagined. This is actually the second indoor playhouse my husband has built, but this version came together differently because of the closet layout in our new home.
Every closet has its own shape and challenges, so instead of strict measurements, this project is really about understanding the process and structure behind the build.
If you have a closet that isn't being used to its full potential, it can become the perfect spot for a small indoor playhouse.
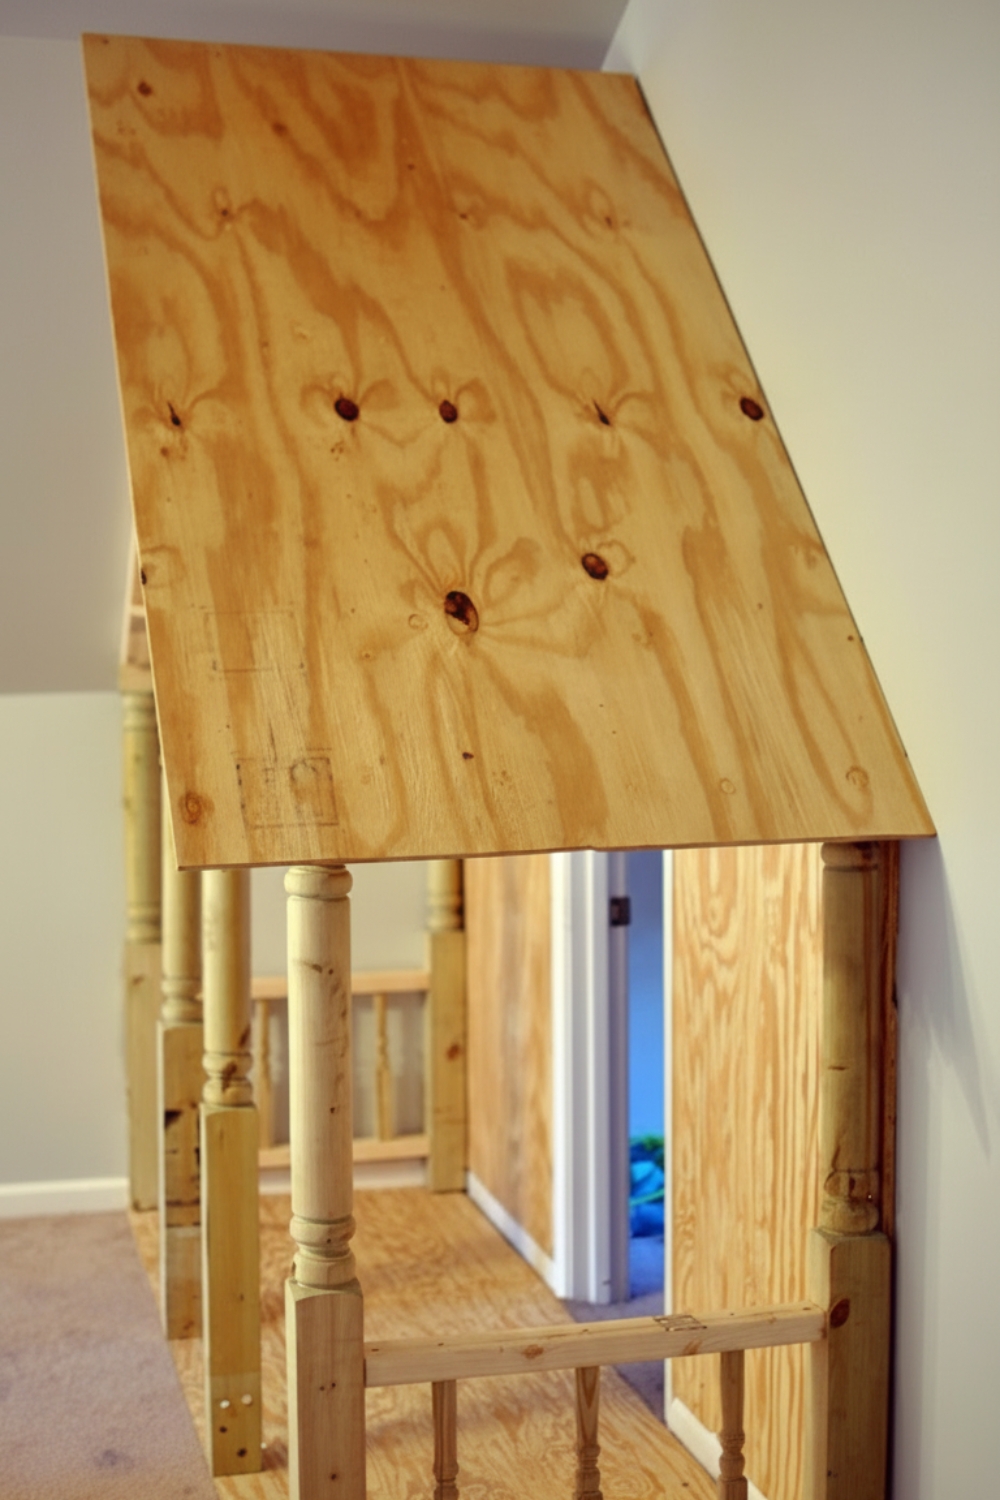
Starting With the Closet Space
In our previous home, the closet opening was narrow, so the playhouse had to be built outward from the closet frame.
In this house, the closet is much larger, which allowed the playhouse to fit inside the closet footprint itself.
That one difference changed the entire design.
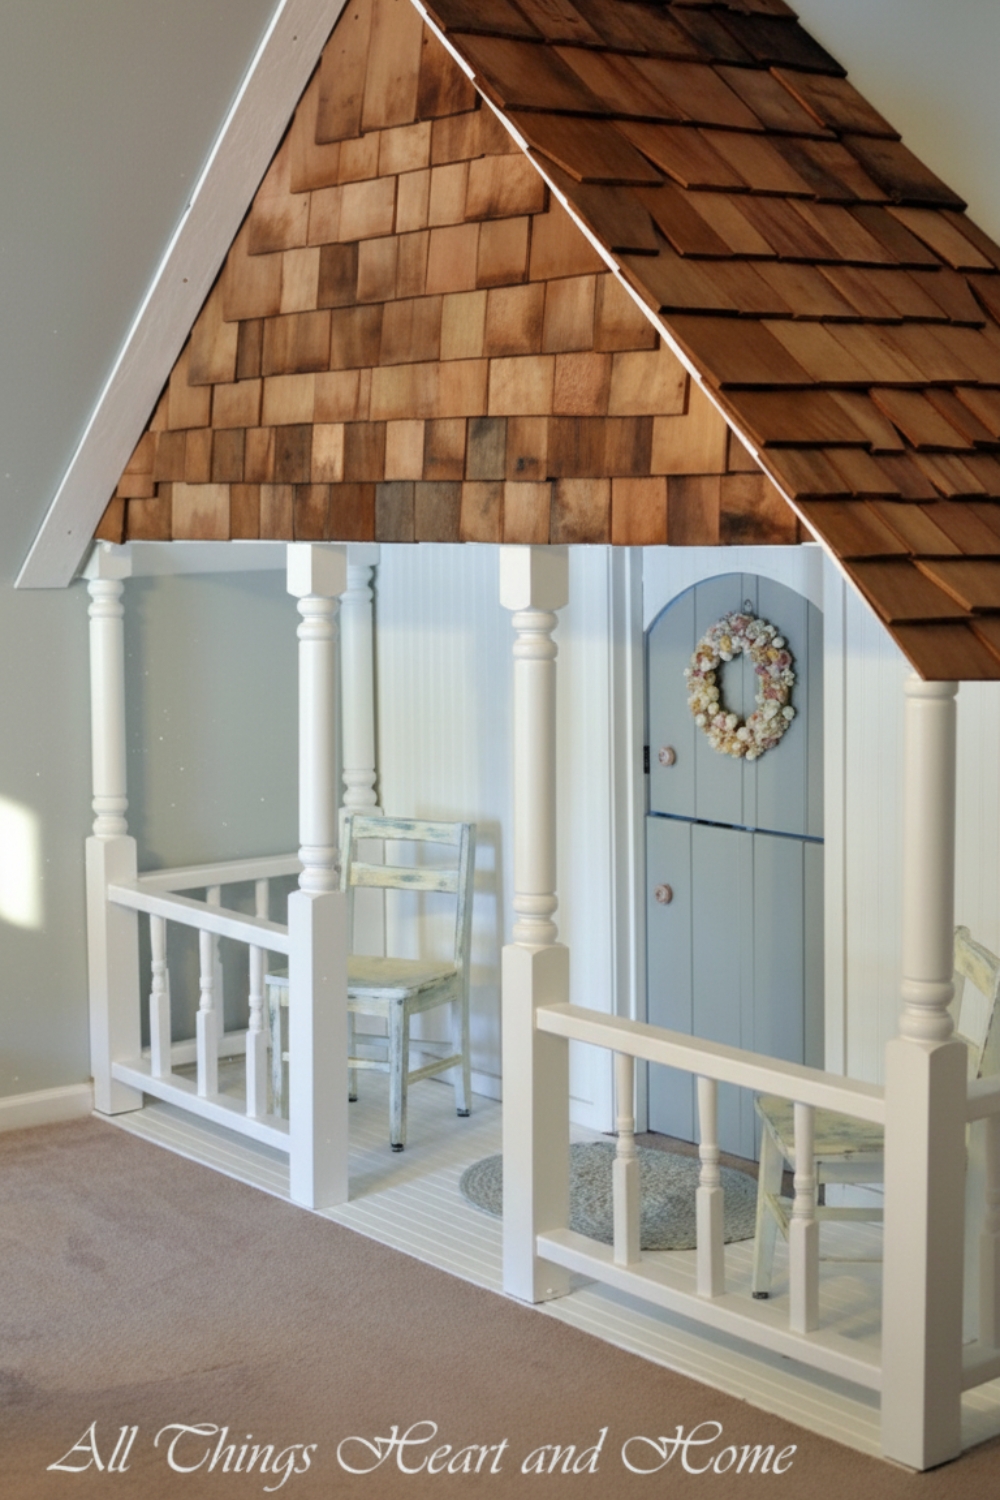
Because there was more depth available, we decided to add a tiny front porch, which instantly gave the playhouse more character and made it feel like a real little cottage.
One important thing to know before starting: building a closet playhouse requires basic woodworking knowledge. Closet openings vary widely, so most of the measurements will depend on your specific space.
The goal is to design the structure so it fits neatly inside the closet while still leaving room for children to play comfortably.
Materials Used for the Playhouse
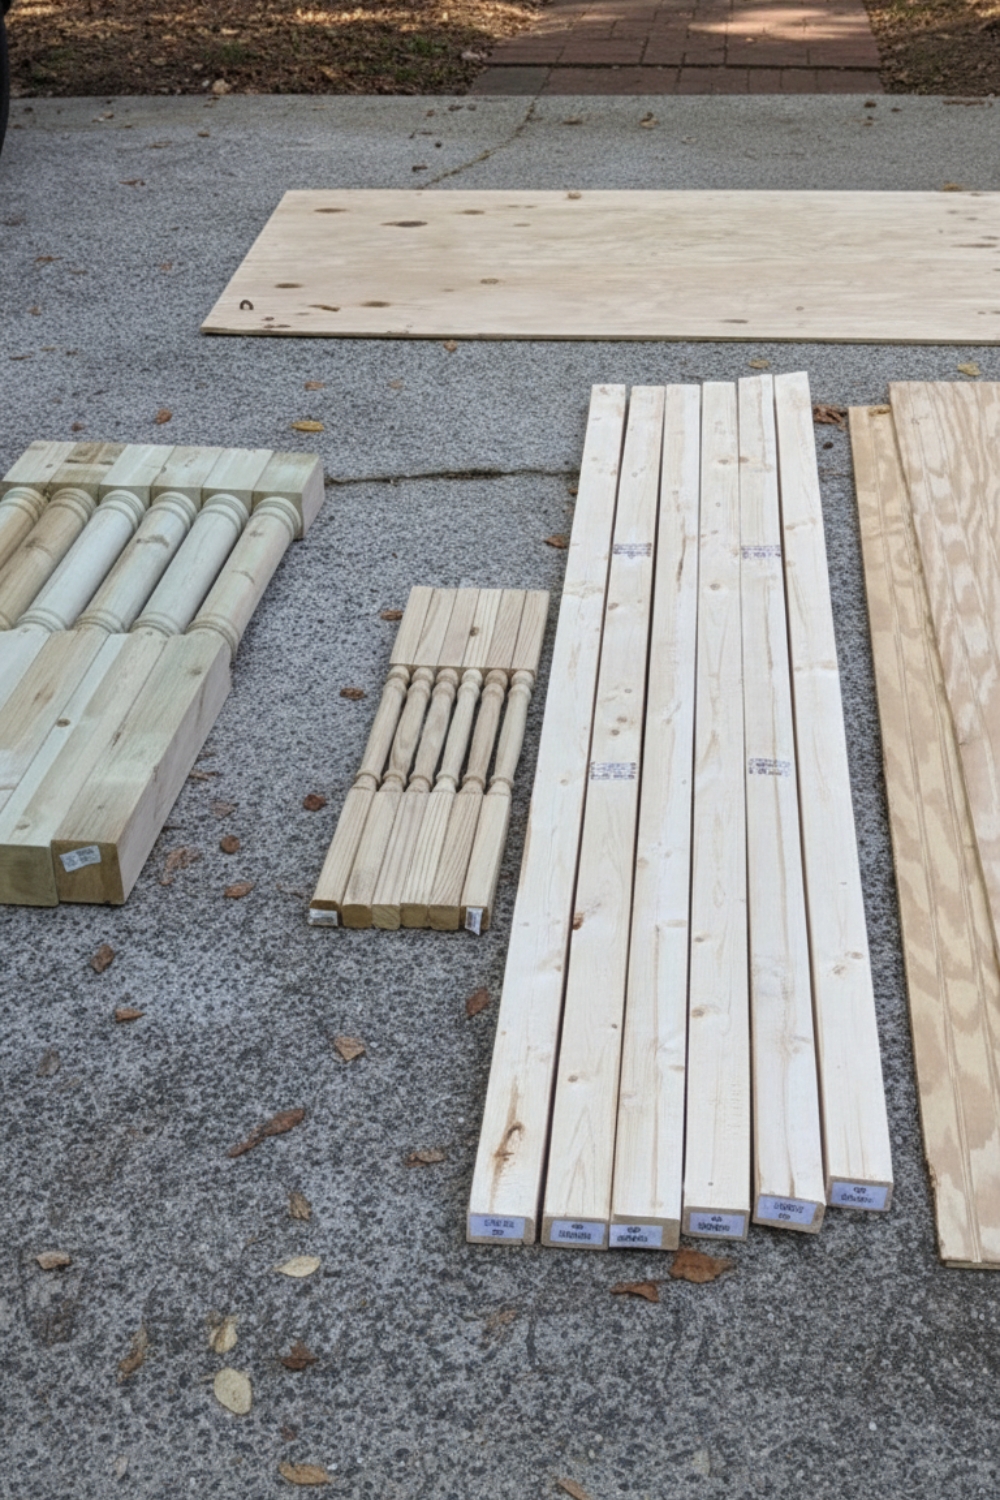
Most of the supplies for this project came from the home improvement store.
Materials included:
- Beadboard panels for the playhouse front
- Wood for framing the structure
- Wood bannisters for the porch railing
- Cedar shingles for the roof
- Hinges and hardware for the door
- Exterior paint and primer
For paint, we used Behr Ultra Paint with Primer in white for the exterior walls and Behr Ultra in Rhino for the door.
Using exterior paint helps protect the wood and creates a durable finish that can handle years of play.
Designing the Cottage Style Front
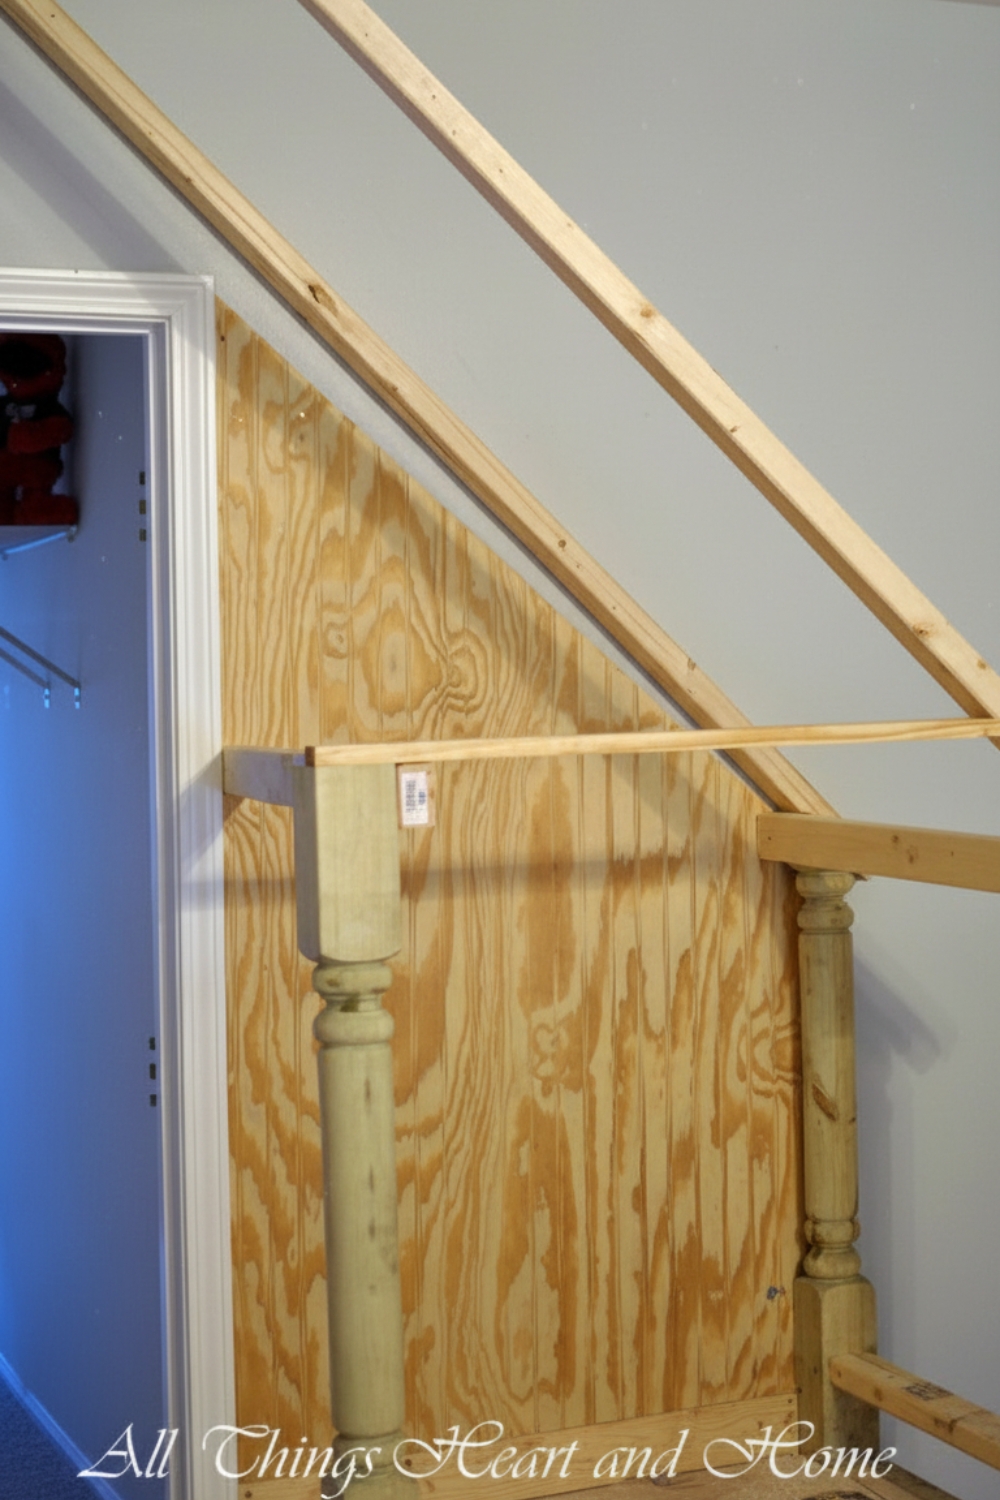
The closet already had a natural roofline that worked perfectly for creating an A-frame style roof.
Instead of repeating the barn-style door used in the first playhouse, we wanted something softer and more cottage-inspired this time.
My husband cut an arched doorway, which instantly changed the feel of the structure. Rounded openings add a lot of charm and make the playhouse feel more like a miniature home rather than a simple built-in structure.
The door itself became a Dutch door, which allows the top half to open independently. This makes it easy for children to peek out and interact while still keeping the lower half closed.
Adding Character With Cedar Shingles
To finish the roof, we used cedar shingles.
This small detail adds texture and warmth that painted wood alone cannot achieve. Cedar also ages beautifully over time, which helps the playhouse feel like a real tiny cottage.
Little design details like this are what make the playhouse feel special rather than temporary.
Building a Tiny Front Porch
Since the closet space was larger, we decided to extend the design slightly and add a mini front porch.
The porch includes small wood bannisters and enough room for tiny chairs or decorative pieces.
A front porch may seem like a small addition, but it completely changes the personality of the playhouse. It gives children a place to sit, pretend, and interact with the room outside the house.
We're even planning to add small rocking chairs for the porch to make the space even more fun.
Why Closet Playhouses Work So Well
Closet playhouses are surprisingly practical.
They use space that might otherwise be underutilized while creating a dedicated imaginative play area for kids.
Another benefit is that the change doesn't have to be permanent.
In our previous home, the playhouse was built inside a closet opening. When we moved, we simply removed the playhouse front, installed a bi-fold door, and added a shelf and hanging rod. The closet instantly returned to normal.
That flexibility makes projects like this much easier to commit to.
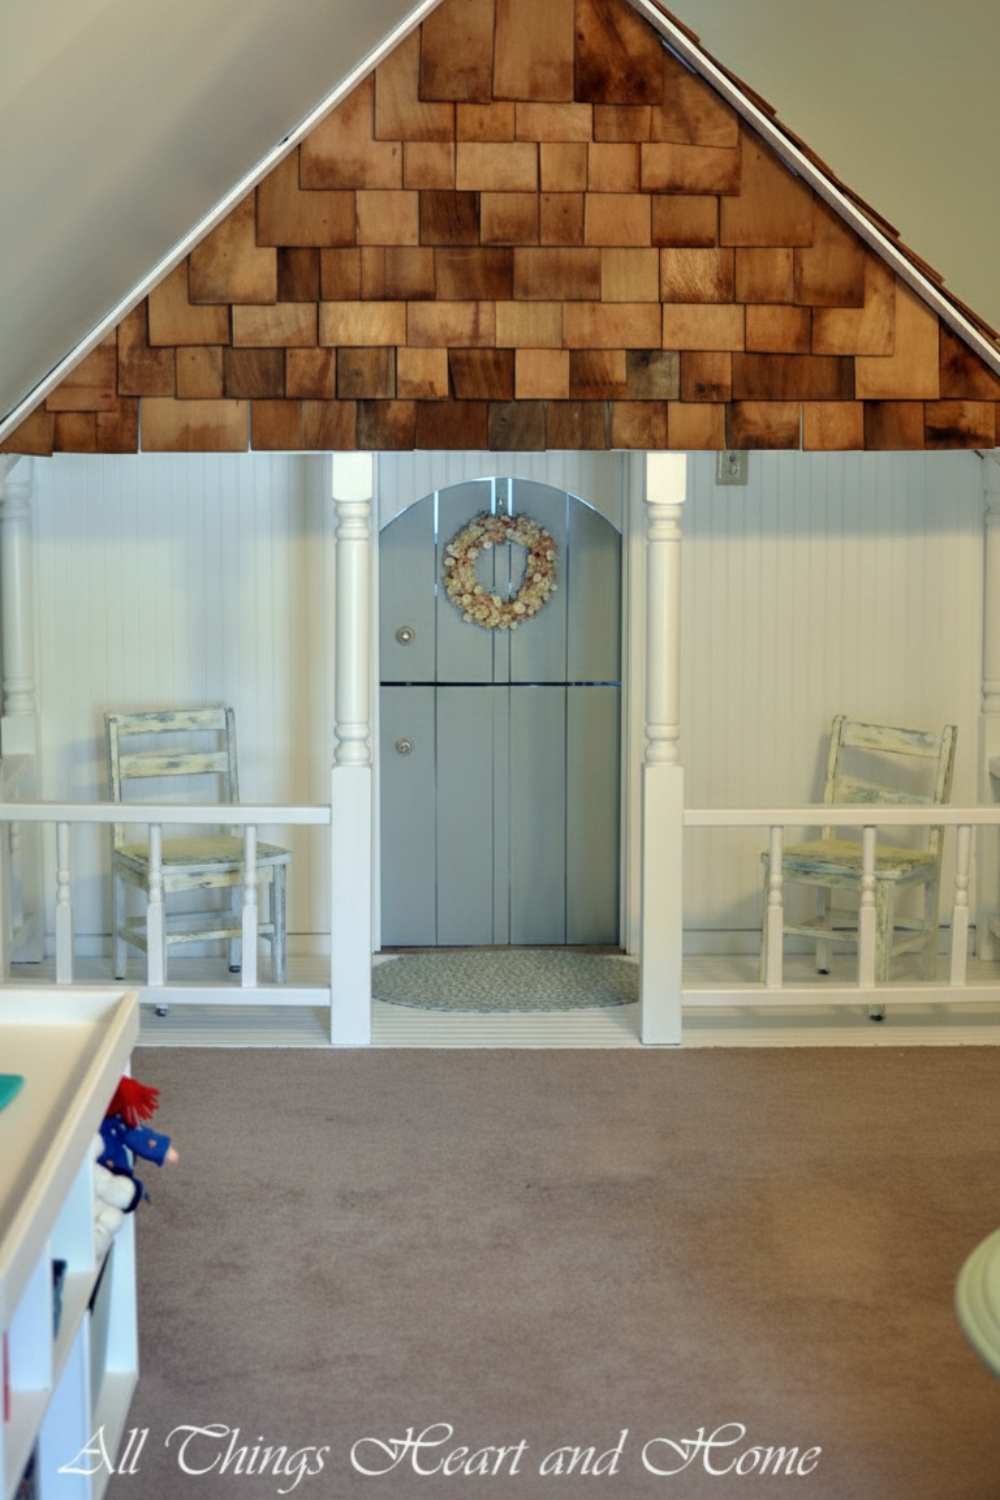
The Finished Playhouse
The finished playhouse feels like a tiny cottage tucked inside the room.
Between the arched door, cedar shingles, and little porch, it has all the charm of a miniature home.
And most importantly, the girls absolutely love it.
Seeing them step inside, invite each other to play, and make the space their own is what makes the project worthwhile.
Ideas for Decorating the Inside
Once the structure is finished, the interior can be customized to fit your child's interests.
Some simple additions include:
- Floor cushions or a small mattress
- String lights or battery lanterns
- A small bookshelf
- Play kitchen accessories
- Dolls or stuffed animals
- Wall decals or removable wallpaper
These details turn the playhouse into a cozy little retreat.