Crochet Hedwig Owl Pattern Free Amigurumi In Grey Yarn
Anyone sorted into a different house can stitch the Hedwig owl amigurumi scarf in green and silver or blue and bronze instead of maroon and red. Light grey milk cotton on a 1.5 mm hook builds a dense body, and a chain loop on top turns the owl into a hanging ornament.
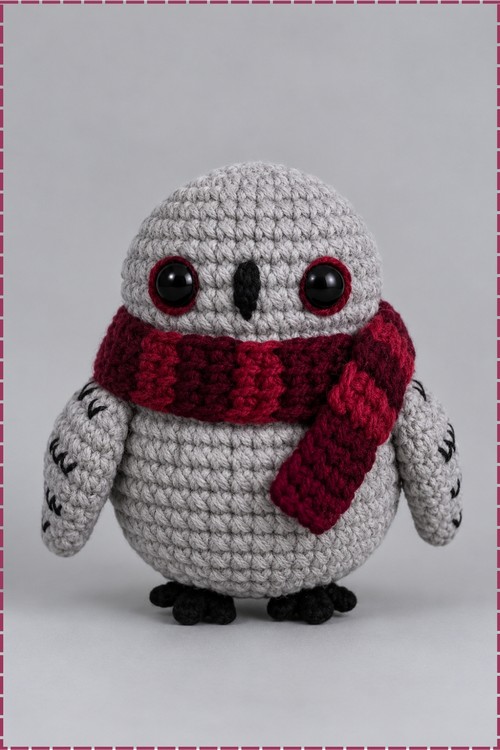
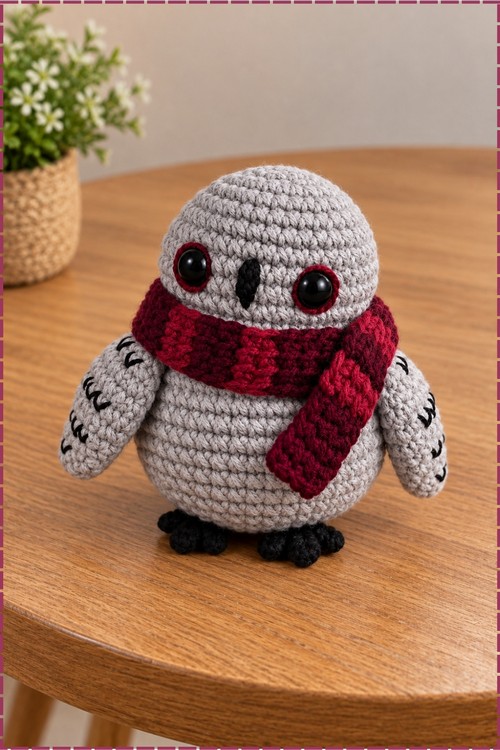
Wrapped in a scarf and standing on stubby feet, this crochet snowy owl amigurumi has a slightly grumpy look that comes straight from the eye placement. The scarf gives the snowy owl amigurumi its attitude. Hand it to anyone who likes a toy with a bit of personality.
Crochet Hedwig Owl Amigurumi
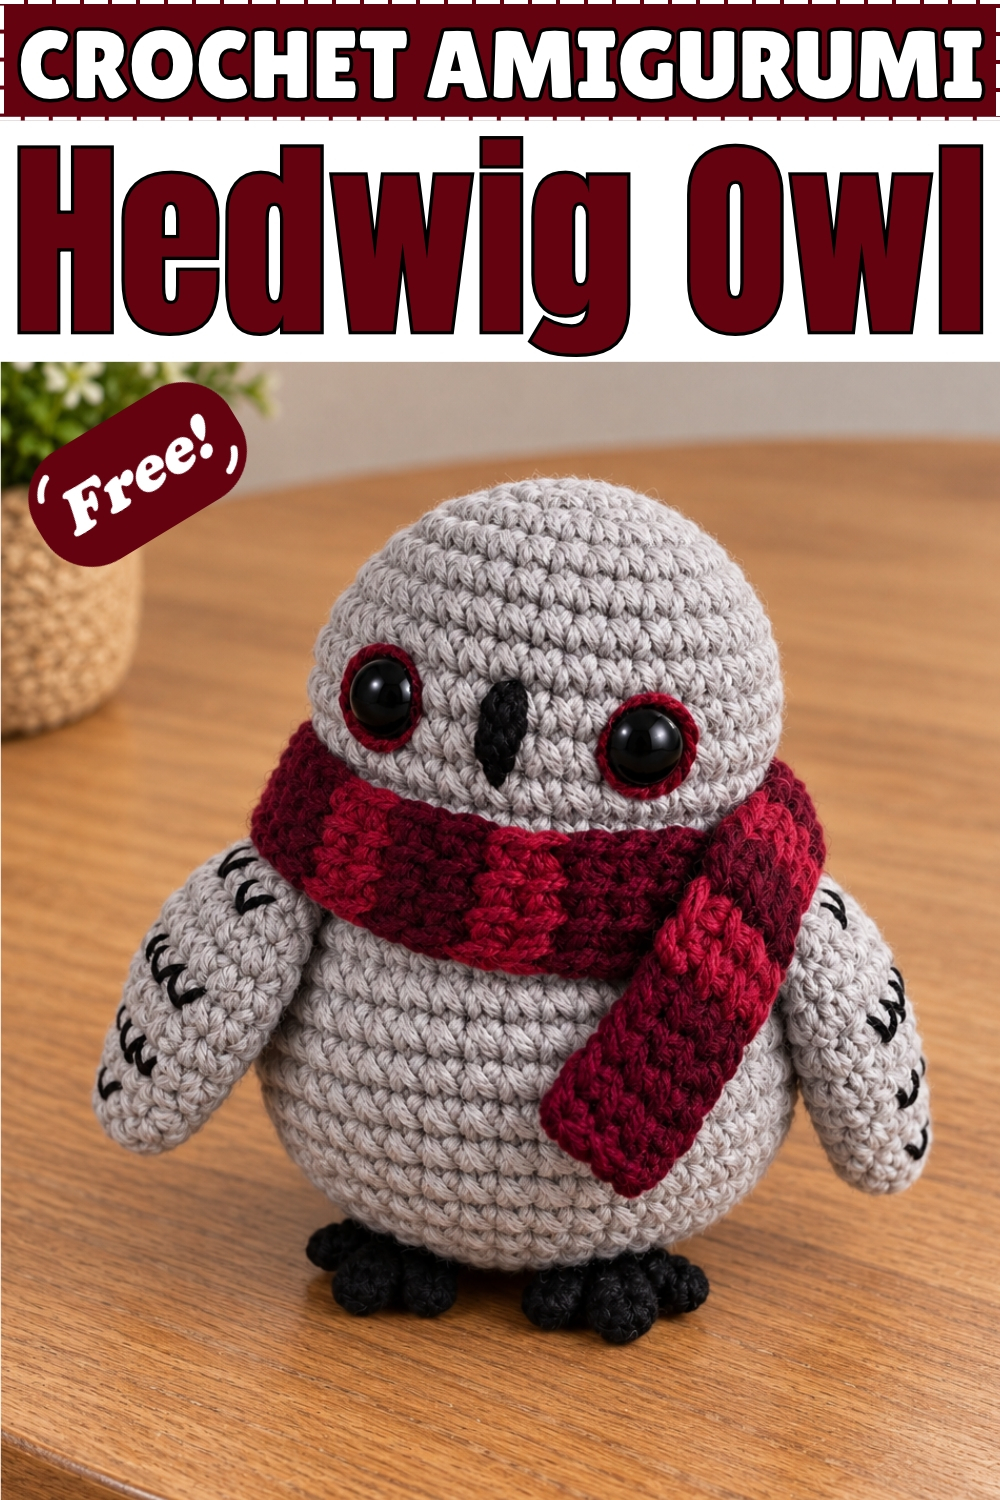
Worked from the top of the head straight down through the body in one unbroken spiral, this crochet Hedwig owl amigurumi needs no shoulder seam anywhere. Grey milk cotton gives the bird its soft feathered surface, while a front loop round at the neck creates the small ledge that separates head from belly. Wings begin in a magic ring and stay flat enough to sit close against the sides. Hand stitched chevrons along each wing suggest feathers without any extra pieces. Scarf stripes finish the whole thing in house colours. You stuff firmly, close the base, and set the owl on two small feet.
Materials And Tools
- Milk cotton yarn in light grey for the head, body and wings
- Milk cotton yarn in deep maroon and bright red for the scarf
- Small amount of black yarn for the beak, the feet and the wing embroidery
- Small amount of maroon yarn for the eye rings
- 1.5 mm crochet hook
- 7 mm black safety eyes or black beads
- Stitch marker
- Fiberfill stuffing
- Tapestry needle
- Fabric glue, optional, for securing the beak and eye rings
My finished owl uses light grey rather than white, and the only yellow in the original notes was left out completely. The beak on my piece is black, so no yellow yarn is needed unless you want a snowy owl look instead.
Difficulty And Time
In my experience this one sits in the easy to intermediate range. The stitches are all basic, but the 1.5 mm hook and thin cotton make the fabric dense and slow. I spent roughly four to five hours on mine across two evenings, and a faster crocheter working at that gauge would likely finish in three.
Beginner Technique Notes
Working In A Spiral
- The head and body are worked in a continuous spiral with no joining and no chain at the start of each round, so move your stitch marker up every single round or the rounds will drift and you will lose count fast.
Front Loop And Back Loop Rounds
- Front loop only means you insert the hook under the front strand of the stitch top only, which leaves the back strand standing as a visible ridge, and this is what gives my owl its neck line between head and belly.
- Back loop only works the same way on the other strand, and the ridge it leaves near the base helps the body sit flat on a shelf.
Keeping Stitches Tight
- Thin cotton on a 1.5 mm hook should produce a fabric with no visible gaps, so if you can see stuffing through the stitches, go down a hook size before starting over.
The Pattern
Head And Body In Grey
- Round 1: work 6 single crochet in a magic ring (6), then pull the ring closed firmly because this point sits at the very top of the head and any gap will show.
- Round 2: work 6 increases, which means 2 single crochet in every stitch (12).
- Round 3: work single crochet, increase, repeated 6 times (18).
- Round 4: work single crochet, increase, single crochet, repeated 6 times (24), and the circle should still lie flat like a coin at this stage.
- Round 5: work 3 single crochet, increase, repeated 6 times (30).
- Round 6: work 2 single crochet, increase, 2 single crochet, repeated 6 times (36), after which the piece begins to cup into a dome.
- Round 7: work 36 single crochet (36).
- Round 8: work 36 single crochet (36).
- Round 9: work 36 single crochet (36), and this is the round where I placed my safety eyes, roughly 6 stitches apart with the beak space centred between them.
- Round 10: work 36 single crochet (36).
- Round 11: work 36 single crochet (36), giving a rounded head with straight sides.
- Round 12: work 2 single crochet, decrease, 2 single crochet, repeated 6 times (30), which draws the head in at the neck.
- Round 13: working in the front loop only, work 2 single crochet, increase, 2 single crochet, repeated 6 times (36), and the back loops left behind form the visible ridge under the chin where the scarf later sits.
- Round 14: work 5 single crochet, increase, repeated 6 times (42), and start stuffing the head firmly now while the opening is still wide.
- Round 15: work 42 single crochet (42).
- Round 16: work 42 single crochet (42).
- Round 17: work 42 single crochet (42).
- Round 18: work 42 single crochet (42).
- Round 19: work 42 single crochet (42).
- Round 20: work 42 single crochet (42).
- Round 21: work 42 single crochet (42), giving a belly that is slightly wider than the head, exactly as it looks in my photo.
- Round 22: work 5 single crochet, decrease, repeated 6 times (36).
- Round 23: work 2 single crochet, decrease, 2 single crochet, repeated 6 times (30), and top up the stuffing here so the lower body keeps its round shape.
- Round 24: working in the back loop only, work 3 single crochet, decrease, repeated 6 times (24), which creates the small ridge that lets the owl stand.
- Round 25: work single crochet, decrease, single crochet, repeated 6 times (18).
- Round 26: work single crochet, decrease, repeated 6 times (12), and push in the last of the stuffing with the back of your hook.
- Round 27: work 6 decreases (6), then fasten off, thread the tail through the remaining stitches, pull tight and weave the end inside.
Wings In Grey, Make Two
- Round 1: work 6 single crochet in a magic ring (6).
- Round 2: work 6 single crochet (6), which keeps the tip of the wing narrow and rounded.
- Round 3: work single crochet, increase, repeated 3 times (9).
- Round 4: work single crochet, increase, single crochet, repeated 3 times (12).
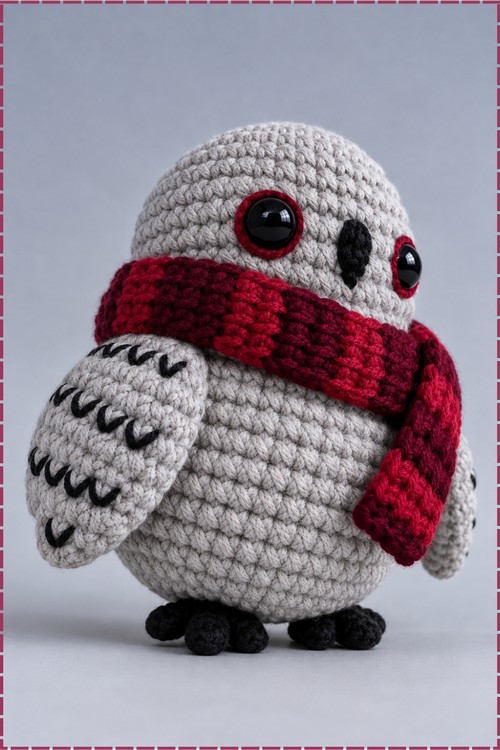
- Continue in single crochet with no further shaping until each wing reaches the length you want, then flatten the piece and fasten off leaving a long tail for sewing, and on my owl the wings reach from just below the scarf to the lower belly.
- Press each wing flat with your fingers rather than stuffing it, because a flat wing lies against the body and a stuffed one sticks out awkwardly.
Beak In Black
- Work a very small triangular beak in black yarn, or embroider one directly onto the face with a few long straight stitches worked over each other until the shape fills in.
- My beak is a small black vertical triangle sitting directly between the eyes and slightly below their centre line, narrow at the bottom and wider at the top.
Eye Rings In Maroon
- Thread maroon yarn on a tapestry needle and work a ring of small stitches around the outside edge of each safety eye, following the circle of the eye disc.
- Keep the ring close against the eye so no grey shows between the yarn and the plastic, since a loose ring makes the face look blurred rather than outlined.
Feet In Black
- Work two small black ovals or short flat pieces for the feet, each only a few rounds, and fasten off leaving a tail for sewing.
- Mine are tiny and sit right at the front base of the body, just far enough apart that the owl balances without leaning.
Scarf In Maroon And Red
- Chain until the strip reaches your preferred scarf length, then work rows of single crochet back and forth across those chains until the scarf is as wide as you want it.
- Change between deep maroon and bright red every few rows to create the stripe pattern, and carry the unused colour loosely along the edge so the scarf stays flexible.
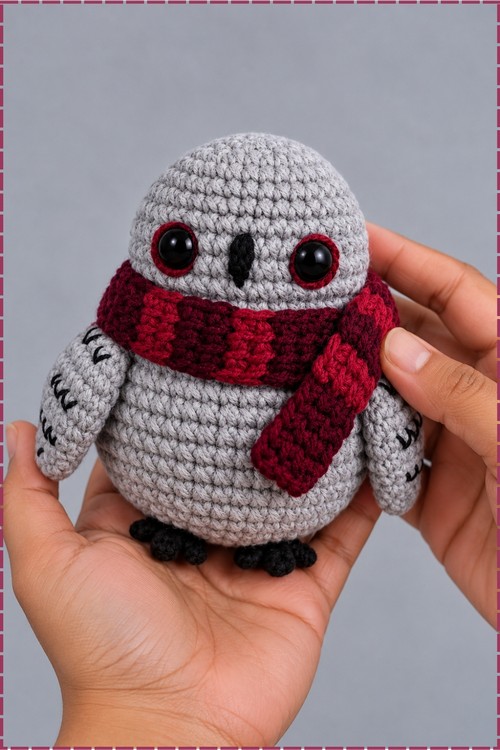
- Make one longer piece for the neck and one shorter piece for the hanging tail end if you want the draped look in my photo, or work a single long strip and fold it over itself.
Assembly
- Pin both wings to the sides of the body first, level with the lower edge of the scarf, and check from the front that they sit at the same height before you sew.
- Sew each wing on through the top few stitches only, leaving the lower part free so it hangs naturally against the belly.
- Embroider three or four small black chevrons down the outer face of each wing with black yarn, spacing them evenly from the top of the wing to the tip.
- Attach the beak between the eyes and add a dab of fabric glue underneath if it shifts while you handle the toy.
- Sew the feet to the front base of the body, slightly angled outwards, then press down on the owl to confirm it stands on its own.
- Wrap the scarf around the neck ridge created in round 13, overlap the ends at the front, and tack the overlap down with a few hidden stitches.
- Let the short end of the scarf hang down over the front of the body on one side, which is how mine sits in the photo.
Tips And Troubleshooting
- Place the safety eyes before you stuff the head, because once the stuffing is in you cannot reach the backs to attach the washers.
- Count every round out loud at the thin gauge, since a single missed increase in the 42 stitch rounds shows up as a flat spot on the belly.
- Stuff in small pinches rather than large handfuls, as big clumps create lumps that are visible through tight cotton stitches.
- Embroider the wing chevrons before sewing the wings on, so you can pull the stitches through to the back without catching the body.
- Keep the eye ring stitches short and close together, because long loose stitches slip around the eye disc and lose the clean circle.
- Block the scarf lightly under a damp cloth if the stripe edges curl, which thin cotton tends to do.
- Weave the colour change tails inside the scarf as you go rather than leaving them all for the end.
Yarn Substitution
Any smooth cotton or cotton blend in a similar weight will work here, and I would stay away from fuzzy acrylic because the halo hides the stitch definition that makes the grey body look feathered. If you move up to a worsted weight yarn with a 3 mm hook, the stitch counts stay exactly the same and you simply end up with a much larger owl, so size your scarf and safety eyes up to match.
Customization Ideas
- Swap the grey for pure white and the black beak for yellow if you want the classic snowy owl colouring described in the original notes.
- Change the scarf to green and silver, blue and bronze, or yellow and black for a different house.
- Add a small chain loop at the top of the head and turn the owl into a hanging ornament.
- Embroider closed sleepy eyes with black yarn instead of using safety eyes for a softer face.
- Stitch a tiny envelope from felt and tack it under one wing for the owl post look.
FAQ
Can I make this without safety eyes? Yes, and it is the better choice if the owl is going to a baby or toddler. Embroider two solid black circles with yarn in the same position, then add the maroon ring around them exactly as written.
Why does my owl lean forward? The feet are most likely sewn too far forward, or the lower body is understuffed. Push a little more fiberfill into the base, then move the feet back slightly until the owl balances.
My head and body look like one blob. What went wrong? The front loop only round at round 13 is what creates the neck line, so if you worked it through both loops the ridge never forms. There is no fix other than reworking that round, which is why I always mark it before starting.
How do I stop the wings from sticking out? Leave them unstuffed and sew only the top portion to the body. Sewing all the way down the wing edge forces it flat and stiff, while sewing only the top lets it fall against the belly.
Is the scarf removable? Mine is tacked down with a few stitches so it stays put, but you can leave it loose and simply wrap it. A loose scarf lets you swap house colours later without undoing anything.