
Crochet Horse Keychain Free Pattern No Sew With Red Mane
Two hours and one smooth chestnut yarn turn into a crochet horse keychain sturdy enough to swing from a backpack all summer. Chain a yellow cord, slip stitch back along it for a double thick loop, and set 5 mm safety eyes before you stuff the head.
Red mane and yellow saddle put this crochet horse keychain squarely in county fair and rodeo season. Summer shows, riding camp, pony club weekends. Stock up on the crochet horse keychain before the show calendar starts, because they sell out at horse events faster than anything else on the table.
Crochet Horse Keychain
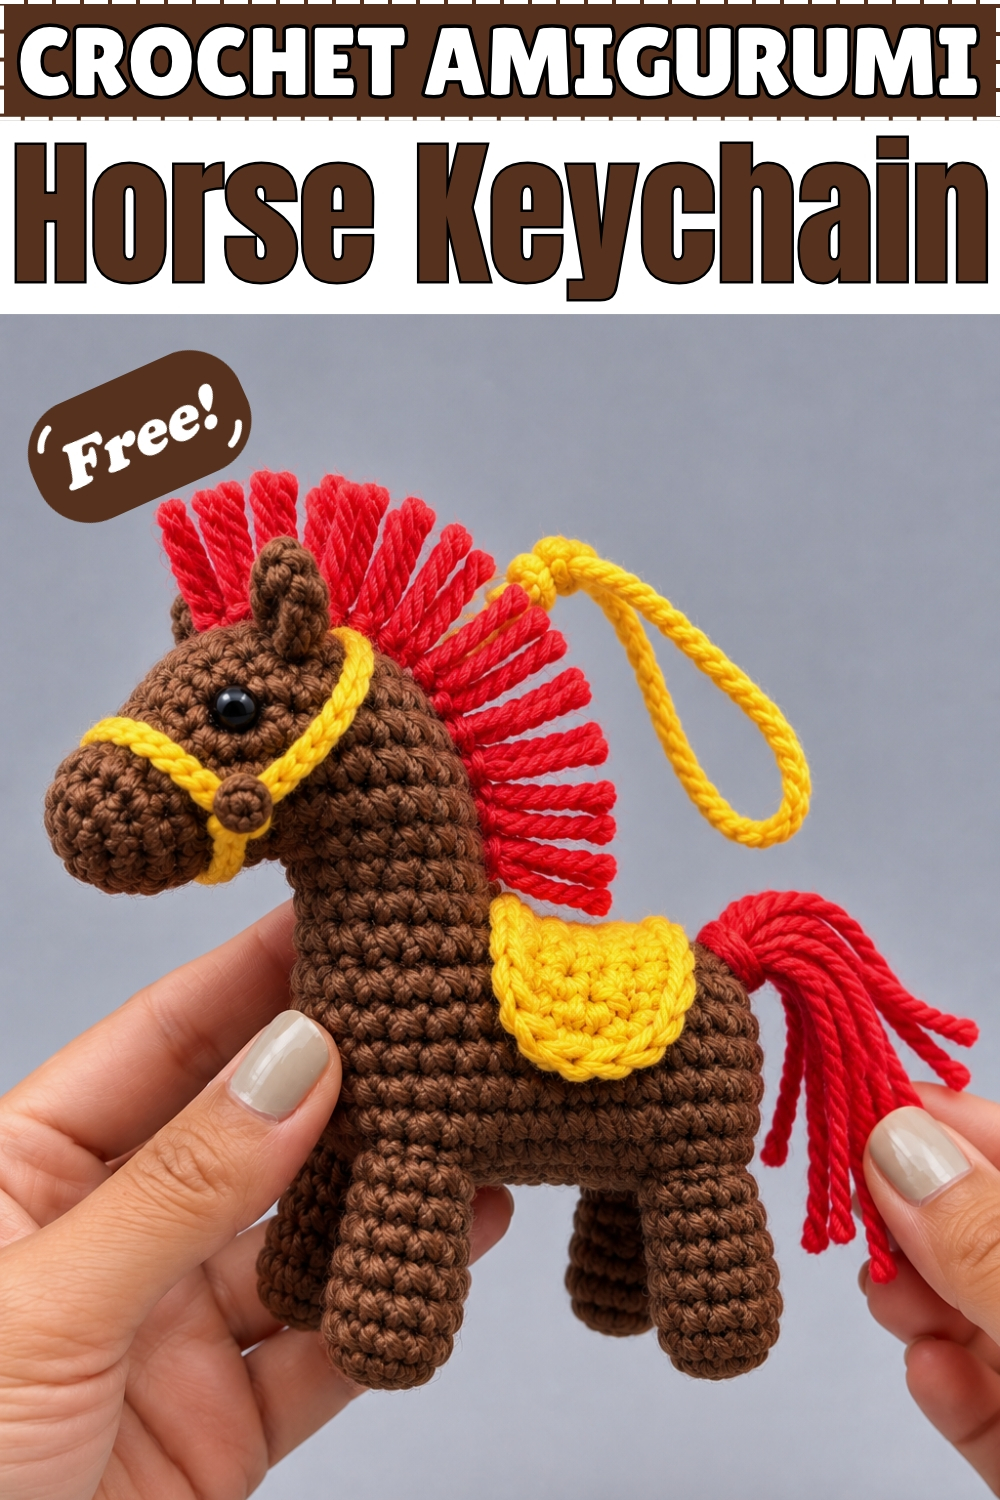
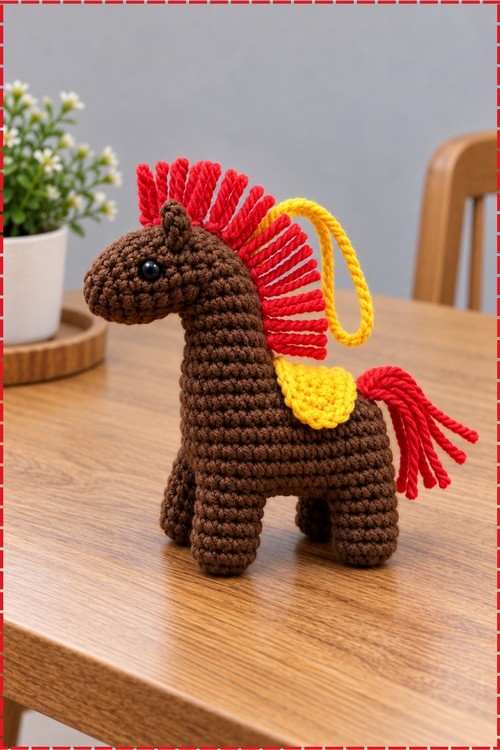
Marked stitches carry the whole construction of this crochet horse keychain, splitting one piece into head, neck, body and legs without ever cutting and rejoining. Nine stitches get reserved at round 4 for the neck while the rest close into the head, and the same trick divides the body into two legs further down. Only the underbelly gap needs sewing at the end, which is why the original calls it a no sew charm. Mine came out chestnut brown with a bright red mane and tail and a yellow saddle blanket.
I made the first one on a bus ride home with a scrap ball of brown and no plan. It hung off my bag by the end of the week and three people asked about it before the month was out. Projects that fit in a pocket get finished, which is more than I can say for the blanket I started that same winter.
Why I Love This One
Hardly any sewing, one skein of leftovers, and a finished horse that stands up straight on four legs.
Materials and Tools
- Medium weight yarn in chestnut brown for the body
- Red yarn for the mane and tail
- Golden yellow yarn for the saddle blanket and the hanging loop
- Crochet hook sized below your yarn label
- 5 mm safety eyes
- Microfill stuffing
- Stitch markers, scissors and a tapestry needle
A smooth yarn matters here. The horse is one plain brown surface across the body, so every uneven stitch shows.
Difficulty and Time
I would place this at easy to intermediate. The stitches are simple but the marked stitch ranges ask for careful counting, and losing track mid body is the main thing that slows people down. Mine took around two hours including the mane, which is my own pace rather than a rule.
The Pattern
Head
- Work in continuous rounds and keep a stitch marker in place throughout.
- Round 1: 6 single crochet, written as SC, in a magic ring [6].
- Round 2: Increase, written as INC, 6 times [12].
- Round 3: (INC, SC) repeated 6 times [18].
- Round 4: (INC, 5 SC) repeated 3 times [21]. Mark the 1st through 9th stitches of this round now, since those are reserved for the neck and you will come back to them.
- Round 5: 12 SC, working only in the 10th through 21st stitches for the head [12]. The head separates from the neck here, so double check your marked range before starting.
- Rounds 6 to 8: SC around [12].
- Round 9: (Decrease, written as DEC, then 2 SC) repeated 3 times [9].
- Insert the 5 mm safety eyes between rounds 6 and 7, spaced 6 stitches apart, and check the angle from the front before snapping the washers on.
- Insert microfill stuffing as you go, keeping the muzzle firm so it does not flatten.
- Round 10: (DEC, SC) repeated 3 times [6].
- Fasten off, then run your yarn end through the front loops only, written as FLO, of round 10 to cinch the opening closed.
- Weave in the yarn end inside the head.
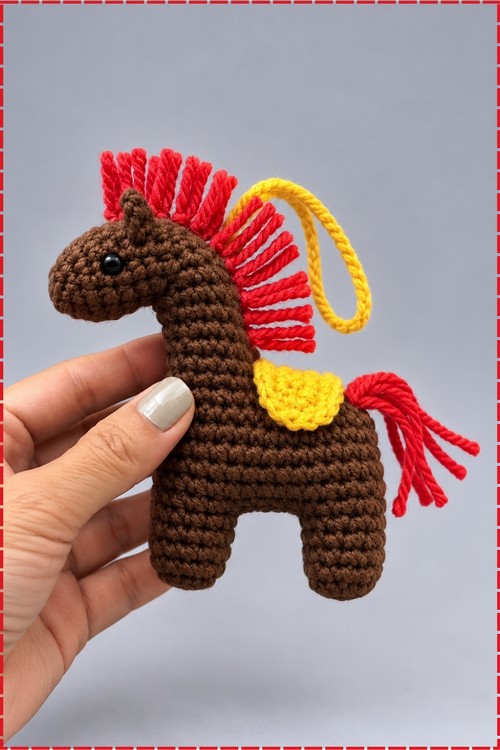
Neck and Body
- Reattach your yarn to begin the neck, working on the 1st through 9th stitches of round 4 that you marked earlier.
- Round 5: Single crochet 2 together twice, then 7 SC [9].
- Round 6: 5 SC, INC, 3 SC [11].
- Round 7: 6 SC, INC, 3 SC [12].
- Round 8: 7 SC, INC, 3 SC [12]. The neck should now stand upright with a clear forward lean, which is what gives the horse its posture.
- Round 9: 8 SC, chain 7, written as 7 CH, skip 1, then continue with 6 SC along the bumps behind the chain and 4 SC [25]. The chain bridges the gap between the neck and the back, so keep it flat rather than twisted before working into it.
- Round 10: 14 SC, then 3 single crochet in the same stitch, written as SC3, then 10 SC [27].
- Round 11: (INC, 8 SC) repeated 3 times [30].
- Rounds 12 to 15: SC around [30]. These straight rounds form the barrel of the body.
Front Leg
- Mark the 29th through 9th stitches to reserve for the front leg.
- Mark the 14th through 24th stitches to reserve for the hind leg.
- Round 16: 11 SC, working only in the 1st through 8th and 29th through 30th stitches [11].
- Rounds 17 to 19: SC around [11].
- Round 20: DEC 5 times, then SC [6].
- Fasten off and weave the yarn end through the front loops only of round 20 to close the leg.
- Weave in the yarn end up inside the leg.
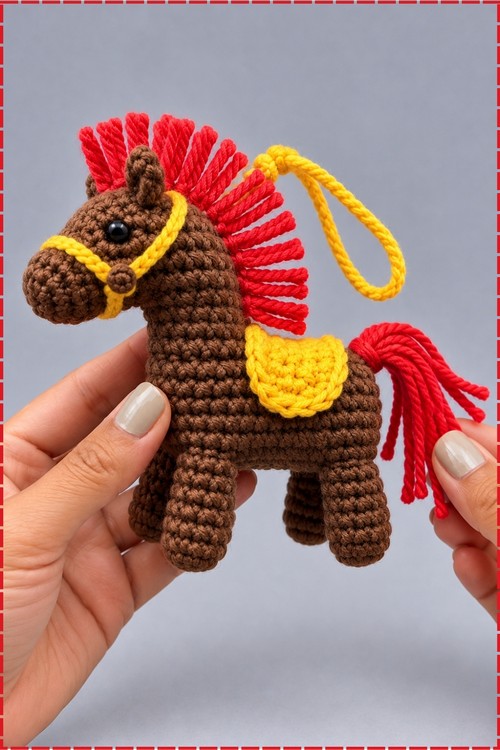
Hind Leg and Underbelly
- Round 16: 11 SC, working across the marked 14th through 24th stitches [11].
- Repeat rounds 17 to 20 exactly as worked for the front leg.
- Stuff the body firmly, pushing filling down into both legs so they hold the horse upright.
- Sew the open gap of the underbelly closed with a tapestry needle, keeping the stitches tight so no stuffing shows between the legs.
Ears
- Attach yarn between rounds 4 and 5 of the head, then work 3 CH, skip 1, slip stitch, written as SL ST, and INC.
- Weave in the yarn end.
- Repeat the exact same sequence for the second ear.
- My ears sit small and close to the head, mostly hidden under the front of the mane.
Mane and Tail
- Cut and loop 13 strands of red yarn for the mane, attaching them starting at round 6 and running down the back of the neck.
- Keep the strands in one straight line down the centre back of the neck so the mane stands up as a crest rather than splaying sideways.
- Secure 3 strands of red yarn to the rear of the body as the tail.
- Trim the mane and tail evenly to your preferred length.
- Mine has a tall upright mane trimmed level across the top and a tail left slightly longer and loose.
Saddle Blanket
- Work the saddle blanket in an oval using yellow yarn.
- Round 1: 7 CH, skip 1, then 6 SC down the chain and around [12].
- Round 2: (SC3, 5 SC) repeated 2 times [16].
- Round 3: (INC, SC, INC, 5 SC) repeated 2 times [20].
- Fasten off and weave in the end.
- Sew the finished blanket securely onto the horse's back, centring it between the mane and the tail where mine sits.
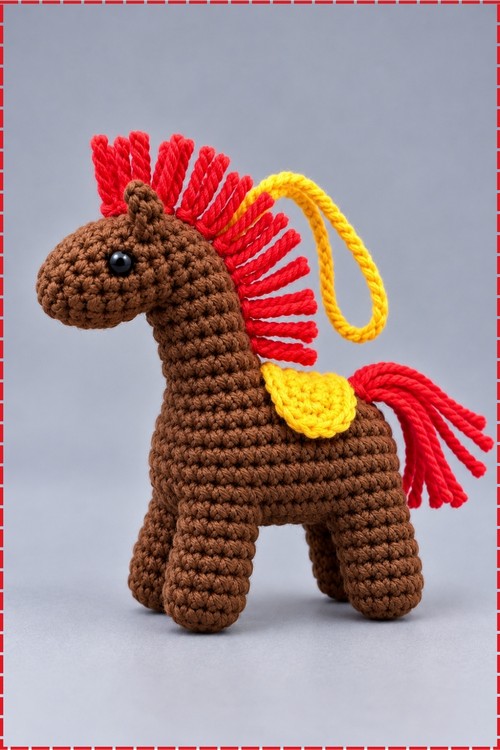
Hanging Loop
- My horse hangs from a yellow cord, which the plain pattern does not include, so chain in yellow yarn until the loop reaches your preferred length.
- Slip stitch back along the chain so the cord sits firm and double thick.
- Fold the cord into a loop and sew both ends into the back of the neck just behind the mane, which is where mine attaches.
- Anchor it through several stitches rather than one, since this carries the weight of the whole charm.
- Add a metal keyring or lobster clasp to the loop if you want to clip it rather than tie it.
Tips and Troubleshooting
- Write your marked stitch ranges on paper before round 16. Holding four numbers in your head while counting 30 stitches is where most people lose their place.
- Stuff the legs before you close the underbelly, not after. Reaching into a finished leg is close to impossible.
- Keep the chain 7 bridge in round 9 untwisted. A twist there pulls the whole back out of line and you will not notice until the body is done.
- Loop the mane strands in one consistent direction so they all fall the same way once trimmed.
- If the horse topples forward, the head is overstuffed. Ease some filling out through the neck before closing anything.
Yarn Substitution
Cotton gives the crisp stitch definition in my photo and keeps the legs firm enough to stand. Acrylic works and makes a softer charm, but the legs lose some rigidity. Use a slightly thicker or multi strand yarn for the mane and tail, since thin strands look sparse once trimmed. Keep the body and blanket at the same weight so the saddle lies flat rather than bunching.
Customization Ideas
- Swap brown for grey, cream or black and change the mane colour to match.
- Skip the saddle blanket for a plain horse.
- Make the mane longer and leave it untrimmed for a flowing look rather than a crest.
- Attach a lobster clasp instead of a plain loop so the charm clips onto a zip.
- Embroider small white socks at the bottom of each leg before closing them.
Frequently Asked Questions
Is this really no sew? Almost. The underbelly gap needs closing with a tapestry needle, and the saddle blanket gets sewn on. Everything else grows from the same piece, so there are no limbs to attach separately.
Why do my legs look uneven? The marked stitch ranges probably overlapped or left a gap. Both legs use 11 stitches at round 16, so recount your markers before working into them rather than after.
How do I stop the mane from falling flat? Attach the strands in a single tight line down the centre of the neck and trim them short. Spreading them wider or leaving them long both pull the crest over to one side.
Can I make it bigger? Yes, with thicker yarn and a larger hook. Every count stays exactly the same and the horse simply scales up, though you will want larger safety eyes to keep the proportions right.