
Pusheen Hello Kitty Plush Crochet Pattern Free With A Red Bow
Charcoal plush yarn makes the hood, body, arms, ears and tail of this Pusheen Hello Kitty plush soft and squishy, while smooth cream yarn shapes the face inside. Thin black acrylic yarn stitches the whiskers, and wide set oval safety eyes give her that familiar stare.
Grey hood, cream face, and a red bow make the crochet kitty hood plushie satisfying to assemble because each piece changes the look the moment it goes on. Stitching the whiskers is the turn where it stops being yarn. Finish the kitty hood plushie and you will want a second one immediately.
Crochet Pusheen Hello Kitty Plushie

Seven separate pieces make up this crochet Pusheen Hello Kitty plushie, and the trick that holds the whole design together is sliding the finished head inside the hood before the final decrease rounds close around it. Dark grey plush yarn carries every outer piece, a rounded hood, a body, two arms, two ears and a tail, while cream yarn builds the inner face that peeks through the hood opening. Black safety eyes and a yellow felt nose land on that cream oval. One red bow sits at the ear. No stripes appear on my version, clean and solid throughout.
Quick Facts
- Difficulty: easy to intermediate
- Time: in my experience, roughly four to five hours across a single session
- Technique: all single crochet, increases and decreases in a continuous spiral
- Joined pieces: seven crocheted parts plus a bow assembled with sewing
Customisation Ideas
Swap the dark grey for any plush colour and the cream face stays the same regardless, since it peeks through the hood opening whatever outer shade you choose. Work the ears in the same grey as the hood for a seamless cat silhouette, or try a contrast inner ear colour for a softer look. Make the bow in any colour: red reads the strongest against dark grey, but pink, white or purple all work. Leave the tail off entirely for a rounder plushie shape, or extend it by a few rounds for a longer swishing curl. Add felt cheek circles if you want a pinker face.
Materials And Tools
- Plush yarn in dark charcoal grey for the hood, body, arms, ears and tail
- Smooth yarn in cream for the head
- Plush or smooth yarn in red for the bow
- Thin black acrylic yarn for the whiskers
- Crochet hook sized for your plush yarn
- Black safety eyes, oval and set wide apart
- Yellow felt for the nose
- Black felt for the eye backing, optional
- Stitch markers
- Polyfill stuffing
- Tapestry needle
- Fabric glue
My version uses no felt for the eyes, only black safety eyes, and the nose is a small yellow felt oval glued on directly. No Pusheen stripe details appear on my piece.
The Pattern
Head In Cream
- Round 1: make a magic ring and work 8 single crochets into it, pull tight and place a stitch marker in the last stitch (8).
- Round 2: work 1 increase, meaning 2 single crochets in the same stitch, in every stitch around (16).
- Round 3: work 1 single crochet then 1 increase and repeat around (24).
- Round 4: work 2 single crochets then 1 increase and repeat around (32).
- Round 5: work 3 single crochets then 1 increase and repeat around (40).
- Round 6: work 1 single crochet in each stitch around (40).
- Round 7: work 1 single crochet in each stitch around (40), and this is where I attached my safety eyes, positioned wide apart and low enough to leave clear space above them for the cream forehead.
- Round 8: work 1 single crochet in each stitch around (40).
- Round 9: work 1 single crochet in each stitch around (40).
- Round 10: work 1 single crochet in each stitch around (40).
- Round 11: work 1 single crochet in each stitch around (40).
- Round 12: work 1 single crochet in each stitch around (40).
- Round 13: work 1 single crochet in each stitch around (40).
- Round 14: work 3 single crochets then 1 decrease and repeat around (35).
- Round 15: work 2 single crochets then 1 decrease and repeat around (28), and begin stuffing the head firmly now while the opening is still wide.
- Round 16: work 1 single crochet then 1 decrease and repeat around (21), top up the stuffing with a final handful.
- Round 17: work 8 decreases all around (8), then slip stitch into the next stitch and cut the yarn leaving a long tail.
- Thread the tail through the front loops of the remaining stitches, pull tight to close, poke the needle through the centre and hide the tail inside.
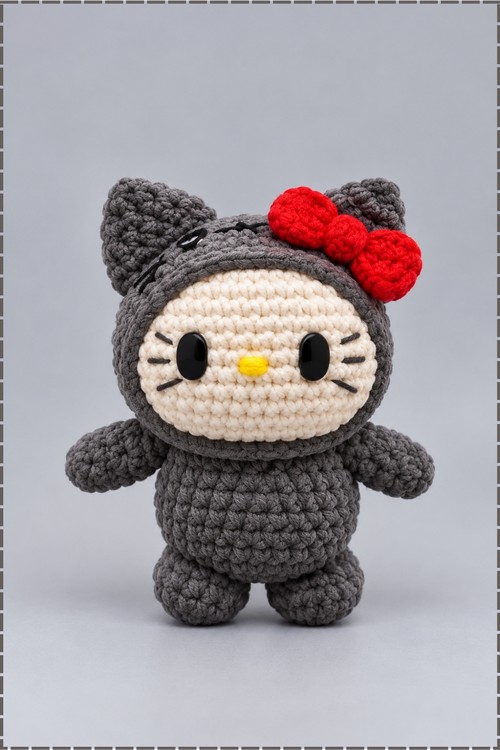
Hood In Dark Grey
- Rounds 1 through 5: follow the exact same instructions as the head, working from the magic ring through the 3 single crochet then 1 increase round, to reach the same stitch count as the head at round 5 (40).
- Round 6: work 1 single crochet in each stitch around (40).
- Round 7: work 1 single crochet in each stitch around (40).
- Round 8: work 1 single crochet in each stitch around (40).
- Round 9: work 1 single crochet in each stitch around (40).
- Round 10: work 1 single crochet in each stitch around (40).
- Round 11: work 1 single crochet in each stitch around (40).
- Round 12: work 3 single crochets then 1 decrease and repeat around (35), then place the completed cream head inside the hood before continuing, since the opening will be too small to insert it after the next round.
- Round 13: with the head sitting inside the hood, work 2 single crochets then 1 decrease and repeat around (28), which closes the grey fabric around the back and sides of the head while leaving the cream face visible at the front.
- Slip stitch to fasten off and leave a tail for weaving.
Body In Dark Grey
- Round 1: make a magic ring and work 8 single crochets into it (8).
- Round 2: work 8 increases (16).
- Round 3: work 1 single crochet then 1 increase and repeat around (24).
- Round 4: work 2 single crochets then 1 increase and repeat around (32).
- Round 5: work 1 single crochet in each stitch around (32).
- Round 6: work 1 single crochet in each stitch around (32).
- Round 7: work 1 single crochet in each stitch around (32).
- Round 8: work 1 single crochet in each stitch around (32).
- Round 9: work 1 single crochet in each stitch around (32).
- Round 10: work 1 single crochet in each stitch around (32), then slip stitch to fasten off leaving a very long tail to sew the head assembly onto the body.
- Stuff the body moderately before sewing it closed at the top.
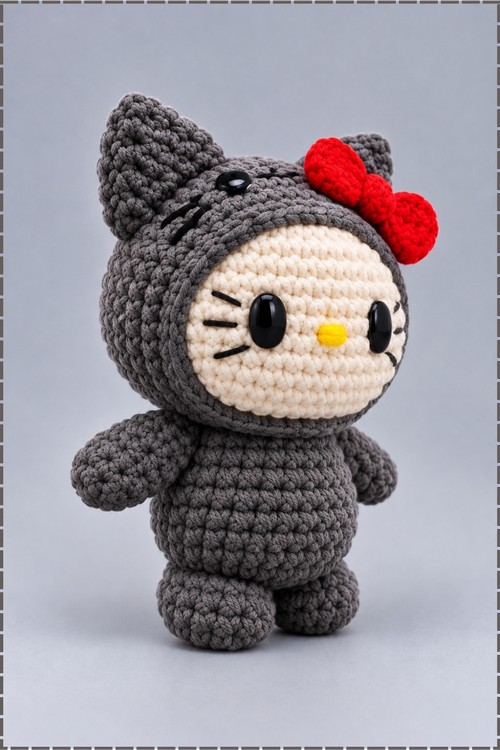
Ears In Dark Grey, Make Two
- Round 1: make a magic ring and work 4 single crochets into it (4).
- Round 2: work 1 single crochet then 1 increase and repeat around (6).
- Round 3: work 1 single crochet then 1 increase and repeat around (9).
- Round 4: work 2 single crochets then 1 increase and repeat around (12).
- Round 5: work 3 single crochets then 1 increase and repeat around (15).
- Slip stitch to fasten off leaving a tail to sew onto the top corners of the hood.
Arms In Dark Grey, Make Two
- Round 1: make a magic ring and work 6 single crochets into it (6).
- Round 2: work 1 single crochet in each stitch around (6).
- Round 3: work 1 single crochet in each stitch around (6).
- Slip stitch to fasten off and cut the yarn, leaving a tail for sewing to the sides of the body.
- Leave the arms unstuffed so they stay soft and flexible against the body.
Tail In Dark Grey
- Round 1: make a magic ring and work 6 single crochets into it (6).
- Round 2: work 1 single crochet in each stitch around (6).
- Round 3: work 1 single crochet in each stitch around (6).
- Round 4: work 1 single crochet in each stitch around (6).
- Round 5: work 1 single crochet in each stitch around (6).
- Round 6: work 1 single crochet in each stitch around (6), then slip stitch to fasten off, stuff lightly and leave a tail to sew onto the back of the body.
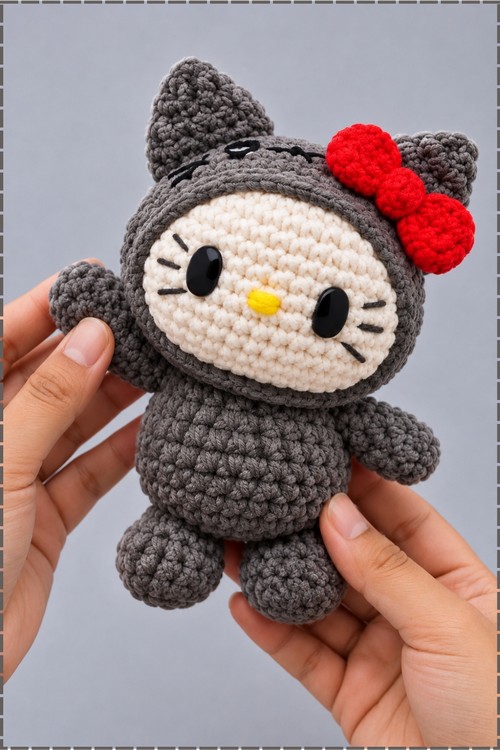
Bow In Red
- Make a slip knot and chain 18.
- Starting in the second chain from the hook, work 17 single crochets across the chain.
- Chain 1, turn your work and work another 17 single crochets back across.
- Chain 1, turn your work and work a final row of 17 single crochets.
- Fold the two short ends of the strip together, join them and work 4 slip stitches across both sides to seam the strip into a loop.
- Cut a very long yarn tail, thread the needle and weave toward the centre of the loop.
- Wrap the remaining tail tightly around the middle of the loop several times to cinch it into the bow shape, then secure and fasten off.
Assembly And Finishing
- Thread thin black yarn on a tapestry needle and embroider the whiskers directly onto the cream face, poking through from inside and anchoring the tail securely before pulling each whisker line out to the cheek and back, trimming neatly when done.
- Cut a small oval from yellow felt and glue it onto the centre lower face for the nose, pressing until dry.
- Sew one ear onto each top corner of the grey hood, passing the tail through the grey fabric several times until each ear sits firmly upright.
- Sew the red bow to the right side of the hood at the base of the right ear, using the long yarn tail and alternating stitches between the bow and the hood.
- Use the long tail from the body to sew the head and hood assembly onto the top of the body, alternating stitches between the base of the hood and the top edge of the body until the join feels solid.
- Sew one arm to each side of the body, positioning them about two rounds down from the neck join.
- Sew the tail to the lower back of the body, angling it slightly so it curls to one side rather than hanging straight down.
Tips
- Insert the head into the hood before round 13, not after, since the opening closes too much to fit the head through cleanly once that round is finished.
- Stuff the cream head very firmly before closing, because plush yarn compresses more than cotton and a lightly stuffed head goes flat inside the hood.
- Glue the felt nose down before sewing the bow on, so you can see the full face and judge placement before anything permanent goes around it.
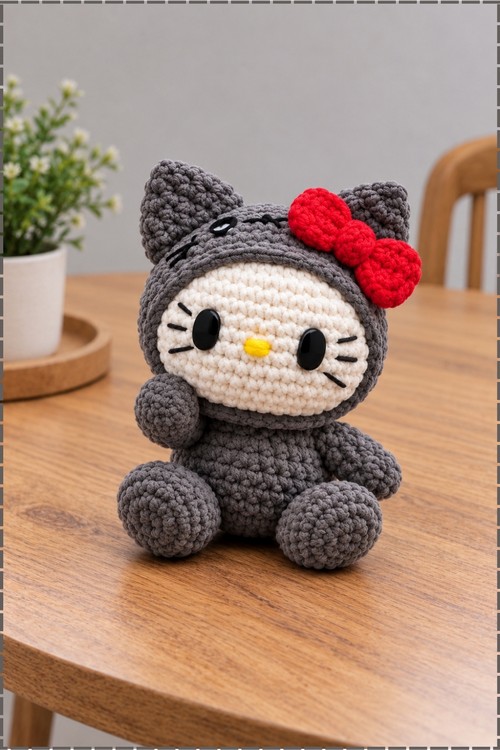
FAQ
Can I use regular acrylic instead of plush yarn? Yes, and the counts stay exactly the same. Regular acrylic gives a more defined stitch texture while plush yarn gives the smoother, softer look in my photo. Both work, but size your hook to your yarn to keep the fabric firm enough to hold its shape.
Why does the face look off centre inside the hood? The cream head rotates inside the hood before round 13 closes it in. Pinch the hood so the face panel sits squarely at the front, hold it there and crochet round 13 slowly, checking the alignment every few stitches.
My ears are floppy. How do I fix them? Sew through the base of each ear twice, once forward and once back, pulling snug each time. Plush yarn compresses under the needle and a single pass often isn't enough to hold the ear upright.
Do the arms need stuffing? No. Leaving them hollow lets them hang softly against the body, which gives the plushie a more relaxed posture. Stuffed arms on this scale tend to stick straight out.