
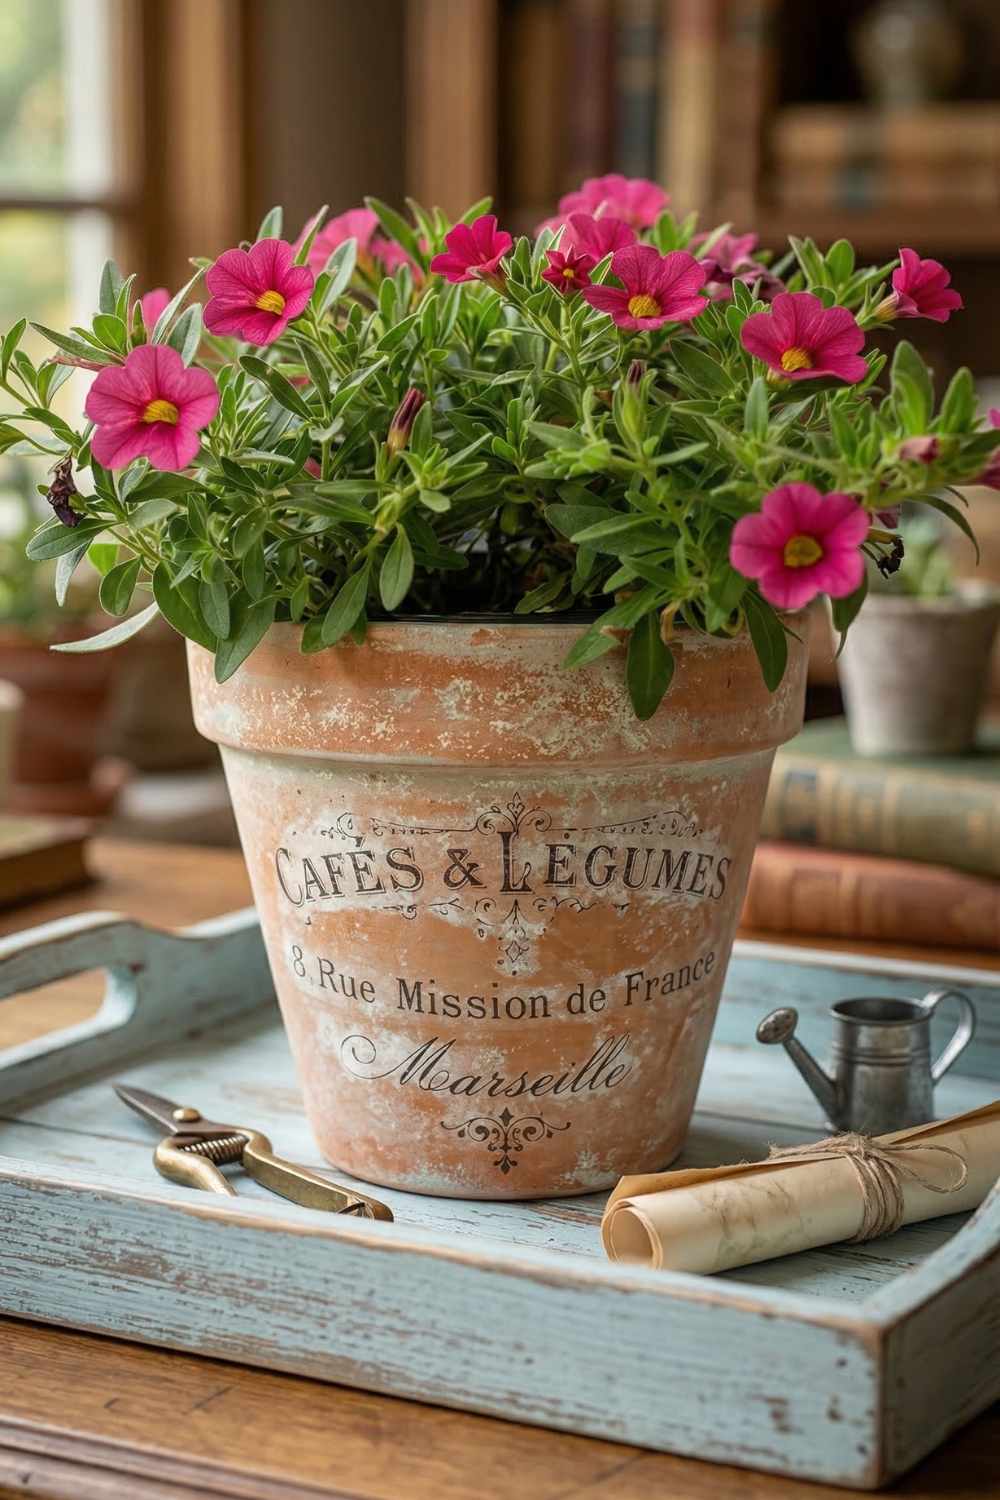
How To Transfer Images Onto Terra Cotta Pots For A Vintage Look
There's something about terra cotta that feels timeless-warm, slightly imperfect, and full of character. Adding a transferred image takes that natural texture even further, giving a plain pot the look of something collected over time rather than newly made.
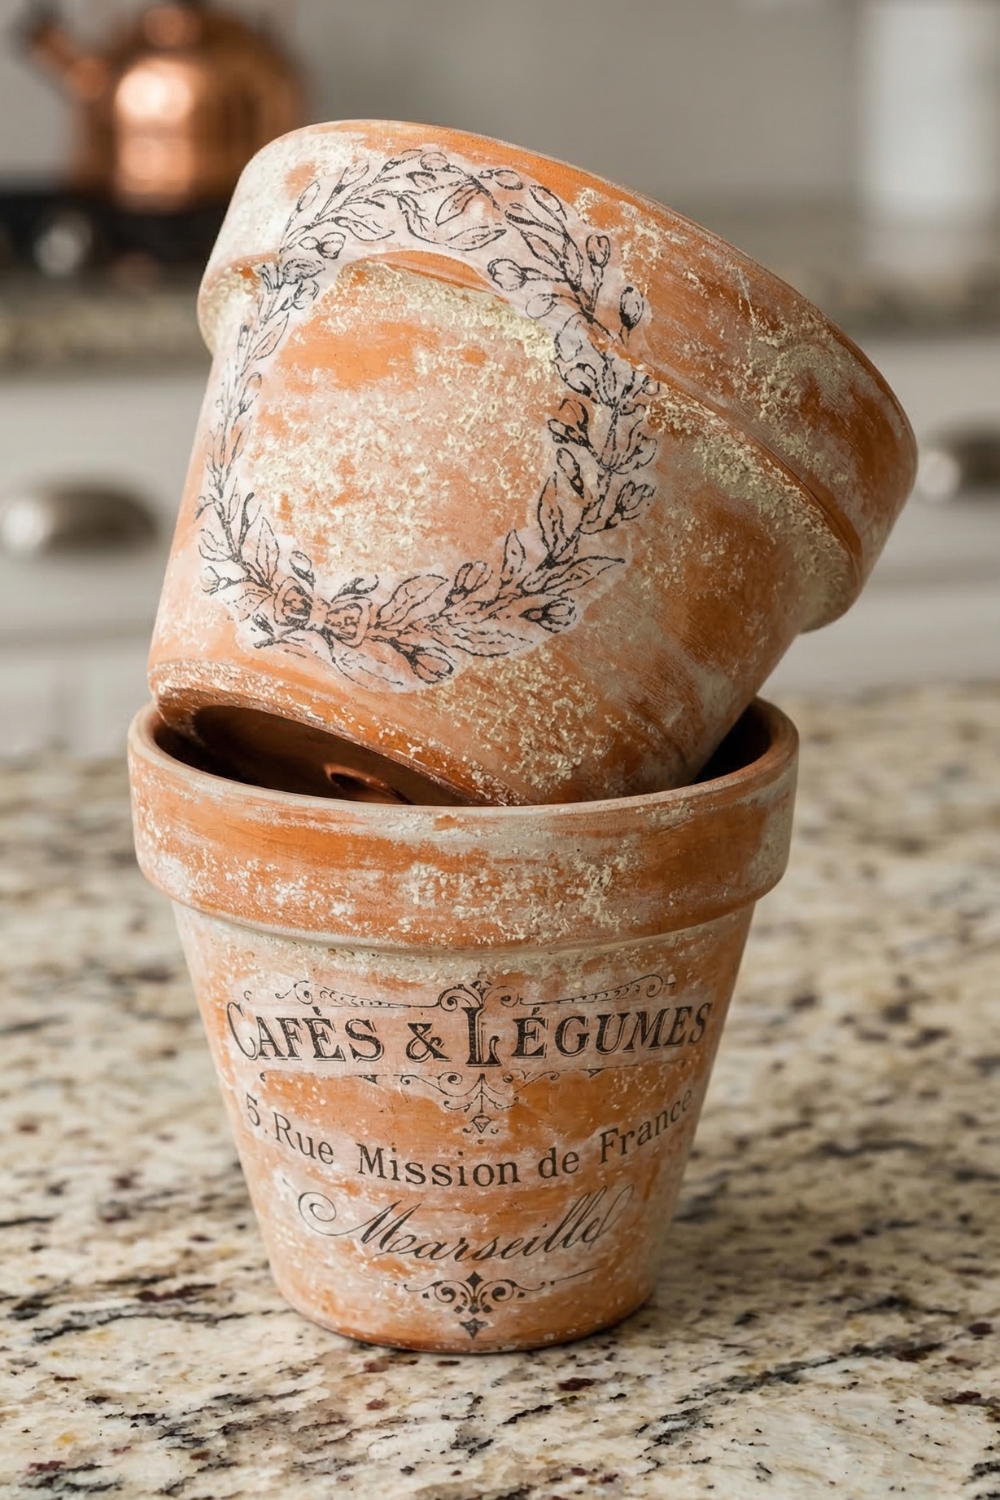
Transfer Images Onto Terra Cotta Pots
This technique is simple, but it works best when you understand why each step matters. That's what makes the difference between a clean transfer and a frustrating one.
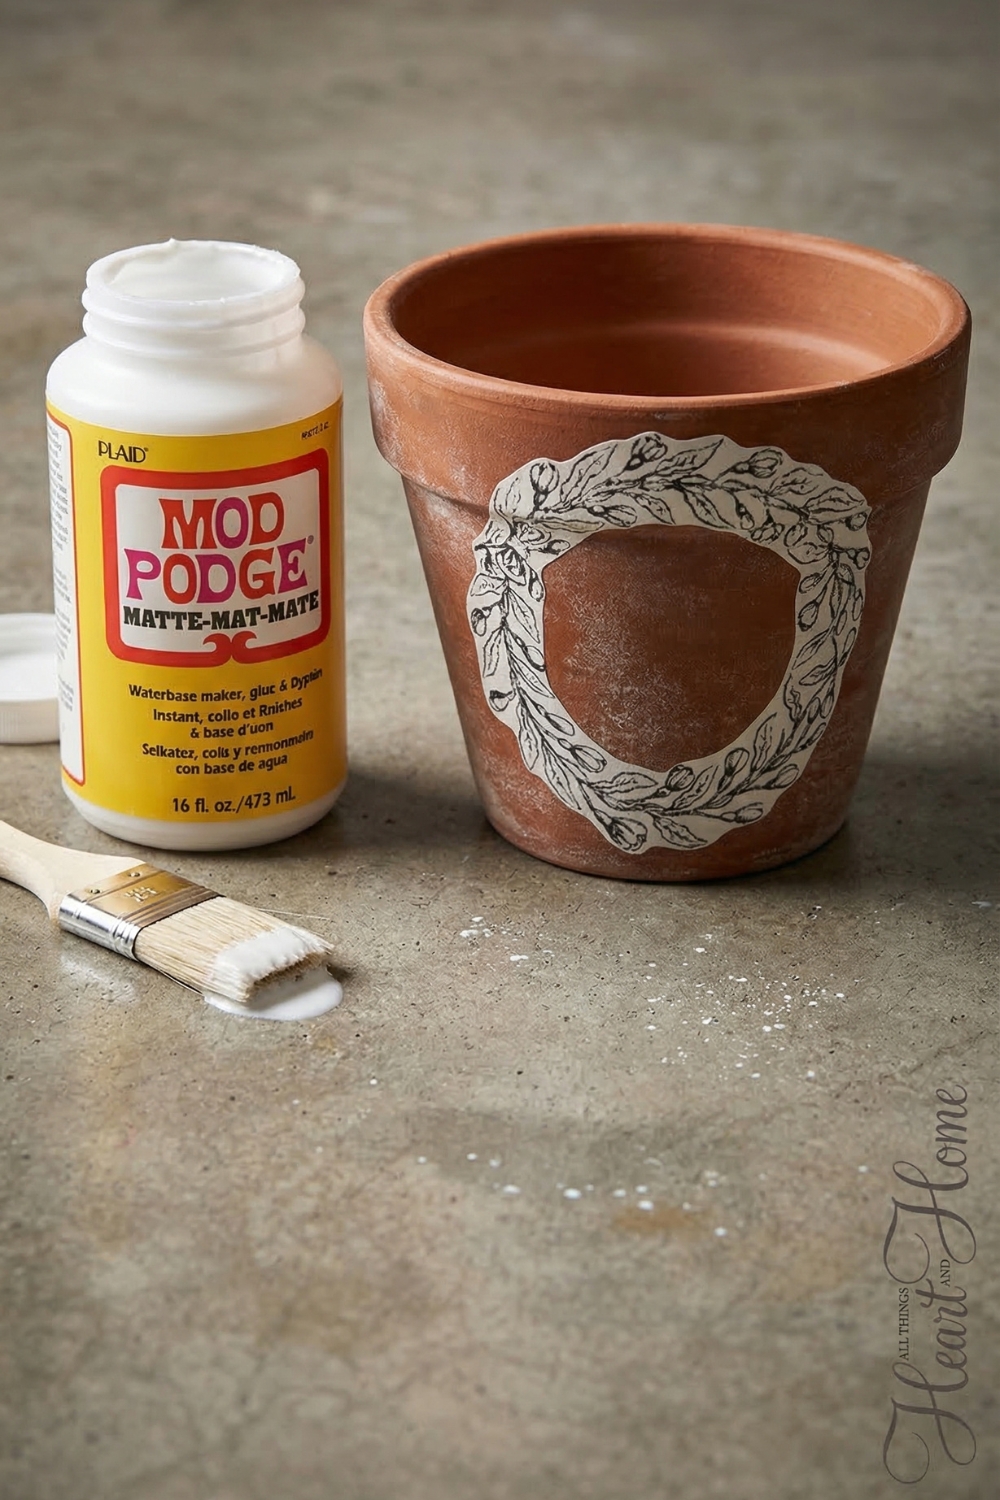
What You'll Need
- Terra cotta flower pot
- Printed graphic (laser print or inkjet, standard paper)
- Mod Podge (matte works best for a vintage finish)
- Scissors
- Water (spray bottle, damp cloth, or light running water)
- Paper towels
Optional: acrylic paint (for base color), sealer spray
Choosing the Right Image (Important Step)
Before starting, take a moment to choose your graphic carefully.
- If your design includes text, print a mirror image so it reads correctly after transferring
- High-contrast images transfer more clearly than soft, faded ones
- Slight imperfections actually enhance the aged, vintage look
This method works especially well with botanical prints, typography, and old-style illustrations.
Step-by-Step: Image Transfer Process
1. Prepare Your Pot
You can use raw terra cotta or paint it first.
- Bare terra cotta = more rustic, textured result
- Painted (soft white or neutral tones) = cleaner, more visible image
If painting, let it dry completely before moving on.
2. Apply Mod Podge to the Image
- Cut your graphic close to the design.
- Apply a generous, even layer of Mod Podge to the printed side of the image.
Why this matters: The ink needs to bond with the pot through the glue layer. Too little Mod Podge = patchy transfer.
3. Attach the Image to the Pot
- Place the image face down onto the pot.
- Press firmly and smooth out any air bubbles.
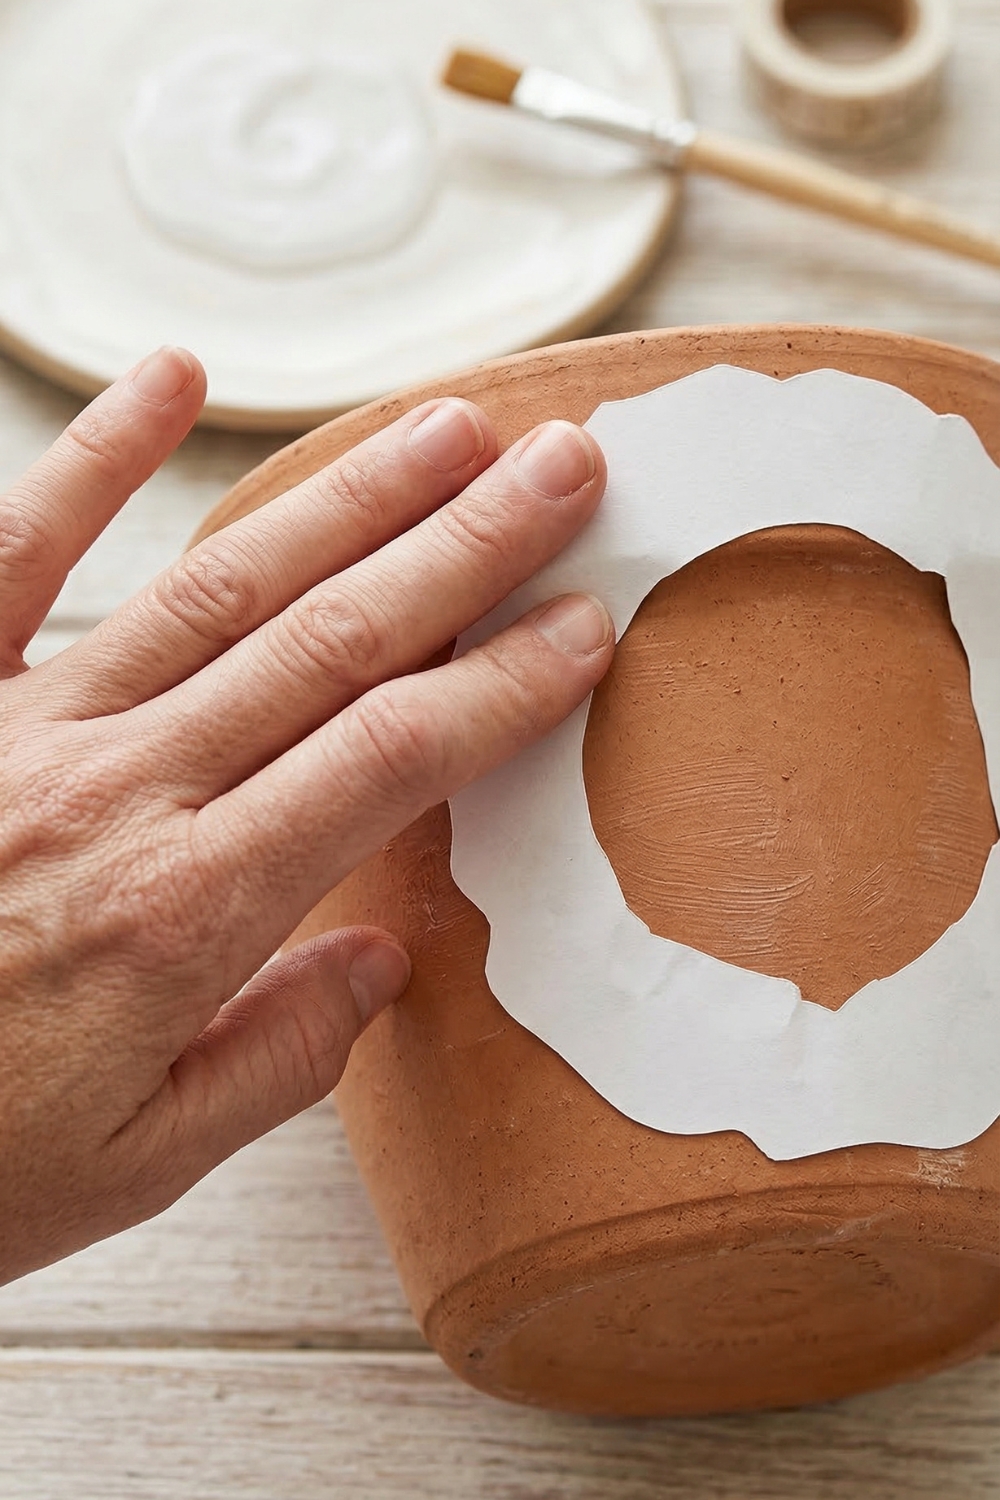
Take your time here-wrinkles or trapped air will show in the final result.
4. Let It Dry Completely
Allow the piece to dry overnight.
This step is non-negotiable.
Why this matters: If the glue hasn't fully cured, the image will lift off when you add water later.
5. Remove the Paper Backing
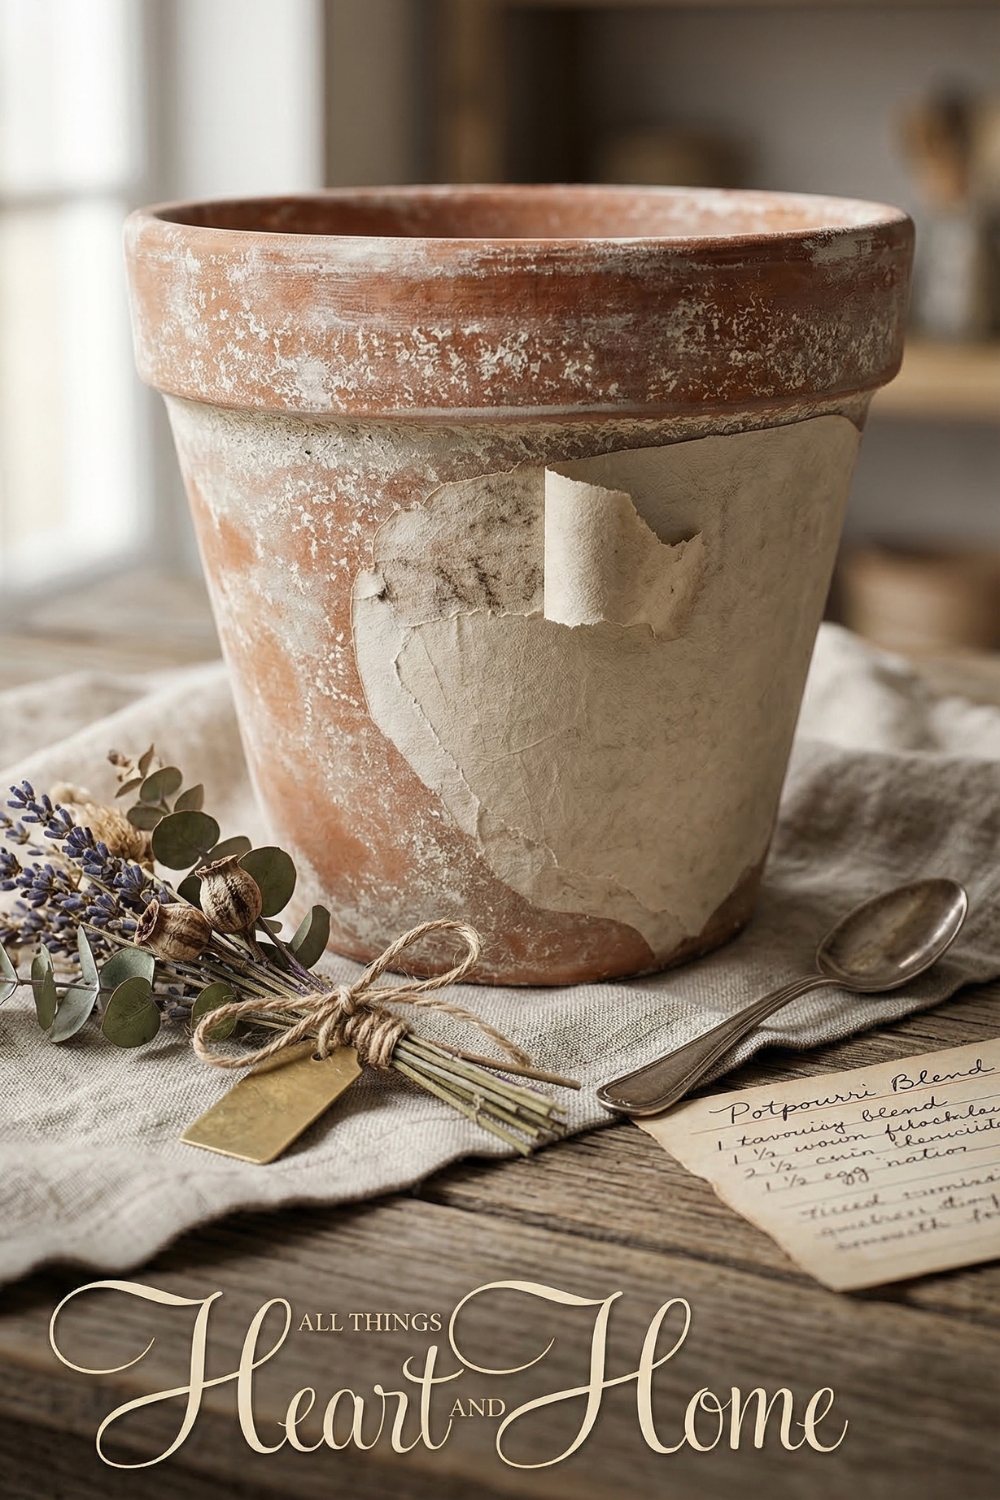
Once fully dry:
- Wet the paper using a damp cloth, spray bottle, or gentle running water
- You'll notice the paper starting to soften and peel
Use your fingers to gently rub the paper away in small circular motions.
The paper will roll up and come off gradually.
Important tip: Go slowly. If you rub too aggressively, you can remove parts of the image.
6. Embrace Imperfection
A slightly worn or faded look is actually ideal here.
- Small missing areas = authentic aged effect
- Uneven transfer = adds character
Trying to make it perfect often leads to over-rubbing and damage.
7. Optional: Seal the Surface
If you want extra durability, apply a light sealer.
- Matte sealer keeps the vintage feel
- Gloss will make the image appear sharper but less aged
Where to Use These Pots
These are best suited for indoor use.
Moisture and outdoor exposure can break down the transfer over time.
Great uses:
- Small houseplants
- Shelf or table styling
- Handmade gifts
- Decorative storage for craft tools