
Crochet Ice Cream Keychain Free Pattern with Cherry Topping
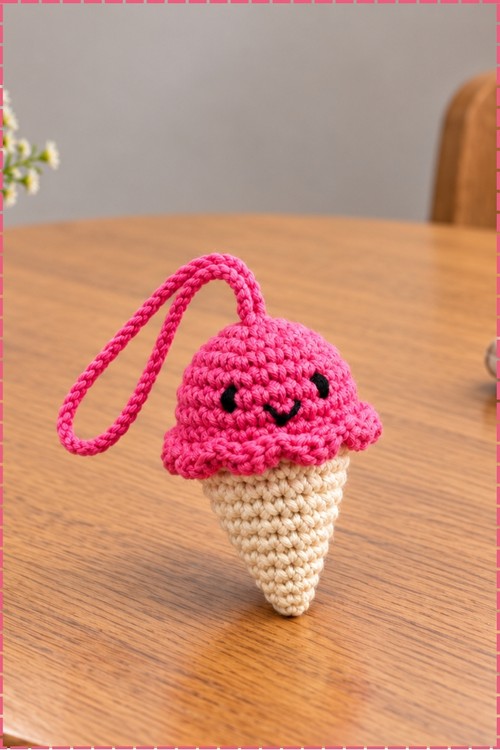
Pale pink cheeks and a stitched smile give the crochet ice cream keychain a friendly face that peeks out from keys, pencil cases and lunch bags. Ice cream fans of any age can carry the amigurumi ice cream charm, which fits in a palm and comes topped or as a plain pink scoop.
Cherry on top makes this crochet ice cream keychain read as summer the second it clips onto a bag. Warm months, end of term, birthdays in July. Hook a batch of the crochet ice cream keychain for fair stalls or party favours, and they move fast whenever the weather turns hot and the ice cream vans come out.
Crochet Ice Cream Keychain
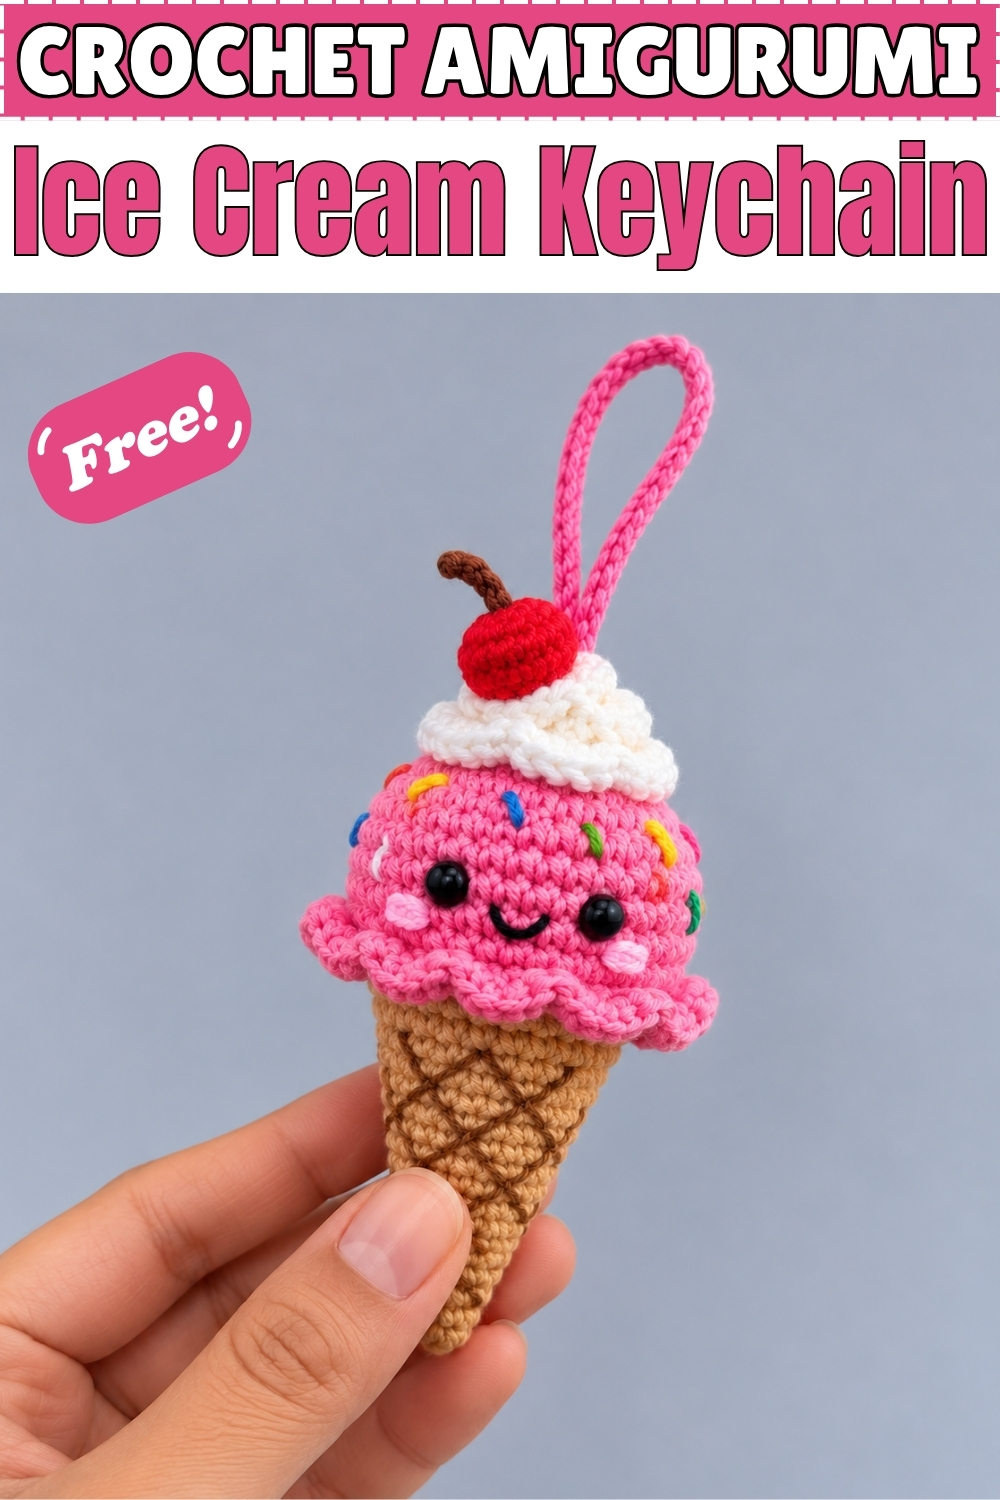
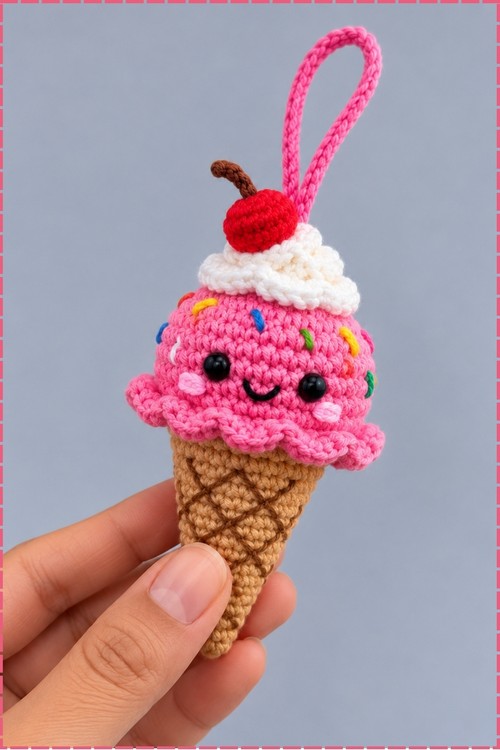
Two separate pieces make up this crochet ice cream keychain, and they join along a hidden ridge of back loops that the melted edge round leaves behind. Front loop stitches create that drippy lip around the scoop, so the pink edge flops over the cone exactly the way soft serve does. Below it, a tan cone widens gradually through single increase rounds until the two pieces line up stitch for stitch. Mine carries a whipped cream swirl, a red cherry, scattered sprinkles and a long pink chain loop instead of a metal ring.
My niece spotted the first one on my desk and had it clipped to her school bag before I could finish weaving in the ends. I made four more that week. Small projects like this one disappear from your work table faster than anything else you crochet, which is reason enough to keep a scrap bin of bright pinks nearby.
Why I Love This One
Every piece of it uses leftovers, and the whole thing finishes in an evening with a face that makes people smile before they even pick it up.
Materials and Tools
- Weight 3 or 4 cotton or acrylic yarn in bright pink for the scoop
- Tan or caramel yarn in the same weight for the cone
- Small amounts of white for the whipped cream swirl and red for the cherry
- A scrap of brown for the cherry stem and the waffle lines
- Scraps of yellow, green, blue, orange and white for the sprinkles
- 2.5 mm or 3.0 mm crochet hook, sized down so the stitches stay tight and the stuffing hides
- 6 mm black safety eyes
- Black embroidery thread for the smile
- Pale pink yarn for the cheeks
- Fiberfill stuffing
- Yarn needle, stitch marker and scissors
- A keychain ring if you want one, though mine uses a crochet chain loop instead
Difficulty and Time
This sits at an easy level, with the melted edge round being the only part that asks for attention. Mine came together in about two hours including the toppings and the face, though that is my own pace and the sprinkles alone can eat twenty minutes if you get fussy about placement.
The Pattern
Ice Cream Scoop
- Work the scoop in continuous rounds without joining at the end of each round, starting at the top and working down.
- Round 1: Make a magic ring, written as MR, and work 6 single crochet, written as sc, into the ring [6].
- Round 2: Increase, written as inc, in every stitch around [12].
- Round 3: (1 sc, inc) repeated 6 times around [18].
- Round 4: (2 sc, inc) repeated 6 times around [24]. The piece should sit as a shallow bowl here rather than a flat disc.
- Rounds 5 to 8: Single crochet in each stitch around for 4 rounds [24]. These straight rounds build the height of the scoop.
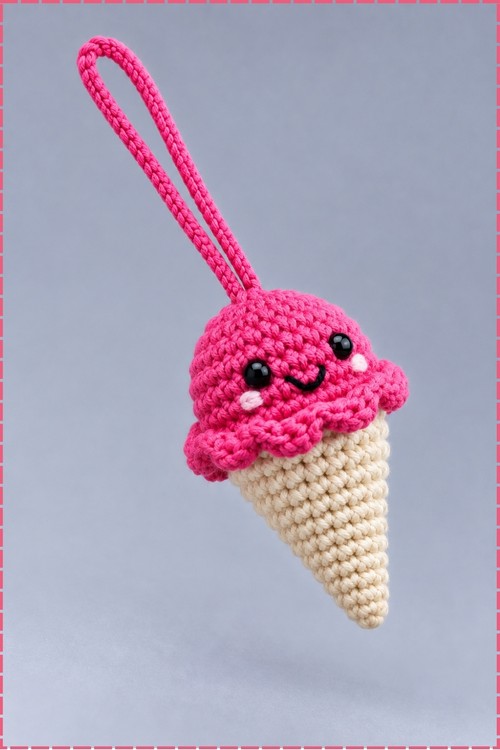
- Round 9, the melted edge: Working in front loops only, written as FLO, for this entire round, work (slip stitch, written as sl st, in the first stitch, skip the next stitch, 5 double crochet, written as dc, in the next stitch, skip the next stitch) and repeat that sequence 6 times around. The shells flip outward and down on their own, which is what gives the drippy lip that overhangs the cone in my photo.
- Fasten off and weave in the tail, keeping the woven end on the inside so it never shows through the pink.
- Attach the safety eyes between rounds 5 and 6 if you are adding a face, spacing them to sit either side of centre on the front of the scoop.
- Embroider a small curved smile in black thread between and just below the eyes, and add two short pink stitches on each side for cheeks.
- Scatter sprinkles across the upper half of the scoop using single short straight stitches in several bright colours, angling them in different directions so they look dropped rather than lined up.
- Keep the sprinkles clear of the eyes and above the melted edge, which is where mine sit.
Cone
- Work the cone in continuous rounds in tan yarn, starting from the bottom tip and working upward.
- Round 1: Magic ring, 6 sc into the ring [6].
- Round 2: (1 sc, inc) repeated 3 times [9].
- Round 3: Single crochet in each stitch around [9].
- Round 4: (2 sc, inc) repeated 3 times [12].
- Round 5: Single crochet in each stitch around [12].
- Round 6: (3 sc, inc) repeated 3 times [15].
- Round 7: Single crochet in each stitch around [15].
- Round 8: (4 sc, inc) repeated 3 times [18].
- Round 9: Single crochet in each stitch around [18].
- Round 10: (5 sc, inc) repeated 3 times [21].
- Round 11: Single crochet in each stitch around [21].
- Round 12: (6 sc, inc) repeated 3 times [24]. The cone should now be a narrow tapered funnel that matches the scoop opening stitch for stitch.
- Fasten off leaving a very long tail, around 12 to 15 inches, since that tail sews the two pieces together.
- Embroider the waffle lines before assembly, running long brown surface stitches diagonally in one direction across the cone and then the other way to form a crosshatch, spacing them evenly down the length.
- Work the waffle lines while the cone is still empty and flat, because the diagonals are far harder to keep straight once the piece is stuffed.
Whipped Cream Swirl
- My keychain has a white swirl sitting on top of the scoop, which the plain pattern does not include, so work it as a small ruffled cap in white yarn.
- Begin with a magic ring and work increase rounds until the circle covers the top of the scoop.
- Finish with a round of shell stitches or a scalloped edge so the outer rim ripples the way soft whipped cream does.
- Sew the swirl flat onto the top of the scoop, centred over the magic ring, stitching all the way around the edge so it does not lift.
Cherry
- A red cherry sits on top of my swirl and is also missing from the plain pattern, so work it as a tiny ball in red yarn.
- Start with a magic ring, increase for a round or two, work straight briefly, then decrease back down, stuffing lightly before closing.
- Chain a short stem in brown yarn, slip stitch back along the chain and fasten off.
- Sew the stem into the top of the cherry at a slight tilt rather than straight up, which reads more like a real cherry.
- Sew the cherry to the centre of the white swirl, anchoring it firmly since this is the part people will tug.
Assembly and Stuffing
- Look at the bottom of the scoop and find the exposed ridge of back loops left behind from round 8, since round 9 used only the front loops.
- Thread the long tan tail from the cone onto your yarn needle.
- Line up the 24 stitches of the cone with the 24 exposed back loops inside the scoop.
- Whip stitch the two pieces together, going through both loops of the cone and the unworked back loop of the scoop.
- Stop when the seam is about three quarters closed, then stuff both the cone and the scoop firmly with fiberfill.
- Push a small amount of stuffing into the narrow cone tip with the blunt end of your hook so the point stays sharp instead of collapsing.
- Finish sewing the seam closed, knot securely and bury the tail inside the body.
Hanging Loop
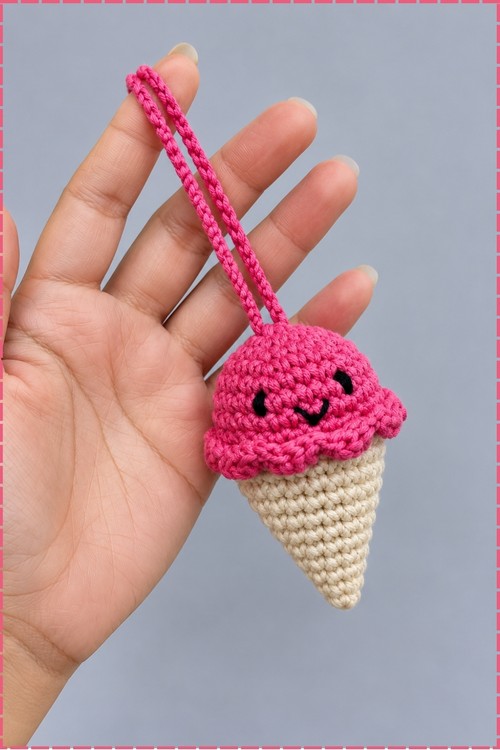
- My version uses a long pink chain loop rather than a metal ring, so chain in pink yarn until the loop reaches your preferred length.
- Slip stitch back along the chain to make the cord firm and double thick.
- Fold the cord into a loop and sew both ends into the top of the scoop, tucking them under the white swirl so the join disappears.
- Use a metal keychain ring instead if you prefer, sewing the bottom link to the centre of round 1 at the top of the scoop and knotting off inside.
Tips and Troubleshooting
- Count the stitches in round 9 carefully as you go, because the skipped stitches make it easy to lose your place and end up with an uneven number of shells.
- If the melted edge stands up instead of flopping over, your double crochets are too tight. Work them a touch looser and the shells will fall outward.
- Stuff the scoop before you finish the seam, not after. The opening closes small and there is no second chance to reach inside.
- Keep sprinkle stitches short and start each one from inside the body so no knots sit on the surface.
- If the cone tip looks blunt, your magic ring never closed fully. Tighten it from the inside with your needle before stuffing.
Yarn Substitution
Cotton gives the crisp waffle lines and defined shells visible in my photo, so it is the better pick here. Acrylic works and takes embroidery just as well, though the melted edge softens over time. Use the same weight for every colour so the scoop and cone meet cleanly at 24 stitches, and avoid anything fuzzy, since the face and sprinkles vanish against texture.
Customization Ideas
- Swap the pink for mint green, pale brown or lemon yellow to build a whole set of flavours.
- Leave the face off for a plain dessert version that reads more like food than a character.
- Add a second scoop by making another scoop section and joining it above the first.
- Skip the cherry and sew a small crochet strawberry or a chocolate chip scatter instead.
- Stitch the loop short and clip it to a zip pull rather than hanging it from keys.
Frequently Asked Questions
My scoop and cone do not line up. What happened? One of them drifted off count. Both pieces have to end at 24 stitches, so recount round 4 on the scoop and round 12 on the cone before you start sewing.
Can I make this without safety eyes? Yes. Embroider the eyes in black thread once the scoop is stuffed, using a few tight stitches in the same spot between rounds 5 and 6.
How do I keep the waffle lines even? Mark your start and end points with pins before stitching, and work all the diagonals in one direction first before crossing them. Freehanding both directions at once is where the crosshatch goes crooked.
Will the hanging loop hold up on keys? A crochet chain loop holds fine for a bag or a zip, but keys get heavy. Sew a metal ring in instead if it will carry real weight, and anchor it through several stitches rather than one.