
Bag Charm Crochet Doll Free Amigurumi Pattern
Finish both cream heads and their French knot faces first, then let the dresses grow straight from the open front loops of this crochet doll bag charm. Swapped red and pink colourways in 4-ply acrylic on a 2.5 mm hook give you a matching pair in about three hours.
Anyone who clips things to a backpack will take a Crochet Doll Bag Charm off your hands, especially students and younger cousins. Teachers get them as end of term gifts. Two colourways from one pattern means a matching pair for friends, and a crochet doll bag charm costs almost nothing in leftover yarn.
Crochet Doll Bag Charm
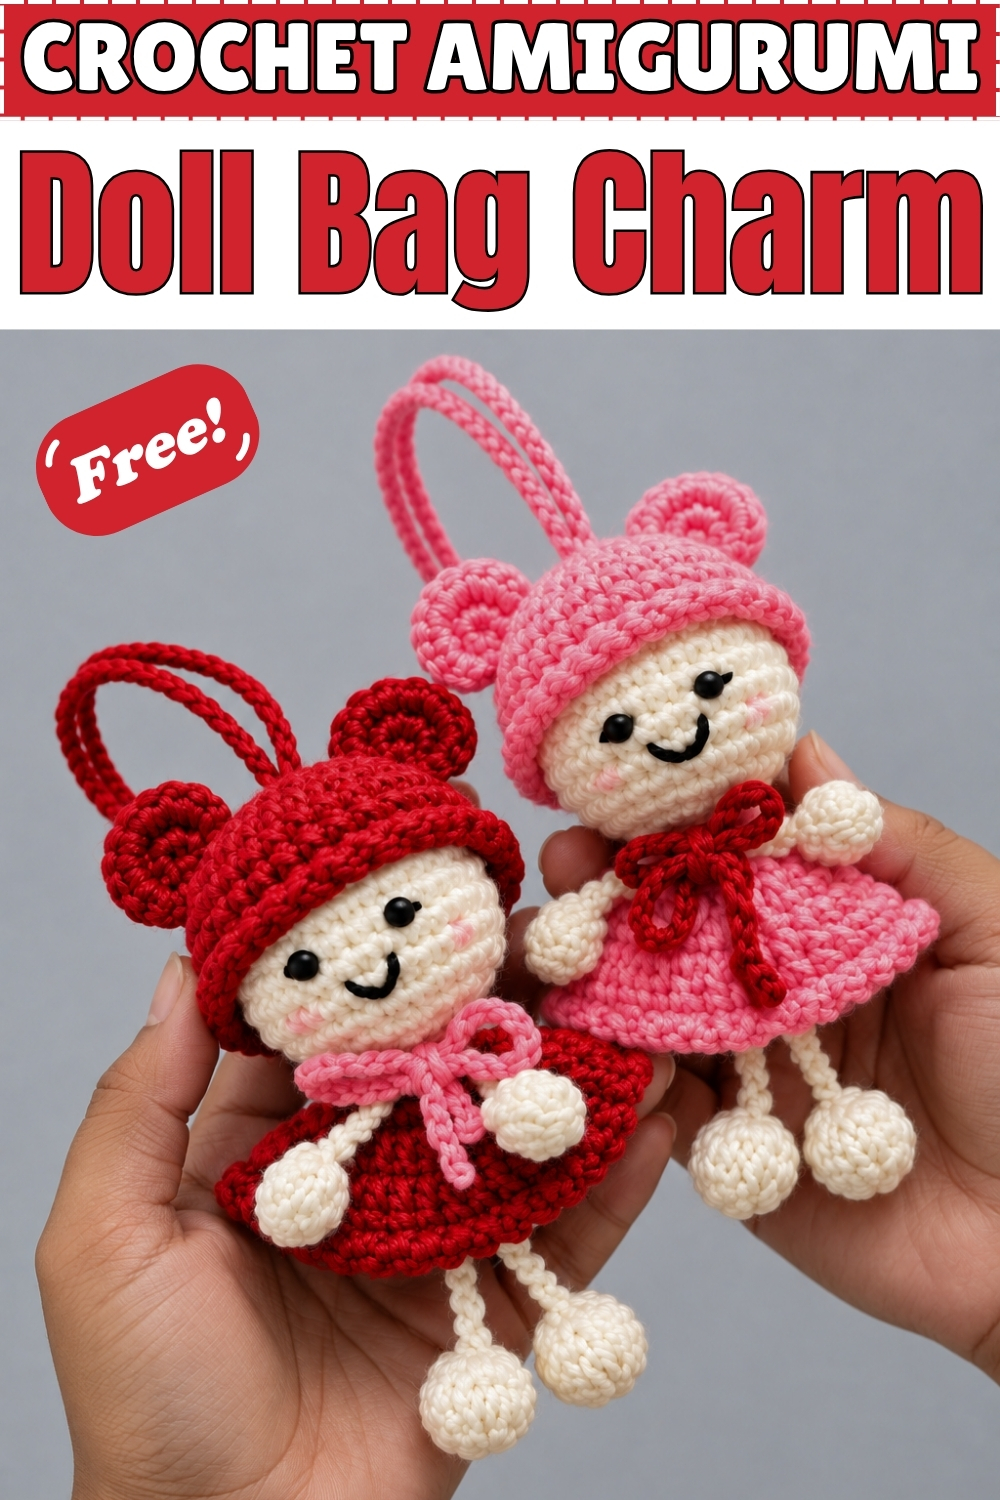
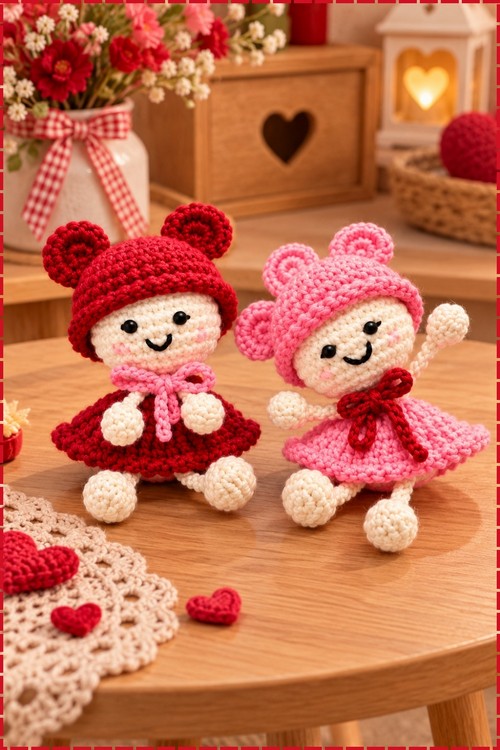
Attaching the dress directly to the front loops left open at the base of the head is the construction trick that holds this crochet doll bag charm together without any seaming between the head and body. Two versions hang here: one in red with a pink bow, and one in pink with a red bow. Both share the same cream head, cream bobble hands and feet, and a round eared hat in the body colour. French knot eyes and an embroidered smile land in the same positions on each face. A looped chain through the top of the hat works as the hanging cord.
Materials And Tools
- 4-ply acrylic yarn in cream for the head, hands, and feet
- The same yarn in red for one doll's dress and hat, and in pink for the other
- The same yarn in pink for the red doll's bow, and in red for the pink doll's bow
- A tiny amount of black yarn or embroidery floss for the face
- A 2.5 mm hook
- Fiberfill for stuffing the head
- Tapestry needle and scissors
Both dolls together take around three hours in practice. Work the head and face on both before moving to the dresses, so the embroidery is done while the face is easy to hold.
Difficulty And Time
Intermediate. The invisible decrease, the BLO round on the head, and the incomplete dc bobble hands and feet each need a little practice before they behave. Everything else is standard. Plan for two to three hours per doll once you have made one of each part.
The Pattern
The Head In Cream
Work in a continuous spiral throughout. Do not join with a slip stitch unless specified.
- Round 1: Make 6 single crochet (sc) in a magic ring (MR). [6]
- Round 2: Work 1 increase (inc) in every stitch. [12]
- Round 3: Work (1 sc, inc) six times. [18]
- Round 4: Work (2 sc, inc) six times. [24]
- Round 5: Work (3 sc, inc) six times. [30]
- Rounds 6 to 9: Work 30 sc in each round for four rounds. [30] These straight rounds form the face area where the embroidery will sit.
- Round 10: Work (3 sc, decrease (dec)) six times using invisible decreases. [24]
- Round 11: Work (2 sc, dec) six times. [18]
- Round 12: Work (1 sc, dec) six times. [12] Stuff the head firmly with fiberfill now while the opening is still easy to reach.
- Round 13: Working in back loops only (BLO), work 6 dec. [6] Do not pull through the front loops. Those exposed front loops are where the dress attaches in the next step, so leave them completely unworked.
- Closing: Fasten off leaving a tail, thread it on a needle, pass it through the front loops of the remaining 6 stitches, and pull tight to close. Hide the tail inside the head.
Face Embroidery In Black
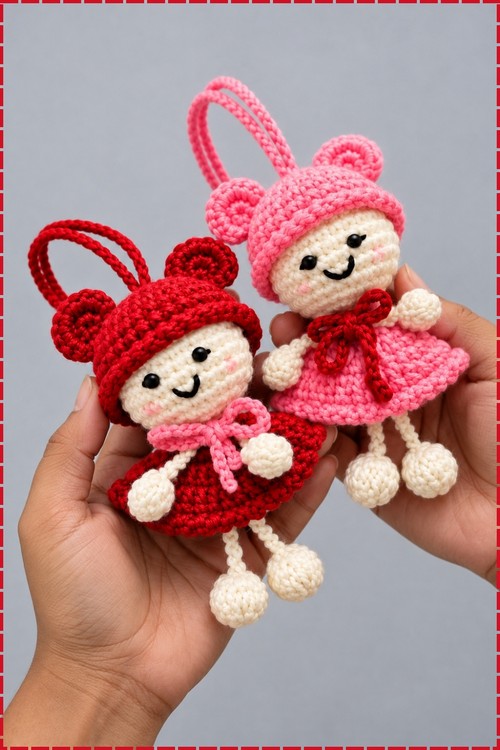
- Eyes: Count down to between rounds 7 and 8 from the top of the head. Leave a gap of 4 stitches between the two eyes. Make a French knot for each eye by wrapping black yarn around the needle 5 times, holding the wraps down against the fabric, and pulling the needle through to form a raised dot. My eyes are solid round black dots with a small highlight, which you can add with a single white straight stitch if you want the same look.
- Mouth: Count one row down from the eyes, centred between them. Sew a small horizontal line covering 2 stitches, then tack the centre of that line very slightly downward to curve it into a smile. My mouth is a clear upward curve with a slight upturn at each end.
- Blush: Using a tiny amount of pink yarn or a pink felt tip made for fabric, add a soft round blush patch on each cheek below and outside each eye. This is not in the original pattern but is visible on both dolls in the photo.
The Dress
Flip the head upside down. You will work into the front loops left unworked in round 13.
- Setup: Attach yarn in the dress colour to any of the exposed front loops with a slip stitch (sl st), then chain (ch) 1 to secure.
- Round 1: Ch 2, which does not count as a stitch. Work (1 double crochet (dc), 1 dc increase (inc dc) in the next stitch) six times. Sl st to join. [18]
- Round 2: Ch 2. Work (2 dc, inc dc in the next stitch) six times. Sl st to join. [24]
- Round 3: Ch 2. Work (2 dc, inc dc in the next stitch) eight times. Sl st to join. [32]
- Round 4: Work (ch 2, sl st into the next stitch) all the way around to create the ruffled border. The chain 2 loops stand out from the edge and give the hem its flutter.
- Finish: Fasten off, pull the tail to the inside of the dress, tie a knot, and weave in.
The Legs And Feet In Cream
The feet use incomplete double crochets clustered together to form a bobble ball. Read through the full foot method once before starting.
- First foot: Make a slip knot, ch 4. Skip the first 3 chains from the hook. In the 4th chain, make 6 incomplete dc stitches one after the other. An incomplete dc is: yarn over, insert hook, pull up a loop, yarn over, pull through 2 loops only, leaving the remaining loops on the hook. After 6 incomplete dc you will have 7 loops on the hook. Yarn over and pull through all 7 at once, then ch 1 to secure the cluster.
- Second half of foot: Ch 3. In the exact same securing space, make 6 more incomplete dc and pull through all loops, then ch 1 to secure.
- Fold and join: Fold the two halves together like a clamshell. Insert your hook into the starting chain on the opposite side and sl st the two halves together to form one round bobble foot.
- Leg string: Ch 30.
- Attaching: Set down your hook. Insert it straight through the bottom of the doll's head, passing it through 3 stitches on one side and 3 stitches on the other so the string runs through the centre of the body. Pull the loop of the ch 30 string all the way through. This is the moment where the two legs become one connected piece running through the doll.
- Second foot: On the remaining tail of the chain string you just pulled through, skip 3 chains, then in the 4th chain repeat the full foot process as above. Weave all loose ends inside the foot bobbles to hide them.
The Arms And Hands In Cream
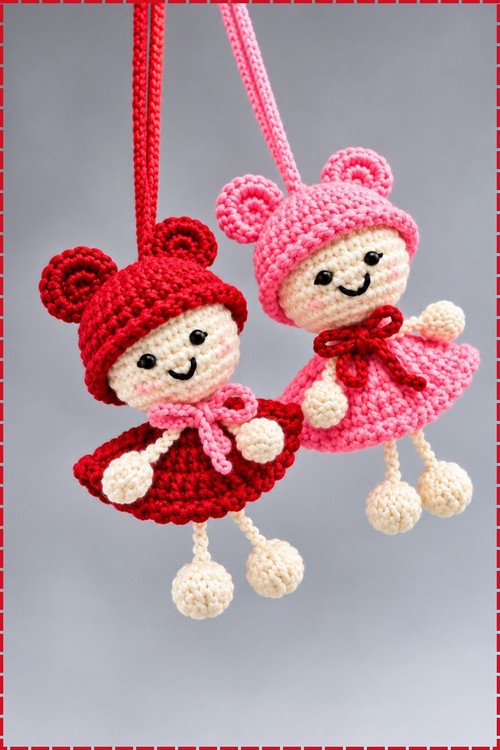
The hands use the same bobble method as the feet but with only 3 incomplete dc instead of 6, making them smaller.
- First hand: Make a slip knot, ch 4. Skip 3 chains. In the 4th chain, make 3 incomplete dc. Pull through all 4 loops on the hook. Ch 1 to secure.
- Second half of hand: Ch 3. In the securing space, make 3 incomplete dc and pull through all loops, then ch 1 to secure. Fold and sl st to form the hand bobble.
- Arm string: Ch 18.
- Attaching: Insert your hook horizontally through the neck area of the dress, passing under about 6 stitches so the string sits at the base of the head. Pull the ch 18 string all the way through.
- Second hand: Skip 3 chains on the remaining tail, then repeat the hand process as above. Hide all loose ends inside the hands.
The Hat
The hat matches the dress colour on each doll.
- Round 1: Make 12 half double crochet (hdc) in a magic ring. Sl st to join. [12]
- Round 2: Ch 1. Work (1 hdc, 1 hdc increase in the next stitch) six times. [18]
- Round 3: Switch to single crochet. Ch 1. Work (2 sc, inc in the next stitch) six times. [24]
- Round 4: Ch 1. Work (3 sc, inc in the next stitch) six times. [30]
- Rounds 5 to 7: Work 30 sc in each round for three rounds. [30]
- Round 8: Working in front loops only (FLO), work (ch 2, sl st into the next stitch) all the way around to create the ruffled brim. This matches the dress hem and ties the two pieces together visually.
- Finish: Fasten off and weave in ends.
Hat Ears, Make Two
- Round 1: Make 6 sc in a magic ring. Do not close the ring. Ch 1 and turn, so you now work flat in rows.
- Row 2: Work inc in every stitch. [12]
- Finish: Leave a long tail for sewing. Position one ear on each side of the hat, about 3 rounds down from the top centre, and sew securely. Weave in ends.
Hanging String And Assembly
- Hanging cord: Ch 65 in the hat or dress colour. Cut the yarn. Insert your hook into the back of the head about 2 rows below the magic ring top, pull the chain halfway through, then pass both ends through each other's first stitch loop to lock them, and tie a tight knot. The loop that sticks up from the head is the hanging cord.
- Hat placement: Pass both ends of the hanging cord through the magic ring hole at the top of the hat using your hook, then pull the cord up and slide the hat down over the head. Tack the hat to the head with a few stitches or a dot of fabric glue if you want it to stay permanently.
The Bow
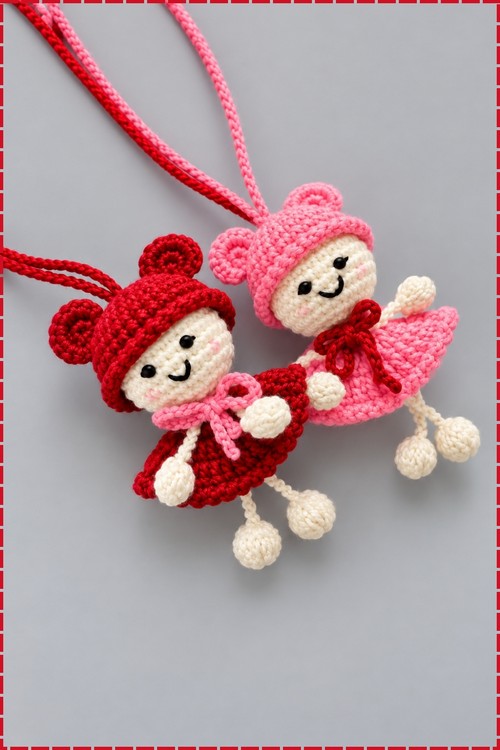
- My bows are in the contrasting colour: pink bow on the red doll and red bow on the pink doll.
- Ch 50 in the bow colour. Fasten off.
- Wrap the chain tightly around the doll's neck in the gap between the head and the dress. Tie it into a small neat bow at the front, pulling the knot tight so it cannot loosen with handling. Trim any excess ends close to the knot.
Technique Notes And Tips
- The BLO round on the head is what makes the dress attachment work. If you accidentally work through both loops in round 13, there will be no open front loops for the dress and you will have to frog back to that round.
- Invisible decreases need front loops only. Insert your hook through only the front loop of the first stitch and only the front loop of the second, then complete the decrease as normal. Working through both loops creates a visible bump on the surface that standard decreases leave.
- Incomplete dc bobbles are easiest if you keep the tension on each loop slack as you add them. Tight loops are difficult to pull through all at once and tend to split the yarn.
- The arm string runs horizontally through the dress, not through the body stuffing. Check that your hook exits cleanly through the dress fabric on both sides before you pull the string through, or one arm will sit higher than the other.
- Do not skip the ch 1 after each bobble cluster. That stitch is what stops the whole cluster from unravelling, and skipping it means the foot or hand simply falls apart.
- Test the hanging cord knot by giving the chain a firm tug before you put the hat on. A loose knot will pull free through the magic ring hole once the hat is in place and the cord carries the doll's weight.
Frequently Asked Questions
Why does the dress attach to the head rather than being sewn on as a separate piece?
Working into the leftover front loops from round 13 of the head is a seamless construction method. The dress grows directly from the head with no join line and no sewing, which is what keeps the neck clean and the whole doll compact enough to work as a bag charm.
My bobble feet look flat rather than round. What went wrong?
Either the incomplete dc loops were too tight to pull cleanly through all at once, or the fold and sl st step did not catch all the way around the edge of both halves. Redo the foot and keep the loops loose as you build up the cluster, then take your time pressing the clamshell fold closed before you sl st.
Can I make the doll without the hanging cord as a standalone toy?
Yes. Skip the ch 65 cord entirely and just slide the hat onto the head. Without the cord there is no loop to hang it by, but the doll still works as a small shelf toy or gift.