
Crochet Keychain Amigurumi Doll Free Pattern In Red
Split rings and lobster clasps turn this red crochet keychain amigurumi doll into a working charm for backpacks and purses. YarnArt Jeans in bright red and pale pink builds a dense, hard wearing fabric, so set aside four to six hours across a couple of sittings.
Valentine season is when a Crochet Doll Keychain Amigurumi in red and pink actually earns its keep, clipped to a bag or a gift box. Makers batch these before February and hand them out at work or school. Scrap yarn covers a whole set. Crochet doll keychain amigurumi sells fast at winter craft fairs too.
Crochet Doll Keychain Amigurumi
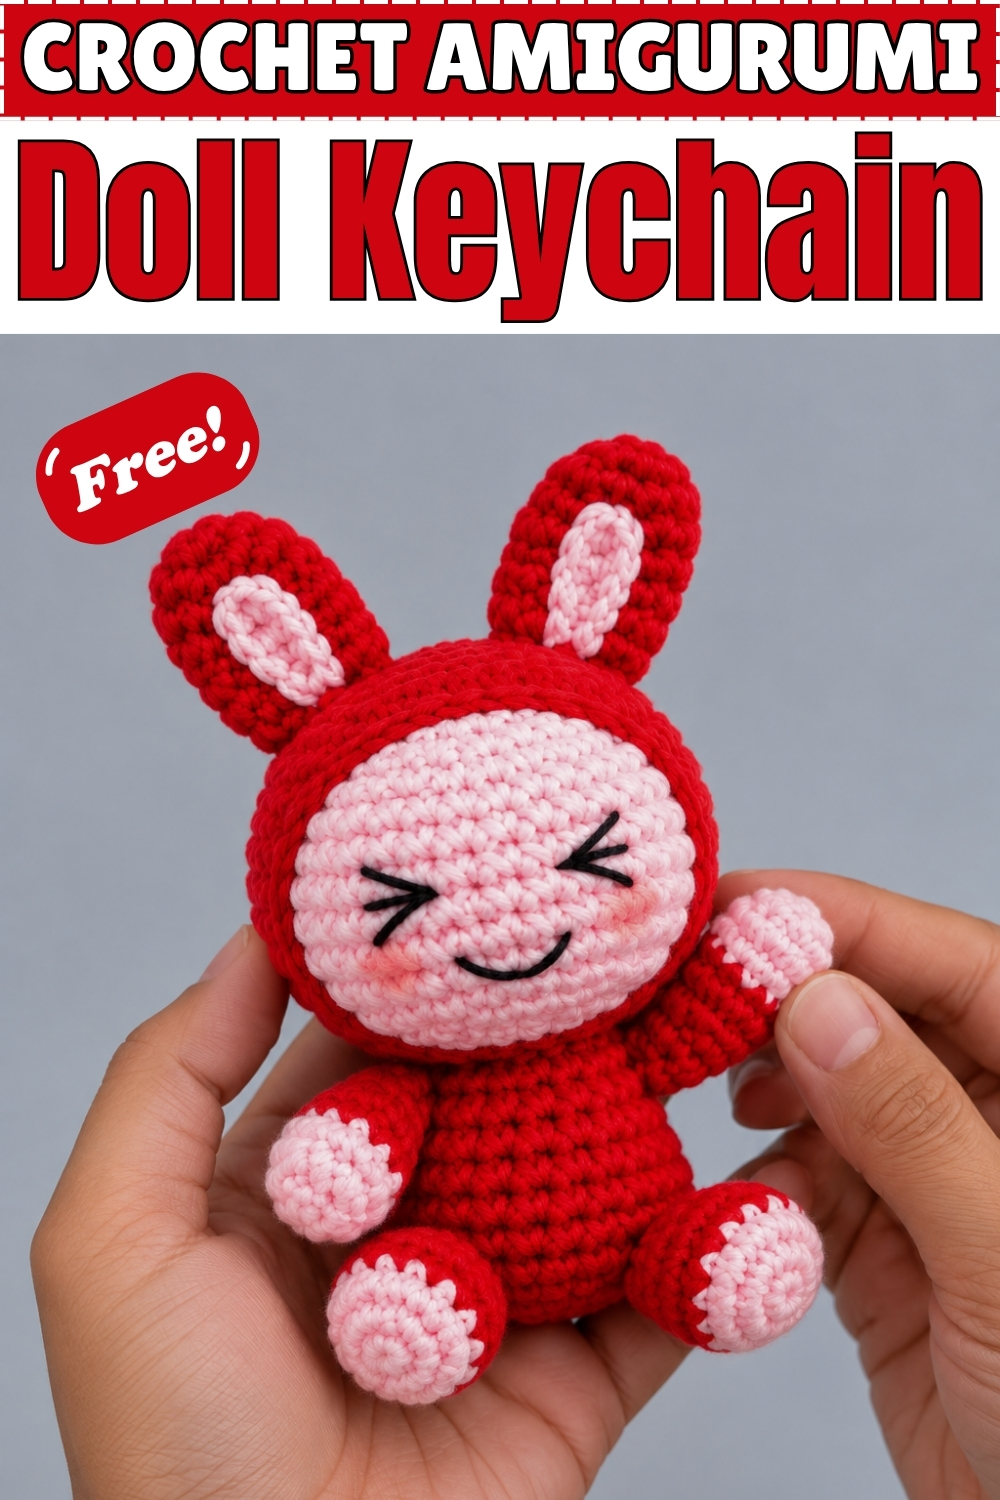
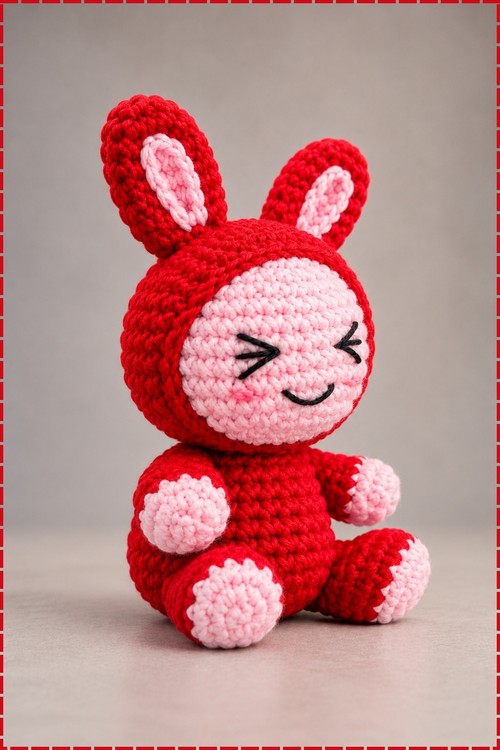
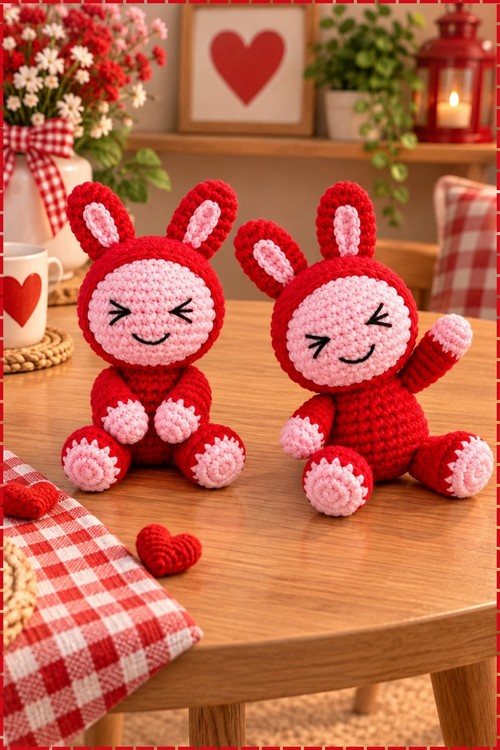
Layering is what makes this crochet doll keychain amigurumi work, because the pale pink face is crocheted as its own closed ball and then dropped inside a red hood that gets sewn around it. Joined rounds run through the whole project, so every round ends with a slip stitch and a chain one before the next begins. Mine came off the hook at roughly palm size on a 1.6 mm hook with cotton blend yarn. Tall red ears with pink inner panels lean slightly outward. Closed smiling eyes and two soft blush spots finish the face.
Why I Love This One
Small enough to finish in a weekend, detailed enough that people always ask where I bought it.
The Story Behind This Version
I started this one on a slow afternoon expecting a quick keychain and ended up spending most of the time on the face. That happens with this design. The inner face piece is just a smooth pink ball until you sit down with black embroidery yarn and decide where the eyes go, and the whole personality lands in about six stitches. I went with closed curved eyes and short lashes instead of open eyes, added a soft upward smile, and brushed a little pink across both cheeks. The red hood went on afterward and framed everything, which is when it stopped looking like a ball of pink cotton and started looking like a doll.
Materials And Tools
- Cotton blend yarn such as YarnArt Jeans in pale pink for the inner face, the hands, the foot pads, and the inner ear panels
- The same yarn in bright red for the hood, the outer ears, the body, the arms, and the legs
- Thin embroidery yarn such as YarnArt Begonia in black for the eyes and mouth, and in pink for the blush
- A 1.6 mm crochet hook
- Fiberfill for stuffing
- Yarn needle with a large eye
- Small sharp scissors
- A split ring and a short chain or lobster clasp if you want to turn it into a working keychain
Difficulty And Time
Not a beginner project, mostly because of the hook size. A 1.6 mm hook with cotton blend yarn makes a very dense fabric and very small stitches, so your hands will notice before your brain does. The stitches themselves stay simple throughout. From experience, I would set aside four to six hours across a couple of sittings, and a good chunk of that goes on the face embroidery and the assembly rather than the crochet.
The Pattern
Every round in this pattern is a joined round. Finish each round with a slip stitch (sl st) into the first stitch of that round, then chain (ch) 1 before you begin the next. Keeping this consistent is what stops the pieces from spiralling and going out of shape, and it gives you a visible seam line you can position at the back of each piece.
Inner Face In Pale Pink
- Round 1: Work 6 single crochet (sc) in a magic ring (MR). [6]
- Round 2: Work 6 increase (inc). [12]
- Round 3: Work (1 sc, 1 inc) six times. [18]
- Round 4: Work (2 sc, 1 inc) six times. [24]
- Round 5: Work (1 inc, 3 sc) six times. [30] The increase sits at the start of this repeat rather than the end, which keeps the increase columns from stacking up in a visible line.
- Rounds 6 to 11: Work 30 sc in each round for six rounds. [30] The piece now reads as a tall rounded barrel, and these straight rounds are the flat area your face embroidery will sit on.
- Round 12: Work (1 decrease (dec), 3 sc) six times. [24]
- Round 13: Work (2 sc, 1 dec) six times. [18] Begin stuffing here while the opening is still wide.
- Round 14: Work (1 dec, 1 sc) six times. [12] Add more stuffing and firm up the shape, pushing filling into the sides so the face front stays smooth.
- Round 15: Work 6 dec. [6]
- Finish: Fasten off (FO) leaving a long tail, thread it on a yarn needle, run it through the front loops of the remaining 6 stitches, pull tight to close, and bury the tail inside.
- Face embroidery: Work the face now, before the hood goes on. Using thin black yarn, stitch two closed curved eyes across the widest part of the face with the curves bowing upward, then add two or three short lashes fanning out from the outer end of each eye. Embroider a wide upward smile centred below and between the eyes, keeping it a smooth curve rather than the jagged line the original describes. Brush or stitch a soft pink blush patch on each cheek, just below and outside each eye. Anchor every embroidery tail deep inside the head, because a knot on the surface will show through cotton this fine.
Ears, Make Two
- Round 1: Work 8 sc in a MR using red. [8]
- Rounds 2 to 5: Work 8 sc in each round for four rounds. [8] The ear comes out as a narrow tube, which flattens naturally once you sew it in place.
- Finish: FO leaving a long sewing tail.
- Inner panel: My ears have a pale pink panel running up the front of each one. Using pink yarn and a yarn needle, work long straight surface stitches lengthwise along the front of the flattened ear, starting near the base and stopping short of the tip, until the panel is as wide and as long as you want it. Keep both ears matched by counting your surface stitches on the first ear before you start the second.
- The original calls for three tiny black surface loops on each ear instead. Mine has the pink panel, so treat the black loops as optional if you prefer that look.
Outer Head And Hood In Red
- Round 1: Work 6 sc in a MR. [6]
- Round 2: Work 6 inc. [12]
- Round 3: Work (1 inc, 1 sc) six times. [18]
- Round 4: Work (2 sc, 1 inc) six times. [24]
- Round 5: Work (1 inc, 3 sc) six times. [30]
- Rounds 6 to 9: Work 30 sc in each round for four rounds. [30] Four straight rounds here against the face's six is what leaves the pink face exposed at the front once the two pieces nest together.
- Round 10: Work 11 sc, then hold the first ear against the head and work 3 sc through both the ear loops and the head loops together to attach it, then 2 sc into the head alone, then hold the second ear in place and work 3 sc through both layers, then 11 sc. [30] Check that both ears point straight up and sit level before you commit to those attaching stitches, because unpicking them later means losing the round.
- Round 11: Work 11 sc, 3 sc into the stitches worked on the first ear in the previous round, 2 sc, 3 sc into the second ear stitches, 11 sc. [30] This second round over the ear bases locks them in and hides the join.
- Round 12: Work 30 sc. [30]
- Finish: FO leaving a long tail.
- Joining: Slide the finished pink inner face into the red hood, centre the embroidered face in the opening, and pin it before you sew. Sew the two pieces together all the way around the edge of the opening, catching one loop from each layer so the seam stays flat. My hood sits low at the sides and covers the back of the head completely, leaving a round pink face panel at the front.
Legs, Make Two
- Round 1: Work 6 sc in a MR using pale pink for the foot pad. [6]
- Round 2: Work 6 inc. [12] This flat pink disc becomes the rounded pad at the end of the foot, which is the only pink showing on the leg in my version.
- Round 3: Change to red and work 12 sc. [12] The original changes to a white sock colour here. Mine stays red, so treat a contrasting sock round as optional.
- Round 4: Still in red, work 3 sc, 3 dec, 3 sc. [9] The decreases pull the foot in at the ankle and give the leg its shape.
- Round 5: Work 9 sc. [9]
- Finish: FO leaving a long tail and stuff the legs lightly with fiberfill.
Hands, Make Two
- Round 1: Work 6 sc in a MR using pale pink. [6]
- Round 2: Work (1 inc, 1 sc) three times. [9]
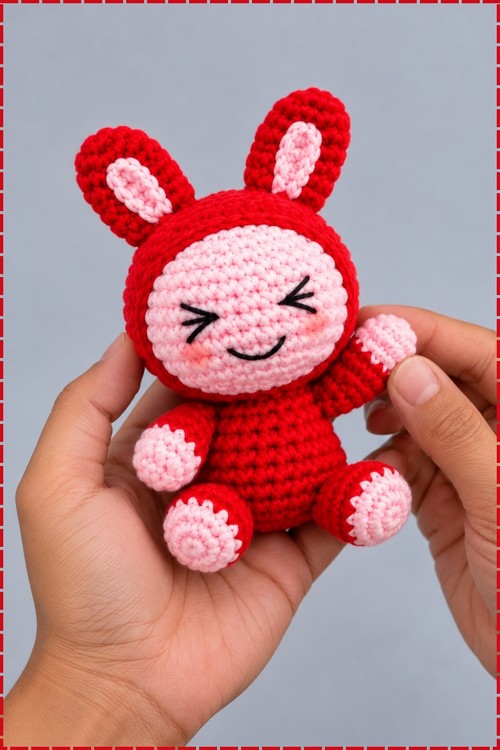
- Round 3: Change to red and work 9 sc. [9] The colour change lands right where the pink paw meets the red sleeve, exactly as it reads in my photo.
- Round 4: Work 1 dec, 7 sc. [8]
- Round 5: Work 8 sc. [8]
- Finish: FO, add a very small amount of fiberfill, fold the opening flat, and crochet 4 sc across both layers to close the arm. Leave a long sewing tail. Stuff sparingly here, since a flat arm end sews cleanly against the body and a stuffed one sticks out awkwardly.
Body, Sitting Version In Red
This is the version I made. The limbs sew on afterward, which gives you full control over the pose.
- Round 1: Work 6 sc in a MR. [6]
- Round 2: Work 6 inc. [12]
- Round 3: Work (1 inc, 1 sc) six times. [18]
- Round 4: Work (2 sc, 1 inc) six times. [24]
- Rounds 5 to 10: Work 24 sc in each round for six rounds. [24] The body should now be a short, straight red cylinder with a rounded base.
- Round 11: Work (2 sc, 1 dec) six times. [18]
- Finish: FO leaving a long tail for sewing.
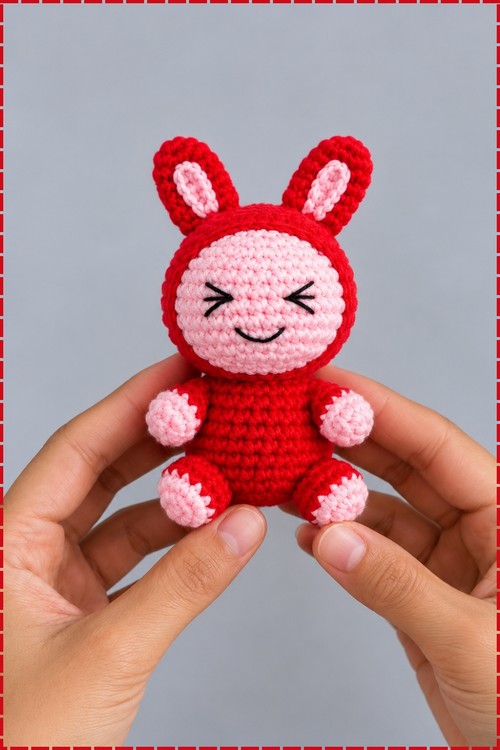
- Assembly: Stuff the body firmly, keeping the base full so it sits without tipping. Sew the legs to the bottom front so both feet point forward and the pink pads face out, which is what gives mine its seated pose. Sew the hands to the sides of the body near the top. Then sew the completed head to the top of the body, checking from the front that the face points straight ahead and both ears are level.
Body, Standing Version With Seamless Legs
Optional alternative if you want the doll to stand rather than sit. Work the legs first as above.
- Round 1: Join red yarn to the first leg, ch 2, sl st into the second leg, ch 1. Work 9 sc around the first leg, 2 sc into the front loops of the chain 2 between the legs, 9 sc around the second leg, then 2 sc into the back loops of the chain 2. [22] Make sure both legs face the same direction before you join them, or one foot will point sideways for good.
- Rounds 2 to 10: Work 22 sc in each round for nine rounds. [22]
- Round 11: Work [3 sc, 1 dec, 1 sc, 1 dec, 3 sc] twice. [18] Placing the decreases at both sides narrows the shoulders without flattening the front.
- Finish: FO leaving a long tail for sewing.
- Assembly: Stuff the body firmly, sew the flat hands to the upper sides, then sew the whole body to the base of the head. Hide all remaining tails inside the toy.
Keychain Attachment, Optional
- My photo shows the doll on its own, so add this only if you want it clipped to a bag.
- Attach yarn at the centre top of the hood between the ears, chain until the loop reaches the length you want, then slip stitch back into the same spot to close the loop.
- Thread a split ring or a lobster clasp onto the loop before you fasten off, and weave the tail deep into the head so the loop cannot pull free under weight.
Tips And Troubleshooting
- Joined rounds create a seam column. Decide early where the back of each piece is and keep every join on that side, so the seam disappears into the assembly.
- Chain one at the start of each round is a turning chain that does not count as a stitch. Do not work into it, or your counts will creep up round by round.
- With a 1.6 mm hook, stuffing is the easiest thing to get wrong. The fabric is dense enough that it will not show fill, so the risk is understuffing and ending up with a soft, saggy head. Pack the face piece firm.
- Embroider the face before sewing the hood on, and before the head goes on the body. Once assembled you lose access to the inside and every knot has to sit on the surface.
- Pin the ears in place through rounds 10 and 11 rather than holding them by hand. Even a small angle difference between the two reads as crooked once the doll is finished.
- Match your two hands and two legs by counting rather than by eye. At this scale one extra round is clearly visible side by side.
Yarn Substitution
Cotton blend is the right call here and I would keep it. The fibre has no stretch and no halo, so the stitch definition stays crisp and the small pieces hold their shape without stiffening. A thicker cotton will work if you also go up a hook size, and you will get a noticeably larger doll at the same stitch counts, which is fine for a toy but too heavy for a bag clip. Avoid anything fluffy, because the face embroidery needs a clean surface to sit on and a halo will swallow the eyes and mouth completely.
Customization Ideas
- Swap red for any strong colour and keep the pale pink face for the same contrast.
- Add the white sock round the original pattern includes for a two tone foot.
- Work open round eyes with a white highlight instead of the closed smiling eyes.
- Use the black surface loops on the ears instead of the pink inner panels.
- Make a set in holiday colours and clip one to each gift bag.
- Change the mouth to a small oval for a surprised expression.
Frequently Asked Questions
Do I really have to work in joined rounds?
You can work in a continuous spiral if you prefer, and the counts will still come out right. The reason the pattern uses joined rounds is that the ear attachment in rounds 10 and 11 depends on knowing exactly where the round starts and ends. In a spiral you lose that reference point and the ears will end up offset.
My face piece does not fit inside the hood. What went wrong?
Almost always tension. The face and the hood share the same increase sequence, and the hood only fits because it has four straight rounds against the face's six, not because it is worked looser. If yours will not nest, your hood tension is tighter than your face tension. Redo the hood a little looser rather than forcing it.
Can I use safety eyes instead of embroidering?
Not really, and not at this size. A 1.6 mm gauge gives a fabric far too dense to push a safety eye shank through cleanly, and the closed smiling eyes in my version cannot be done with hardware anyway. Thin embroidery yarn is the intended method and gives a much better result on a piece this small.
Will it hold up as an everyday keychain?
Cotton blend at this gauge is tough and the dense fabric resists snagging well. The weak point is the attachment loop, not the doll. Anchor the loop through several stitches at the top of the hood rather than one, and check it occasionally if it lives on a bag.