
Crochet Doll Clothes Free Pattern For Amigurumi
Your palm sized amigurumi can change outfits whenever you like with this crochet doll clothes pattern, since the shirt and pants both button at the back. One 3.0 mm hook and DK cotton in red and warm brown carry all three pieces, hijab included, in four to five hours.
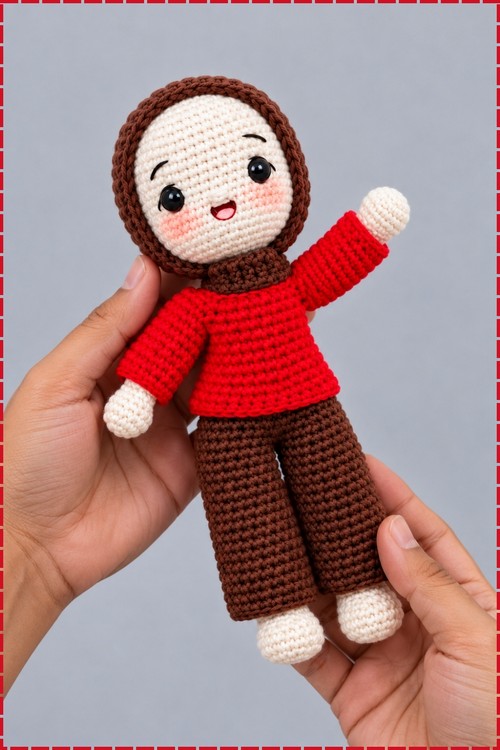
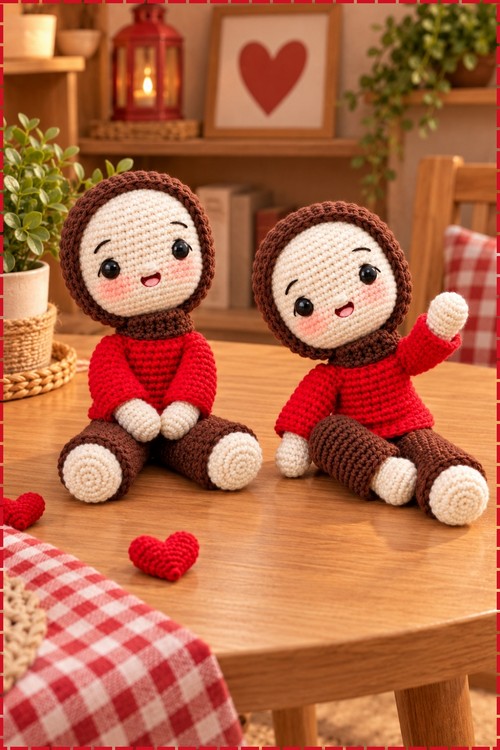
One arm up mid wave, the Crochet Doll Clothes set in red and brown gives this doll a friendly busybody look, like it has somewhere to be. The stitched open mouth pushes that further. Swap colours on the crochet doll clothes and the same doll turns shy or bold.
Crochet Doll Clothes
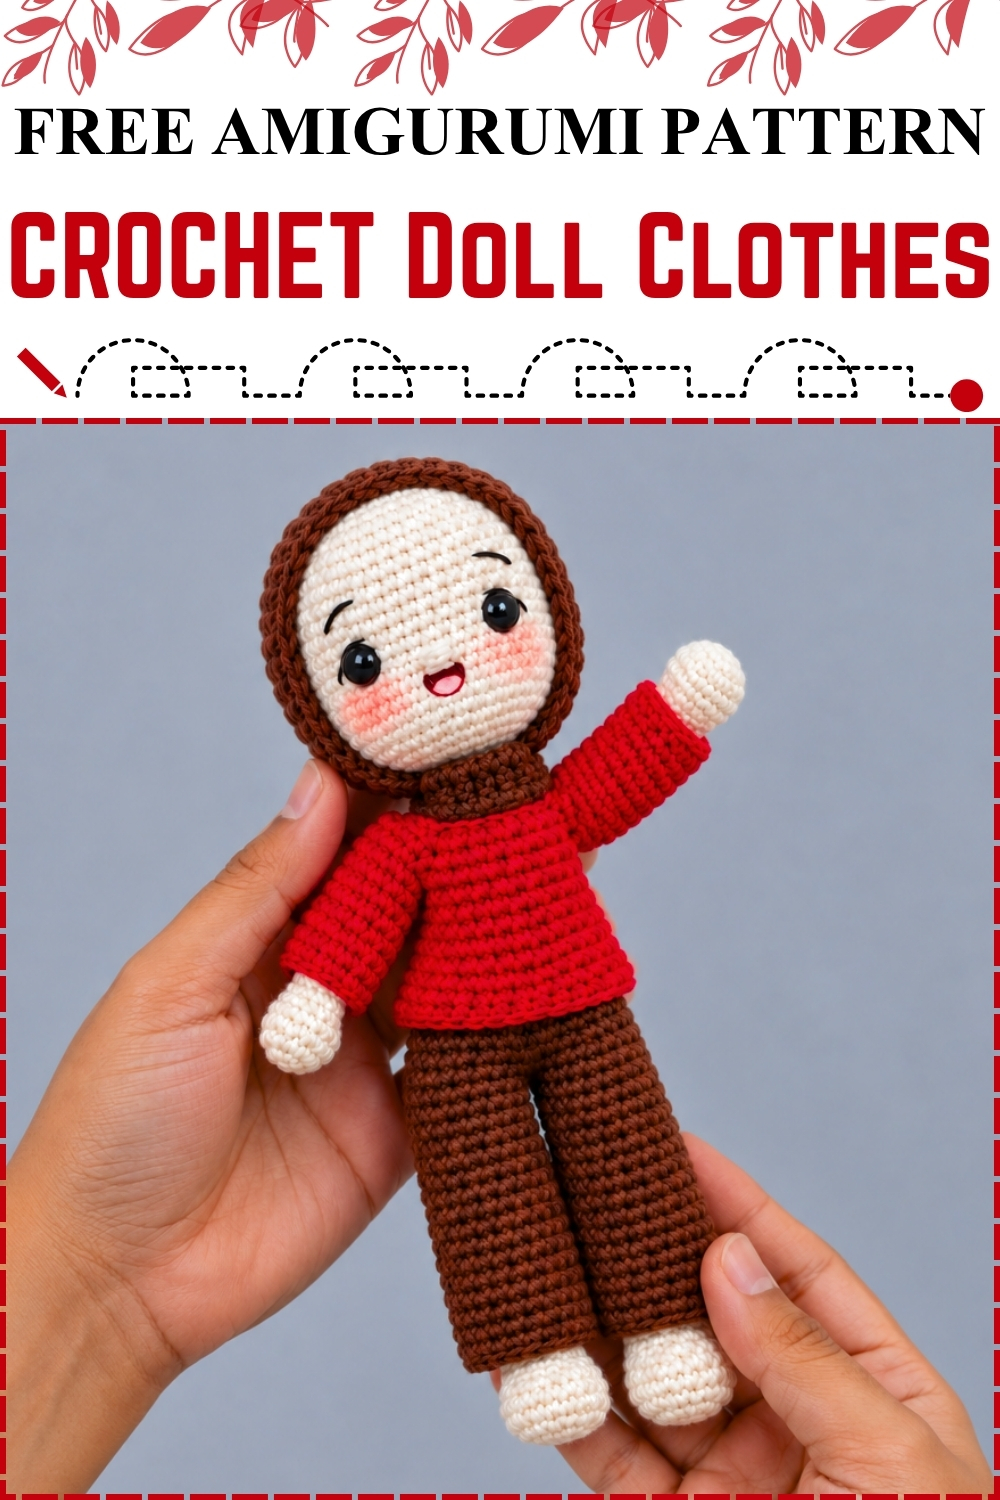
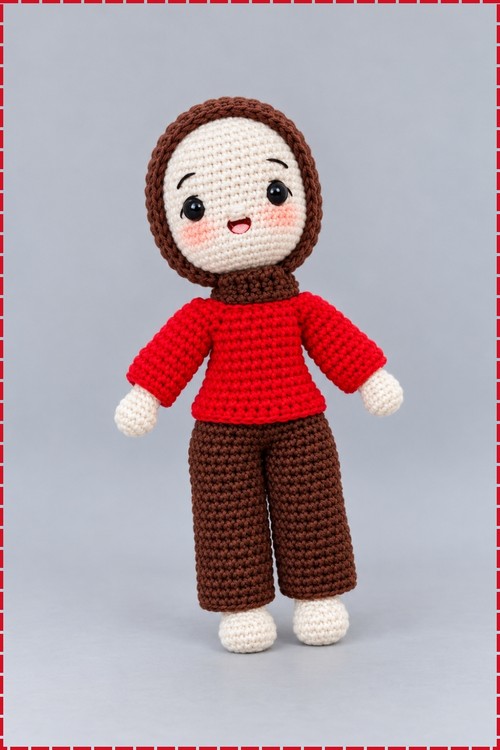
Button openings built directly into the foundation chains are what make these crochet doll clothes removable rather than sewn permanently onto the doll. Three pieces come off the hook separately: a button up red shirt with working sleeves, brown pants with divided legs, and a brown pashmina hijab with two long wrap ties. Mine fits a standard palm sized amigurumi with a cream face, rosy cheeks, and black safety eyes. Every piece uses the same hook and the same weight yarn, so you never need to stop and re tension. All three together dress the doll completely from head to foot.
Materials And Tools
- Medium weight or DK cotton yarn in red for the shirt
- The same yarn in warm brown for the pants and the hijab
- A 3.0 mm hook throughout
- Four small buttons, two for the shirt back and two for the pants back
- Stitch markers
- Tapestry needle and scissors
From experience, all three pieces together take around four to five hours at a comfortable pace. The hijab is the quickest, the pants take the longest because of the leg rounds, and the shirt sits in between.
Beginner Technique Notes
- This pattern uses flat rows and joined rounds mixed together. Flat rows use a turning chain 1 at the start and you flip the work at the end of each row. Joined rounds do not turn and do not use a turning chain. The pattern tells you which you are doing at each section.
- Back loop only, abbreviated as BLO, means you insert your hook only into the loop sitting at the back of the stitch rather than through both loops. Working this way leaves a visible ridge on the right side of the fabric, which the hijab uses for the forehead edge detail.
- Front loop only, abbreviated as FLO, is the opposite and is what you use for the hijab forehead edge in the pattern.
- The buttonhole loops in both the shirt and the pants are formed by the skipped chains at the start of the foundation row. Those gaps become the loops a button passes through, so do not skip past them accidentally.
- When the pants pattern says to join in round 6, line up the two short edges of your flat piece and slip stitch them together. The skipped chain loop on one side and the chain 5 loop on the other become your button and buttonhole pair for the waist.
- Double crochet is taller than single crochet. In the hijab wrap ties the pattern uses double crochet, which gives the ties their length and drape without taking as many rows as single crochet would.
The Pattern
The Shirt In Red
- Foundation: Chain (ch) 29.
- Row 1: Skip (sk) the first 6 chains, which form the first buttonhole loop. Starting in the 7th chain from the hook, work 3 single crochet (sc), then 1 increase (inc) in the next chain. Work (2 sc, inc) six times. Work sc in the last 3 chains. The skipped chain loop at the beginning is your first button loop and will sit at the top back of the shirt.
- Row 2: Ch 1, turn. Work 3 sc, inc, then (2 sc, inc) eight times, then sc in the last 3 stitches.
- Row 3: Ch 1, turn. Work 5 sc, ch 3, sk 9 stitches. Work 1 inc, 8 sc, 1 inc. Ch 3, sk 9 stitches. Work 5 sc. The two sets of skipped stitches are the armhole openings you will come back to for the sleeves.
- Row 4: Ch 1, turn. Work 1 sc in each stitch and chain space across the row. [28]
- Rows 5 to 8: Ch 1, turn. Work 28 sc across for four rows. [28 each row] The shirt body is now a flat rectangle with armhole gaps.
- Row 9: Ch 1, turn. Work 7 sc, inc, 12 sc, inc, 7 sc. [30]
- Row 10: Ch 1, turn. Work 30 sc across. [30]
- Row 11: Ch 1, turn. Work 8 sc, inc, 13 sc, inc, 8 sc. [32]
- Row 12: Ch 1, turn. Work 32 sc across. At the end of the row, ch 5 to create the second buttonhole loop. [32]
- Row 13: Work 32 sc across. Fasten off and weave in ends. The ch 5 loop at the end of row 12 and the skipped chain loop at the start of row 1 are the two points where buttons will fasten the back of the shirt.
- Buttons: Sew two buttons onto the back of the shirt at the positions opposite both buttonhole loops.
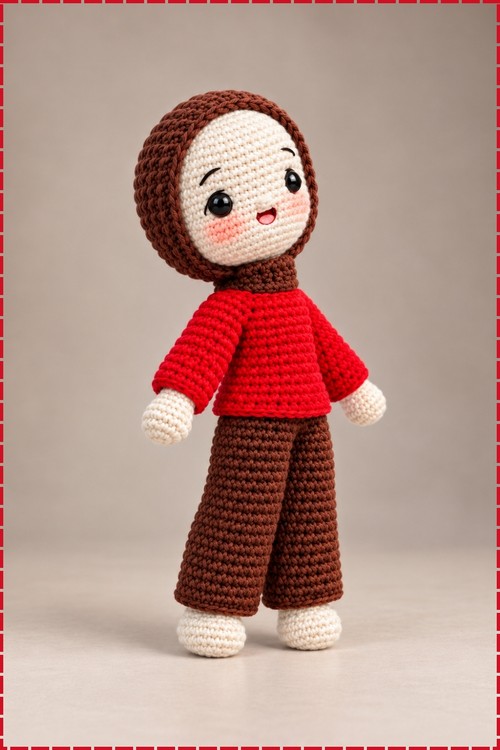
Shirt Sleeves, Make Two
- Setup: Attach red yarn to the armhole opening left in row 3.
- Round 1: Work 15 sc evenly around the armhole opening and place a stitch marker in the first stitch. The sleeve works in a continuous spiral from here.
- Rounds 2 to 9: Work 15 sc in each round for eight rounds. [15 each round]
- Round 10: Work (3 sc, decrease (dec)) three times. [12]
- Finish: Slip stitch (sl st) into the next stitch, fasten off, and weave in the end. Repeat for the second sleeve.
The Pants In Brown
- Foundation: Ch 30.
- Row 1: Sk the first 5 chains, which form the first buttonhole loop. Starting in the 6th chain from the hook, work sc in each chain across. [25]
- Row 2: Ch 1, turn. Work (4 sc, inc) five times across. [30]
- Row 3: Ch 1, turn. Work 30 sc across. [30]
- Row 4: Ch 1, turn. Work (5 sc, inc) five times across. [35]
- Row 5: Ch 5, turn. The chain 5 here is your second buttonhole loop. Work (6 sc, inc) five times across. [40] The waistband is now complete as a flat strip with one buttonhole at each short end.
- Round 6: Bring the two short ends of the strip together so the buttonholes align at the back. Sl st the ends together to join them into a circle, ch 1, then work 40 sc around. Sl st to join. [40]
- Round 7: Ch 3. Sk 20 stitches along the waist circle and sl st into the 21st stitch. This chain bridge splits the pants into two leg holes of 20 stitches each. The bridge becomes part of the inner leg seam.
- Round 8: Work 1 sc into each of the 20 stitches of the first leg hole, then 3 sc along the ch 3 bridge. [23] Place a stitch marker to track the start of the leg round.
- Rounds 9 to 24: Work 23 sc around for sixteen rounds. [23 each round] Sl st and fasten off.
- Second leg: Attach brown yarn to the second leg hole, work 20 sc around the hole and 3 sc along the opposite side of the ch 3 bridge. [23] Work 23 sc around for sixteen rounds to match the first leg. Sl st and fasten off.
- Buttons: Sew two buttons onto the back of the waistband at the positions opposite the two buttonhole loops.
The Pashmina Hijab In Brown
- Round 1: Work 8 sc into a magic ring. [8]
- Round 2: Work 1 inc in each stitch around. [16]
- Round 3: Work (1 sc, inc) eight times around. [24]
- Round 4: Work (2 sc, inc) eight times around. [32]
- Round 5: Work (3 sc, inc) eight times around. [40]
- Rounds 6 to 9: Work 40 sc in each round for four rounds. [40 each round]
- Round 10: Work (4 sc, inc) eight times around. [48]
- Rounds 11 to 13: Work 48 sc in each round for three rounds. [48 each round] Sl st into the next stitch at the end of round 13 but do not fasten off. The hijab cap is complete and should sit comfortably over the top of the doll's head.
- First wrap tie: Ch 15. Yarn over and work a double crochet (dc) into the 3rd chain from the hook, then dc in each of the remaining 12 chains. [13 dc]
- Forehead edge: From the base of the tie, continue along the front edge of the hijab opening working dc stitches through the front loops only (FLO). Working FLO here leaves a neat raised ridge along the doll's forehead, which reads as the hijab frame against the face. Stop when 4 stitches remain unworked on the hijab opening. Those 4 unworked stitches leave the gap for the doll's face and chin to show through.
- Second wrap tie: Ch 15. Turn and work dc into the 3rd chain from the hook, then dc all the way down the chain. Sl st back into the edge of the hijab.
- Finish: Fasten off and weave in all loose ends. The two ties are long enough to drape around the doll's neck in a pashmina wrap, which is exactly how mine sits in the photo.
Tips And Troubleshooting
- Make the buttonhole loops first and test an actual button through each one before you crochet any further. The loop size depends on the yarn you use, and adjusting it at the foundation stage is a ten second job, while adjusting it at the end means frogging back to row one.
- Count the armhole stitches in row 3 before you move to row 4. If your skip count is off by even one stitch the two sleeves will come out different sizes, which is hard to fix without restarting the row.
- Mark the round start on every leg and keep the marker moving. Sixteen rounds is a long haul and drifting markers turn up as twisted seams inside the leg.
- Work the hijab ties very loosely. They drape best when the chains and the dc stitches have some movement, and a tight tie pulls the hijab opening closed around the face.
- Press the finished shirt flat under a damp cloth before putting it on the doll. Flat rows in cotton tend to curl at the edges and a quick block makes the back sit straight where the buttons fasten.
- Sew buttons with a doubled thread and knot securely at the back of the fabric. Small buttons on a doll take real strain when the clothes go on and off repeatedly.
Yarn Substitution
Cotton or a cotton blend is worth staying with for doll clothes. It holds its shape through repeated handling, does not stretch the way acrylic does under tension, and presses flat easily for a neat finish. Any DK or medium weight that behaves similarly will work at the same hook size. Avoid anything stretchy, because the buttonhole loops are sized to fit the yarn you use and a stretchier fibre will make them baggy. If you do go up in weight, the finished clothes will be noticeably larger and may not fit a standard sized doll without adjusting the foundation chain.
Customization Ideas
- Swap the red shirt for any colour you like. The shirt pattern has no colour changes, so a single skein covers it.
- Work the pants in a contrasting dark colour for a two tone outfit, or match them to the shirt for a coordinating set.
- Omit the hijab and use the shirt and pants alone for a plain outfit.
- Embroider a small pocket shape on the shirt front with a contrasting thread.
- Add a ribbed cuff to the shirt sleeves by working the final round in BLO only, then working one more round back through the exposed front loops.
- Make the hijab in a completely different colour for each doll in a set.
- Sew a small bow or a floral button to the hijab instead of leaving it plain.
Frequently Asked Questions
Can I make the clothes fit a different sized doll?
Yes, but the stitch counts will need to adjust with the doll size. Measure the doll's chest and waist before you start, and do a small swatch so you know how many stitches equal an inch in your yarn and hook combination. From there you can scale the foundation chain to fit. The sleeve and leg rounds can be lengthened or shortened by adding or removing straight rounds without touching the shaping rows.
My shirt puckers around the armholes. What went wrong?
Almost always the chain 3 bridge in row 3 is too short or too tight. The bridge needs enough ease to lie flat when you work across it in row 4. If yours pulls, frog back to row 3 and try chain 4 instead.
The pants legs are different lengths. How do I fix it?
Count the rounds on both legs together rather than working one leg all the way through before starting the other. Work one round on each leg alternately so any counting mistake shows up immediately while you can still correct it.
Why do I work the forehead edge of the hijab in front loops only?
Working into the front loops only leaves the back loop exposed as a visible ridge along the edge. On the hijab that ridge sits right where the fabric meets the forehead and reads as a clean frame around the face, which is the signature look of a pashmina style hijab.
Can I skip the buttons and use snaps or velcro instead?
Snaps work well on the pants waist where the fabric sits flat. They are harder on the shirt because the button loops are formed by the chain structure rather than added later. If you want snaps on the shirt, omit the skipped chains in the foundation rows and sew snaps directly to the back edges instead.