
Crochet Corn Amigurumi Free Keychain Pattern
Swapping from a 2.0 mm hook on the cob to a 2.5 mm hook on the husks gives this crochet corn amigurumi tight stitches and softer, curling leaves. Add a split ring or lobster clasp and the free keychain pattern becomes a bag charm in about two hours.
Requests keep coming for the Crochet Corn Amigurumi because the open husk leaves make it read as food instantly, which most tiny keychains fail at. Crafters see one on a bag and ask where the pattern is. Fast, uses almost no yarn, and a crochet corn amigurumi never needs explaining twice.
Crochet Corn Amigurumi
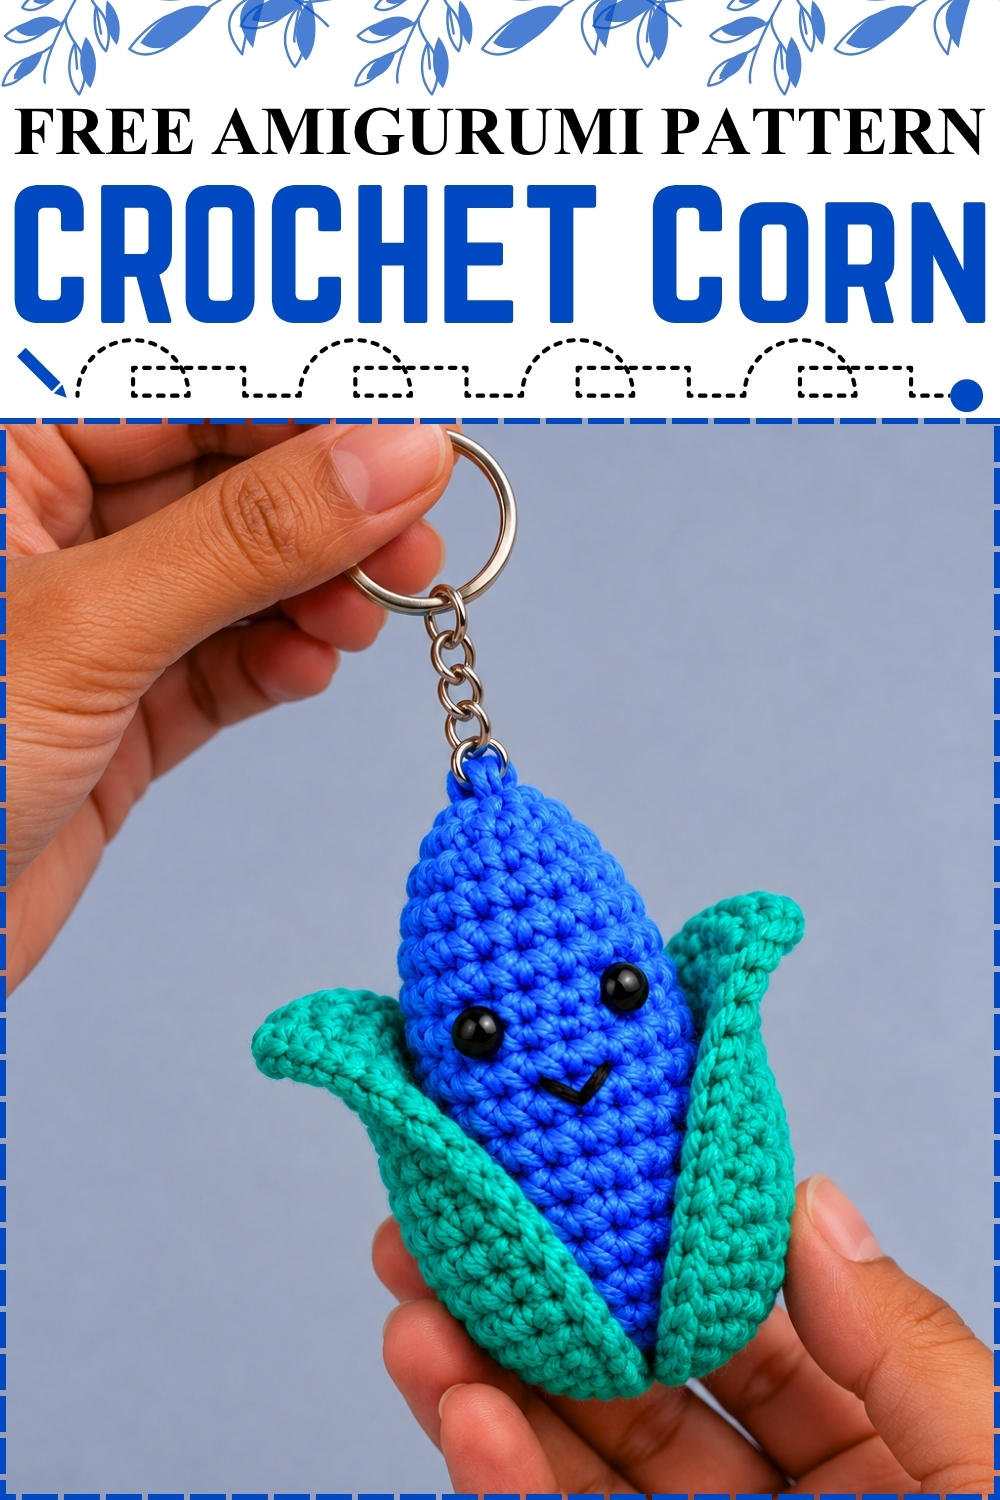
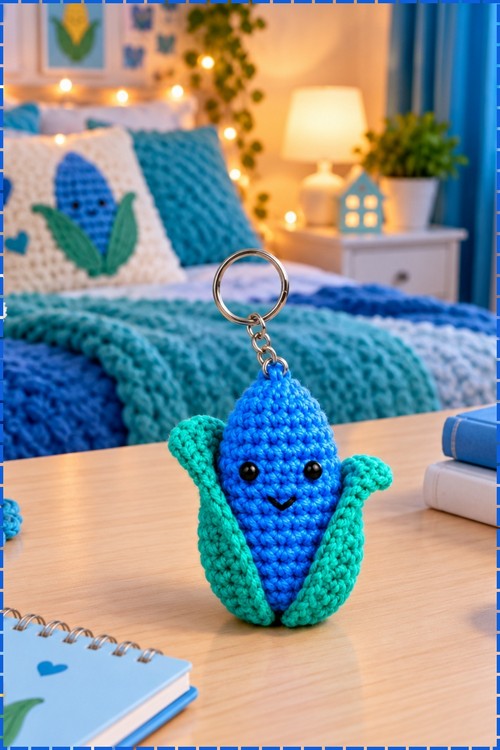
Three separate pieces make up this crochet corn amigurumi, and none of them is difficult on its own. Working the cob first means you finish a simple stuffed cone before you touch the husks. Mine came out in bright blue with teal green husks instead of the usual yellow and green, which turns it into something closer to a keychain charm than a food toy. Black safety eyes and a small embroidered smile give it a face. Two leaves sew on at the base and curve open like real husks. Beginners can finish one in an evening.
Materials And Tools
- Cotton yarn in bright blue for the cob, fine weight to suit a 2.0 mm hook
- Cotton yarn in teal green for the two husk leaves
- Black embroidery floss or thin black yarn for the mouth
- Two small black safety eyes
- A 2.0 mm hook for the cob and a 2.5 mm hook for the husks
- Fiberfill stuffing
- Yarn needle and small scissors
- A split ring with a short chain or a lobster clasp if you want to hang it as a keychain
Difficulty And Time
Beginner friendly in every way that matters. You only need a magic ring, single crochet, half double crochet, increases, and decreases. The only thing that slows you down is the hook size, because a 2.0 mm hook with cotton makes very small stitches that take concentration rather than skill. From experience, plan for around two hours in total, with the cob taking about an hour and each leaf around twenty minutes.
Beginner Technique Notes
- A magic ring is an adjustable loop you crochet into and then pull closed. It matters here because it leaves no hole at the tip of the cob, which a chain ring would. If you have never made one, practise it two or three times on scrap yarn before starting.
- Everything in the cob works in a continuous spiral. That means you do not join with a slip stitch and you do not chain at the start of a round. Place a stitch marker in the first stitch of each round and move it up as you go, otherwise you will lose your place within three rounds.
- An increase is two single crochets worked into the same stitch. A decrease joins two stitches into one. The invisible decrease method, where you pick up only the front loops of both stitches before finishing, gives a much smoother surface on a small piece like this.
- Half double crochet is taller than single crochet. In the husk leaves, the pattern alternates hdc and sc deliberately so one end of the leaf stands taller than the other, which is what creates the curve. Do not substitute them for each other.
- The husk leaves are worked flat around a foundation chain, going up one side and back down the other. Work into the bumps on the back of the chain for the return side and the edge will look neat rather than loose.
- The original creator uses a crossed single crochet, sometimes called an x stitch, for a tighter surface. Standard single crochet works perfectly and is what I would recommend for a first attempt.
- Change hook size between the pieces as written. The larger hook on the husks gives them the slight looseness they need to curve outward rather than sit flat against the cob.
The Pattern
Corn Cob Base In Blue
- Round 1: Make a magic ring, work 8 single crochet (sc) into it, and pull the ring closed. [8] Pull the tail firmly now, because tightening it later once the stuffing is in is very difficult.
- Round 2: Work (1 sc, 1 increase (inc)) four times. [12] The piece is still a small flat disc at this stage.
- Round 3: Work 1 sc, 1 inc, then (2 sc, 1 inc) three times, then 1 sc. [16] Starting the round with a partial repeat staggers the increases so they do not line up into a visible ridge.
- Round 4: Work 1 sc in each stitch around. [16] A straight round here stops the cone from flaring too fast and gives the cob its tapered tip.
- Round 5: Work 2 sc, 1 inc, then (4 sc, 1 inc) three times, then 2 sc. [24] This is the widest the cob gets.
Corn Cob Body
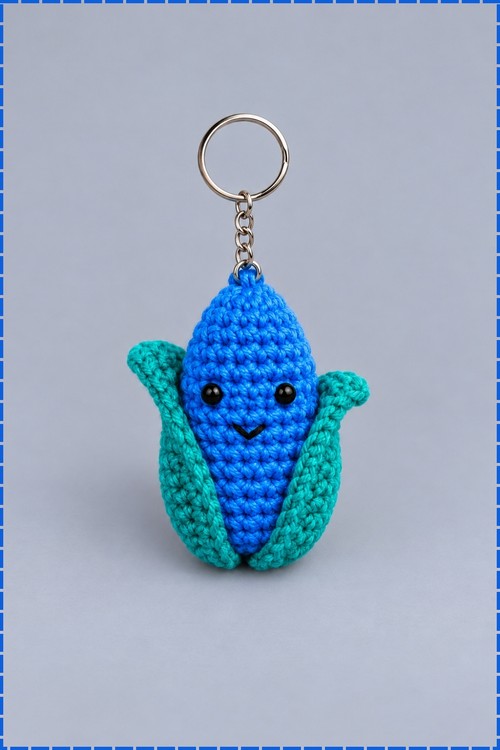
- Rounds 6 to 17: Work 1 sc in each stitch around for twelve rounds. [24 in each round] The cob grows into a tall straight tube with a pointed top, which is the whole body shape.
- Eyes: Fit the safety eyes now, around round 6 or wherever looks right to you, and secure the backings from inside while the opening is still wide. Waiting until the cob is nearly closed makes this almost impossible. My eyes sit low on the cob rather than at the tip, with a gap of several stitches between them.
- Mouth: Embroider a small black smile just below and centred between the eyes. Mine is a simple shallow V shape made from two short straight stitches meeting at the bottom. Anchor the floss deep inside the cob so no knot shows on the surface.
Closing The Cob
- Stuff the cob firmly with fiberfill before you begin the decrease rounds. Push small pieces up into the pointed tip first so the point stays sharp, then fill the body.
- Round 18: Work (2 sc, 1 decrease (dec)) six times. [18]
- Round 19: Work (1 sc, 1 dec) six times. [12] Add a little more stuffing through the gap if the cob feels soft.
- Round 20: Work 6 dec. [6]
- Fasten off, cut the yarn leaving a tail, thread it onto a yarn needle, and weave it through the final 6 stitches. Pull tight to close the hole completely, then bury the tail inside the cob and trim.
Husk Leaves In Teal Green, Make Two
- Foundation: Chain (ch) 12. You will crochet in an oval all the way around both sides of this chain.
- Row 1: Starting in the second chain from the hook, work 10 sc, then 3 sc into the final chain to turn the corner. Working back down the opposite side of the chain, work 9 sc, then 1 inc in the final stitch. [24] The three stitches worked into one chain are what round the leaf tip instead of leaving it square.
- Row 2: Work 2 half double crochet (hdc) in the first stitch, 6 hdc, 4 sc, 3 sc in the tip stitch, 4 sc, 7 hdc, then 2 hdc in the final stitch. [28] The taller hdc stitches gather along one end and start pulling the leaf into a gentle curve.
- Row 3: Work (2 hdc in the same stitch) twice, 5 hdc, 6 sc, 3 sc in the tip stitch, 6 sc, 6 hdc, then (2 hdc in the same stitch) twice. [34] The leaf should now be clearly leaf shaped, wider at the base and tapering toward the point.
- Row 4: Work 16 sc, then into the tip stitch work 1 sc, ch 2, and 1 sc all in the same space, then finish the other side with 17 sc. The chain 2 at the tip creates the small sharp point at the end of the leaf.
- Fasten off and leave a long tail for sewing. Repeat all four rows to make a second leaf.
Assembly
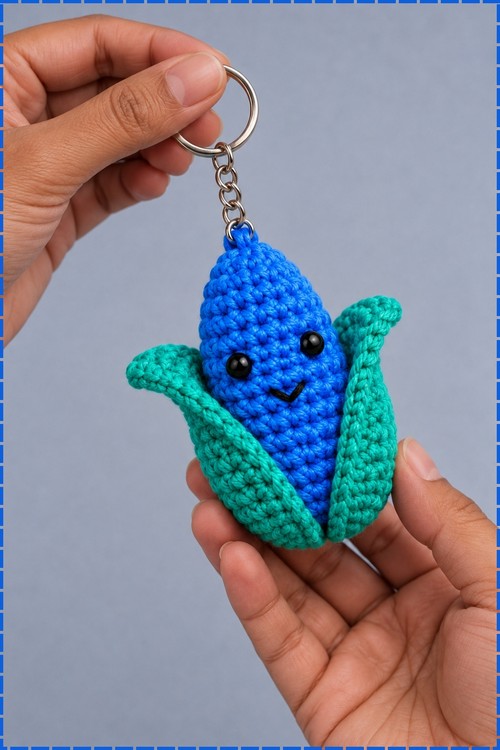
- Hold both leaves against the lower half of the cob and position them before you sew anything. Mine sit on opposite sides, attached low down and angled so they open outward and upward like a pair of wings, leaving the front of the cob and the face completely visible.
- Sew each leaf securely along its lower edge to the bottom and lower side of the cob, catching the leaf stitches and the cob stitches with small firm stitches so the leaf cannot flop loose.
- Attach only the bottom portion of each leaf and leave the upper part free. That free edge is what lets the husks curve away from the cob instead of lying flat.
- Weave all remaining tails deep into the cob and snip them close so the ends disappear inside.
Keychain Attachment
- My photo shows the corn hanging from a split ring and a short chain, which the original pattern does not include. Add this only if you want it as a keychain.
- Attach yarn at the very top point of the cob, chain until the loop is as long as you want, then slip stitch back into the same spot to close the loop.
- Slide a split ring or the end link of a short chain onto the loop before fastening off.
- Weave the tail deep into the stuffing so the loop cannot pull free when the keychain carries weight. Alternatively, open the split ring and hook it directly through a stitch at the top of the cob.
Tips And Troubleshooting
- Mark round one and move your marker every single round. On a 24 stitch spiral, finding your place again after you lose it takes longer than the whole round did.
- Keep your tension even rather than tight. Beginners often grip harder as they concentrate, and on a 2.0 mm hook that turns the fabric stiff enough to hurt your hands.
- Stuff the pointed tip before you stuff the body. It is the one part you cannot reach once the cob is half full, and an unstuffed tip folds over and looks deflated.
- Fit the eyes early and check them from the front before you push the backings on. Safety eye backings are called safety backings for a reason, and removing one usually means cutting it off.
- Pin both leaves in place and look at the corn from the front, the side, and upside down before sewing. Leaves sewn even slightly unevenly are the most visible mistake on this piece.
- If your leaves curl the wrong way, flip them over. Both leaves are identical, so one of them simply needs to be used with its reverse side facing out to mirror the other.
Yarn Substitution
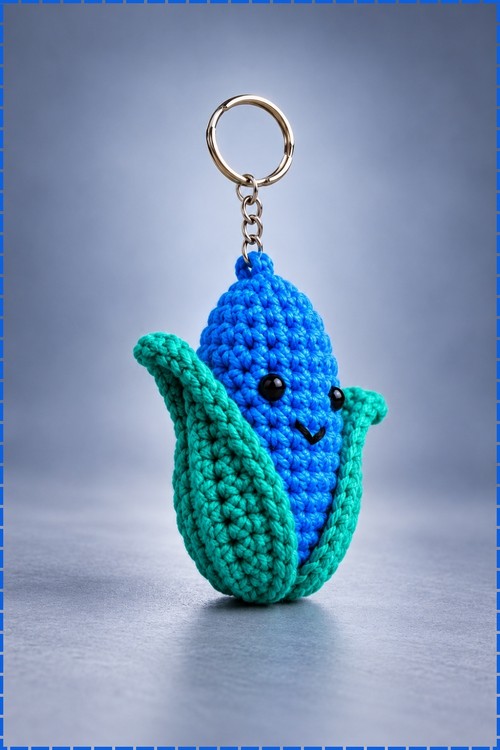
Cotton is the right fibre for this project and worth sticking with. It holds the small stitches crisply, keeps the leaf shape without blocking, and does not fuzz around the face. If you only have worsted weight yarn, the pattern still works exactly as written with a larger hook, and you will end up with a noticeably bigger corn that suits a shelf better than a keyring. Keep both colours in the same weight so the leaves stay in proportion to the cob. Avoid fluffy or brushed yarns, since the halo will hide the stitch texture that makes this read as corn.
Customization Ideas
- Work the cob in classic yellow with green husks for a realistic version.
- Try any bright colour you like for the cob, since the shape carries the design on its own.
- Skip the face entirely for a plain vegetable ornament.
- Embroider a small open oval mouth instead of the V smile for a different expression.
- Make three in different colours and hang them together from one ring.
- Add a third leaf if you want the husks to wrap further around the cob.
- Leave out the keychain hardware and sew a loop of yarn for a hanging ornament instead.
Frequently Asked Questions
What do I do if I lose count in the middle of a round?
Stop and count from your stitch marker forward rather than guessing. On the straight rounds 6 to 17 every round is simply 24 single crochets, so if your count comes out wrong you can add or skip one stitch in that round without it showing. Losing count in a shaping round matters more, and there it is worth pulling back to the marker and reworking.
Can I use a bigger hook if the 2.0 mm is hurting my hands?
Yes, absolutely. Go up to whatever size feels comfortable and keep the same 0.5 mm difference between the cob hook and the husk hook. Your corn will come out larger, which is completely fine. Nothing in the pattern depends on the finished size.
What is a magic ring and can I skip it?
It is an adjustable starting loop that closes to nothing, which is how amigurumi avoids a hole at the tip. You can substitute chaining 2 and working 8 sc into the second chain, but you will have a small gap at the point of the cob. For a piece where the tip is this visible, the magic ring is worth learning.
My leaves look flat and will not curve. What went wrong?
Two likely causes. Either you used the smaller hook for the leaves instead of the 2.5 mm, or you sewed too much of the leaf edge down. The curve comes from the taller hdc stitches gathering at one end, and it only shows if the upper part of the leaf is left free.
Do I need safety eyes, or can I embroider the face?
Embroidery works fine and is the safer choice if the corn is going to a small child. Use the same black floss you use for the mouth and work two small solid ovals in the same positions. The look is softer but just as good.
Take it one round at a time and you will have a finished corn on your keys before you know it.