
Crochet Amigurumi Dobby Free Pattern For A Tiny House Elf Doll
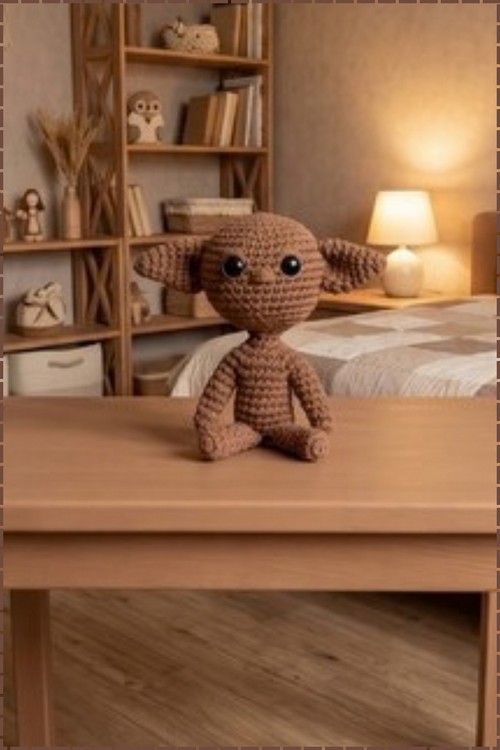
Wizard themed bookshelves and movie night corners suit a crochet Dobby inspired amigurumi in warm brown cotton that stands on its own two feet. Fantasy fans get a tiny house elf character doll with glossy black eyes and wide pointed ears that fits neatly in a Christmas stocking.
Hold him in two hands and the crochet Dobby inspired amigurumi looks ready to speak first. Wide ears, round head, thin limbs that flop when you move him. He carries that loyal and slightly anxious air fans know well. Work up this Dobby inspired amigurumi and you get real character in one small toy.
Crochet Dobby Inspired Amigurumi
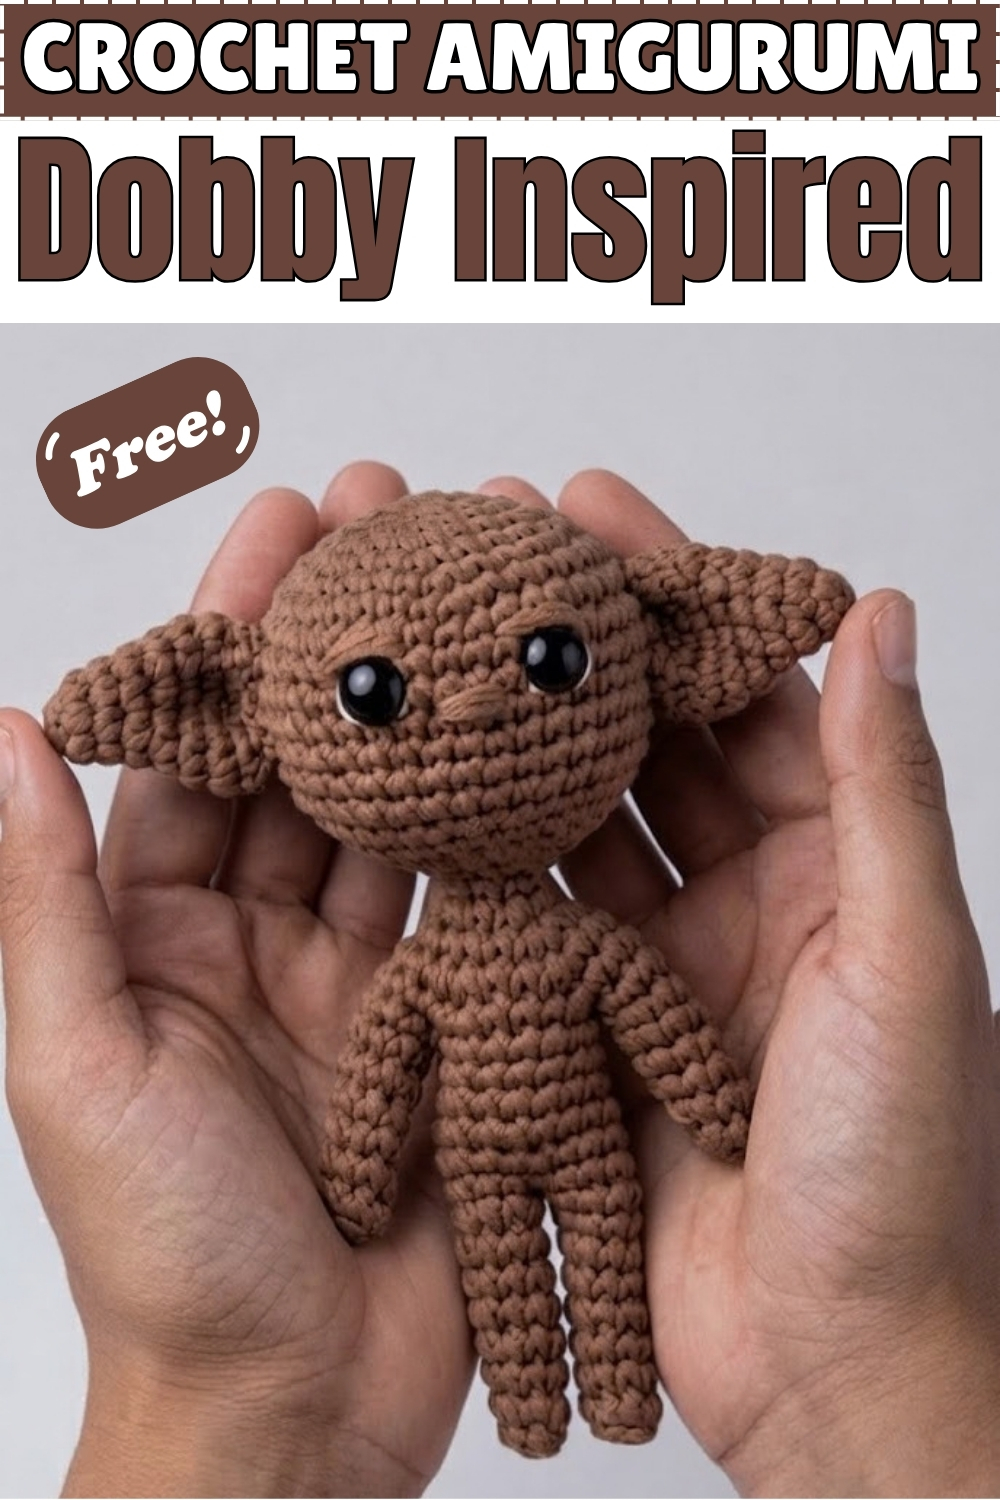
Everything on this little figure grows from one continuous spiral, starting at the top of the head and running straight down into the neck and torso without a single seam. My crochet Dobby inspired amigurumi stands about the length of my palm, worked in a warm brown cotton with two glossy black safety eyes and a pair of long ears that droop sideways like folded leaves. Arms hang loose from open armholes left in one round. Legs split off the torso and finish with a simple gathered toe. Sewing happens only twice, once for each ear.
Materials and Tools
- 100 percent cotton yarn in a warm medium brown, such as Schachenmayr Catania, for the whole doll
- A scrap of cream or white cotton if you want to add the optional half moon highlight above each eye
- 2.5 mm crochet hook
- Two black safety eyes, 8 mm to 10 mm
- Tapestry needle
- Scissors
- Stitch marker, or a short length of contrasting yarn looped into the first stitch of each round
- Toy stuffing (fiberfill)
My version uses one single brown for the head, body, arms, legs and ears, so you only need one full ball plus a small amount for finishing. I skipped the cream eye detail and the embroidered nose entirely, and the face still reads clearly because the eyes sit low and close together.
Difficulty and Time
From my own experience with this one, it sits at an easy to lower intermediate level. You need a magic ring, single crochet, increases and invisible decreases, and you need to be comfortable skipping stitches to form armholes. It took me somewhere around three to four hours spread over an evening, and the ears were the slowest part because they change shape every round.
Beginner Technique Notes
- Work in continuous rounds, never joining or chaining up, and move your stitch marker into the first stitch of each new round so the spiral stays countable.
- Use US crochet terminology throughout.
- Single crochet (sc) means one stitch worked into one stitch.
- Increase (inc) means two single crochet worked into the same stitch.
- Invisible decrease (dec) means picking up the front loops of the next two stitches and working them off together, which keeps the fabric smooth instead of leaving a bump.
- Magic ring (MR) means starting with an adjustable loop you pull closed, so no hole appears at the top of the head.
- Keep your tension tight enough that no stuffing shows through. At 2.5 mm with cotton the fabric should feel firm and slightly stiff.
The Pattern
Head
- Round 1: 6 sc in a magic ring [6]
- Round 2: inc in every stitch around [12]
- Round 3: 1 sc, inc, repeat around [18]
- Round 4: 2 sc, inc, repeat around [24]
- Round 5: 3 sc, inc, repeat around [30]
- Round 6: 4 sc, inc, repeat around [36] and the piece should now sit flat like a small coin before the sides begin to rise
- Rounds 7 to 13: 1 sc in each stitch around [36] and by the end of these seven straight rounds you have a short open cylinder that will become the whole head
- Insert the safety eyes between Round 8 and Round 9, spacing them about 4 to 5 stitches apart, and on my doll they sit low on the face with only a narrow gap between them, which is what gives him that wide startled look
- Secure the backings firmly from the inside before any stuffing goes in, because once the head is closed you cannot reach them again
- Optional: with cream or white yarn and a tapestry needle, stitch a small curved half moon along the upper outer edge of each eye. My finished piece skips this and leaves the eyes plain black
- Optional: with brown yarn, embroider a small horizontal nose between and slightly below the eyes across Rounds 9 and 10, passing over the same two or three stitches four or five times so it stands proud. My version leaves the face bare with no nose at all
- Round 14: 4 sc, dec, repeat around [30]
- Round 15: 3 sc, dec, repeat around [24]
- Round 16: 2 sc, dec, repeat around [18]
- Round 17: 1 sc, dec, repeat around [12] and this is your last easy chance to shape the stuffing, so push it in now
- Stuff the head firmly, working small pieces of fiberfill in at a time and pressing them up into the crown so the top stays round rather than dented
- Round 18: 2 sc, dec, repeat around [9] and the head should now be a firm ball narrowing into a small neck opening
- Do not fasten off. Carry straight on into the neck
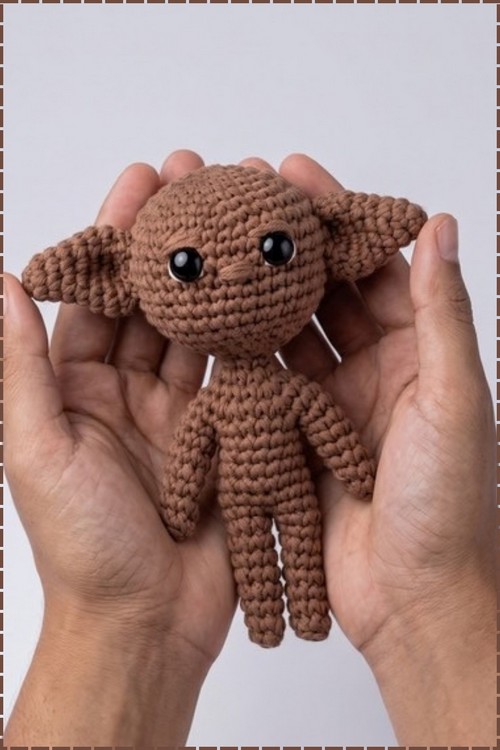
Neck and Body
- Round 19: 1 sc in each stitch around [9] and this single narrow round is the entire neck, so keep the tension tight here or the head will flop
- Round 20: 2 sc, inc, repeat around [12]
- Round 21: 1 sc, inc, repeat around [18]
- Round 22: 2 sc, inc, repeat around [24]
- Round 23: 3 sc, inc, repeat around [30] and the shoulders are now at their widest point
- Round 24: 7 sc, skip the next 8 stitches, 7 sc, skip the last 8 stitches [14 working stitches] and those two skipped groups are the armholes you will come back to later
- Count the skipped groups twice before moving on, because an armhole placed off centre will leave one arm sitting further forward than the other
- Round 25: 6 sc, inc, repeat around [16]
- Rounds 26 to 28: 1 sc in each stitch around [16] and the torso should now look like a slim tube with two open slots at the top, narrower than the head by a good margin, which is exactly the proportion you want
Legs
- Flatten the torso and find the exact middle, then divide the 16 stitches into two groups of 8 so each leg gets the same number
- Rounds 1 to 7 of the first leg: 1 sc in each of the 8 stitches [8] and the leg should come out long and thin, roughly as long as the torso itself, which matches how my doll stands
- Round 8: 2 sc, dec, repeat twice [6]
- Fasten off and leave a long tail
- Stuff the leg lightly, using only small wisps so it stays slim instead of turning into a sausage
- Thread the tail on a tapestry needle, run it through the front loops of the remaining 6 stitches, pull tight to close, and bury the end inside the leg
- Reattach the yarn to the other 8 stitches and repeat Rounds 1 to 8 for the second leg
- Use a leftover tail to close the small gap where the two legs meet, taking two or three stitches across the crotch so the body does not gape open
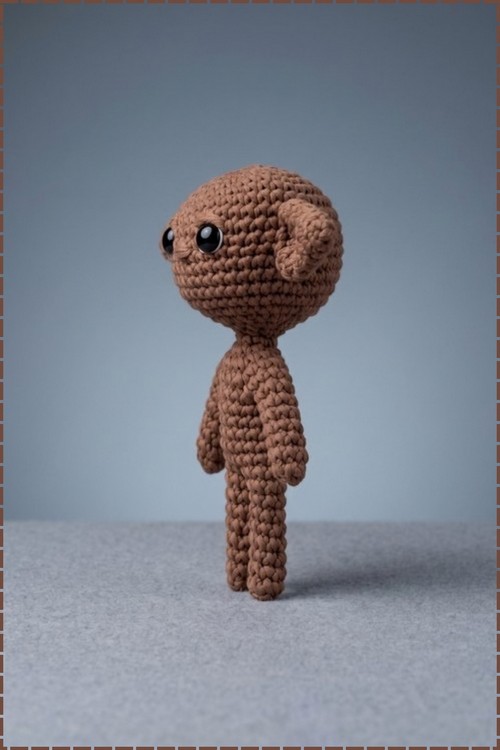
Arms
- Reattach the brown yarn to one of the 8 stitch armholes left unworked in Round 24
- Rounds 1 to 5: 1 sc in each stitch around [8] and the arm should hang naturally against the body rather than sticking out
- Round 6: 2 sc, dec, repeat twice [6]
- Fasten off, thread the tail through the remaining stitches, pull tight to close, and hide the end inside the arm
- Repeat for the second armhole
- Leave both arms unstuffed. My doll has completely empty arms and that is what lets them fall softly along the sides instead of standing away from the torso
Ears (Make 2)
- Round 1: 6 sc in a magic ring [6]
- Round 2: inc in the first stitch, 1 sc in the next 5 stitches [7]
- Round 3: inc in the first stitch, 1 sc in the next 6 stitches [8] and the piece should already be leaning to one side, which is intentional
- Round 4: 3 sc, inc, repeat twice [10]
- Round 5: 4 sc, inc, repeat twice [12]
- Round 6: 3 sc, inc, repeat three times [15]
- Round 7: 4 sc, inc, repeat three times [18] and this is the widest part of the ear
- Round 8: 1 sc, dec, repeat around [12] and the edge should now pull in slightly so the ear ends with a soft rounded rim instead of a raw flare
- Fasten off and leave a very long sewing tail
- Leave the ears completely unstuffed and press them flat between your fingers
- Curve the narrow tip gently as you pin so each ear points outward and slightly down, the way both ears sit on my finished doll
- Sew each ear to the side of the head level with the eyes, attaching along the folded narrow end only and leaving the wide part free so it stands out from the head
- Stitch all the way around the join rather than tacking two or three points, because these ears are large for the head and a light join will let them sag forward
- Optional: wrap the body in a scrap of pale fabric knotted at one shoulder to make a pillowcase tunic. My doll is finished plain with no clothing
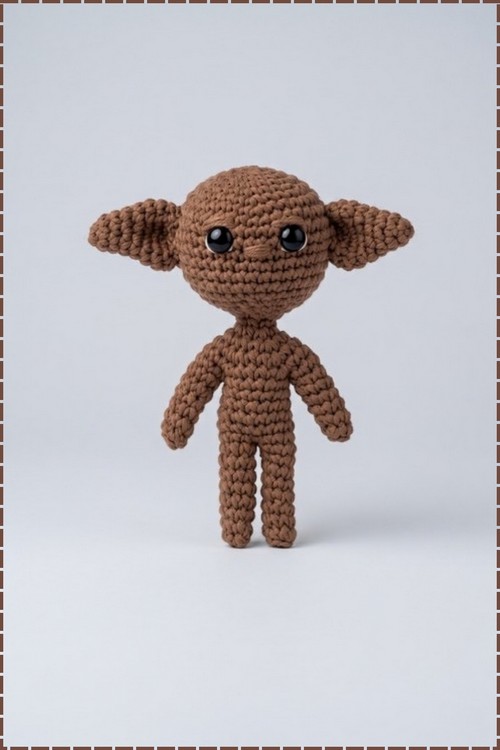
Tips and Troubleshooting
- Mark your first stitch every single round. This pattern has long stretches of plain single crochet where a lost round is almost impossible to spot until the shaping goes wrong.
- Stuff the head in small pinches rather than one lump. Cotton at 2.5 mm shows every bump, and one big piece of fiberfill will push the crown out of round.
- Keep the neck round tight. Nine stitches is a narrow neck holding a heavy head, so any looseness there shows up as a wobble later.
- Count your armhole skips twice before working Round 25. Fixing a misplaced armhole means undoing the whole torso.
- Pin both ears before sewing either one. Hold the doll at arm's length and check them from the front, because ears at slightly different heights are very visible on a face this small.
- Leave the arms hollow. Stuffed arms stick out sideways and lose the loose hanging shape.
- Bury every tail deep inside the body before trimming. Cotton ends work their way loose more readily than acrylic.
Yarn Substitution
Any smooth worsted or sport weight cotton in a warm medium brown will work here. A soft acrylic gives a slightly fluffier finish and a little more stretch, which makes stuffing easier but also makes the neck more likely to lean. If you swap to a thicker yarn, move up a hook size and expect a noticeably bigger doll, since the stitch counts stay the same. Avoid anything fuzzy or halo heavy, because the ear shaping and the narrow neck both depend on seeing your stitches clearly.
Customization Ideas
- Change the brown to a paler sand, grey or green for a different creature entirely.
- Add the cream half moon highlights above the eyes for a rounder, more surprised expression.
- Embroider a small nose and a thin mouth if you want more face detail than my plain version.
- Cut a rectangle of old pillowcase fabric, snip holes for the head and arms, and tie it at the waist for the classic tunic.
- Make the ears one round shorter in the straight sections if you prefer them smaller and neater.
- Attach a keyring loop through the top of the head to turn him into a bag charm.
FAQ
How big does this doll finish? Mine sits comfortably in one palm, roughly the length of my hand from wrist to fingertip, worked in cotton at 2.5 mm. Your size will shift with your tension and yarn, so treat that as a guide rather than a measurement.
Why are my ears floppy and falling forward? Almost always the sewing. These ears are wide and unstuffed, so they need a full line of stitches all around the narrow folded end. Tacking them at two points will not hold them upright.
Can I use embroidered eyes instead of safety eyes? Yes. Work two small satin stitch ovals in black between Rounds 8 and 9, keeping them the same distance apart. This is the better choice for a doll going to a baby or toddler.
My head is wobbling on the neck. What went wrong? The neck round is only 9 stitches and it does the whole job of holding the head up. If it worked up loose, the head will lean. Understuffing the lower head also causes this, so pack that area firmly before closing Round 18.
Do I have to stuff the legs? Only lightly. My legs have a small amount of fiberfill just in the upper half so they hold their shape without going stiff. Fully stuffed legs look chunky against such a slim torso.