
Crochet Dragon Amigurumi Free Pattern With Cream Wings And Felt Belly
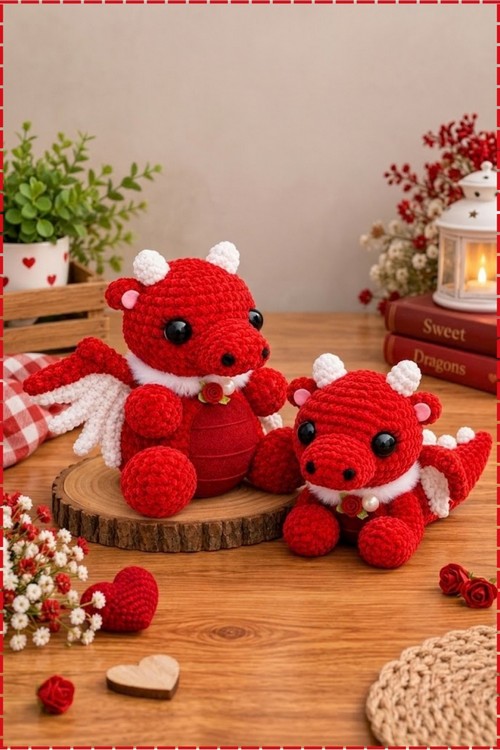
Winter movie nights get cosier with a crochet dragon amigurumi in plush red velvet yarn, topped with cream horns and a fluffy white collar. Fantasy loving kids can cuddle a red velvet crochet dragon plush with white feathered wings and a smooth felt belly patch.
Hold it up and it stares right back, which is half the fun of this crochet dragon amigurumi. The horns tilt forward like it is ready to argue with you. Wings stay small, the belly stays round, and the whole crochet dragon behaves more clingy than fearsome. Dragons like this get named fast.
Crochet Dragon Amigurumi
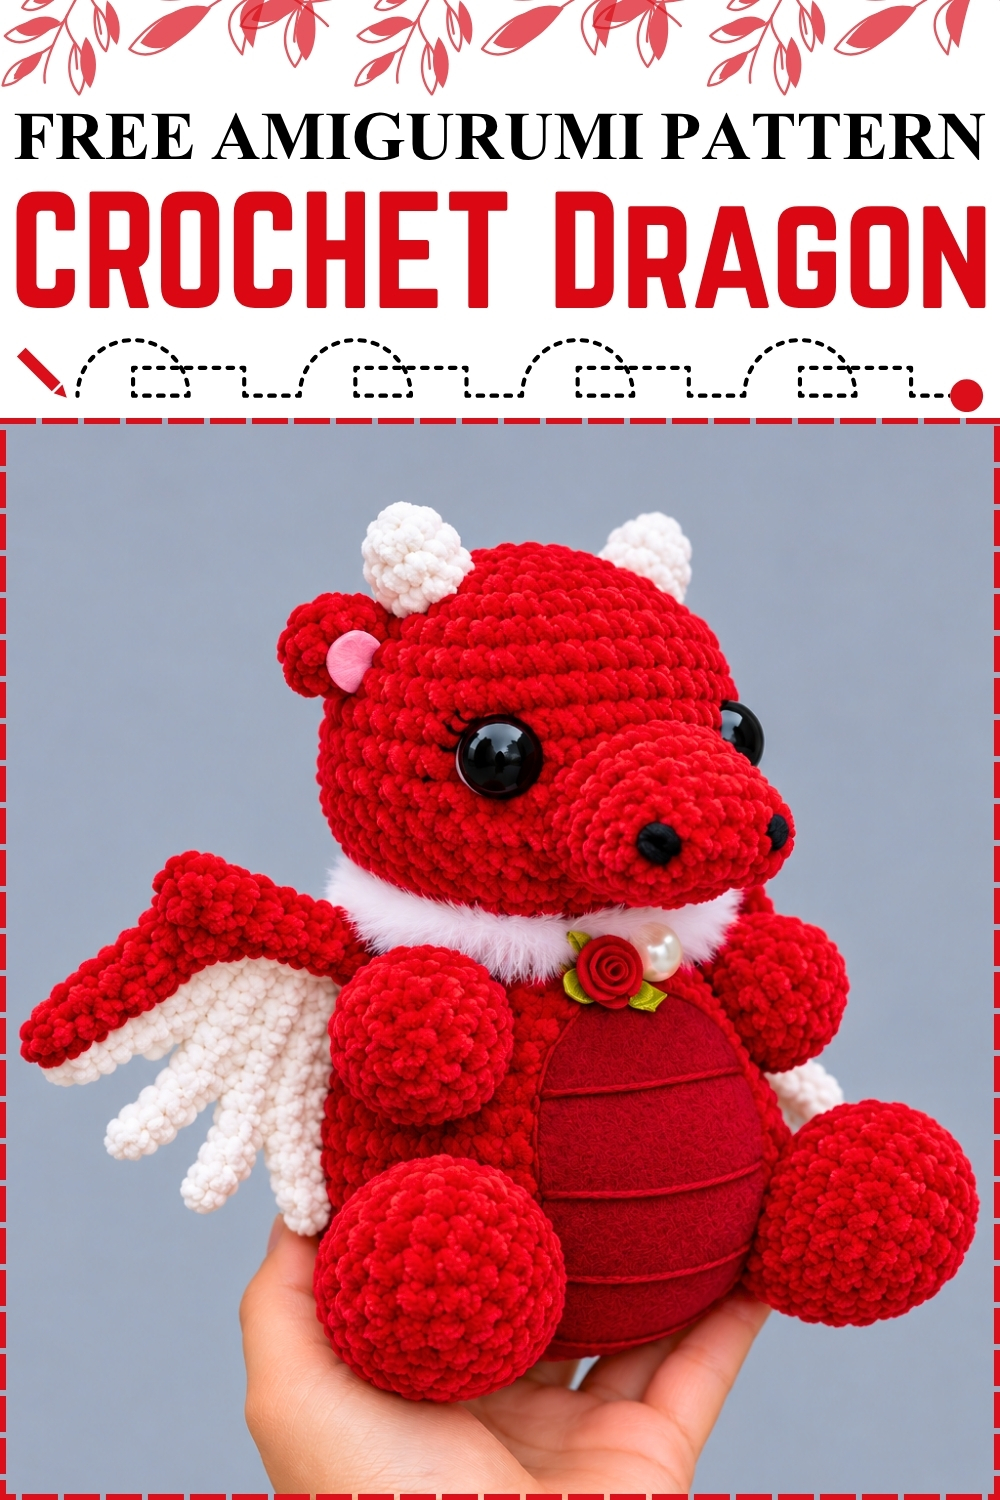
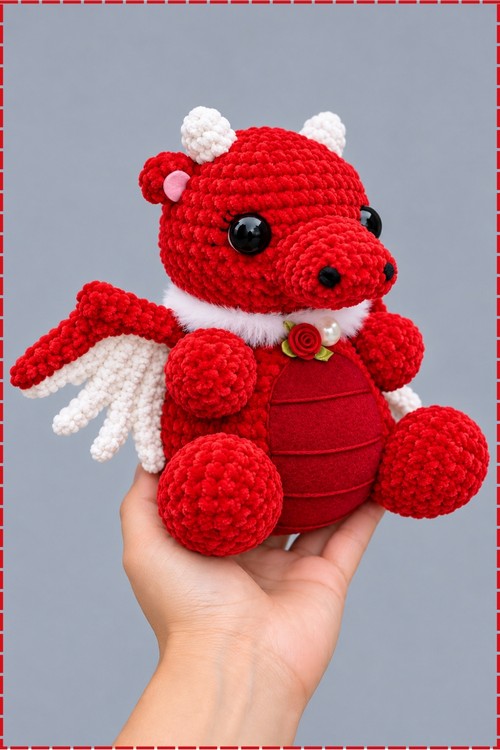
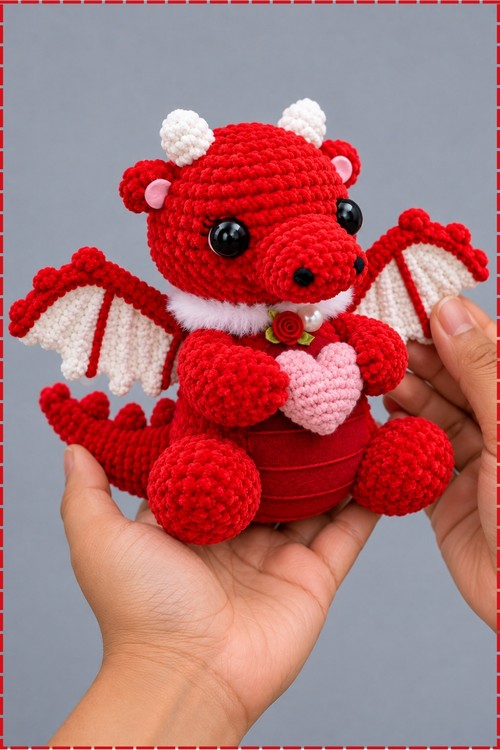
Rounds of single crochet build each piece of this crochet dragon amigurumi separately, so the head, body, tail, wings, and limbs only come together at the sewing stage. I worked mine in bright red velvet yarn with cream horns and cream feathered wings. My version swaps the crocheted belly for a soft red felt panel scored with curved lines, which gave the whole front a smooth dragon plate look. Safety eyes sit low and wide on the cheeks. Fluffy white trim hides the neck seam completely. Finishing touches include one tiny rose, a single pearl bead, and a small heart beside the ear.
Materials And Tools
- Red velvet or chenille yarn for the head, body, nose, tail, arms, feet, and outer wings
- Cream or off white yarn for the horns and the inner feathered wing pieces
- White fluffy or faux fur yarn for the neck trim
- Black safety eyes, around 14 mm, for the wide spaced eyes
- One small black safety nose or a black bead for the snout tip
- Crochet hook sized one step below your yarn band suggestion so the stuffing never shows
- A smaller spare hook for pulling yarn through tight velvet stitches
- Polyester fiberfill
- Tapestry needle with an eye large enough for velvet yarn
- Red felt for the belly plate, plus a small pink felt heart
- One small red ribbon rose and one pearl bead for the chest detail
- Stitch markers
- Optional wooden skewers if you want stiffer wings
Difficulty And Time
In my experience this sits at an easy to intermediate level. The stitches themselves stay simple, single crochet with increases and decreases, but velvet yarn hides stitch definition and the assembly takes patience. Working at a relaxed pace I would expect most people to spend somewhere around eight to twelve hours spread over a few sittings, with a good chunk of that going into sewing on the limbs, wings, and head.
Beginner Technique Notes
- Magic ring means wrapping the yarn into an adjustable loop, working stitches into it, then pulling the tail to close the hole.
- Single crochet, written as sc, is the short stitch that forms the whole body of this toy.
- Increase, written as inc, means two single crochet worked into the same stitch.
- Decrease, written as dec, means joining two stitches into one, and invisible decrease keeps velvet looking smoothest.
- Back loops only, written as BLO, means working into the back strand of the stitch, which creates a visible ridge.
- Work in continuous rounds without joining, and move your stitch marker up every single round. Velvet yarn makes lost rounds very hard to recount.
The Pattern
The Nose
- Make a slip knot and chain 7 in red velvet yarn.
- Round 2: skip 1 stitch, work an increase, then 4 single crochet, then an increase in the final stitch before turning. Turn the work to the underside of the foundation chain and work an increase, 4 single crochet, and an increase. You now have a flat oval that will become the muzzle, so keep the ends rounded rather than pointed.
- Round 3: single crochet all the way around [16]. Place a stitch marker in the final stitch of this round so you do not lose your place in the velvet.
- Round 4: work 2 single crochet, then an increase in each of the next 4 stitches, then 5 single crochet, 1 decrease, and finish with 3 single crochet [19]. The side with the four increases becomes the top of the snout, which is why the shape ends up slightly lopsided on purpose.
- Rounds 5 to 6: single crochet all the way around [19].
- Slip stitch, cut the yarn leaving a long sewing tail, and pull through to fasten off. Shape the nose gently with your fingers and add only a small pinch of stuffing, since a flat muzzle sits better against the head than a puffy one.
- Fix the small black nose piece or bead at the very front tip of the muzzle before sewing it on, because reaching inside later is awkward.
The Head
- Round 1: make a magic ring and work 6 single crochet into it, then close the ring tightly [6].
- Round 2: increase in every stitch [12].
- Round 3: work 1 single crochet, 1 increase, repeat around [18].
- Round 4: work 2 single crochet, 1 increase, repeat around [24].
- Round 5: work 3 single crochet, 1 increase, repeat around [30].
- Round 6: work 5 single crochet, 1 increase, repeat around [36].
- Round 7: work 6 single crochet, 1 increase, repeat around [40]. The piece should still lie as a shallow dome at this point rather than curling into a cup.
- Rounds 8 to 12: single crochet all the way around for 5 rounds [40]. These straight rounds create the tall forehead that gives the dragon its soft rounded face.
- Round 13: work 1 single crochet, 1 increase, repeat around [60]. This sudden jump forms the wide cheeks, so expect the work to flare out dramatically here.
- Round 14: single crochet all the way around [60].
- Round 15: work 1 single crochet, 1 decrease, repeat around [40].
- Insert the black safety eyes between rounds 11 and 12 with roughly 10 stitches between them. On my dragon the eyes sit low and far apart, which is what gives the face its friendly look rather than a fierce one, so check the placement from the front before clicking the backs on.
- Round 16: decrease all the way around [20].
- Begin stuffing firmly now, pushing fiberfill right into the cheek corners in small pieces so the sides stay plump and do not crumple inward.
- Round 17: single crochet all the way around [20].
- Round 18: work 1 single crochet and 1 decrease six times, then finish with 2 single crochet in the last two stitches.
- Final round: decrease all the way around until the opening closes, adding one more round of decreases if a gap remains. Slip stitch, fasten off, and leave a long tail to sew the last gap shut and bury the yarn through the centre of the head.
- Sew the finished nose onto the lower front of the head, centred just below and between the eyes, so the muzzle juts forward slightly rather than lying flat.
The Body
- Round 1: work 6 single crochet in a magic ring [6].
- Round 2: increase in every stitch [12].
- Round 3: work 1 single crochet, 1 increase, repeat around [18].
- Round 4: work 2 single crochet, 1 increase, repeat around [24].
- Round 5: work 3 single crochet, 1 increase, repeat around [30].
- Round 6: work 2 single crochet, 1 increase, 2 single crochet, repeat around [36].
- Round 7: work 5 single crochet, 1 increase, repeat around [42].
- Round 8: work 3 single crochet, 1 increase, 3 single crochet, repeat around [48].
- Round 9: work 7 single crochet, 1 increase, repeat around [54]. This is the widest point and becomes the seat the dragon rests on, so keep your tension even here.
- Round 10: single crochet in the back loops only all the way around [54]. The ridge this leaves marks the base of the body neatly and helps the finished toy sit flat.
- Rounds 11 to 13: single crochet all the way around for 3 rounds [54].
- Round 14: work 7 single crochet, 1 decrease, repeat around [48].
- Rounds 15 to 16: single crochet all the way around for 2 rounds [48].
- Round 17: work 6 single crochet, 1 decrease, repeat around [42].
- Round 18: single crochet all the way around [42].
- Round 19: work 5 single crochet, 1 decrease, repeat around [36].
- Round 20: single crochet all the way around [36].
- Round 21: work 4 single crochet, 1 decrease, repeat around [30].
- Round 22: single crochet all the way around [30].
- Round 23: work 3 single crochet, 1 decrease, repeat around [24].
- Round 24: single crochet all the way around [24]. The body should now look like a wide pear with a narrow neck opening ready for the head.
- Slip stitch, fasten off leaving a very long tail for sewing to the head, and stuff heavily. Pack the base much harder than the top, because a soft bottom makes the whole dragon slump forward once the head goes on.
The Felt Belly Plate
- Cut an oval of red felt sized to cover the front of the body from just under the neck down to the base.
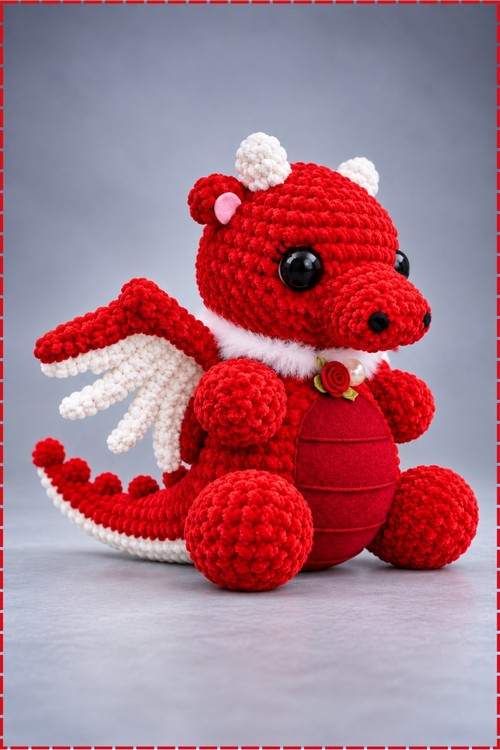
- Score or stitch gentle curved lines across the oval at even spacing to suggest belly plates. I used four lines running side to side, which reads clearly without looking busy.
- Pin the oval centred on the front of the body and sew around the edge with matching red thread using small stitches tucked just under the felt edge.
- Slide a little extra stuffing behind the felt before closing the last section so the plate sits slightly domed instead of flat and wrinkled.
The Tail
- Round 1: work 4 single crochet in a magic ring [4]. Poke the piece right side out after the first few rounds if it curls inward.
- Round 2: single crochet around [4].
- Round 3: work 1 single crochet, 1 increase, repeat twice [6].
- Round 4: single crochet around [6].
- Round 5: work 2 single crochet, 1 increase, repeat twice [8].
- Round 6: single crochet around [8].
- Round 7: work 3 single crochet, 1 increase, repeat twice [10].
- Round 8: single crochet around [10].
- Round 9: work 4 single crochet, 1 increase, repeat twice [12].
- Round 10: single crochet around [12].
- Round 11: work 5 single crochet, 1 increase, repeat twice [14].
- Round 12: single crochet around [14].
- Round 13: work 6 single crochet, 1 increase, repeat twice [16].
- Round 14: single crochet around [16].
- Round 15: work 7 single crochet, 1 increase, repeat twice [18].
- Round 16: single crochet around [18].
- Round 17: work 8 single crochet, 1 increase, repeat twice [20].
- Round 18: single crochet around [20]. The finished piece should be a smooth cone that tapers to a fine tip.
- Slip stitch, fasten off leaving a long tail for sewing, and stuff. Keep the thin tip almost empty so the tail can curve rather than stick out stiffly.
The Horns
- Round 1: work 6 single crochet in a magic ring in cream yarn [6].
- Round 2: single crochet around [6]. Slip stitch and fasten off, leaving a long tail to sew to the head. Make 2.
- Add only a tiny wisp of stuffing so the horns stand up without going bulbous. On my dragon these cream pieces read as short rounded horns sitting high on the top of the head.
The Feet
- Round 1: work 6 single crochet in a magic ring [6].
- Round 2: increase in every stitch [12].
- Round 3: work 1 single crochet, 1 increase, repeat around [18].
- Round 4: single crochet around [18].
- Round 5: single crochet in the back loops only around [18]. This ridge becomes the edge where the top of the foot meets the sole.
- Rounds 6 to 7: single crochet around for 2 rounds [18].
- Round 8: work 10 increases, then 4 decreases. The increases bunch up into the toe end and the decreases pull in the back, so the oval starts to lean.
- Round 9: work 18 single crochet, then 3 decreases at the very end [21].
- Round 10: work 9 decreases, then 3 single crochet, which forms the heel.
- Final round: increase all the way around [24].
- Slip stitch, fasten off leaving a long tail, and stuff heavily. Keep the heel facing downward when you sew so the foot points forward. Make 2.
- My feet sit well forward on the body with the toes visible from the front, which helps the dragon balance on its own.
The Arms
- Round 1: work 6 single crochet in a magic ring [6].
- Round 2: increase in every stitch [12].
- Round 3: work 1 single crochet, 1 increase, repeat around [18].
- Round 4: single crochet around [18].
- Round 5: decrease all the way around [9].
- Slip stitch, fasten off leaving a long tail, and stuff heavily. The arms end up as short round paws rather than long limbs, so overstuff them to keep that ball shape. Make 2.
The Wings
- Make 4 red velvet wing bases, which is 2 per wing.
- Chain 10.
- Crochet back along the chain working 2 single crochet, then chain 10.
- Work 9 single crochet back along the new chain, then 7 single crochet down the first chain.
- Slip stitch to fasten off, leaving a very long tail for sewing around the outer edges. The piece looks like a narrow forked shape at this stage and will not resemble a wing until it is paired up.
- Make 2 cream feathered inner pieces.
- Row 1: chain 11, then work 10 single crochet back along the chain [10].
- Row 2: chain 1 and turn. Work 7 single crochet, chain 4, turn, and in the second stitch work 10 single crochet back along.
- Row 3: chain 1 and turn. Work 6 single crochet, chain 5, turn, and work 10 single crochet back along.
- Row 4: chain 1 and turn. Work 5 single crochet, chain 6, turn, and work 10 single crochet back along. Slip stitch to fasten off. The staggered strands give you the layered feather fan that shows between the red sections.
- Sandwich a cream feathered piece between two red wing bases and sew securely around the outer perimeter, leaving the feather tips free so they splay out behind.
- Insert wooden skewers between the layers before closing if you want the wings to hold a raised position. Mine hold their shape from firm sewing alone.
The Neck Trim
- Cut a length of white fluffy yarn long enough to circle the neck seam with a little overlap.
- Sew it around the join between head and body using matching thread, working small stitches into the base of the fur so they disappear.
- Fluff the fibres out with a needle tip afterwards so the trim looks full and hides the seam completely.
Optional Back Frill
- Chain a multiple of 5 plus 1, long enough to run down the spine from the back of the head.
- Next row: work 1 double crochet, 1 treble crochet, 1 double crochet, then 2 slip stitches, repeating this sequence to the end of the chain. Slip stitch to fasten off. I left this off my dragon, so treat it as an extra if you want a spikier look.
Final Assembly
- Pin the head to the body with long pins or needles and check the angle from the side before you commit, since a head tilted slightly forward looks far friendlier than one sitting straight up.
- Stitch the head on firmly all the way around using the long body tail.
- Sew the tail centrally down the back right at the base so it props the dragon upright.
- Attach the arms high on the front of the body, just under the neck trim, angled slightly outward.
- Attach the feet between body rounds 10 and 15, lined up under the arms with the toes pointing forward.
- Attach the wings just behind the arms and below the head, tilted up and back so the cream feathers fan out.
- Sew the two cream horns onto the top of the head, spaced evenly either side of centre.
- Sew the small pink felt heart onto the side of the head beside one horn.
- Stitch the small red rose and the pearl bead side by side onto the chest where the fluffy trim meets the felt belly plate.
Tips And Troubleshooting
- Count your stitches at the end of every single round. Velvet yarn makes it nearly impossible to recount later, and one missed increase in the head will show as a dent in the cheek.
- Go down a hook size from the yarn band recommendation. Loose stitches on a stuffed toy let white fiberfill grin through the red, which is very noticeable on a dark colour.
- Use invisible decreases wherever the pattern calls for a decrease. Standard decreases leave a bump that catches the light on velvet.
- Stuff in small pinches rather than large handfuls, especially in the head. Big clumps create lumpy flat spots that you cannot smooth out later.
- Pin everything before you sew anything. I pinned the head, wings, and feet all at once and looked at the dragon from the front and both sides before threading a needle.
- Sew the felt belly on before attaching the arms. Reaching around finished limbs with a needle is far harder than it sounds.
- Keep your yarn tails long. Velvet unravels and sheds, so an extra few inches saves you re-threading halfway through a seam.
Yarn Substitution
Velvet yarn gives the plush look you see in my photo, but it is not the easiest to learn on. A soft worsted acrylic works just as well and makes your stitches far easier to see while you count, though the finish will read as flat rather than furry. Chenille is a close cousin of velvet with slightly better stitch definition. If you do use velvet, expect some worming where the yarn twists back on itself, and keep your tension tight to limit it. For the wings, a plain acrylic in cream actually holds the feather shape better than fluffy yarn does.
Customization Ideas
- Swap the red for green, teal, or lavender and keep the cream wings for a classic storybook dragon.
- Embroider belly plates directly onto the body if you would rather skip the felt panel.
- Replace the rose and pearl with a small bow, a tiny bell, or a felt star for a different occasion.
- Add the back frill in a contrasting colour for a spikier dragon.
- Use larger safety eyes placed closer together for a cuter, more babyish face.
- Make the tail shorter by stopping the increases early if you want a stubbier shape.
Frequently Asked Questions
Can a beginner make this crochet dragon amigurumi? Yes, as long as you are comfortable with the magic ring, single crochet, increases, and decreases. Nothing here is harder than that. The challenge is the number of pieces and the sewing, not the stitches themselves. I would suggest making it in regular acrylic first rather than velvet if this is one of your early amigurumi projects.
How big does the finished dragon come out? From my own make, it sits roughly hand sized, around the length of an adult palm plus a little, when worked in velvet yarn with a small hook. Your size will shift with your yarn weight and tension, so treat that as a rough guide rather than a measurement.
Why does my velvet yarn keep twisting and looking bumpy? That is worming, and it happens because velvet has very little twist holding it together. Tighter tension, a smaller hook, and firm stuffing all reduce it. A light steam once the toy is finished also helps the surface settle.
Do I have to use felt for the belly? Not at all. The felt plate is my change and it gives a smooth contrast against the textured body. You can leave the body plain, or embroider curved lines in a lighter red to suggest the same plates with yarn instead.
How do I stop the dragon from tipping over? Three things do the work. Stuff the base of the body much harder than the top, sew the tail right at the back of the base so it acts as a third point of contact, and position the feet forward enough to catch the weight of the head. If it still leans, add a small bag of poly pellets at the very bottom before you close the body.