
Crochet Donkey Amigurumi Free Pattern For Beginners
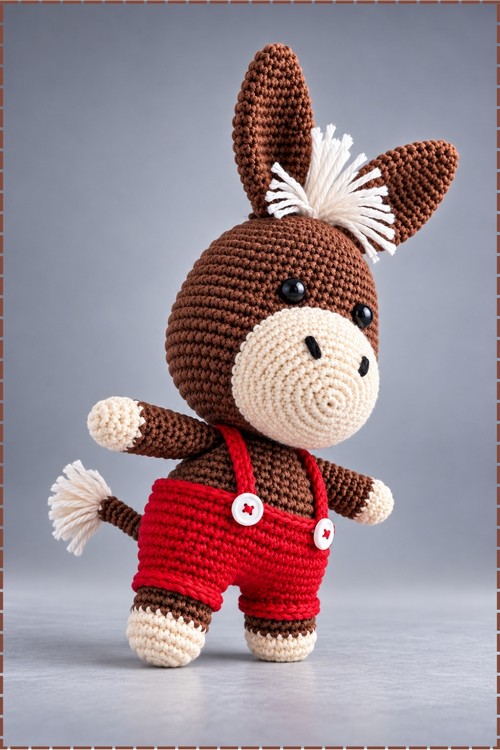
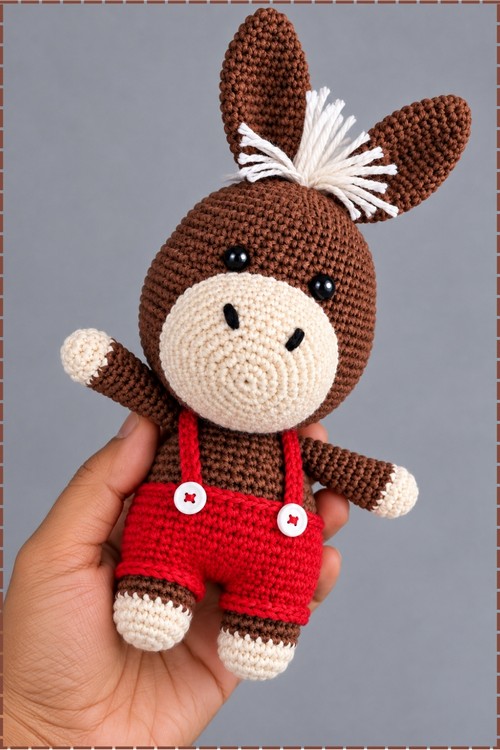
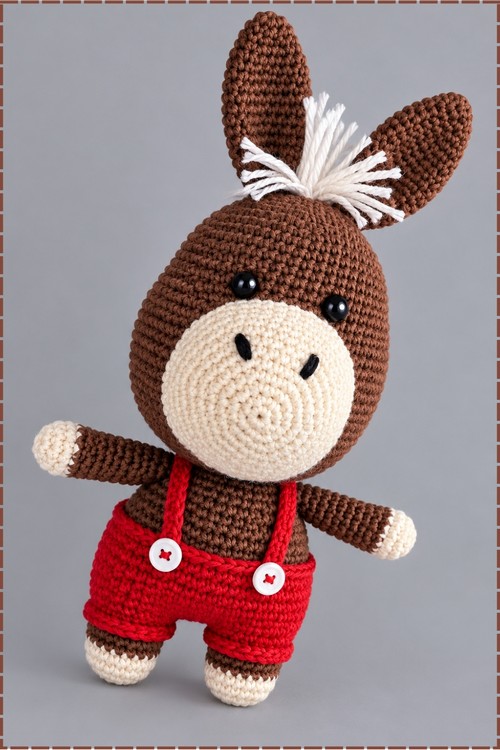
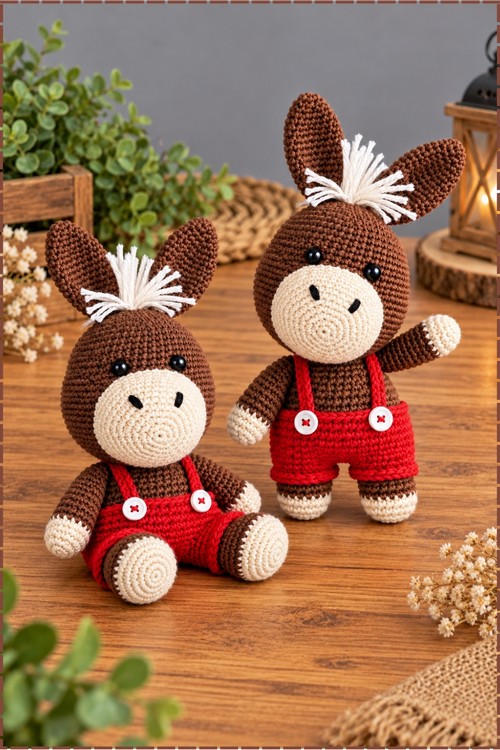
Single crochet carries every round of this crochet donkey amigurumi in 5 ply brown milk cotton on a 2.25 mm hook. Both legs merge into one body, and you sew on the head, arms, ears and tufted mane, with 10 mm safety eyes framing the cream muzzle.
The Crochet Donkey Amigurumi satisfying to build piece by piece. Limbs come together faster than expected. Dressing the Crochet Donkey Amigurumi at the end feels like the reward part. Pinning the ears before sewing is where the whole face suddenly clicks into place.
Crochet Donkey Amigurumi
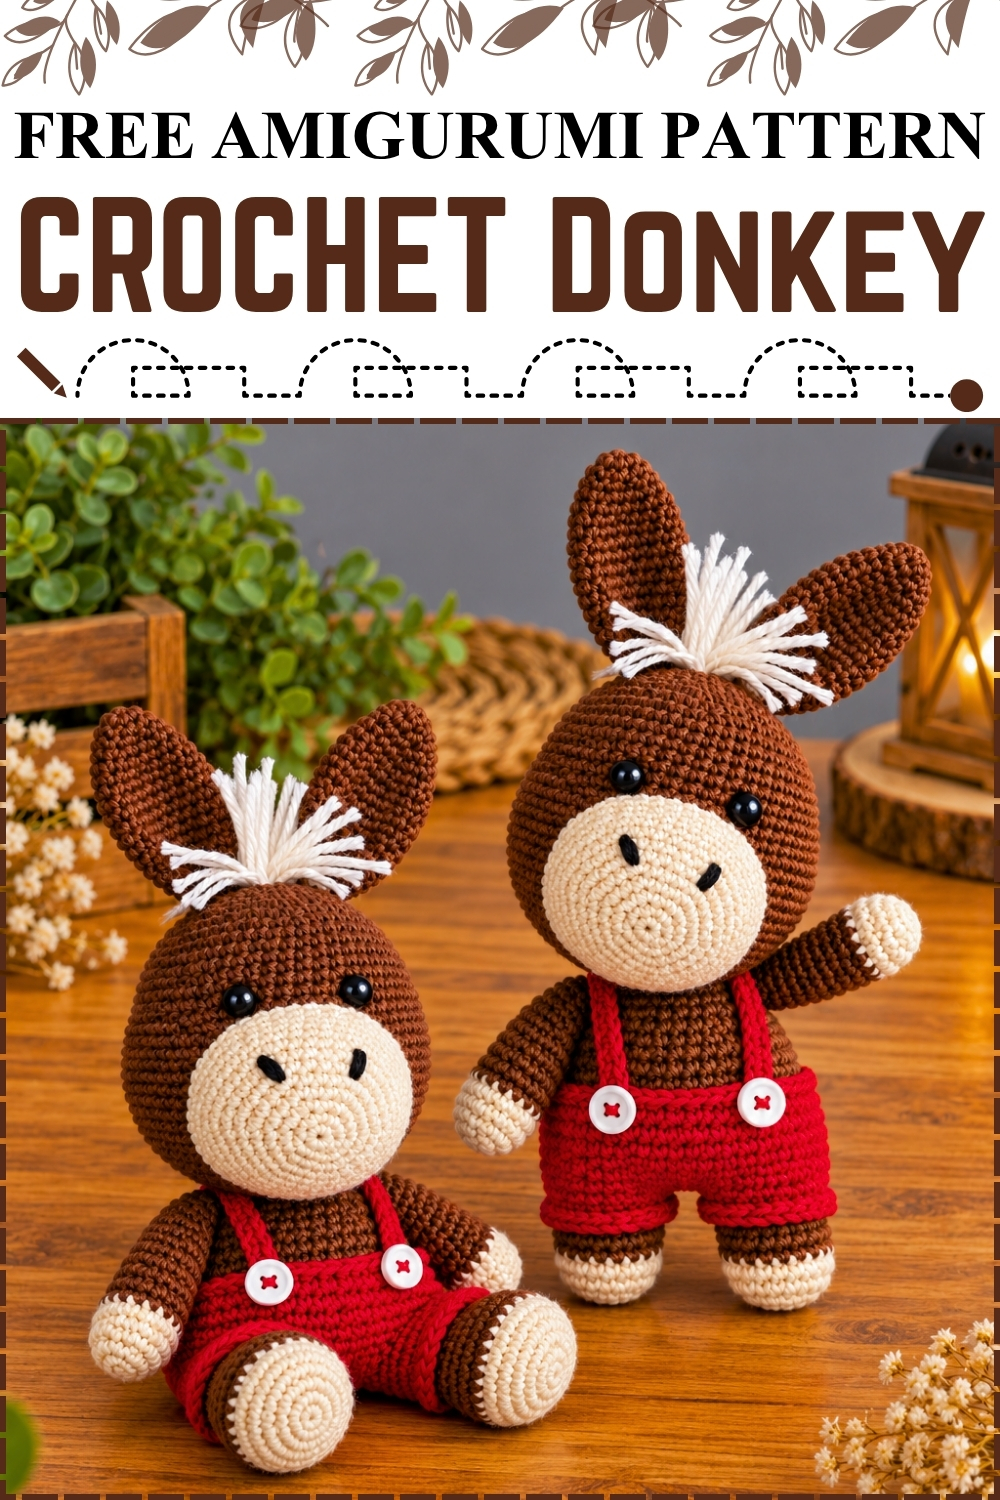
Built from six small pieces that get sewn together at the end, this crochet donkey works up fast because no single part takes longer than a few minutes. Legs join into one body so the lower half needs no seaming, and everything above that gets stitched on by hand. Brown milk cotton gives the clean stitch definition you can see across every round. My version adds red inner ears, red cheek circles, a stitched smile, and a yellow blanket over the back. Beginners can tackle this one safely, since every round uses only single crochet with simple shaping.
Who This Pattern Suits
If you have made a magic ring and a few basic increases before, you are ready for this. Nothing here needs a stitch you have not met already. The only part that looks intimidating is joining the two legs into one body, and that happens in a single round which I have broken down step by step below.
Materials and Tools
- 5 ply milk cotton yarn in medium brown for the head, ears, body, arms, and legs
- Off white or cream yarn for the muzzle and the inner ear borders
- Black yarn for the hooves and the mane
- Red yarn for the inner ears and the cheek circles
- Yellow yarn for the blanket over the back
- Small amount of black yarn or embroidery thread for the smile and nostrils
- 2.25 mm crochet hook, which is a number 3 hook
- Safety eyes, 10 mm
- Fiberfill stuffing
- Tapestry needle and stitch marker
- Scissors, tweezers, and a hot glue gun
- Keychain ring
Difficulty and Time
Easy, with a little patience needed for assembly. In my own experience the crochet itself takes an evening and the sewing takes almost as long again, because placing the face correctly is worth slowing down for. The finished keychain fits in a palm. Both of those are from my piece, so your tension will shift things a little.
Beginner Technique Notes
- Work in continuous spiral rounds. That means you never join at the end of a round and never chain up. You simply keep going into the next stitch, which is why a stitch marker matters so much here.
- Put a stitch marker in the first stitch of every round and move it up as you finish each one. Without it, the rounds blur together and you will lose your count somewhere in the straight sections.
- A magic ring is an adjustable loop you crochet into and then pull tight. If you cannot manage one yet, chain 2 and work your first round stitches into the second chain from the hook, then tighten the gap with your starting tail.
- An increase means working 2 single crochet into the same stitch. It makes the piece grow wider, which is why increases cluster near the start of every round.
- An invisible decrease means inserting your hook under the front loops only of the next 2 stitches, then pulling through all loops at once. It closes a gap without leaving the bump that a standard decrease makes.
- Back loop only means working into the back strand of the stitch instead of both strands. It leaves a visible ridge on the outside, which is exactly what you want where the black hoof meets the brown leg.
- Front loop only appears at the very end of the head, where you thread the tail through the front loops of the last 6 stitches to cinch the hole closed.
- Count your stitches at the end of every round. Catching an extra stitch in Round 4 takes seconds, and catching it in Round 13 means pulling out nine rounds.
- Keep your tension tight enough that stuffing does not show through. If you can see white fibre between stitches, drop half a hook size and start again.
The Pattern
Muzzle, in Cream
- Round 1: Make a magic ring and work 6 single crochet into it. (6)
- Round 2: Work 1 increase in each stitch around. (12)
- Round 3: Work 1 single crochet, then 1 increase, and repeat that sequence 6 times around. (18)
- Rounds 4 to 5: Work 1 single crochet in each stitch around for both rounds. The muzzle is now a shallow cup with straight sides, which is what lets it sit proud of the face once stuffed. (18)
- Fasten off leaving a long tail for sewing to the head later. Do not weave this tail in, since you need its full length.
Head, in Brown
- Round 1: Make a magic ring and work 6 single crochet into it. (6)
- Round 2: Work 1 increase in each stitch around. (12)
- Round 3: Work 1 single crochet, then 1 increase, and repeat that sequence 6 times around. (18)
- Round 4: Work 2 single crochet, then 1 increase, and repeat that sequence 6 times around. (24)
- Round 5: Work 3 single crochet, then 1 increase, and repeat that sequence 6 times around. (30)
- Round 6: Work 4 single crochet, then 1 increase, and repeat that sequence 6 times around. The head should lie flat as a disc at this stage, not dome yet. (36)
- Rounds 7 to 13: Work 1 single crochet in each stitch around for all seven rounds. These straight rounds build the height of the head, and the piece will curl into a cup shape as you go. (36)
- Round 14: Work 4 single crochet, then 1 decrease, and repeat that sequence 6 times around. (30)
- Insert the safety eyes between Rounds 10 and 11, spaced roughly 7 to 8 stitches apart, and push the washers on from inside. Mine sit high on the head with the muzzle filling the space below, and once those washers click on they do not come off, so look at the spacing from a distance first.
- Round 15: Work 3 single crochet, then 1 decrease, and repeat that sequence 6 times around. (24)
- Stuff the head firmly now, while the opening is still wide enough to reach into. A soft head tips forward once the keyring takes the weight.
- Round 16: Work 2 single crochet, then 1 decrease, and repeat that sequence 6 times around. (18)
- Round 17: Work 1 single crochet, then 1 decrease, and repeat that sequence 6 times around. (12)
- Round 18: Work 6 decreases around. (6)
- Fasten off, thread the tail through the front loops of the remaining 6 stitches, pull tight to close the hole, and hide the end inside the head.
Ears, Make 2 in Brown
- Round 1: Make a magic ring and work 4 single crochet into it. (4)
- Round 2: Work 1 single crochet, then 1 increase, and repeat that sequence 2 times around. (6)
- Round 3: Work 1 single crochet, then 1 increase, and repeat that sequence 3 times around. (9)
- Round 4: Work 2 single crochet, then 1 increase, and repeat that sequence 3 times around. (12)
- Rounds 5 to 8: Work 1 single crochet in each stitch around for all four rounds. (12)
- Round 9: Work 2 single crochet, then 1 decrease, and repeat that sequence 3 times around. (9)
- Pinch the opening flat and single crochet across the top edge to close it, or simply leave it flat, then fasten off leaving a long tail for sewing. Do not stuff the ears. Flat ears are what gives this donkey its wide floppy look rather than two stiff horns.
- Add the inner ear detail with surface stitching. Work a cream outline in an oval inside the flattened ear, then fill the centre with red. Keep the oval short of the ear edge all the way round so the brown shows as a border. Mine have a cream ring with a solid red centre, which is a change from the plain pink inner the original pattern suggests.
Arms, Make 2, Black Hoof into Brown
- Round 1 in black: Make a magic ring and work 6 single crochet into it. (6)
- Round 2 in black: Work 1 single crochet, then 1 increase, and repeat that sequence 3 times around. (9)
- Round 3 in black: Working in back loops only, work 1 single crochet in each stitch around. The back loop ridge here is what makes the hoof read as a separate shoe rather than a smudge of colour. (9)
- Round 4, switching to brown: Work 1 single crochet in each stitch around. Carry the colour change at the start of the round so the join sits at the back of the arm. (9)
- Rounds 5 to 8: Work 1 single crochet in each stitch around for all four rounds. (9)
- Stuff the lower hoof lightly, leaving the upper arm empty so it bends against the body.
- Pinch the top flat and single crochet across to close, then fasten off with a tail for sewing.
Legs and Body, Black Hooves into Brown
- Leg 1, Round 1 in black: Make a magic ring and work 6 single crochet into it. (6)
- Round 2 in black: Work 1 increase in each stitch around. (12)
- Round 3 in black: Working in back loops only, work 1 single crochet in each stitch around. (12)
- Round 4, switching to brown: Work 1 single crochet in each stitch around. (12)
- Rounds 5 to 6: Work 1 single crochet in each stitch around for both rounds. (12)
- Fasten off Leg 1 and set it aside.
- Work Leg 2 exactly the same way through Round 6, but do not cut the yarn. Chain 2, then join to Leg 1 with a single crochet to begin the body.
- Round 7: Work 12 single crochet around Leg 1, then 2 single crochet along the chain 2, then 12 single crochet around Leg 2, then 2 single crochet along the opposite side of the chain 2. Check before you start that both hooves point the same direction, because a twisted leg cannot be fixed once the body grows above it. (28)
- Rounds 8 to 11: Work 1 single crochet in each stitch around for all four rounds. The gap between the legs closes up on its own as these rounds build. (28)
- Round 12: Work 5 single crochet, then 1 decrease, and repeat that sequence 4 times around. (24)
- Round 13: Work 1 single crochet in each stitch around. (24)
- Round 14: Work 2 single crochet, then 1 decrease, and repeat that sequence 6 times around. (18)
- Round 15: Work 1 single crochet in each stitch around. (18)
- Round 16: Work 1 single crochet, then 1 decrease, and repeat that sequence 6 times around. (12)
- Stuff the body firmly, pushing stuffing down into both legs with the blunt end of your hook so the donkey stands rather than sags.
- Fasten off leaving a long tail for attaching the head.
Blanket, in Yellow
- The original pattern has no blanket, so this part uses general measurements rather than counts.
- Chain until the strip is as long as you want the blanket to lie across the back, then work rows of single crochet back and forth until it is as wide as you like.
- Fasten off leaving a long tail. On mine it sits as a small yellow panel draped over one side of the back behind the arm, so keep it narrow enough that it does not swallow the body.
- Lay it in place and pin before sewing, then stitch it down along the top edge only so the lower edge hangs free.
Mane and Tail
- For the mane, cut short strands of black yarn, fold each one in half, and pull the folded loop through a stitch at the top of the head with your hook, then pass the ends through the loop and tighten. Work a row of these from between the ears back toward the neck.
- Trim the mane with scissors once it is all attached. Mine stands upright in a tall spiky tuft rather than lying flat, so cut it longer than you think and shape it gradually.
- For the tail, chain 6 in brown, fasten off, and add a small tuft of black yarn at the end, then sew it to the back of the body. My photo shows the donkey from the front so no tail is visible, which means you can treat this part as optional.
Assembly and Face
- Stuff the muzzle lightly and sew it to the lower front of the head between Rounds 10 and 15, centred directly beneath the eyes. Add the last of the stuffing just before you close the final few stitches.
- Embroider the smile in black across the lower muzzle as one long curved line with a small upward hook at each end.
- Embroider two short slanted nostril lines in black above the smile, angled inward toward each other.
- Add the cheeks as solid red circles, one on each side of the muzzle, roughly level with the nostrils. Work them as tight surface stitches packed closely together so no cream shows through.
- Fold the base of each ear slightly to give it a curve, then sew the ears to the top sides of the head around Rounds 4 and 5. Mine angle outward and slightly downward, which is what makes them look floppy rather than alert.
- Sew the body to the bottom of the head, stitching all the way around the join twice so the head stays upright under the weight of the keyring.
- Sew the arms to the sides of the body just under the neckline. One of mine is angled upward as though waving, which you get simply by stitching the top edge at a tilt.
- Attach the keychain ring at the top of the head, anchoring it through the base of the mane so it disappears into the black strands.
- Apply a little blush to the cheeks with tweezers and a brush if you want extra colour, though my red circles already do that job.
Tips and Troubleshooting
- Sew the eyes in before anything else gets attached. Eye spacing sets the entire expression, and every other feature is positioned relative to them.
- Pin all the parts on before stitching a single one down. Looking at the whole face at once tells you far more than checking each piece alone.
- Stuff the head and body firmly and evenly. Loose stuffing is the most common reason a small amigurumi looks saggy in photos.
- Keep your embroidery stitches shallow, catching only the surface of the fabric so the yarn does not pull the muzzle out of shape.
- Work the surface detail on the ears while they are flat on a table, not held in your hand. Holding them distorts the oval.
- Hide every yarn end inside a stuffed part rather than weaving along the surface, since cotton ends work their way out with handling.
- Take a photo on your phone partway through assembly. Mistakes in placement jump out on a screen that you cannot see in person.
Yarn Substitution
Milk cotton gives the crisp round stitches and the flat colour blocks you see in my photos, and it holds the small shapes well at this hook size. Any smooth cotton or cotton blend in a similar weight works with the same hook and the same counts. Acrylic is softer and more forgiving on the hands, though the stitch definition is slightly less sharp. Avoid fuzzy yarns entirely, since the embroidered smile, the nostrils, and the inner ear ovals all disappear into a halo. If you move to a thicker yarn with a larger hook, every count still works and you simply get a larger donkey, which stops being keychain sized.
Customization Ideas
Change the body colour and you have a whole herd. Grey reads as a traditional donkey, cream looks like a pony, and dark brown suits a mule. The inner ears can be pink, red, or plain cream depending on how bold you want the face. Swapping the yellow blanket for a tiny scarf or a saddle in another colour changes the character completely. Leaving the keyring off turns the same piece into a small shelf figure or a car mirror hanger. You can also skip the blanket entirely for a plainer farm animal look, or add a tiny crochet flower behind one ear.
Frequently Asked Questions
What is a magic ring and do I have to use one? It is an adjustable loop you work your first round into, then pull closed so no hole remains. If it feels awkward, chain 2 instead and work the first round into the second chain from the hook, then tighten the centre with your starting tail. Both give the same stitch count.
How do I keep track of my rounds? Place a stitch marker in the first stitch of each round and move it up every time you come back around. A scrap of contrasting yarn works just as well as a plastic marker. Write each round number down as you finish it if you tend to lose your place.
My stuffing shows through the stitches. What went wrong? Your tension is too loose for the hook size. Drop half a hook size and work the piece again, keeping each loop snug as you pull it through. Darker yarns hide stuffing better than light ones while you are still finding your tension.
Can I use embroidered eyes instead of safety eyes? Yes, and that is the better choice if this is going to a small child. Embroider two filled black ovals in the same position between Rounds 10 and 11, keeping them the same distance apart as the safety eyes would have been.
Why does my donkey's head lean forward? Either the head is understuffed or the neck join was sewn on one side only. Stuff the head firm enough that it holds its shape when squeezed, and stitch all the way around the join twice before fastening off.