
Crochet Dustin Doll Amigurumi Free Pattern With Curly Hair and Pink Cap
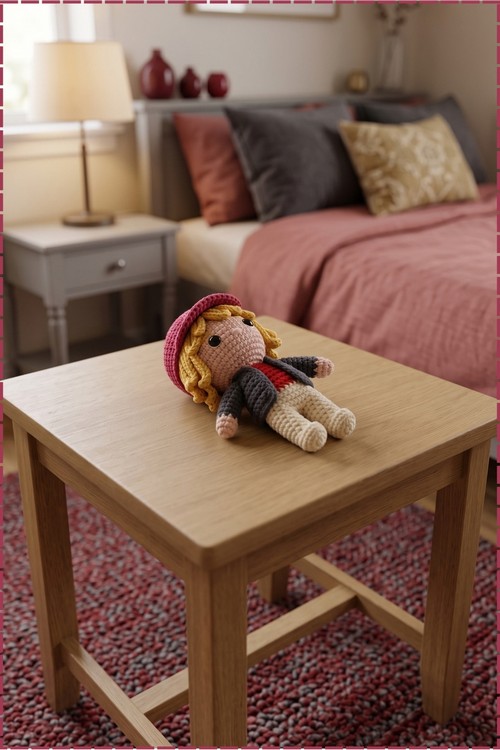
Swap the grey jacket on and off this crochet Dustin doll amigurumi, since the outfit layers over a red shirt instead of being stitched down. Golden curly hair, a solid pink cap and safety eyes finish a figure whose legs join straight into the body.
Layered jacket and curled hair make the Crochet Dustin Doll Amigurumi suited to anyone building character dolls rather than animals. Teen crocheters recognise the look straight away. Makers who enjoy dressing figures get the most from the Crochet Dustin Doll Amigurumi, since the clothes come off and swap out.
Crochet Dustin Doll Amigurumi
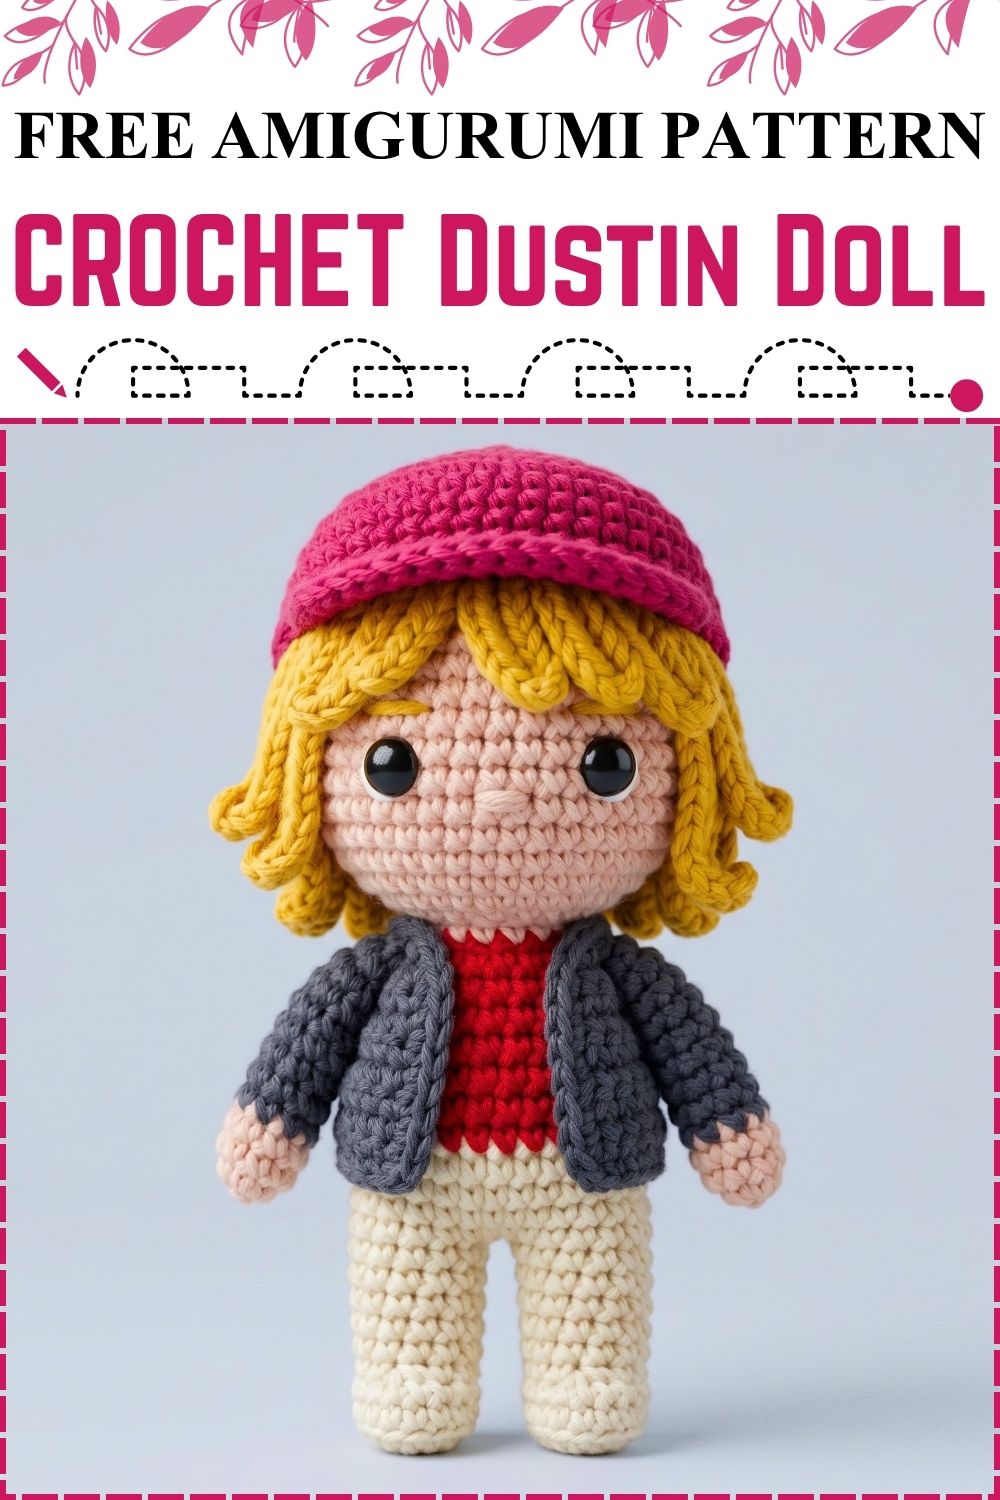
Legs join directly into the body so the lower half grows in one continuous piece, which keeps the seam count down and the proportions clean. Colour changes handle the outfit, with cream trousers giving way to a red shirt, then skin tone climbing through the neck into the head. My version changes several colours from the original: pale pink skin, cream legs, a red shirt, a grey jacket, golden yellow curly hair, and a solid pink cap with no visor. The face is plain, with just safety eyes and a subtle nose. Assembly is the longest part by far.
Materials and Tools
- Fine cotton yarn or 4 ply acrylic in pale pink for the head, face, neck, and arms
- Cream yarn for the legs
- Red yarn for the shirt
- Grey yarn for the jacket
- Golden yellow yarn for the curly hair
- Bright pink yarn for the cap, worked solid rather than in sections
- Small amount of brown yarn for the eyebrows
- Safety eyes in black, sized to suit your yarn weight
- Fiberfill stuffing
- Tapestry needle, stitch marker, scissors
Difficulty and Time
Intermediate. The body and head use only single crochet with straightforward increases and decreases. The jacket works flat in rows, and the hair is a chained curl strip. Assembly is what takes the longest, since the hair, cap, and jacket all need careful positioning against each other. Based on my own run, expect two evenings: one for the crochet and one for putting it together and finishing the face.
The Pattern
Arms, Make 2
- Round 1 in pale pink: Work 6 single crochet into a magic ring. (6)
- Round 2: Work 1 single crochet in each stitch around. (6)
- Change to grey on the last stitch to begin the sleeve.
- Rounds 3 to 5: Work 1 single crochet in each stitch around for all three rounds. The arm is a short narrow tube, and the colour break near the wrist is the only detail it needs. (6)
- Flatten the open top of the arm, insert the hook through both layers, and work 3 single crochet across to seal it shut. Sealing flat rather than closing with a decrease is what keeps the arm from bunching at the shoulder when sewn.
- Chain 1, leave a long tail for sewing, and fasten off.
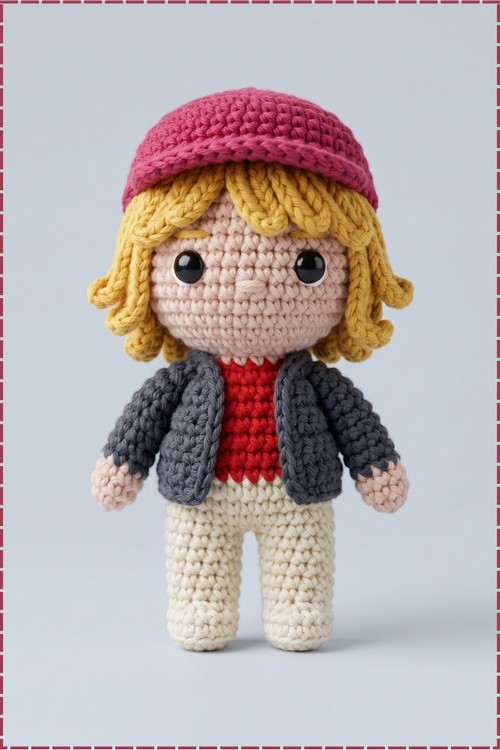
Legs, Body, and Head
- Leg 1, Round 1 in cream: Work 4 single crochet loosely into a magic ring. Working loosely here is important since the increase round doubles the count and tight stitches fight the hook. (4)
- Round 2: Work 1 increase, which is 2 single crochet in the same stitch, in each stitch around. (8)
- Change to cream on the last stitch. My legs are entirely cream, with no separate shoe section, so the colour stays the same and no change round is needed.
- Rounds 3 to 4: Work 1 single crochet in each stitch around for both rounds. (8)
- Fasten off and cut the yarn on Leg 1 only.
- Work Leg 2 the same way through Round 4 but do not cut the yarn. Chain 1.
- Round 5, joining the legs: Join to Leg 1 with a single crochet, work 8 single crochet around Leg 1, work 1 single crochet into the chain space, work 8 single crochet around Leg 2, then work 1 single crochet into the back loop of the chain. Check that both legs face the same way before completing the join. (18 sts total)
- Round 6: Work 4 single crochet, then 1 decrease, and repeat that sequence 3 times around. (15)
- Round 7: Work 1 single crochet in each stitch around. (15)
- Change to red on the last stitch to begin the shirt.
- Rounds 8 to 9: Work 1 single crochet in each stitch around for both rounds. (15)
- Stuff the lower body lightly now. Getting stuffing in later is difficult, so a small amount added at this point is better than too much.
- Round 10: Work 3 single crochet, then 1 decrease, and repeat that sequence 3 times around. (12)
- Rounds 11 to 12: Work 1 single crochet in each stitch around for both rounds. (12)
- Change to pale pink on the last stitch to begin the neck and head.
- Round 13: Work 1 increase in each stitch around. The head balloons outward very quickly from the narrow shirt top. (24)
- Round 14: Work 3 single crochet, then 1 increase, and repeat that sequence 6 times around. (30)
- Rounds 15 to 19: Work 1 single crochet in each stitch around for all five rounds. (30)
- Insert the safety eyes between Rounds 16 and 17, spaced 5 stitches apart. Look at the spacing from the front before securing the backs, since removing them afterwards damages the fabric.
- Round 20: Work 3 single crochet, then 1 decrease, and repeat that sequence 6 times around. (24)
- Round 21: Work 2 single crochet, then 1 decrease, and repeat that sequence 6 times around. (18)
- Stuff the head firmly. Use small pieces of fiberfill and pack them in gradually so the head stays round rather than lopsided.
- Round 22: Work 1 single crochet, then 1 decrease, and repeat that sequence 6 times around. (12)
- Round 23: Work 6 decreases around. (6)
- Fasten off, weave the needle through the front loops only of the remaining 6 stitches, pull tight to close, and hide the end inside the head.
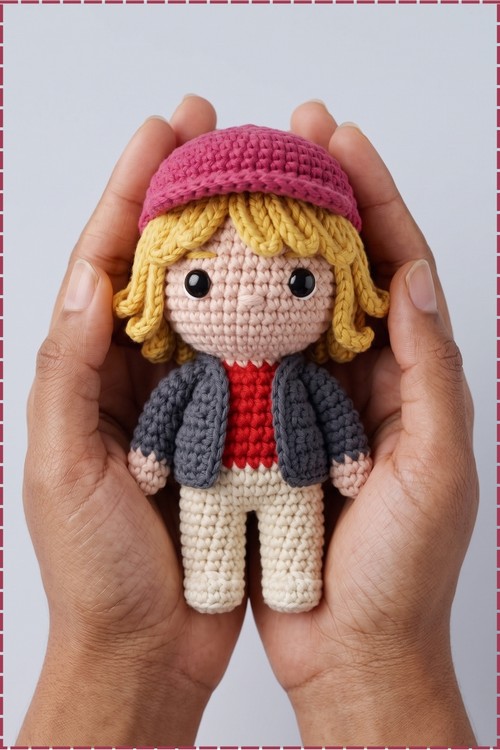
Jacket, in Grey
- Work in flat rows throughout.
- Chain 16.
- Row 1: Starting in the second chain from the hook, work 15 single crochet across. Chain 1 and turn. (15)
- Row 2: Work 7 single crochet, then 1 increase, then 7 single crochet. Chain 1 and turn. (16)
- Row 3: Work 2 single crochet, then 1 increase, then 10 single crochet, then 1 increase, then 2 single crochet. Chain 1 and turn. (18)
- Row 4: Work 3 single crochet, then 1 increase, then 10 single crochet, then 1 increase, then 3 single crochet. The piece is now a wide flat rectangle that wraps around the body without pulling. (20)
- Edging: Work 4 single crochet down the first side edge, 15 single crochet across the top chain edge, then 4 single crochet down the second side edge.
- Slip stitch to the first stitch of the bottom edge to close the edging round, pull tight, and leave a long tail. Weave that tail to the top collar area for sewing onto the body.
Curly Hair Strip, in Golden Yellow
- The hair is worked as one continuous strip of curled chains.
- Long curls for the sides and back, first group of 4: Chain 6, then starting in the third chain from the hook work 4 half double crochet increases, which are 2 half double crochet in the same stitch, and repeat that whole sequence 4 times in total to make 4 strands. Each strand gives 8 half double crochet and curls on its own.
- Short curls for the front bangs, 5 strands: Chain 4, then starting in the third chain from the hook work 2 half double crochet, and repeat that whole sequence 5 times in total to make 5 shorter strands.
- Long curls for the sides and back, second group of 5: Chain 6, then starting in the third chain from the hook work 4 half double crochet increases, and repeat that whole sequence 5 times in total to make 5 more long strands.
- Chain 1, leave a long tail for sewing, and fasten off. The total strip has 4 long curls, 5 short curls, and 5 more long curls in that order, which is what lets it wrap around the head with the bangs landing at the front.
Cap, in Bright Pink
- My cap is worked entirely in bright pink with no colour sections or visor, which differs from the blue and white striped original. Adapt the colour instructions below accordingly.
- Round 1 in pink: Make a magic ring and work 6 single crochet into it. (6)
- Round 2: Work 1 increase in each stitch around. (12)
- Round 3: Work 1 single crochet, then 1 increase, and repeat that sequence 6 times around. (18)
- Round 4: Work 2 single crochet, then 1 increase, and repeat that sequence 6 times around. (24)
- Round 5: Work 3 single crochet, then 1 increase, and repeat that sequence 6 times around. (30)
- Rounds 6 to 7: Work 30 single crochet in each round, keeping the colour consistent throughout. (30)
- Slip stitch to the next stitch, cut the yarn leaving a long tail for sewing, and fasten off.
- My version has no visor, so the cap visor section from the original pattern is optional. If you want to add it, attach yarn to the front loops only of 10 stitches at the front edge, work 2 rows of 10 single crochet, then fasten off.
Assembly and Face
- Wrap the jacket around the neck and collar area with the front opening centred to the eyes, and sew along the top collar edge only, leaving the bottom of the jacket hanging loose.
- Sew the arms on top of the jacket at the neckline, one on each side, aligned roughly with the legs below.
- Embroider the eyebrows in brown just above the eyes as two short slightly arched lines. Keep them the same length and angle or the face looks off balance.
- Embroider a tiny skin tone nose between and below the eyes with a couple of small stitches. Mine sits just below the midpoint between the eyes and the chin.
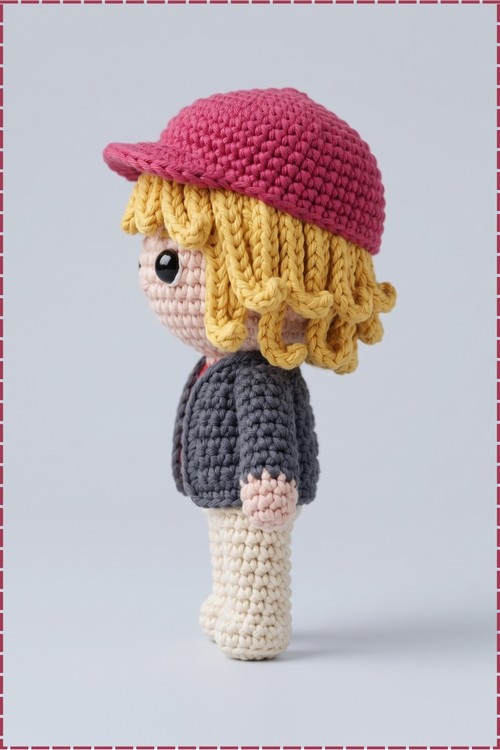
- Position the cap centred on the head, sitting about 4 rounds above the eyes, and pin or sew it in place.
- Wrap the hair strip around the head right under the cap boundary. Position the 5 short bang strands under the cap front so they fall across the forehead, with the longer curls draping at the sides and back. Pin the top edge and stitch it to the head to secure, letting the curl ends hang free.
Tips and Troubleshooting
Count stitches at the end of every round in the body section. A stray stitch in Round 6 means the shirt and head widths come out wrong, since each builds directly on the round below.
Sew the jacket on before the arms. The jacket collar and the arm attachment point overlap, and getting the sequence wrong means unpicking one of them.
Do the hair before the cap. The cap covers the top edge of the hair strip, and placing the hair first lets you tuck that edge under the cap neatly without any raw stitches showing.
Keep the stuffing light in the lower body and firm in the head. Too much stuffing in the shirt section causes the body to bulge wide and the jacket stops fitting.
Position the long and short curl groups carefully before stitching the hair strip down. Once a few stitches are in, the strip is committed and shifting it later distorts the curls.
Customisation Ideas
Any colour works for the cap, and a solid colour is far simpler than the striped original. The jacket grey can shift to navy, olive, or brown for a different character feel. Swapping the yellow curls for a dark brown or black hair strip gives a completely different look from the same base pattern. Leaving the jacket off and working the shirt in a plain colour produces a simpler seasonal version. You can also make the body taller by adding extra straight rounds in the shirt section, as long as you keep the other pieces proportional.
Frequently Asked Questions
Why do my legs look twisted after joining? Both legs need to point the same direction before you complete Round 5. Lay them flat and make sure both magic ring closes face the same way before joining.
Can I use a magic ring with 4 stitches if I find it too tight? Yes. Chain 2 instead and work the 4 single crochet of Round 1 into the second chain from the hook, then tighten the tail. It leaves a slightly larger centre but closes up fine on the increase round.
My hair strip is curling the wrong way. What went wrong? Working into the third chain from the hook is what makes the curl happen. Going into the second chain instead gives a shorter, straighter strand. Count back from the end of the chain before starting each strand.