
Gorgeous Crochet Flower Vase Free Pattern With Orange Pearl Flowers & Brown Pot
Set this crochet flower vase on a nightstand or windowsill for a pot of orange blooms that never needs watering. Plant lovers with dark corners or forgetful habits get a crochet potted flower that stays bright year round, with soft green leaves spilling over a ribbed brown pot.
Keep one on your desk and the Crochet Gorgeous Flower Vase quietly runs the room. Cheerful without trying. The orange petals and pearl centers give this flower vase a bright, chatty mood, while the heavy brown pot keeps it grounded. A crochet vase with opinions about where it sits.
Crochet Gorgeous Flower Vase
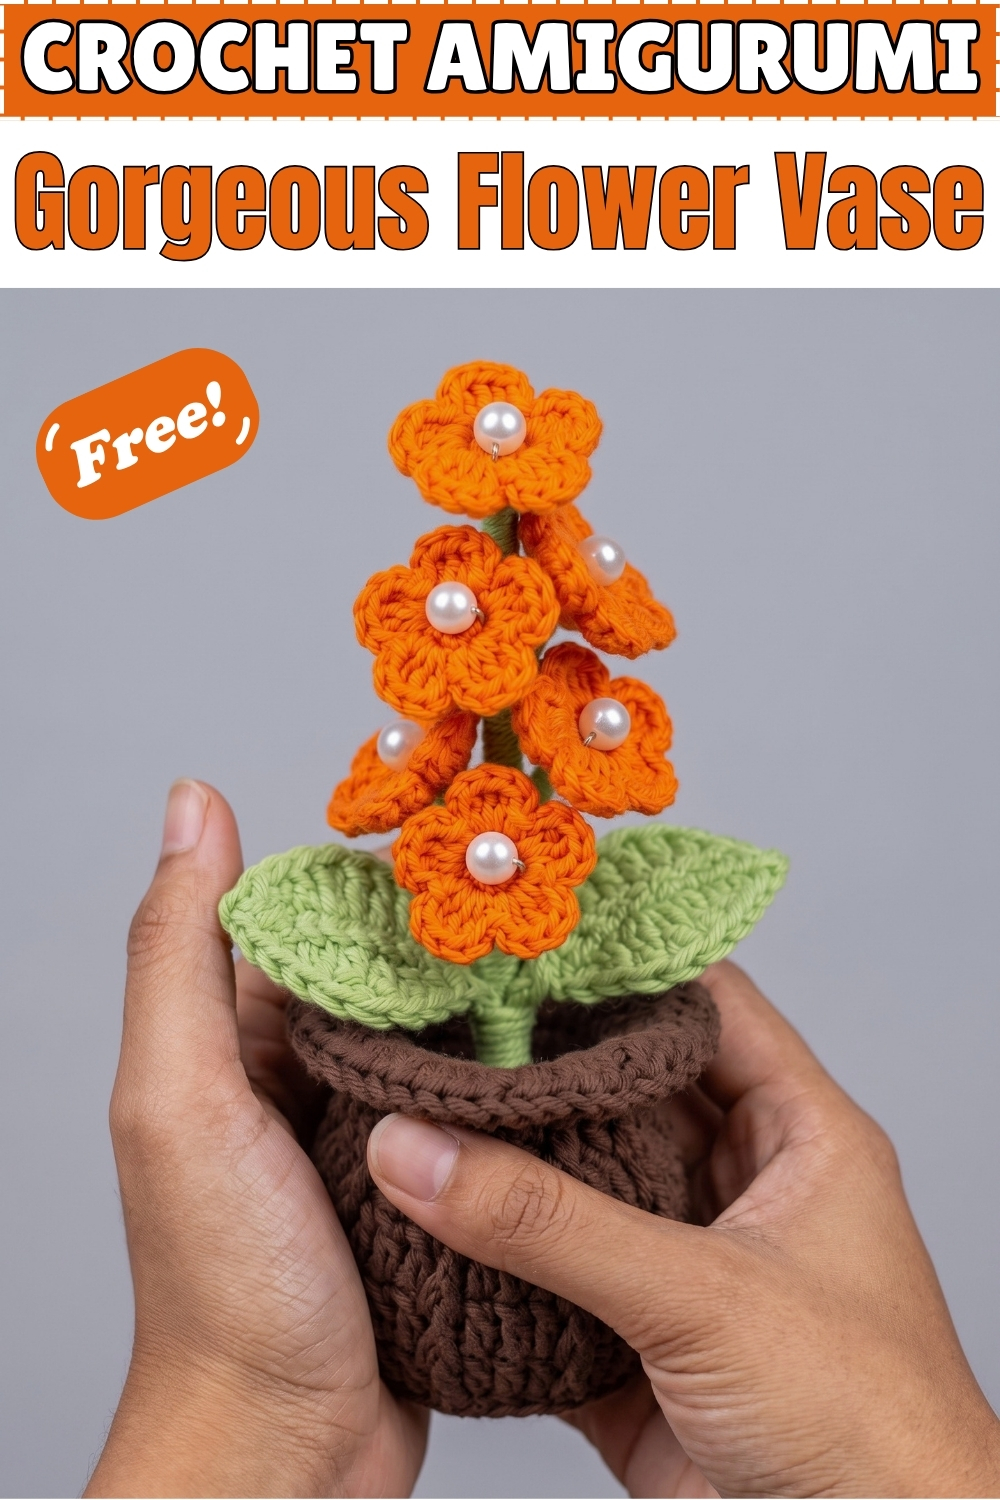
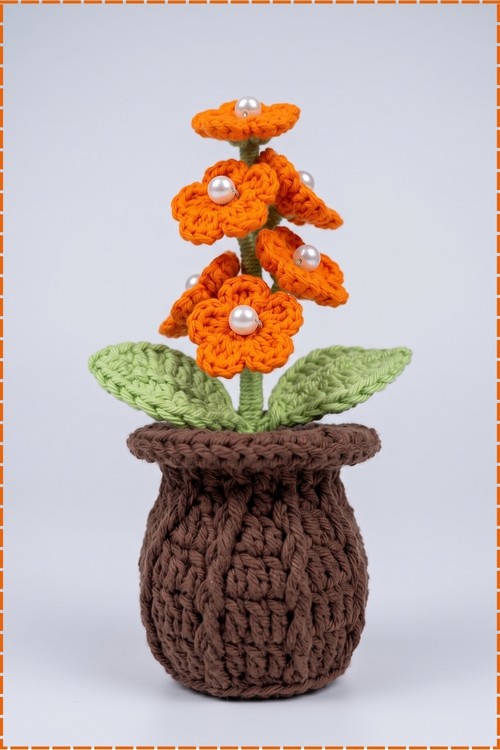
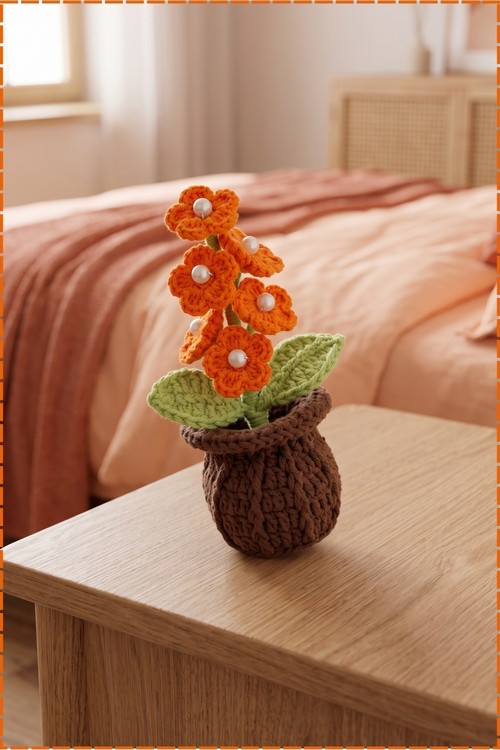
Wire runs through every stem and leaf in this crochet flower vase, so the whole arrangement bends where you want it and stays there. Five small orange blossoms sit at staggered heights around one wrapped stem, each one holding a single pearl bead at its center. Two broad leaves fan out near the base and hide the join. Brown yarn forms the little pot, worked firm enough to hold the bundle upright on its own. Making mine took one quiet evening, and the result has not shed a petal since.
Materials and Tools
- Crochet hook, 2.50 mm
- Orange yarn for the flowers
- Light green yarn for the leaves and the stem wrapping
- Brown yarn for the small pot
- Thin craft wire, bendable, for the flower stems and the leaf framing
- Five small pearl beads for the flower centers
- Hot glue gun
- Scissors
- Tapestry needle for weaving in ends
Abbreviations
- ch: chain
- sc: single crochet
- hdc: half double crochet
- dc: double crochet
- slst: slip stitch
Difficulty and Time
In my experience this sits at an easy to confident beginner level, since the only shaping comes from a magic ring and one repeated petal sequence. Crocheting over wire is the one new skill, and it clicks after the first leaf. Mine took roughly two to three hours in total, spread over an evening, though your own pace with the wire wrapping will decide most of that.
Beginner Technique Notes
- A magic ring lets you pull the flower center closed completely, which matters here because the pearl stem passes through that exact spot.
- Crocheting over wire means laying the wire along the chain and working your stitches so they wrap around both the chain and the wire together.
- Keep the wire ends long while you work, then trim them only once the leaf is finished.
The Pattern
Small Flowers (Make 5)
- Thread one pearl bead onto a short piece of thin bendable wire, fold the wire in half, and twist it tightly just below the bead so the bead sits like a pin head on a short stem. The twist should be snug enough that the bead cannot spin.
- Using orange yarn, start with a magic ring.
- Work 1 sc, 3 dc into the ring, then repeat that same sequence 4 more times for a total of 5 petals. Each sc sits at the base of a petal and each group of 3 dc forms the rounded petal top, so you should see five even lobes around a loose center.
- Pull the magic ring tail tight to close the center circle completely. Leaving any gap here lets the pearl slip through to the back later.
- Fasten off and secure the yarn ends on the back of the flower. Keeping all ends on the back matters because the front shows on every finished flower.
- Insert the pearl wire stem through the middle of the flower center from front to back so the pearl rests directly on the closed ring.
- Apply hot glue at the base where the wire meets the flower back, then wrap light green yarn around the wire stem to cover it fully down its length. My flowers each carry a wrapped green stem of a different length, which is what gives the finished bundle its staggered look.
Leaves (Make 2)
- Using light green yarn, make a foundation ch 10.
- Lay a piece of thin craft wire alongside the chain so you can crochet over it as you work down the side.
- Working down one side of the chain and over the wire, make 1 slst, 1 sc, 1 hdc, 3 dc, 1 hdc, 1 sc, 1 slst. The stitches should grow taller toward the middle and shorten again toward the tip, giving the leaf its pointed oval outline.
- Pivot around the tip and repeat the same stitch sequence down the opposite side of the chain to complete the leaf shape. Keep your tension even on the second side or the leaf will curl toward the tighter edge.
- Fasten off the yarn.
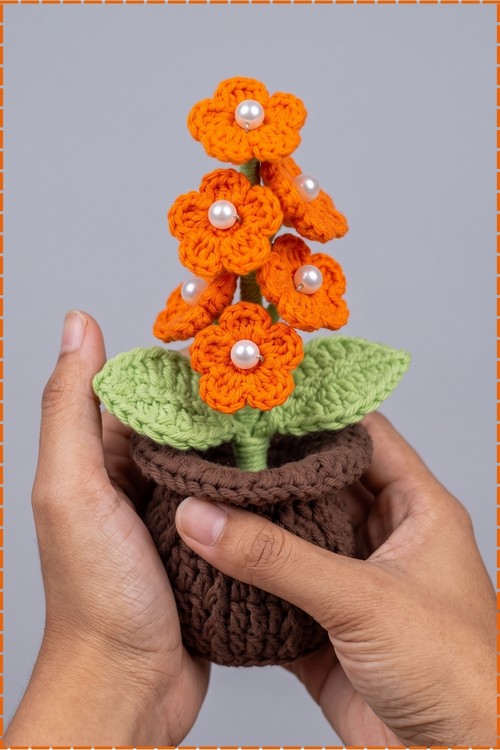
- Twist the exposed wire ends together at the base of the leaf, then wrap light green yarn securely down that wire stem. My two leaves are wide and flat rather than curled, so I pressed each one gently between my fingers to set the wire straight before assembly.
The Brown Pot
- Using brown yarn and the same hook, start with a magic ring and work in continuous rounds, increasing evenly until the flat base reaches the width of pot you want.
- Stop increasing and work even rounds in sc to build the sides upward until the pot stands as tall as you like. Working into the back loops only on your first even round gives the pot the sharp edge between base and wall that mine has.
- Continue straight to the top, then work a final round of sc to finish the rim. Mine has a slight flare at the top, made by adding a few evenly spaced increases in that last round only.
- Fasten off and weave in the ends on the inside of the pot. Keeping the brown fabric firm is what lets the pot hold the arrangement upright, so go down a hook size if your stitches look loose.
Assembly
- Take the 5 orange flowers and arrange them at staggered heights so the blossoms form a tall cluster rather than a flat bunch. Turn each flower to face slightly outward so no two pearls point the same way.
- Secure the stems together using light green yarn, wrapping tightly down the main stem. Starting the wrap just below the lowest flower keeps the green column clean and unbroken.
- Place the two leaves on opposite sides near the base of the flower arrangement so they sit almost horizontally, the way mine fan out just above the rim.
- Continue wrapping light green yarn over all the combined wire stems down to the end, enclosing the leaf stems as you go.
- Trim excess wire if necessary and secure the end of the wrapping with a dot of hot glue.
- Insert the finished bundle into the brown crochet pot. Padding the inside of the pot with a little stuffing or a dab of glue around the stem holds the arrangement at the angle you set it.
Tips and Troubleshooting
- Close the magic ring harder than feels necessary. A center that loosens later will let the pearl sink backward into the flower.
- Wrap the stems in one continuous motion rather than in sections. Stopping and restarting leaves visible ridges in the green.
- Keep the hot glue to small dots at the base of each flower. Too much soaks into the yarn and leaves a shiny patch.
- If a petal curls forward, block the flower flat under a damp cloth for a few minutes and let it dry face down.
- Bend the wire stems only after everything is wrapped. Bending bare wire first tends to kink it where the yarn then cannot sit smoothly.
- Make all five flowers before you wrap any stems, so you can lay them out and choose which one sits highest.
Yarn Substitution
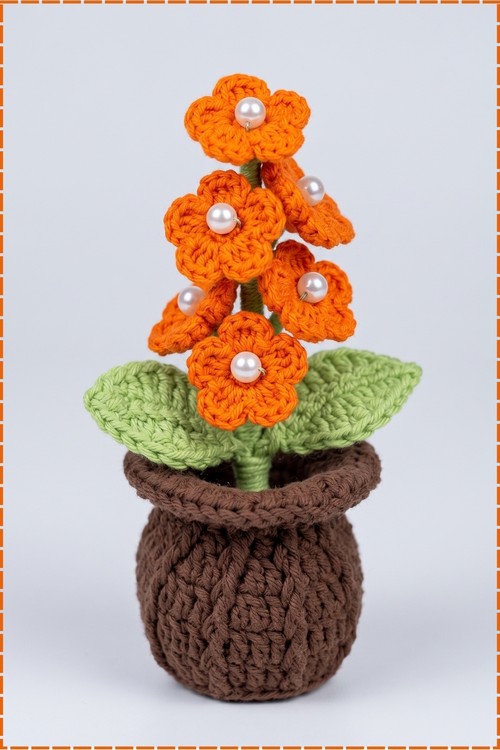
Cotton yarn in a light worsted or sport weight suits this best, since it holds the petal shape and shows the stitch definition that makes the blossoms read as flowers. Acrylic works too, though petals come out softer and may need light blocking. Avoid anything fuzzy or variegated, because the pearl center and the crisp petal edges are the whole point. For the pot, a slightly thicker yarn than you used for the flowers gives the firmer fabric mine has.
Customization Ideas
- Swap the orange for soft pink, deep red, or white and keep the pearls for a bridal look.
- Make seven flowers instead of five for a fuller arrangement, wrapping the extra stems in with the rest.
- Use seed beads in place of pearls for a smaller, more scattered center.
- Work the pot in terracotta yarn and add a contrasting rim round for a planter look.
- Add a third leaf at the back if your bundle looks sparse from one side.
FAQ
Can I make this without wire? You can crochet the flowers and leaves without it, but the arrangement will flop. Wire is what holds the stems upright and lets the leaves stay fanned out, so I would keep it.
Why do my petals look pointed instead of rounded? That usually comes from working the 3 dc too tightly into the ring. Loosen your tension on the dc stitches and the petal tops will round out.
What size does the finished piece come to? Mine fits comfortably in two hands, with the tallest flower sitting roughly twice the height of the pot. Your exact size depends on your yarn and how long you wrap the stems, so treat that as a rough guide.
Can I skip the pearl beads? Yes. A French knot or a small contrasting bobble in the center works, though you will still want something on a wire or stitched through to anchor the flower.
How do I stop the pot from tipping over? Weight the base. A small stone or a few coins hidden under a little stuffing inside the pot solves it immediately, and the brown fabric hides them completely.