
Crochet Amigurumi Dobby Free Pattern With Big Floppy Ears
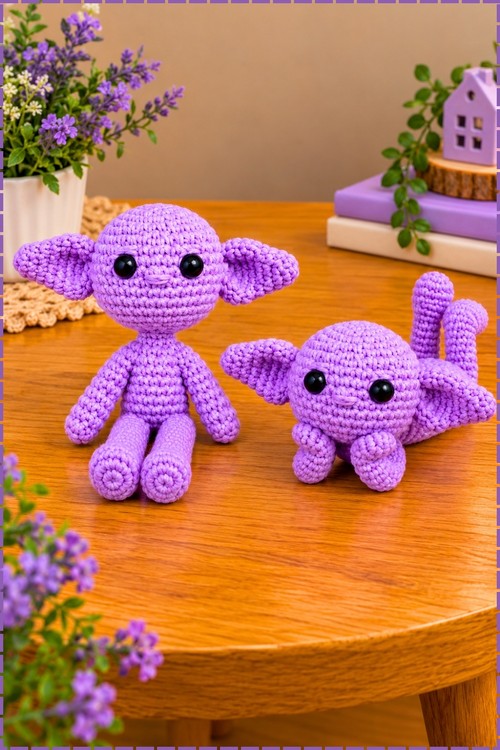
Skipped stitches at the armhole split are the one step that needs attention in the Dobby amigurumi, and they let the arms grow straight out of the lilac body. Most makers finish him in three to four hours on a 2.5 mm hook, with plain black safety eyes.
Big ears and wide eyes give Crochet Dobby the look of someone caught mid thought. He stands tall and slightly awkward, loyal in a way that shows before he says anything at all. Make him for the shelf where the quiet characters live, because this Crochet Dobby holds his corner well.
Crochet Dobby
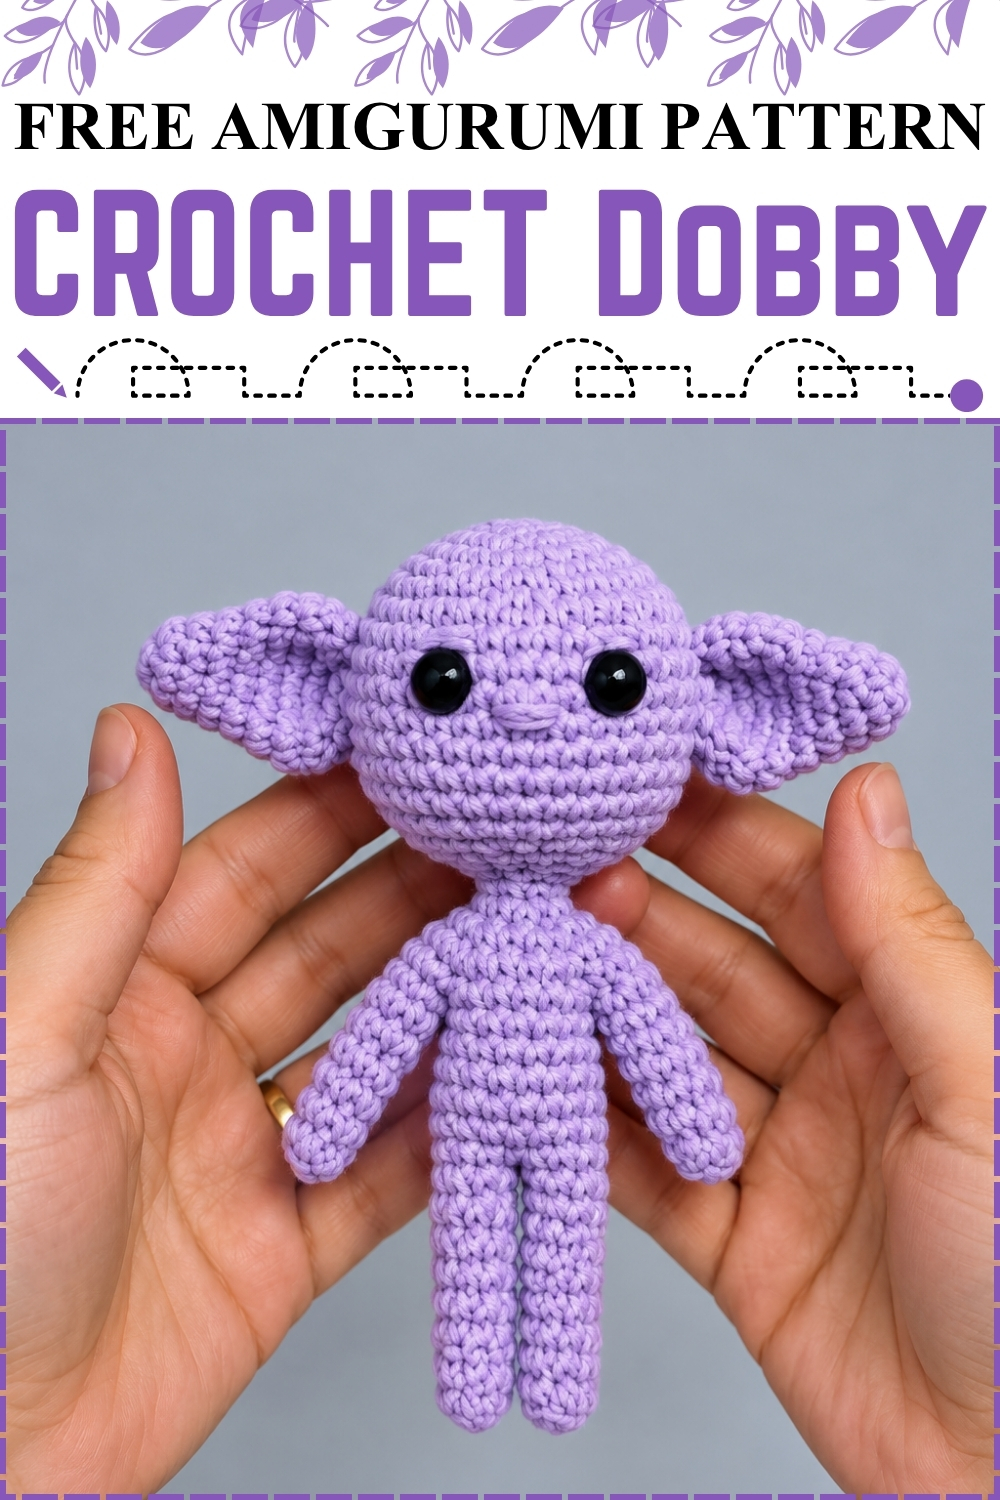
Worked in one continuous spiral from the top of the head straight down to the hips, this crochet Dobby keeps head, neck and torso in a single seamless piece. Ears grow from a tiny magic ring and stay unstuffed, so they flop the way house elf ears should. My version swaps the usual sand cotton for soft lilac, and low set black safety eyes give him that wide open stare. Arms and legs come directly out of the body, which leaves only two ears to sew on at the end. Beginners can finish one over a single quiet evening.
Materials and Tools
- Lilac (soft purple) 100% cotton yarn for the whole doll, head, ears, body, arms and legs. I used one colour throughout and did not add a second shade anywhere.
- A small amount of cream white yarn only if you want painted style eye highlights. My finished elf skips this, so treat it as optional.
- 2.5 mm crochet hook, or whatever hook gives you a tight fabric with no stuffing showing through on your chosen yarn.
- Two black safety eyes, roughly 1 cm to 1.5 cm. Mine are plain glossy black domes with no white detail.
- Fiberfill stuffing.
- Tapestry needle, scissors, and a stitch marker or a length of contrasting scrap yarn.
Difficulty and Time
From my own making, this sits at an easy to confident beginner level. The only part that asks for attention is the armhole split, where you skip stitches instead of working them. I finished mine in about three to four hours spread over an evening, and a slower first attempt could easily take five. Sizes vary with yarn and tension, so treat any finished measurement as a rough guide rather than a promise.
Abbreviations Used
- MR means magic ring, the adjustable loop you start the head and ears from.
- sc means single crochet.
- inc means increase, which is two single crochet stitches worked into the same stitch.
- dec means decrease. I use the invisible decrease: insert the hook into the front loop of the next stitch, then into the front loop of the following stitch, yarn over and pull through both front loops, yarn over and pull through the two loops on the hook.
- st or sts means stitch or stitches.
- sl st means slip stitch.
- Everything is worked in continuous spiral rounds. Do not join with a slip stitch at the end of a round unless a step tells you to.
Beginner Technique Notes
- Move your stitch marker into the first stitch of every new round before you work it. In a spiral there is no seam to count from, and a lost marker on the body is the main reason counts drift.
- Keep your single crochet snug. Cotton at 2.5 mm should feel firm and slightly stiff, because loose stitches let the fiberfill show as pale flecks through the purple.
- The invisible decrease matters more here than on most dolls. The head shrinks from 36 stitches down to 12 in a short stretch, and a standard decrease leaves visible bumps around the cheeks.
- Stuff in small pinches rather than large clumps. Even stuffing is what gives the head its smooth round shape in the photo.
The Pattern
Part 1: Head and Upper Torso
Worked from the top of the head down in one continuous piece.
- Round 1: Work 6 sc in a magic ring (6 sts). Pull the ring closed firmly now, because a gap here will widen once the head is stuffed.
- Round 2: Inc in each st around (12 sts). The piece should sit flat like a small coin at this point.
- Round 3: (1 sc, inc) repeat 6 times (18 sts).
- Round 4: (2 sc, inc) repeat 6 times (24 sts). Still flat, with six faint ridges radiating out from the centre.
- Round 5: (3 sc, inc) repeat 6 times (30 sts).
- Round 6: (4 sc, inc) repeat 6 times (36 sts). The disc should now measure roughly the width of the finished head and the edges will start curling up on their own.
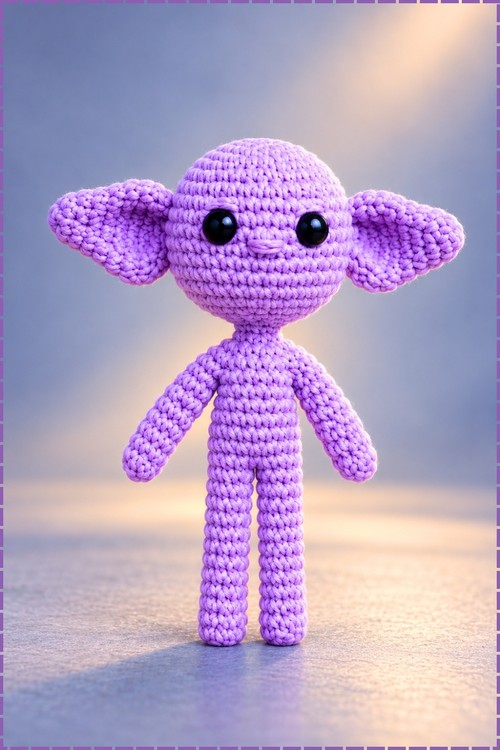
- Rounds 7 to 13: Sc in each st around for 7 rounds (36 sts per round). These straight rounds build the tall dome shape you can see above the eyes in my photo.
- Round 14: (4 sc, dec) repeat 6 times (30 sts). The sides begin pulling inward here, so the head reads as a ball rather than a cylinder.
Face Assembly and Details
- Push the safety eyes in between Rounds 8 and 9, leaving 4 or 5 stitches between them. Mine sit noticeably low on the face, which is what gives the elf his big forehead, so resist the urge to raise them.
- Check the eyes from the front before you snap the washers on. Once those backs click into place they do not come off.
- Skip the cream white highlight arcs if you want the same look as my doll. My eyes are plain black with no white stitching at all.
- Stitch two short beige toned eyelid lines across the top curve of each eye only if you want a sleepier face. My version leaves the eyes bare and open, so treat this as optional.
- Nose: Using a length of the same lilac yarn, stitch horizontally back and forth 5 times across 2 or 3 stitches, centred between and slightly below the eyes. Matching yarn keeps the nose subtle, exactly as it reads in my photo, where it shows as a soft raised bump rather than a contrasting mark.
- Work the face before the head closes. Once the opening narrows past Round 17 you cannot reach inside to secure your yarn tails.
- Round 15: (3 sc, dec) repeat 6 times (24 sts).
- Round 16: (2 sc, dec) repeat 6 times (18 sts).
- Round 17: (1 sc, dec) repeat 6 times (12 sts). The head is now a closed ball with a small opening at the base.
- Stuff the head firmly with fiberfill. Firm is the word here, since a soft head tips forward on the thin neck and the whole doll loses its posture.
- Round 18 (Neck): (2 sc, dec) repeat 3 times (9 sts). This is the narrowest point of the entire doll.
- Round 19: Sc in each st around (9 sts). Add a small pinch of stuffing into the neck as you pass, just enough to stop it collapsing.
- Round 20: (2 sc, inc) repeat 3 times (12 sts). The shoulders start here.
- Round 21: (1 sc, inc) repeat 6 times (18 sts).
- Round 22: (2 sc, inc) repeat 6 times (24 sts).
- Round 23: (3 sc, inc) repeat 6 times (30 sts). You should now have a bell shaped upper torso flaring out below the neck.
Part 2: Large Ears (Make 2)
Worked from the pointed tip down to the wide base.
- Round 1: Work 6 sc in MR (6 sts).
- Round 2: Inc in the 1st st, sc in the remaining 5 sts (7 sts). Increasing on one side only is what curves the ear instead of making a cone.
- Round 3: Inc in the 1st st, sc in the remaining 6 sts (8 sts).
- Round 4: (3 sc, inc) repeat 2 times (10 sts).
- Round 5: (4 sc, inc) repeat 2 times (12 sts).
- Round 6: (3 sc, inc) repeat 3 times (15 sts).
- Round 7: (4 sc, inc) repeat 3 times (18 sts). The ear is at its widest here and should look like a small leaf.
- Round 8: (1 sc, dec) repeat 6 times (12 sts). This pulls the base in so the ear sits flat against the head instead of gaping.
- Fasten off leaving a tail of about 20 cm for sewing. Do not stuff the ear. Flat ears are the whole point, and stuffing turns them into horns.
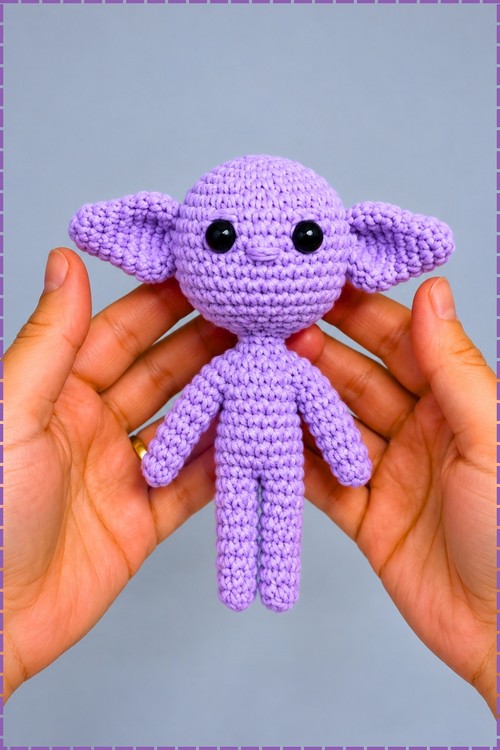
- Pinch the base flat with the increase line running along the bottom edge, then sew each ear to the side of the head at eye level. In my photo the ears attach around Rounds 8 to 12 and angle slightly upward and back, so they lift away from the head and droop at the tips.
- Sew the full width of the pinched base rather than just the corners. A short seam lets the ear spin, and both ears end up pointing in different directions.
Part 3: Lower Body and Arm Divisions
- Round 24 (Armhole Split): Count out 8 sts for the right arm, 8 sts for the left arm, and 7 sts each for the front and back panels. Sc across 7 sts for the front panel, skip 8 sts for the armhole, sc across 7 sts for the back panel, skip 8 sts for the second armhole (14 sts remaining around the main body core).
- Count this round twice before moving on. The skipped stitches become the arm openings later, and an uneven split gives you one arm sitting higher than the other.
- Round 25: (6 sc, inc) repeat 2 times across the 14 body stitches (16 sts). The gap left by the armholes closes up as you work across it.
- Rounds 26 to 28: Sc in each st around for 3 rounds (16 sts per round). Stuff the torso as you go, keeping it a little softer than the head so the doll still sits comfortably.
Part 4: Legs and Arms
Legs (make 2)
- Round 1 (Splitting Legs): Divide the 16 body stitches into two openings of 8 stitches each. Reattach the lilac yarn at the centre and work around one 8 stitch ring.
- Pinch the body flat and count 8 stitches to each side before you rejoin. Getting this division even is what keeps the finished doll sitting upright instead of leaning.
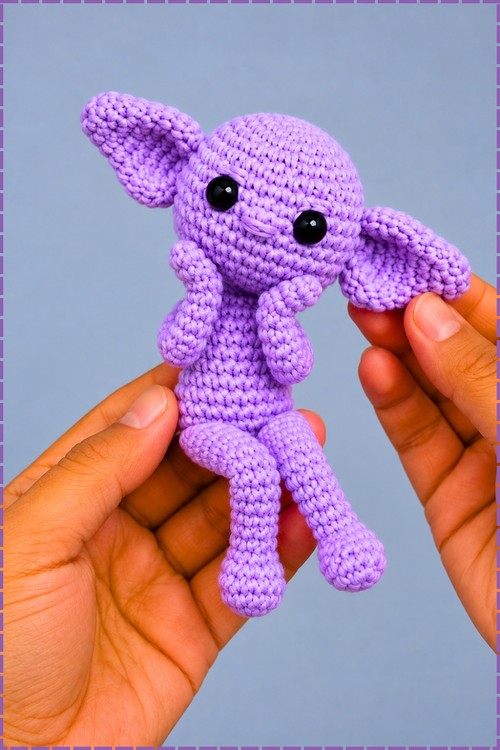
- Rounds 2 to 7: Sc in each st around for 7 rounds (8 sts per round). These long straight rounds give the slim dangling legs in my photo.
- Round 8: (2 sc, dec) repeat 2 times (6 sts). The leg tapers gently into a rounded foot end.
- Fasten off, stuff the leg lightly, then weave the yarn tail through the front loops of the remaining 6 stitches, pull tight to close, and weave the end back inside the leg.
- Keep the stuffing light and even in the legs. Overstuffed legs stick straight out and the doll will not sit on a shelf edge.
- Repeat every leg round for the second 8 stitch opening.
Arms (make 2)
- Attach the lilac yarn to one of the 8 stitch arm openings created in Round 24.
- Rounds 1 to 5: Sc in each st around for 5 rounds (8 sts per round). Arms are shorter than legs by design, which is why the hands rest near the face in my photo.
- Round 6: (2 sc, dec) repeat 2 times (6 sts).
- Fasten off, stuff the arm very lightly, then thread the tail through the remaining 6 stitches, pull tight to cinch the end closed and weave in the remaining ends.
- Work the second arm the same way in the opposite opening. A little wire free bend happens naturally if you understuff, and that is what lets the arms curl inward.
Tips and Troubleshooting
- Count at the end of every round, not every few rounds. Fixing a stitch two rounds back takes a minute, while fixing it ten rounds back means frogging the whole head.
- If stuffing shows through as pale flecks, drop a hook size and start again rather than adding less stuffing. Loose fabric on a purple doll shows white immediately.
- Place the safety eyes low and check them in a mirror or a photo before locking them. Eyes that look fine up close often look too high once you step back.
- Sew both ears on before weaving in any body ends, so you can still adjust the angle if one sits higher than the other.
- If the neck buckles under the weight of the head, push a tiny extra pinch of fiberfill into the neck through the shoulders and firm the head up further.
- Weave every yarn tail inside a stuffed section rather than along the surface. Cotton tails have a habit of working their way back out through stitches.
- Block nothing. This doll relies on firm fabric, and steaming will only relax the stitches and soften the shape.
Yarn Substitution
Cotton gives the crisp stitch definition you can see across the head and legs, and it holds the ear shape without any stiffener. Acrylic works if that is what you have, though it stretches more, so you may want to go down a hook size and stuff a touch firmer. Cotton blends behave well too. Avoid fluffy or brushed yarns entirely, because the halo swallows the face details and the nose disappears completely. Any yarn weight works so long as you match your hook to it, but expect the finished size to shift up or down with your choice.
Customization Ideas
- Change the body colour completely. Mine is lilac rather than the sand tone in the original notes, and the same pattern reads just as well in grey, mint or pale pink.
- Add the cream white eye highlight arcs if you want a glossier cartoon look instead of the plain black eyes on my doll.
- Embroider the eyelids in a slightly darker shade of your body colour for a sleepy expression.
- Crochet a small chain and tie it around one hand as a little sock or bundle. Chain until the cord reaches your preferred length rather than counting stitches.
- Make a longer chain from the back of the neck if you want to hang the finished elf, chaining until the loop is the length you like.
- Work the ears one round longer before the final decrease round for an even floppier look, keeping in mind that any change to rounds will alter the finished proportions.
Frequently Asked Questions
Why are my ears standing up instead of drooping? Stuffing is almost always the cause. These ears are meant to stay completely flat and empty, and even a small amount of fiberfill turns them rigid. Pinch the base flat before sewing and let the tip fall naturally. Can I use embroidered eyes instead of safety eyes? Yes, and it is the safer choice for a doll going to a young child. Stitch black yarn in a small filled oval at the same position, between Rounds 8 and 9 with 4 or 5 stitches between them. Do it before you close the head so you can secure the ends inside. My head keeps flopping forward on the neck. What went wrong? The head is understuffed, or the neck rounds are empty. Firm the head up until it holds its shape when squeezed, and add a pinch of stuffing into the 9 stitch neck as you work past it. How do I stop the armhole split going wrong? Place a marker at the start of Round 24 and again after each group of stitches before you work them, so all four sections are marked out before your hook moves. Skipping 8 stitches feels strange the first time, but the gap closes up neatly on the next round. Do I need to sew the arms and legs on separately? No, and that is the nicest part of this build. Arms and legs are worked directly out of the body openings, so the only sewing in the whole project is attaching the two ears.