
Crochet Sunflower Coin Purse Pattern Free
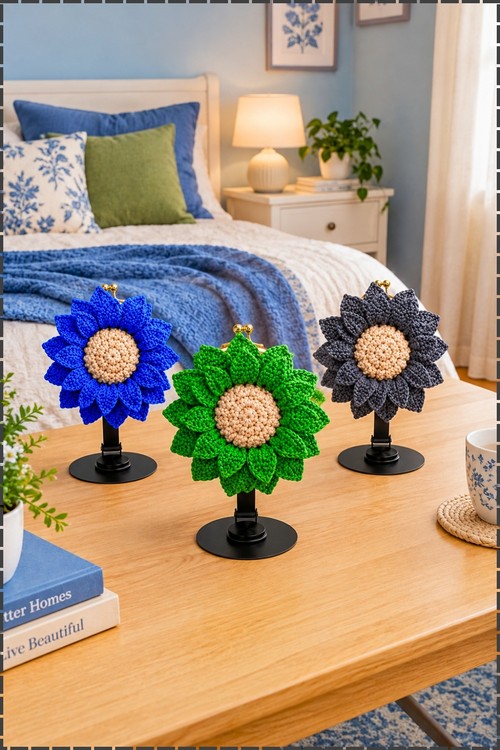
Each petal takes about two minutes once the chain nine rhythm settles in, and two offset layers circle the sunflower coin purse seed centre. Up top sits a gold kiss clasp. Make one colour change in the petal yarn and the purse turns green or grey.
Layered petals and a gold clasp explain why the Crochet Sunflower Coin Purse keeps getting requested at every craft fair table. It sells before the plain ones do. Change the petal colour and it reads as a new product. Makers return to the Crochet Sunflower Coin Purse because buyers pick it up first.
Crochet Sunflower Coin Purse
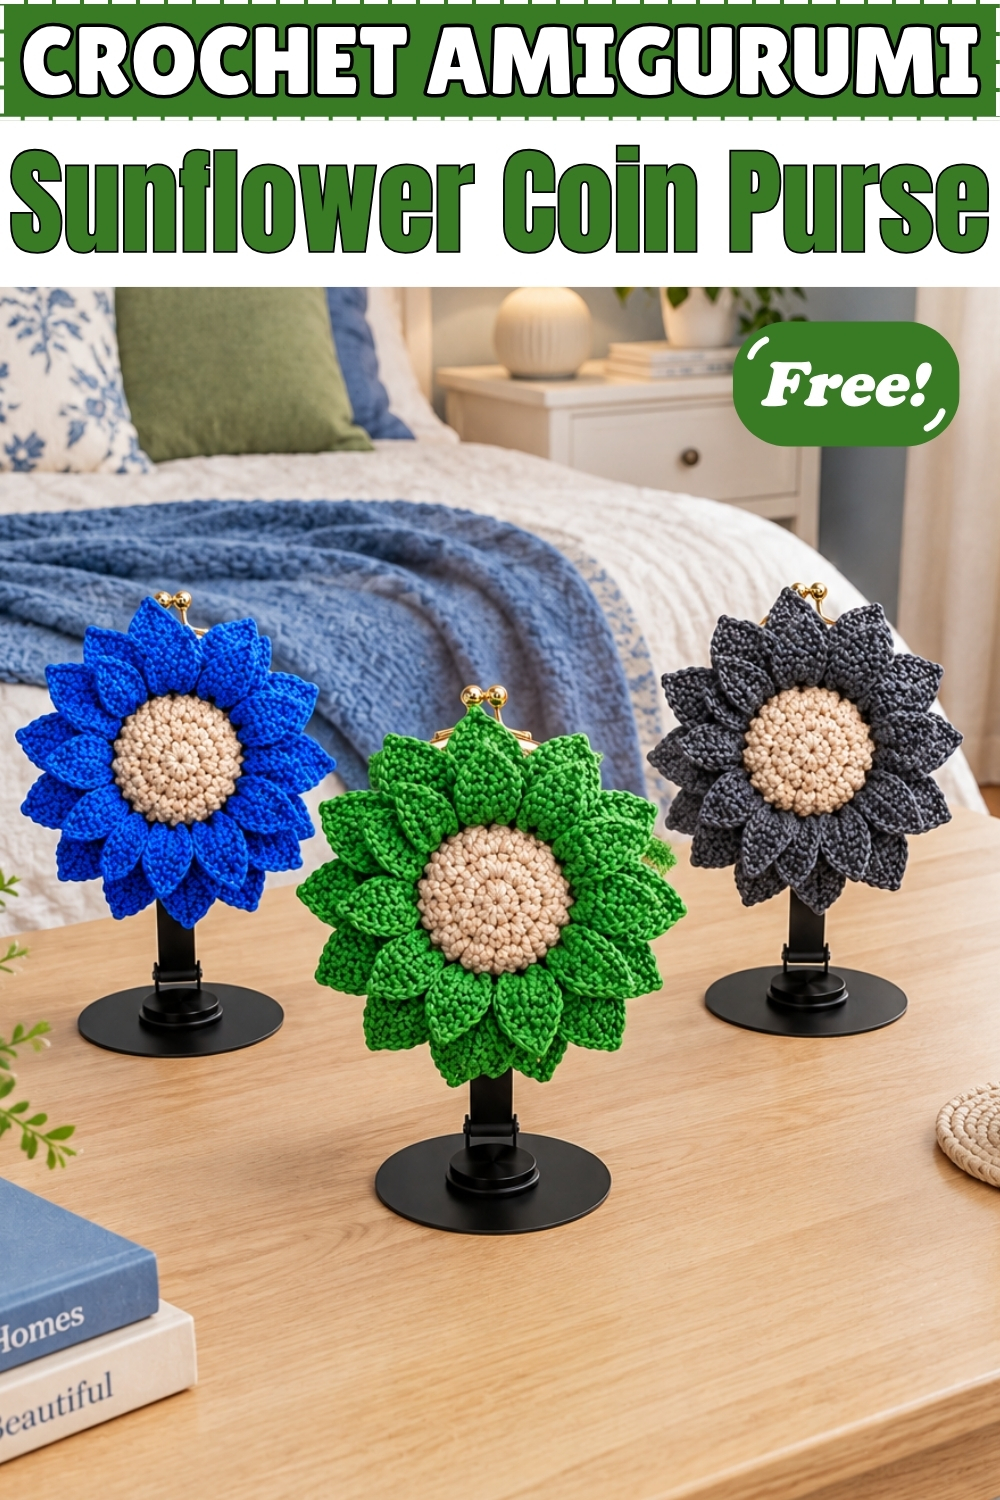
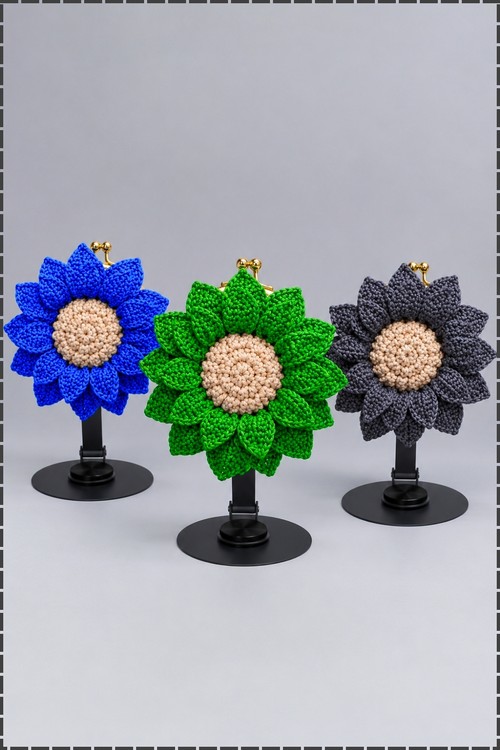
Growing from a flat crocheted circle, this crochet sunflower coin purse builds its seed texture through bubble stitches worked directly onto the base before a single petal ever goes on. Two full layers of petals follow, each anchored to a different round of the base and offset from each other so the whole flower reads as deep and dimensional from every angle. Gold kiss frame clasps at the top keep coins secure, and the round leather base at the back adds structure. Mine came out in three colourways: royal blue, bright green and dark grey, each with the same warm beige seed centre.
A Note Before You Start
I made three of these at once, and that second layer of petals is the part that turns the flower from a flat craft project into something genuinely worth giving away. Each petal takes a couple of minutes once you have the chain nine rhythm, but the total count adds up, so put some music on and let the colour change carry the mood. Blue was my favourite to work, because the beige seeds glow against it in a way that does not quite happen in the other two.
Materials and Tools
- Nylon cord or 5 ply mercerized cotton in your chosen petal colour. I made three: royal blue, bright green and dark charcoal grey.
- The same weight yarn in warm beige for the seed centre on all three purses.
- 2.20 mm crochet hook. Go up to 2.50 mm if your tension runs tight.
- One 8.5 cm round metal kiss frame clasp per purse. Mine are gold toned.
- One round leather base per purse, sewn to the back.
- Optional wrist strap or keychain ring.
- Tapestry needle, scissors, stitch markers.
Difficulty and Time
Intermediate, primarily because of the bubble stitch and the two layer petal technique. Both become repetitive quickly, so the difficulty drops after the first petal and the first bubble round. From my own experience making three at once, each purse takes around three to four hours. Treat that as a rough guide since tension changes the pace noticeably.
Beginner Technique Notes
The bubble stitch used here is a modified five double crochet cluster. You work several unfinished double crochet stitches into the same stitch, add one more into the next stitch, then close them all together through the top. The result is a raised rounded lump, which is exactly what the seed centre needs. Read the special stitch section before your first bubble and try one on a swatch so the closing step feels natural before you work it into the base. Tension on the petals is the other thing to watch. Pulling the chain nine too tight before you work into it closes the petal and makes it curl inward rather than lying flat. Keep a relaxed hand on the foundation chain of each petal and stretch it gently before you start working down it. The BLO anchor on the petal sides is what creates the neat raised edge visible in all three of my purses. Working into the back loop only on the slip stitch sections along the petal edge leaves the front loop as a standing ridge, which is what separates the petal faces cleanly.
The Pattern
Part 1: The Base (Work in Beige)
Crochet a standard flat circle in beige yarn for 5 rounds. Each round is joined with a slip stitch and a chain to step up. The base is the foundation for both the seed texture and the petal attachment, so keeping it flat and even matters more here than on most projects. Do not cut the yarn when you finish Round 5.
Part 2: The Sunflower Seeds (Beige, Worked Onto the Base)
Continue directly from Round 5 of the base. The bubble stitch abbreviations are:
- Starting Bubble: Ch 2, yarn over and insert the hook into the same stitch, pull up a loop and pull through 2 loops to make an unfinished dc (double crochet). Repeat 2 more times in the same stitch. Yarn over, insert the hook into the next stitch, pull up a loop and pull through 2 loops. You now have 5 loops on the hook. Yarn over and pull through all 5 loops. Ch 3 and sl st (slip stitch) into the top of the bubble.
- Regular Bubble: Ch 2, make 4 unfinished dc in the same stitch, then make 1 unfinished dc in the next stitch so you have 5 loops on the hook. Yarn over and pull through all 5 loops. Ch 3 and sl st into the top of the bubble.
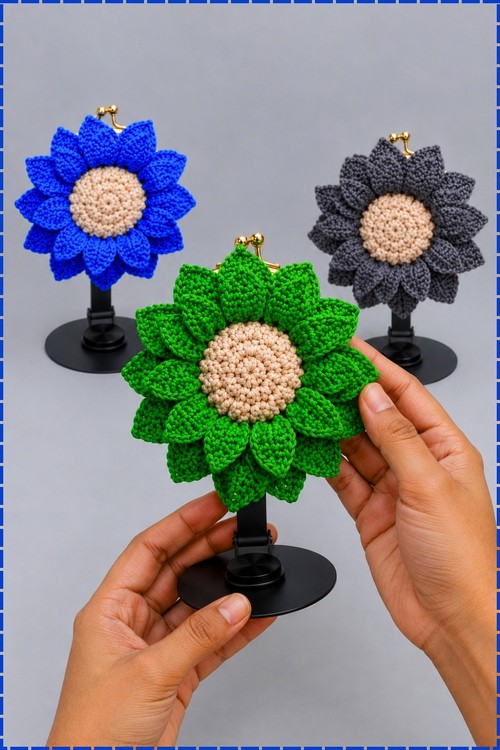
Seed Round 1 (Round 6 of the base):
- From the last sl st of the base, ch 2.
- Make a Starting Bubble: work 3 unfinished dc in the same stitch, 1 unfinished dc in the next stitch, pull through all 5 loops, ch 3 and sl st into the top of the bubble.
- Sl st into the next stitch on the base to anchor it.
- Work a Regular Bubble, sl st into the top to close, sl st into the next base stitch. Repeat this all the way around.
- You should have 6 bubble stitches total. Sl st into the final stitch.
Seed Round 2:
- Ch 2 to step up. Sl st into the first stitch of the new round.
- Work the exact same bubble sequence as Seed Round 1, repeating all the way around.
- Because the circle is wider now you will fit 12 bubble stitches in this round.
- Cut the beige yarn and fasten off.
Part 3: The First Layer of Petals (Work in Your Petal Colour)
Switch to your chosen petal colour. Keep your tension relaxed throughout, since tight stitches stop the petals from lying flat. Attaching the yarn:
- Look at the brown beige base. Attach the petal colour with a slip knot to any stitch on the 3rd round of the beige base, working behind the seeds.
Making each half petal (make 12):
- Ch 9.
- Working down the chain: skip the first 2 chains, then work 1 hdc (half double crochet) in the 3rd chain from the hook, 1 dc in each of the next 3 chains, 1 tr (treble crochet) in each of the next 3 chains, 1 dc in the next chain and 1 hdc in the last chain.
- Anchor the half petal with a sl st into the next 2 stitches on the beige base.
- Repeat the chain 9 and the stitch sequence for all 12 half petals pointing outward.
Completing the other half of each petal:
- At the last half petal, sl st once into the base instead of twice so you can jump into the side of the first petal to close it.
- Working up the opposite side of the first half petal: 1 hdc in the first stitch, 1 dc in the next, 1 tr in each of the next 3, 1 dc in the next, 1 hdc in the next, then 1 sc in the very tip.
- Create the picot point: ch 2 and sl st into the 1st chain.
- Work down the left side: sl st into the BLO (back loop only, the outer loop) of the next stitch, then sl st through both loops of the remaining 7 stitches down the side of the petal.
- Anchor with sl st into the next 2 base stitches.
- Repeat the full petal close for all 12 petals around.
Part 4: The Second Layer of Petals
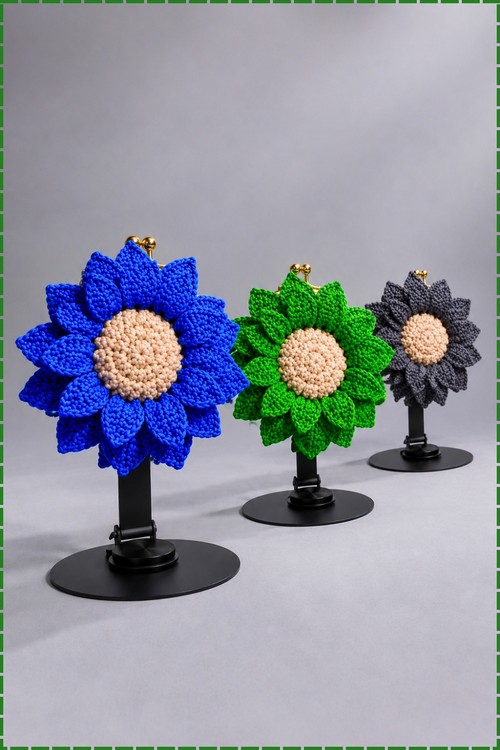
The second layer sits slightly behind the first and uses exactly the same stitch sequence. The only change is the anchoring between petals.
- Ch 2 to cross over to the 4th round of the beige base. Sl st into the stitch directly aligned with your chain.
- Ch 9 and work down the chain exactly as in the first layer: 1 hdc, 3 dc, 3 tr, 1 dc, 1 hdc.
- Anchor with sl st 4 times into the base between petals instead of 2 times. When completing the full petal on the return and working back down, sl st 3 times into the base to step up to the next petal.
- Complete all 12 petals the same way as the first layer, working up each side with hdc, dc, tr, adding the picot tip and slip stitching down the left side.
- Fasten off and weave in all ends.
- Pull and stretch each petal gently with your fingers to open it out and correct any inward curling.
Part 5: Assembly
- Attach the completed sunflower front panel to your round leather base by sewing it on with the beige yarn tail or a matching thread, working through the edge of the base and the outermost round of the crocheted circle.
- Sew the front panel and the leather base to the lower half of the 8.5 cm round metal kiss frame, stitching through the frame holes with a sturdy thread and pulling tight so neither the frame nor the leather can shift.
- If you are making a back panel, work a plain flat circle in your petal colour to match the front size and attach it to the back of the frame the same way.
- Attach a wrist strap or keychain ring to the frame loop at the top if you want one.
Tips
- Crochet the base tighter than feels comfortable. A flat base that gaps under the seeds lets the bubble stitches sink sideways, and you cannot correct that once the petals go on.
- Mark the start of Seed Round 1 with a scrap of yarn. The bubbles all look identical and it is very easy to lose your place and end up with five seeds instead of six.
- Work the chain nine for each petal loosely and tug it once before working into it. A tight foundation chain pulls the petal into a spike rather than a broad leaf shape.
- Lay the finished first layer flat on a table before attaching the second. If any petal curls, stretch and pin it now. The second layer covers the base of the first and makes corrections impossible.
- Sew the frame with doubled thread rather than yarn. The frame carries real weight over time, and yarn alone can work loose at the holes.
- Block the finished flower by misting it lightly with water and pinning each petal flat until dry. Cotton and nylon cord both respond well, and the difference between a blocked and unblocked sunflower is significant.
- Make all three colourways at the same time if you can. Keeping one in progress at each stage means you can cross check your bubble count and petal placement between them.
Yarn Substitution
Nylon cord gives the stiffest, shiniest result and holds the petal shape without any blocking. Mercerized cotton at 5 ply is softer but still has enough body to keep the layers separate. Regular cotton without the mercerization works but tends to go limp around the petals and needs firmer blocking. Avoid any yarn thicker than 5 ply since the petals lose their individual definition and the coin purse starts looking like a fabric flower rather than a crocheted one.
Customization Ideas
- Change the petal colour entirely. A pale pink centre with cream petals reads as a daisy rather than a sunflower, and the whole stitch sequence stays the same.
- Use the same pattern with velvet yarn and a larger hook for a mini bag version. The pattern notes mention adding a third seed round for the larger size.
- Add a wrist strap by chaining until the loop reaches a comfortable wrist length and attaching both ends to the frame loop.
- Embroider a small detail in the seed centre, such as a few straight stitches in a slightly darker brown, for extra texture.
- Make a matching set in all three colourways as a gift set.
- Use the sunflower front without the frame as a brooch or hair accessory by sewing a pin back to the leather base instead.
Frequently Asked Questions
Why do my petals curl inward instead of lying flat? Tension on the chain nine foundation is almost always the cause. Pull the chain gently before working into it and keep a deliberately loose hand on those first few stitches. If the petals are already finished, stretching them firmly with both thumbs and a light misting of water usually corrects the curl. My bubble stitches look uneven. What am I doing wrong? Check that every unfinished double crochet has the same height before you close the cluster. A short unfinished dc pulls the bubble sideways. Also make sure the chain 3 after closing sits straight up from the top of the bubble rather than angling to one side, because that chain is what the closing sl st locks into. Can I use a different size frame? Yes, though you would need to adjust the base size to match. The 8.5 cm frame fits a 5 round base with this yarn and hook. A 10 cm frame would likely need one extra round on the base before starting the seeds. How do I attach the leather base? Align it behind the crocheted circle, wax thread or strong cotton in a matching colour, and stitch through both the leather and the outermost round of the crochet around the full edge. Pre punching the leather with an awl makes the stitching much easier and stops the needle pulling the leather out of shape. Do I have to make two layers of petals? The first layer alone makes a recognisable flower and a usable coin purse, but the second layer is what gives the purse its depth and makes it look like a real sunflower rather than a flat rosette. If time is short, stop at one layer and the pattern still works.