
Crochet Bear Keychain With A Red Heart Amigurumi Pattern Free
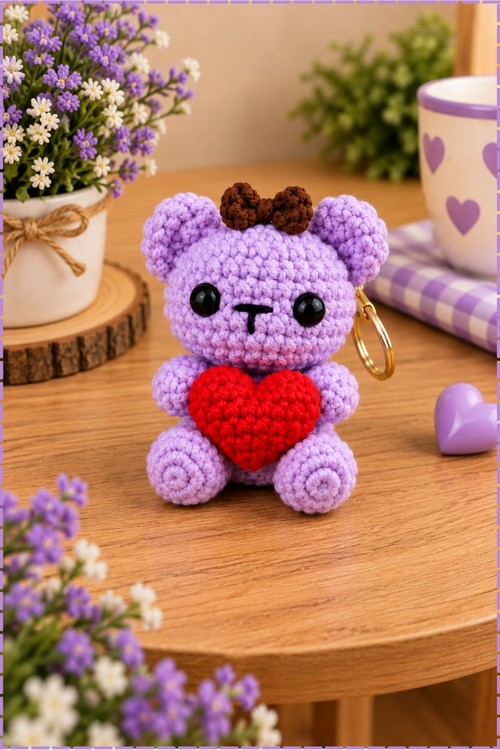
Your backpack zip or car keys can carry a lilac crochet bear keychain on a gold ring, small enough to sit in one palm. Crochet amigurumi bear keychains in purple and red make a sweet gift for a best friend, a teacher, or a classmate who collects bag charms.
Hold one up and the face does the work, since crochet keychains bears hug a heart in both paws and wear a bow that tips sideways. The look reads shy rather than silly. Make a few crochet bear keychains and every one ends up with its own tilt and its own mood.
Crochet Keychains Bears
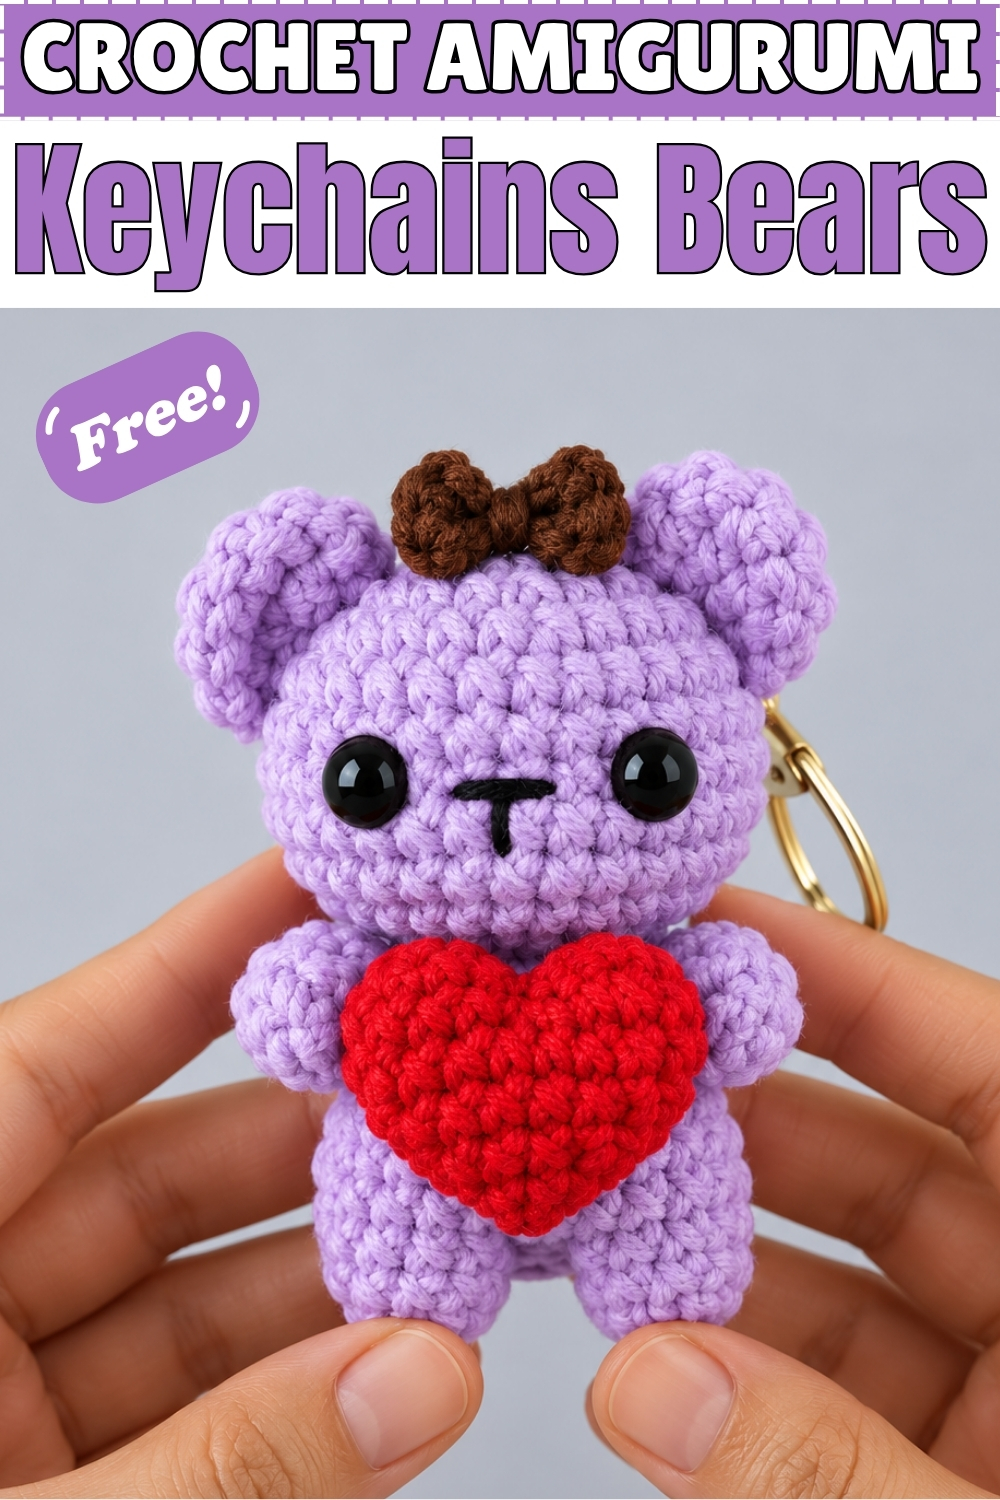
Two small circles form the muzzle of this crochet keychain bear, joined to each other before the head grows outward around them. Round ears sit high on the sides, worked into front loops so they stand up without any sewing. Soft purple yarn keeps the whole piece light enough to swing from a zip pull all day. A red heart presses against the chest and gives the little bear something to hold onto. Brown yarn ties a small bow above the forehead. Arms stay unstuffed so they curve around the heart. Everything finishes with a swivel clip.
Quick Facts
- Difficulty: easy to confident beginner, as long as you are comfortable working in a continuous spiral and joining two small circles.
- Time: in my experience this one takes roughly three to four hours spread over an evening, with most of that going into assembly and the face.
- Finished size: mine sits comfortably in the palm of a hand, about the length of my thumb plus a little, though your yarn and tension will shift this.
Materials and Tools
- Worsted weight or light worsted yarn in lilac purple for the head, body, ears, arms and legs.
- Small amount of true red yarn for the heart.
- Small amount of chocolate brown yarn for the bow.
- Black yarn or black embroidery floss for the nose and mouth, since my face is embroidered rather than pre printed.
- Two black safety eyes in a small size, around 8 mm on my bear, or black yarn if you are making this for a baby.
- Crochet hook one size smaller than your yarn label suggests, so the stuffing never peeks through.
- Polyester fiberfill for the head, body and heart.
- Tapestry needle for closing and sewing parts together.
- Stitch marker to track the start of each round.
- One lobster clasp keyring with a split ring, gold on mine.
- Pink blush or chalk pastel if you want soft cheeks, which is optional.
Beginner Technique Notes
- MR means magic ring, the adjustable loop that starts a closed circle.
- SC means single crochet, DC means double crochet, and SL ST means slip stitch.
- INC means increase, which is two single crochets worked into one stitch. DEC means decrease, which is two stitches worked together into one. DC INC means two double crochets in the same stitch.
- FLO means front loop only, and BLO means back loop only. The ears depend on this, so take a moment to find the two loops at the top of each stitch before you start that round.
- CH means chain.
Customization Ideas
- Swap the lilac for mint, dusty pink or cream and keep the red heart, since the contrast is what makes the bear read as a gift.
- Change the heart colour to match a sports team, a school or a wedding palette.
- Leave the heart off entirely and sew a tiny embroidered initial on the chest instead.
- Use a plain ribbon bow instead of the crocheted one if you are making a batch and want them finished faster.
- Make the bow in the same purple as the body for a quieter, tonal version.
- Skip the clasp and sew a loop of chain to the back of the head if you would rather hang the bear from a rear view mirror or a nursery shelf.
- Add the tail from the last pattern section if you want a fuller animal shape rather than a flat backed keychain.
The Pattern
Head
The head starts as two small circles that become the muzzle, then grows outward around them. On my bear these two circles sit low and centred, with the embroidered nose landing exactly on the seam between them.
Muzzle Circle One
- Round 1: 6 SC in a magic ring. (6) Pull the ring tight, slip stitch into the first stitch, chain 1, and cut the yarn. The circle should be a firm little coin with no hole at the centre.
Muzzle Circle Two and Joining
- Round 1: 6 SC in a magic ring. (6) Do not cut the yarn this time.
- Turn your work, insert the hook into the last single crochet you made, pick up circle one, and insert the hook into its final slip stitch.
- Work 2 SC through all four loops of both pieces at once to lock them together. Pull these two joining stitches snug, because a loose join leaves a visible gap right under the nose.
- Open the joined piece out flat and begin crocheting around the outside perimeter of both circles. From here you are working one continuous oval.
Shaping the Head
- Round 2: 1 SC in the same joining stitch, 1 SC, 2 INC, 4 SC placing 2 on the first circle, the third in the opposite joining stitch and the fourth in the next stitch, 2 INC, 2 SC. (16) Place your stitch marker now, since the join makes it easy to lose your place. The piece should look like a wide peanut.
- Round 3: 7 SC, 2 INC, 7 SC. (18) End with a slip stitch and chain 1.
- Round 4: 2 SC, 1 INC repeated 3 times, then 1 INC, 2 SC repeated 3 times. (24) End with a slip stitch and chain 1. The mirrored increase order keeps the face symmetrical, so do not simplify it into one repeat.
- Round 5: 3 SC, 1 INC repeated 3 times, then 1 INC, 3 SC repeated 3 times. (30) End with a slip stitch and chain 1.
- Rounds 6 to 9: 30 SC around for 4 rounds. (30) The head should now be a rounded dome with the muzzle sitting proud at the front.
- Round 10: Chain 1, 10 SC. First ear: 1 SC in FLO, 1 DC INC in FLO, chain 1, 1 DC INC in FLO, 1 SC in FLO. Forehead: 5 SC through both loops. Second ear: 1 SC in FLO, 1 DC INC in FLO, chain 1, 1 DC INC in FLO, 1 SC in FLO. Side and back: 7 SC through both loops. (36 counting the ear chains) Slip stitch and chain 1. On my bear I rounded these ear sections rather than letting them come to a point, pushing the double crochets outward with my thumb as I worked so the finished ears read as bear ears instead of cat ears.
- Round 11: 10 SC, skip the 7 ear stitches and work 4 SC in the unworked back loops behind the first ear, 5 SC, skip the 7 ear stitches and work 4 SC in the back loops behind the second ear, 7 SC. (30) Slip stitch and chain 1. The ears now stand free of the head and the body of the head carries on underneath them.
- Round 12: 30 SC around. (30)
- Round 13: 3 SC, 1 DEC repeated 6 times. (24) Slip stitch and chain 1.
- Round 14: 1 SC, 1 DEC, 1 SC repeated 6 times. (18) Slip stitch and chain 1. Start stuffing the head firmly now, while you can still reach inside easily. A firm head keeps the ears upright and stops the keychain sagging when it hangs.
- Round 15: 1 SC, 1 DEC repeated 6 times. (12) Slip stitch and chain 1. Add a little more stuffing and press the muzzle outward from inside so it stays rounded.
- Round 16: 6 DEC. (6) Slip stitch, chain 1, and cut the yarn leaving a 20 cm tail.
- Closing: thread the tail onto a tapestry needle, weave through the front loops of the final 6 stitches, pull tight to close the hole, and bury the end inside the head. The closing hole sits at the back of the head where the keyring will attach on my version.
Body
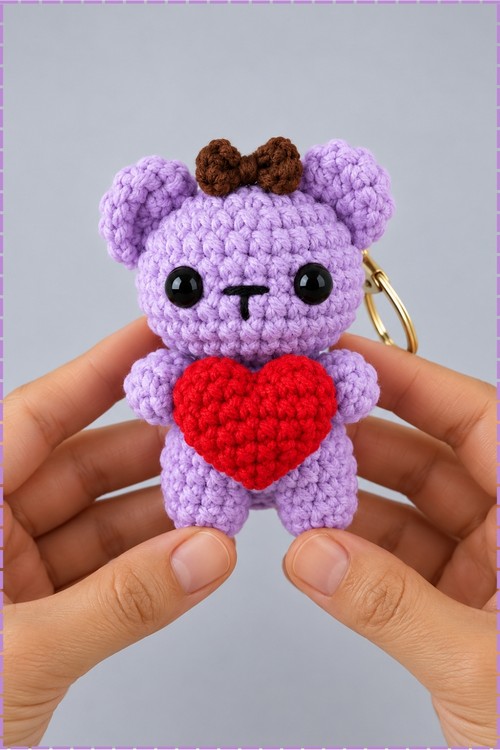
My body is the same purple as the head and stays short and chunky, since a keychain needs to be compact.
- Round 1: 6 SC in a magic ring. (6)
- Round 2: 6 INC. (12)
- Round 3: 1 SC, 1 INC repeated 6 times. (18)
- Round 4: 1 SC, 1 INC, 1 SC repeated 6 times. (24)
- Round 5: 3 SC, 1 INC repeated 6 times. (30)
- Rounds 6 to 10: 30 SC around for 5 rounds. (30) The body should be a straight sided barrel at this point.
- Round 11: 3 SC, 1 DEC repeated 3 times, 15 SC. (27)
- Round 12: 27 SC around. (27)
- Round 13: 2 SC, 1 DEC repeated 3 times, 15 SC. (24)
- Round 14: 24 SC around. (24)
- Round 15: 1 SC, 1 DEC repeated 3 times, 15 SC. (21)
- Round 16: 21 SC around. (21)
- Round 17: 3 DEC, 15 SC. (18) The decreases all stack on one side, and that side becomes the tummy where the heart sits.
- Round 18: 15 SC, 3 SL ST. (18)
- Round 19, an incomplete round: 6 SL ST, 8 SC, 1 SL ST. Chain 1 and cut the yarn leaving a very long tail for sewing the body to the head. Stuff the body firmly before you sew, because the keychain gets squeezed constantly and a soft body goes shapeless fast.
Arms, Worked as the Front Legs
Make two. Leave these unstuffed so they bend around the heart the way mine do.
- Round 1: 6 SC in a magic ring. (6)
- Round 2: 2 SC, 1 INC repeated 2 times. (8)
- Rounds 3 to 10: 8 SC around for 8 rounds. (8)
- Round 11: 3 SC, 2 DC, 3 SC. (8) The two double crochets create a gentle bend, which becomes the elbow curve.
- Round 12: 1 SL ST, 2 SC, 2 DC, 2 SC, 1 SL ST. (8) Chain 1 and cut the yarn, leaving a long tail for sewing.
- On my bear I left the paw pads unembroidered, so the arms stay plain purple all the way to the tip. If you want contrast pads, embroider them between rounds 1 and 2 with french knots in a deeper shade. Mirror the bends so the curve of each arm faces outward.
Legs, Worked as the Back Legs
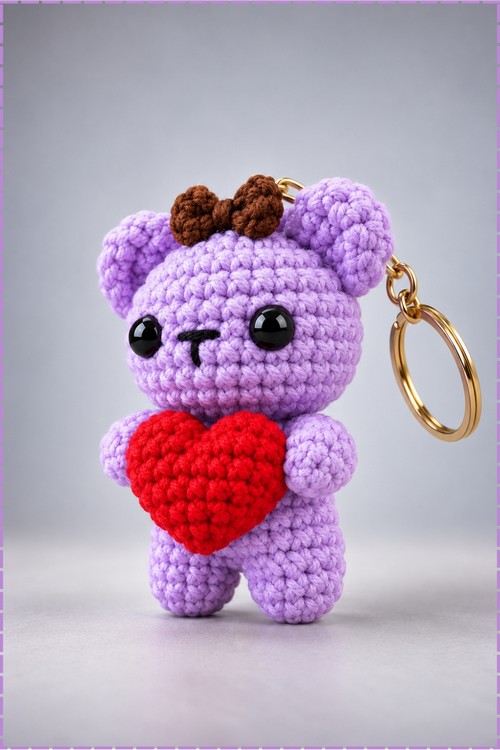
Make two. These stay unstuffed too and sit flat so the bear can stand on a shelf.
- Round 1: Chain 8. Starting in the second chain from the hook, work 1 INC, 5 SC, 3 SC in the last chain, then work down the opposite side of the chain with 6 SC. (16) You should have a flat oval sole.
- Round 2: 2 INC, 5 SC, 3 INC, 5 SC, 1 INC. (22)
- Round 3: 22 SC around. (22) Embroider any paw pad details now while the sole is still open and flat. Mine are left plain purple.
- Round 4: 2 DEC, 5 SC, 3 DEC, 5 SC, 1 DEC. (16)
- Round 5: 1 INC, 2 SC, 1 INC, skip 9 stitches to form the ankle bend, then in the tenth stitch work 1 INC, 2 SC. (10) Skipping those stitches is what tips the foot forward, so count carefully here.
- Round 6: 2 INC, 3 SC, 2 INC, 3 SC. (14)
- Round 7: 1 SC, 2 INC, 5 SC, 2 INC, 4 SC. (18)
- Rounds 8 to 10: 18 SC around for 3 rounds. (18)
- Round 11: 1 SC, 1 DEC repeated 6 times. (12)
- Round 12: 6 DEC. (6) Slip stitch, chain 1 and cut the yarn leaving a 30 cm tail. Weave through the front loops of the last 6 stitches and pull closed.
- Thread the remaining tail down to the skipped 9 stitch gap at the heel from round 5 and whip stitch it fully closed. Keep these stitches tight and even, because this seam shows from the side when the bear hangs.
Tail, Optional
My keychain has no tail, since a flat back sits better against a bag. Make this only if you want the fuller animal shape. Stuff it very lightly so it stays poseable.
- Round 1: 6 SC in a magic ring. (6)
- Round 2: 6 SC around. (6)
- Round 3: 1 INC, 5 SC. (7)
- Rounds 4 to 5: 7 SC around for 2 rounds. (7)
- Round 6: 1 INC, 6 SC. (8)
- Rounds 7 to 9: 8 SC around for 3 rounds. (8)
- Round 10: 1 INC, 7 SC. (9)
- Rounds 11 to 14: 9 SC around for 4 rounds. (9) Slip stitch, chain 1 and cut the yarn, leaving a long tail for sewing.
Red Heart
The heart on my bear is worked separately in red and sewn across the chest, where the arms meet it on both sides. The plain pattern does not include a heart, so work it with your preferred small amigurumi heart method rather than invented counts.
- Make two matching rounded bumps side by side, then join them and work around the joined piece, decreasing evenly down each side until the shape comes to a point at the bottom. Stop when the heart looks right against your bear's chest.
- Stuff the heart lightly and flatten it slightly before closing, since a puffy heart pushes the arms out of position.
- Leave a long red tail for sewing. Check the width against the body before you fasten off, because the heart should span almost the full tummy the way mine does.
Brown Bow
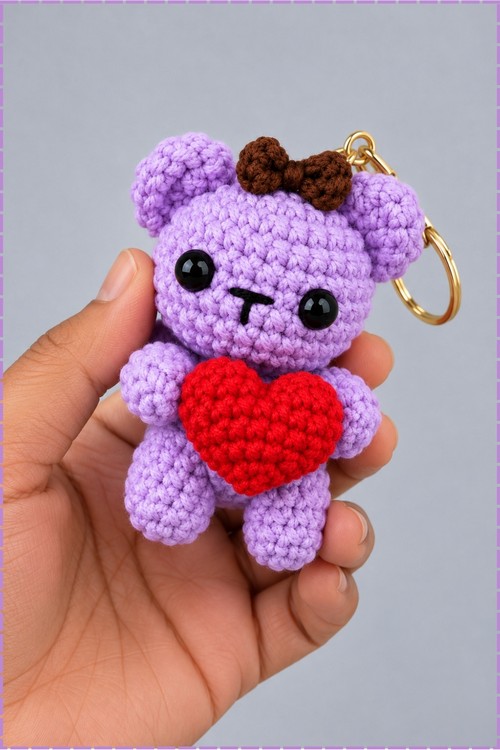
The bow sits above the forehead, slightly off centre, between the two ears.
- Chain in brown until the strip reaches your preferred bow width, then work single crochet rows back and forth until you have a small rectangle.
- Pinch the rectangle in the middle, wrap the yarn tail around the pinch several times, and pull tight to form the two loops.
- Secure the wrap at the back and keep both tails long for sewing.
- Work the bow loops a touch wider than feels right, since they flatten once sewn down.
Assembly
- Face sculpting: thread a long length of purple yarn on a tapestry needle and pass it through the head across the eye area, pulling gently to create two shallow indentations. Knot underneath and hide the ends inside. This is what makes the eyes sit deep rather than perched on the surface.
- Eyes: mark 4 rounds inward from the base of the ears and insert the safety eyes there, one on each side of the muzzle, before the head is fully closed if you can. Mine are plain black domes with no white highlight.
- Nose and mouth: using black yarn, embroider a small rounded triangle directly on the seam where the two muzzle circles meet, then run two short stitches down and outward from the base of the triangle to make the small smile. Keep the mouth stitches shallow, since pulling them tight dents the muzzle.
- Head to body: sit the head on the body with the decreased tummy side facing forward. Sew all the way around the join with the long body tail, adding a pinch more stuffing through the gap just before you close it. Mine sits straight rather than tilted, which suits a keychain.
- Arms: sew one arm to each side of the body directly below the head seam, angled slightly forward so the tips meet the sides of the heart.
- Legs: pin the legs to the lower sides of the tummy, roughly between rounds 4 and 12 of the body, with the soles facing forward and down. Sew securely all the way round so the bear sits upright without tipping.
- Heart: pin the heart across the tummy with the point facing down, then sew around the whole outline with red yarn so the edges do not lift away from the body. Tuck the arm tips over the sides of the heart as you sew.
- Bow: sew the bow flat against the top of the head, set a little to one side of centre and just in front of the gap between the ears.
- Keyring: attach the split ring to the back of the head at the closing point. Sew a short loop of purple chain through the ring and anchor both ends firmly into the head, passing the needle through several times so the loop never pulls free. Attach it at the back of the head rather than the body, since the head is the heaviest part and hangs level this way.
Tips and Troubleshooting
- Work the whole bear at a tighter tension than you would for a shelf toy. Keychains get rubbed against keys and zips, and a dense fabric keeps the stuffing hidden and the colour clean.
- Keep the magic rings tight on both muzzle circles. Any gap there sits right in the middle of the face where it is most visible, and no amount of embroidery hides it afterwards.
- Pin every part before you sew, then hold the bear at arm's length and check symmetry. Eyes and arms that sit even a stitch apart read as crooked on a piece this small.
Yarn Substitution
Cotton gives the sharpest stitch definition and holds up best to daily handling, which is why I would reach for it again on a keychain. Acrylic works perfectly well and comes in brighter purples, though it fuzzes faster where it rubs against a bag. Avoid anything fluffy or brushed, because the texture swallows the embroidered nose and mouth entirely. If you switch yarn weight, go down a hook size from the label and expect the finished bear to change size even though every stitch count stays the same.
FAQ
Can I make this safe for a small child? Yes. Skip the safety eyes and embroider the eyes with black yarn instead, and sew the heart, bow and keyring loop down thoroughly. Anything that can be pulled off a keychain will be pulled off eventually.
Why does my head look lopsided? Round 4 and round 5 use mirrored increase repeats, and running them as a single repeat throughout pushes the face off centre. Check that you worked the first half and second half in opposite order.
Do the arms and legs really stay unstuffed? They do. Unstuffed limbs stay slim and flexible, which lets the arms curve around the heart. A little stuffing in the upper arm is fine if you prefer a rounder shape, but leave the tips empty.
How do I stop the keyring from tearing out? Anchor the chain loop through at least four or five separate stitches at the back of the head rather than one, and pass the yarn back through the head between each anchor point. Weight is spread instead of landing on a single stitch.