
Crochet Cat Pattern Free Amigurumi Kitty Doll
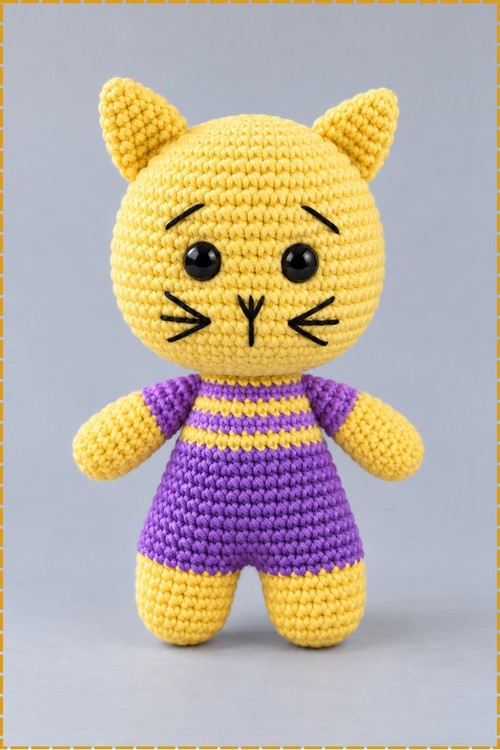
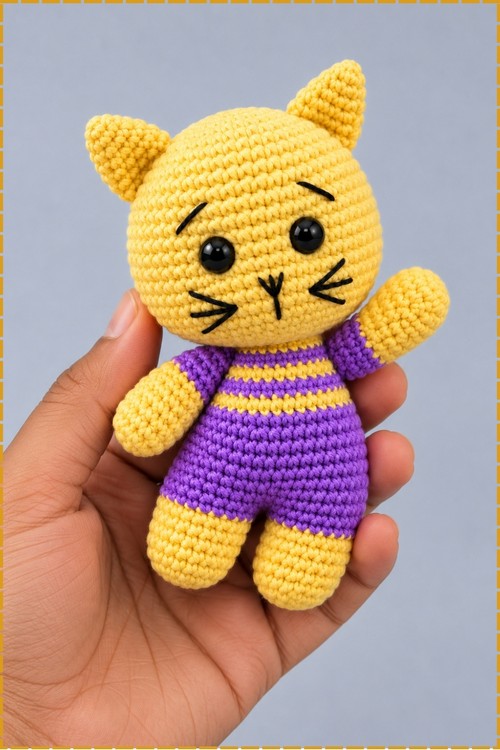
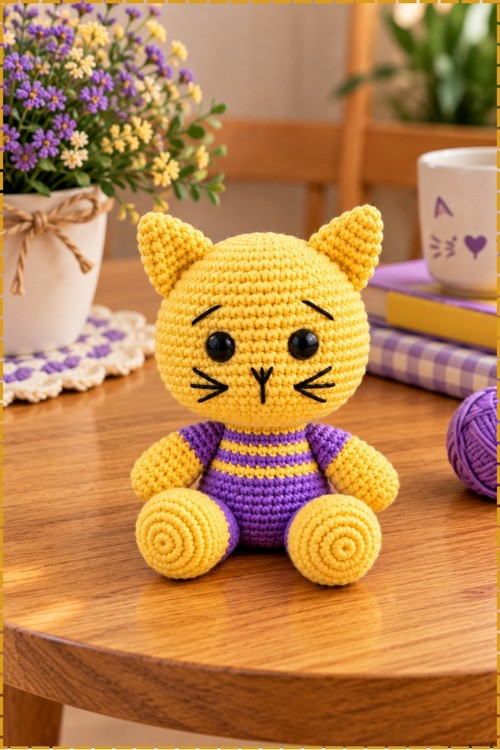
Round cheeked and golden yellow, this kitty cat doll wears a purple romper with stripes worked straight into the body. Two feet join into one round so legs and torso grow upward in a single piece, and sculpting stitches shape the cheeks beside black safety eyes.
Big head, striped romper, black bead eyes. That is the crochet kitty cat amigurumi doll in full. Pieces are made separately and sewn. Colour changes handle the outfit, so there is nothing extra to dress it in. Build a crochet kitty cat amigurumi doll in an afternoon of steady rounds.
Crochet Kitty Cat Amigurumi Doll
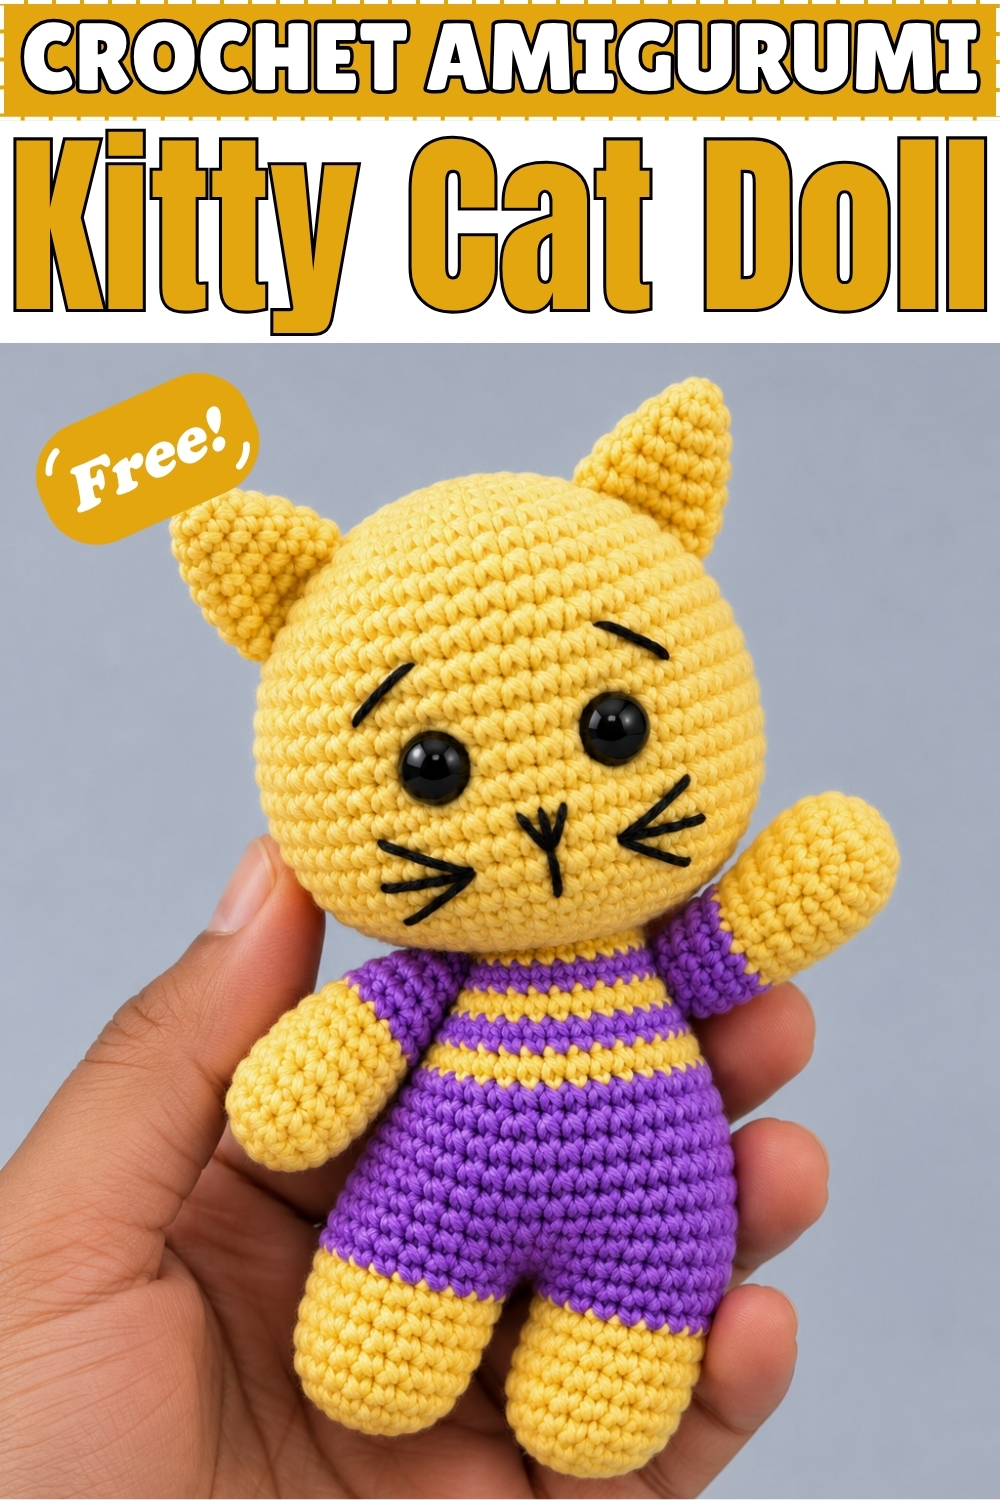
Legs begin as two separate feet that join into one round, so this crochet kitty cat amigurumi doll grows upward in a single piece to the shoulders. Colour changes build the striped top directly into the body rather than dressing the doll afterward. Mine uses golden yellow for the cat and purple for the outfit, with the stripes worked in that same yellow. Sculpting stitches pulled through the face create the rounded cheeks either side of the eyes. Arms sew on last, close against the body. Plan on several hours across the parts and the assembly.
Materials
- Golden yellow yarn for the head, ears, arms, legs, and feet
- Purple yarn for the outfit, both the shorts and the top
- Black embroidery thread for the eyebrows, whiskers, and nose
- 2 mm crochet hook
- Small black safety eyes
- Stuffing
- Sewing needle and scissors
My colours replace the white, dark green, and light green the pattern lists. Yellow does the work of the white, and purple replaces both greens, so the outfit reads as one colour with yellow stripes across the chest.
Difficulty and Time
Intermediate, mostly for the leg join and the colour changes. Several hours in my experience, spread over two sittings.
The Pattern
Arms, Make 2
- Row 1: With yellow yarn, make a magic ring and work 7 single crochet (sc) into it. Pull the ring tight. (7)
- Rows 2 through 8: Work 7 increases in the first round after the ring to reach 14 stitches, then maintain 14 sc with no changes across the remaining rows. (14)
- Colour change: on the last stitch of the yellow rows, leave 2 loops on the hook, switch to purple, and pull through. Work a few anchoring stitches in purple and cut the yellow.
- Rows 9 through 14: Work 6 more rows of 14 sc in purple. (14) The purple section becomes the sleeve and on my doll it covers roughly the upper half of each arm.
- Finish: fasten off with a slip stitch, leaving a long tail for sewing.
First Foot
- Row 1: With purple yarn, make a magic ring and work 8 sc into it, then pull tight. (8)
- Row 2: Work 8 increases, meaning 2 sc in each stitch. (16)
- Row 3: Work (1 sc, 1 increase) repeated 8 times. (24)
- Rows 4 through 8: Work 5 rows of 24 sc with no changes. (24)
- Finish: fasten off, cut the yarn, and pull through.
Second Foot and Joining the Body
- Repeat rows 1 through 8 of the first foot, but do not cut the yarn on the second foot.
- Join the second leg to the first at the slip stitch point, continuing in the purple body yarn.
- Row 1: Crochet 24 sc around the first leg. At the connecting gap between the legs, work a decrease spanning the middle stitch and the first stitch of the second leg to close any hole. Continue with 23 more sc around the second leg. (48) The join is the weakest point on any two leg doll, so pull that decrease snug.
- Rows 2 through 6: Work 5 rows of 48 sc with no changes. (48)
- Row 7: Work (6 sc, 1 decrease) repeated around. (42)
- Rows 8 through 10: Work 3 rows of 42 sc with no changes. (42)
- Row 11: Work (5 sc, 1 decrease) repeated around. On the final decrease, do not finish the last stitch. Swap to the yarn for the top, which on my doll is the same purple. (36)
- Row 12: Working into the back loops only, crochet 36 sc around in the top colour. The back loop round leaves a visible ridge that reads as the waistband where the shorts meet the top.
- Row 13: Switch to yellow and work 36 sc around. (36)
- Row 14: Switch back to purple and work (4 sc, 1 decrease) repeated 6 times.
- Row 15: Switch to yellow and work 30 stitches with no changes. (30)
- Row 16: Switch to purple and work (3 sc, 1 decrease) repeated 6 times. (24) The alternating rows produce the two yellow bands across the chest, which on my doll sit high, just below the shoulders.
- Finish: complete a slip stitch, fasten off, and leave a tail. Stuff the body firmly.
Head
- Row 1: With yellow yarn, make a magic ring and work 8 sc into it, then pull tight. (8)
- Row 2: Work 8 increases. (16)
- Row 3: Work (1 sc, 1 increase) repeated 8 times. (24)
- Increase rows: continue increasing progressively each row, working (2 sc, 1 increase), then (3 sc, 1 increase), and onward up to (7 sc, 1 increase) repeated 8 times. (72)
- Rows 5 through 16: Work 12 rows of 72 sc with no changes. (72)
- Eyes: count down 14 rows from the magic ring and insert the small black safety eyes between rows 14 and 15, leaving 9 stitches between them. Fit them before any decreasing, since the head closes from here.
- Decrease row 1: Work (7 sc, 1 decrease) repeated 8 times. (64)
- Decrease row 2: Work 64 sc with no changes. (64)
- Remaining decrease rows: continue decreasing gradually, working (6 sc, 1 dec), then (5 sc, 1 dec), down through (2 sc, 1 decrease), until 24 stitches remain. (24)
- Finish: stuff the head firmly, then fasten off leaving a long tail for sewing.
Ears, Make 2
- Row 1: With yellow yarn, make a magic ring and work 4 sc into it, then pull tight. (4)
- Row 2: Work 4 increases. (8)
- Increase rows: continue increasing progressively, working (3 sc, 1 increase), then (4 sc, 1 increase), up to (6 sc, 1 increase) repeated 2 times. (16)
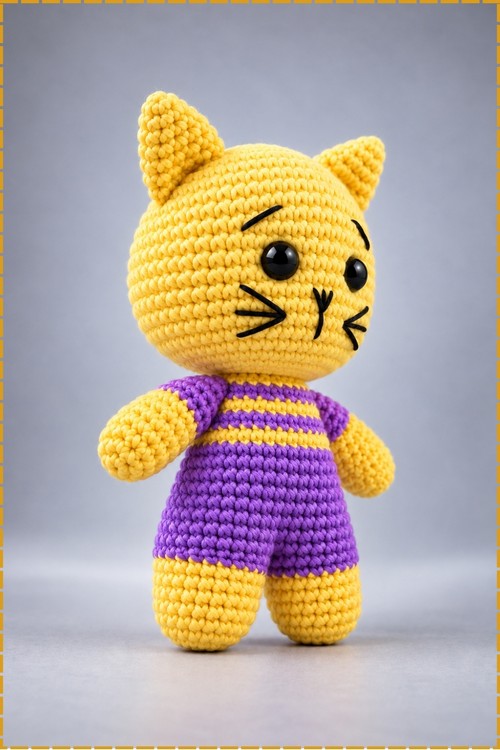
- Finish: fasten off with a slip stitch, leaving a tail for sewing. Keep the ears flat and do not stuff them, since flat ears hold the pointed triangle shape that mine have.
Assembly and Face
- Sew the arms onto the upper body at the sides, positioned just above the waistband. On my doll they hang straight down and sit close against the body.
- Sew the head securely onto the top of the body, checking it faces straight forward before you commit.
- Pin and sew the ears about 4 rows down from the top of the head, keeping them flat and angled slightly outward.
- Thread a needle with matching yellow yarn, insert it from the neck up through the middle of the face about 4 rows below the eyes, and pull tightly around the sides of the eyes to sculpt puffy cheeks. Repeat and anchor securely. Pull gradually and check the face from the front as you go, since this step is easy to overdo.
- Embroider the eyebrows in black thread, set well above the eyes as two short curved lines.
- Embroider the whiskers in black thread, three on each side fanning outward from the muzzle.
- Stitch a small triangular nose in the center, directly between and slightly below the eyes.
Tips
- Count the head increase rows carefully. The pattern compresses them into one instruction, so write the sequence out before you start.
- Keep the carried colour loose inside the body. Tight floats pucker the stripes.
- Stuff the body before sewing the head on. Reaching in afterward distorts the neck.
- Pin everything before sewing. On a doll this size a few stitches out of place changes the whole expression.
Customization Ideas
- Change the outfit colour entirely, or make the stripes a third colour.
- Work the sleeves in a contrasting shade from the body of the top.
- Give the cat a tail by crocheting a stuffed tube and sewing it low on the back.
- Embroider a different mouth, or add a small bow between the ears.
- Skip the safety eyes and embroider them instead for a baby safe version.
FAQ
How many increase rows does the head actually need?
The pattern compresses them, but the sequence runs from (1 sc, 1 inc) up to (7 sc, 1 inc), each repeated 8 times, ending at 72 stitches. Write the full list out before starting.
Why does my leg join have a hole?
The decrease spanning the gap between the legs was worked too loosely or skipped. That one stitch is the only thing closing the crotch, so it needs to be tight.
How tight should the cheek sculpting be?
Tight enough to see the cheeks round out, loose enough that the face does not dent inward. Pull a little, look at the front, and pull again rather than cinching in one go.