
Crochet Disney Princess Dolls Amigurumi Pattern
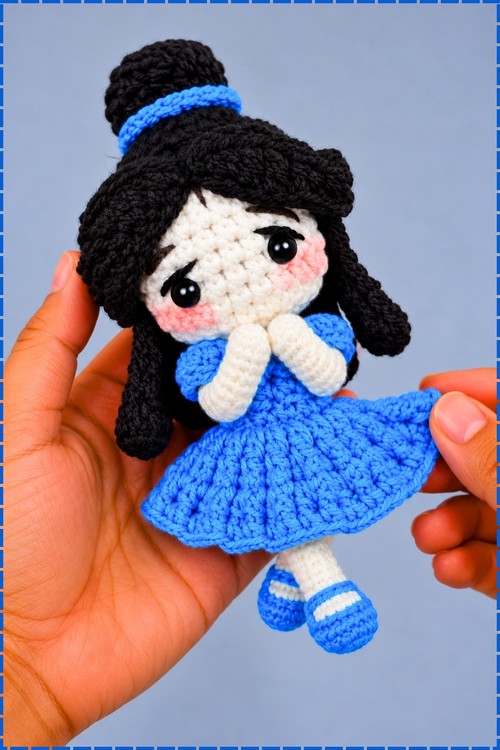
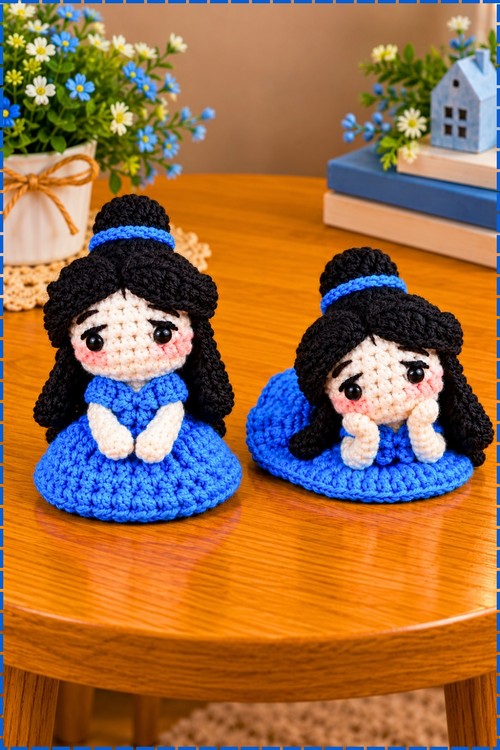
Ever wanted a crochet princess doll amigurumi whose ruffled blue skirt grows straight out of the body? Front loops saved on round 4 make it happen, while long dark strands gather into a high bun with a blue band and a 5.0 mm hook keeps the hair soft.
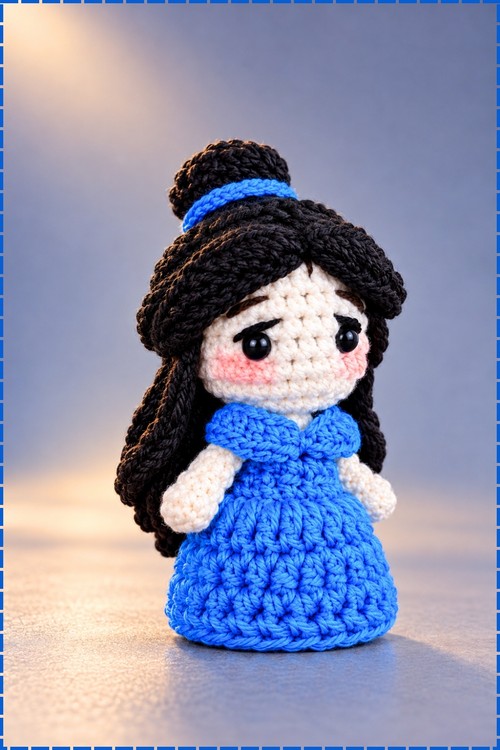
Those tilted brows give this Crochet Disney Princess Dolls Amigurumi a thoughtful look rather than a cheerful one. Quiet, a little serious. The topknot adds poise. Set the Crochet Disney Princess Dolls Amigurumi on a shelf and the expression reads different from every angle, which is what keeps people picking it up.
Crochet Disney Princess Dolls Amigurumi
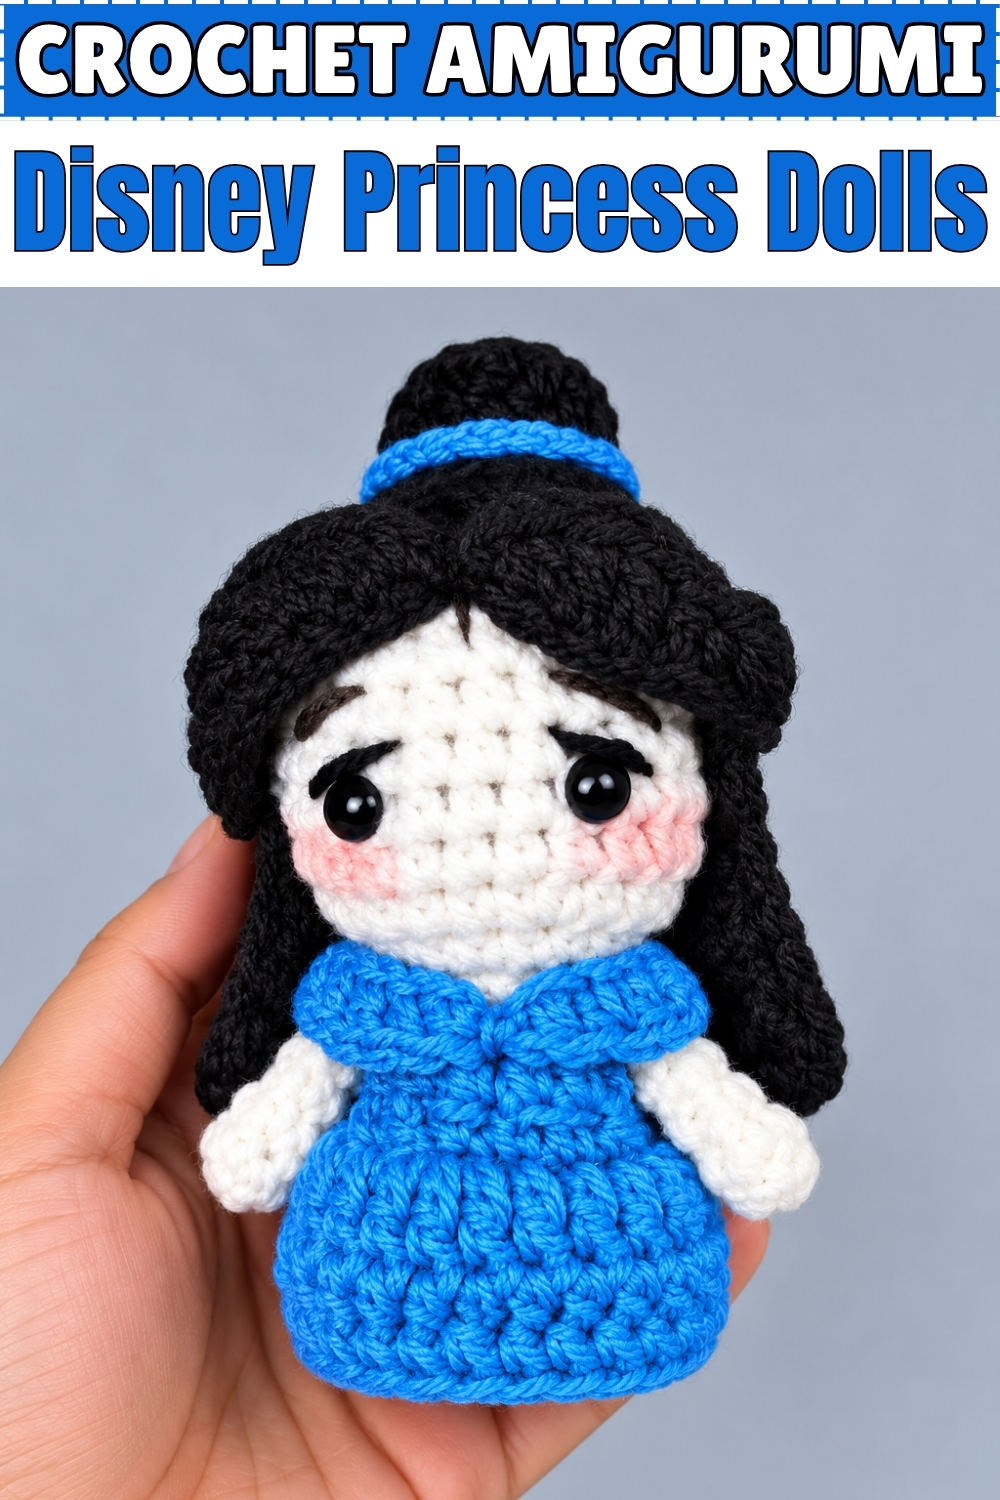
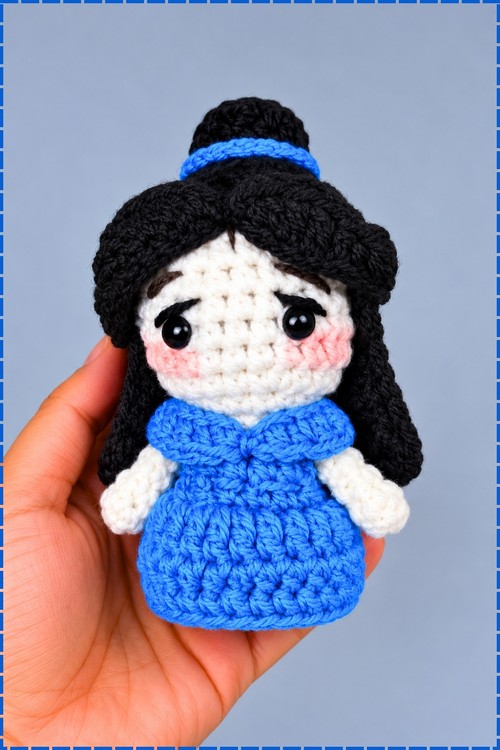
Working the body and head as one continuous piece from the bottom up means there is no neck seam to sew and no wobbly join to fight with later. Mine wears a bright blue dress with a full ruffled skirt, worked into the front loops left waiting on round 4. Dark brown hair falls in long strands on both sides, gathered into a high bun with a blue band. Black safety eyes sit above soft pink blush, with fine dark eyeliner and brows stitched on afterward. Standing height comes to roughly five inches for me.
Materials and Tools
- 4.0 mm crochet hook for the body, arms, dress, and hairband
- 5.0 mm crochet hook for the hair cap and hair strands
- Medium weight yarn in bright blue for the dress base and hairband
- Medium weight yarn in a pale skin tone for the head, neck, and arms
- Medium weight yarn in dark brown for the hair and eyebrows
- Scrap of black yarn for the eyeliner detail
- Two 9 mm safety eyes with backings
- Fiberfill stuffing
- Stitch marker
- Tapestry needle
- Scissors
- Hot glue gun, optional, for faster assembly
- Blush and a small applicator
Difficulty and Time
Intermediate, mostly because of the number of small pieces rather than any hard stitch. The hair is the part that takes patience. From my own build, allow one evening for the body, dress, and arms, then a second sitting for the hair and the face.
Beginner Technique Notes
Magic circle is abbreviated MR. Single crochet is sc. Increase is inc and means 2 single crochet in the same stitch. Decrease is dec and means single crochet 2 together. Half double crochet is hdc, double crochet is dc, slip stitch is sl st, and chain is ch. Back loop only is BLO, which means working into just the back strand of the stitch and leaving the front loop free for later.
Those free front loops on round 4 are what the skirt attaches to, so resist the urge to work through both loops there. The same logic applies at round 7.
The Pattern
Body and Head in Blue and Skin Tone
- Round 1: using blue yarn and the 4.0 mm hook, work 6 single crochet into a magic circle [6].
- Round 2: work an increase into each stitch around [12].
- Round 3: repeat 1 single crochet then 1 increase six times [18].
- Round 4: working in back loop only, work 1 single crochet in each stitch around [18]. The free front loops left here become the attachment ridge for the skirt, so keep them clear.
- Round 5: work 1 single crochet in each stitch around through both loops [18].
- Round 6: work 1 single crochet in each stitch around through both loops [18].
- Round 7: working in back loop only, repeat 4 single crochet then 1 decrease three times [15].
- Round 8: work 1 single crochet in each stitch around, changing colour to skin tone on the last stitch [15]. Changing on the final stitch keeps the colour line crisp instead of stepped.
- Round 9: using skin tone yarn, work 1 single crochet in each stitch around [15].
- Round 10: repeat 1 single crochet then 1 decrease five times [10]. This narrow point is the neck, so the shape should pinch in clearly here.
- Stuff the body firmly at this step, before the neck closes in any further.
- Round 11: work an increase in each stitch around [20].
- Round 12: repeat 4 single crochet then 1 increase four times [24].
- Round 13: work 1 single crochet in each stitch around [24].
- Round 14: work 1 single crochet in each stitch around [24].
- Round 15: work 1 single crochet in each stitch around [24].
- Round 16: work 1 single crochet in each stitch around [24].
- Round 17: work 1 single crochet in each stitch around [24].
- Round 18: work 1 single crochet in each stitch around [24]. The head should now read as a rounded barrel sitting above a narrow neck.
- Insert the 9 mm safety eyes between rounds 14 and 15, spaced 4 visible stitches apart, then stuff the neck and lower head. Fix them before the head closes, since the backings will not come off.
- Round 19: repeat 2 single crochet then 1 decrease six times [18].
- Round 20: repeat 1 single crochet then 1 decrease six times [12].
- Finish stuffing the head firmly at this point, packing it harder than feels right so the face stays smooth.
- Round 21: work a decrease into each stitch around [6].
- Fasten off leaving a tail, weave it through the front loops to cinch the opening closed, and weave in the ends.
Arms, Make 2
- Round 1: using skin tone yarn and the 4.0 mm hook, work 6 single crochet into a magic circle [6].
- Round 2: work 1 single crochet in each stitch around [6].
- Round 3: work 1 single crochet in each stitch around [6].
- Round 4: work 1 single crochet in each stitch around [6].
- Round 5: work 1 single crochet in each stitch around [6].
- Leave the arms unstuffed. Stuffed arms look chunky against this slim body.
- Flatten the top opening and work 2 single crochet across both sides to seal it shut, then fasten off leaving a long tail for sewing.
Dress Skirt in Blue
- Attach blue yarn to the remaining front loops of round 4 on the body using the 4.0 mm hook.
- Round 1: chain 2, which does not count as a stitch, then repeat 2 double crochet and 1 double crochet increase around, joining to the first stitch with a slip stitch. The skirt should immediately flare outward.
- Round 2: chain 1, work 1 half double crochet in each stitch around, then join with a slip stitch [20].
- Round 3: chain 1, work 1 single crochet in each stitch around, then join with a slip stitch. The single crochet round pulls the hem in slightly, which is what gives mine its rounded bell shape.
- Fasten off and weave in the ends.
Dress Off Shoulder Sleeves in Blue
- Using blue yarn and the 4.0 mm hook, chain 20.
- Starting in the 2nd chain from the hook, work 1 slip stitch, 2 single crochet, 2 half double crochet, 2 double crochet, 2 half double crochet, then 1 slip stitch.
- Continue with 2 half double crochet, 2 double crochet, 2 half double crochet, 2 single crochet, then 1 slip stitch in the final chain. The taller stitches at each end form the draped shoulder curves.
- Fasten off, leaving a tail for assembly.
Facial Embroidery
- Thread black scrap yarn, insert the needle from the back of the head out to the outer corner of one safety eye, and stitch one line straight or slightly angled above the eye for the eyeliner. Repeat on the other side. Keep the line short, since a long stroke makes the face look severe.
- Thread brown yarn and stitch one line above each eyeliner, spanning across 3 stitches, for the eyebrows. On my doll the brows angle gently downward toward the centre, which is what gives the soft expression.
Hair Wig Cap in Brown
- Round 1: using brown yarn and the 5.0 mm hook, work 6 single crochet into a magic circle [6].
- Round 2: work an increase in each stitch around [12].
- Round 3: repeat 1 single crochet then 1 increase six times [18].
- Round 4: repeat 2 single crochet then 1 increase six times [24].
- Round 5: work 1 single crochet in each stitch around [24].
- Round 6: work 1 single crochet in each stitch around [24].
- Round 7: work 1 single crochet in each stitch around [24].
- Round 8: work 1 single crochet in each stitch around [24]. Try the cap on the head now, since a cap that slips is much easier to fix before the back extension is added.
- Row 1: slip stitch in the next stitch, chain 1, then work 1 half double crochet across the next 12 stitches, which is halfway around.
- Row 2: chain 1, turn, and work 1 half double crochet in each of the 12 stitches.
- Row 3: chain 1, turn, and work 1 half double crochet in each of the 12 stitches.
- Row 4: chain 1, turn, and work 1 half double crochet in each of the 12 stitches. This flap covers the back of the head beneath the long side strands.
- Edging: chain 1, work 1 single crochet in each stitch down the side, then work 3 single crochet in the corner stitch.
- Continue working single crochet evenly up the edge to the top cap, work loose slip stitches across the front hairline stitches to the opposite side, work single crochet down the edge with 3 single crochet in the corner stitch, then slip stitch to join and fasten off. Keep the front hairline slip stitches loose, because a tight hairline pulls the cap up off the forehead.
Front Hair Strands and Hair Bun in Brown
- Using brown yarn and the 5.0 mm hook, chain 20.
- Work 1 slip stitch, 2 single crochet, 2 half double crochet, 2 double crochet, 2 half double crochet, 1 slip stitch, 2 half double crochet, 2 double crochet, 2 half double crochet, 2 single crochet, then 1 slip stitch, following the same sequence as the sleeve piece.
- Fasten off. My doll has long twisted strands framing both sides of the face, so make extra strands the same way and attach as many as you want until the hair looks as full as mine.
- Bun round 1: using brown yarn and the 4.0 mm hook, work 6 single crochet in a magic circle [6].
- Bun round 2: work an increase in each stitch around [12].
- Bun round 3: work 1 single crochet in each stitch around [12].
- Bun round 4: working in back loop only, work a decrease in each stitch around [6]. The back loop only round gives the bun its defined rim.
- Stuff lightly, cinch the opening tight, and leave a tail to attach.
Hairband in Blue
- Using blue yarn and the 4.0 mm hook, chain 15, or chain until the band reaches around your hair bun, then fasten off. Mine is blue to match the dress rather than gold.
Assembly and Finishing
- Sew the sealed arm tops directly to the sides of the body just below the neck seam, at the junction of rounds 10 and 11. Pin both arms first and check they hang level from the front.
- Centre the middle slip stitch of the sleeve piece against the chest, wrap the piece around the body over the shoulders and arms, then stitch it closed at the back. On my doll this forms the wide blue collar that sits across the shoulders with a soft knot at the centre front.
- Secure the hair cap onto the head with hot glue or sewing, lining the front hairline up just above the eyebrows.
- Position the front strand centred on the top of the cap, curve the sides down so they sweep across the forehead, and secure the ends. Attach the longer side strands so they fall past the shoulders as they do on mine.
- Glue or sew the bun onto the top centre of the hair cap, sitting high and slightly forward.
- Wrap the blue band around the base of the bun, stitch it down, and tie a small bow. My band wraps neatly with no visible bow tails at the front.
- Apply blush to the cheeks under the eyes with an applicator. Mine has fairly strong round pink cheeks, so build the colour up in light layers rather than one heavy pass.
Tips and Troubleshooting
- Count your stitches at the end of every round on the body. One missed increase in the head rounds shows up as a lopsided face later.
- Place the safety eyes and step back before pushing the backings on. Eye spacing changes the whole character of the doll and there is no second chance.
- Work the skirt loosely. A tight double crochet round makes the skirt stand out stiffly instead of falling into a soft bell.
- Pin the hair cap on and look at the doll from the front before gluing. A cap set even slightly low crowds the eyebrows.
- Attach the side hair strands in pairs, one on each side, checking symmetry as you go rather than doing one whole side first.
- Keep the arms unstuffed and sew them flat against the body so the sleeve piece sits smoothly over them.
- Apply blush before the hair goes on if you want clean control around the cheeks.
Yarn Substitution
Cotton gives the crisp stitch definition and clean colour blocks visible in my photo, and it holds the skirt shape well. Acrylic is softer and cheaper and works fine, though the skirt drapes a little more. Skip fuzzy yarns entirely, since the face details and the colour change at the neckline both depend on clear stitches. Keep the blue, skin tone, and brown in the same weight so the pieces fit together as written.
Customization Ideas
- Change the dress and hairband to any colour pairing you like, keeping them matched as mine are
- Work the hair in blonde, red, or black and adjust the brows to match
- Leave the hair loose without the bun for a different look
- Add a small crochet flower or bead at the base of the bun
- Make a tiny chain necklace in a contrasting colour
- Work the skirt one round longer for a floor length gown
FAQ
Why does my skirt stick out instead of hanging softly? Usually tension. Work the double crochet round with a relaxed hand and go up a hook size for the skirt only if it still stands out stiffly.
Can I make the doll without safety eyes? Yes. Embroider the eyes in black yarn as small oval satin stitches in the same position between rounds 14 and 15, which also makes the doll safe for a small child.
How do I stop the head from flopping forward? Stuff the neck rounds firmly before you work past round 11. Once the head widens, reaching back down into the neck is very difficult.
How many hair strands do I need? As many as it takes to cover the cap to your liking. Mine uses several long strands on each side, added until the hair looked full from the front and the back.
Can I sew the hair on instead of gluing it? Yes, and sewing holds up better to handling. Glue is faster, but stitching the cap around the hairline gives a cleaner edge that will not peel.