
Crochet Dragon Stacker Toy Amigurumi Free Pattern
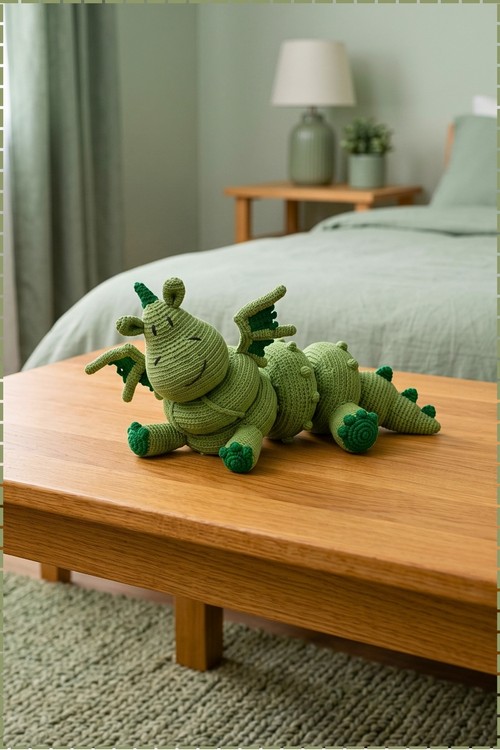
Sliding four lime green rings onto a crocheted core stem builds the dragon from the tail up, and each ring comes back off for play. Back loop single crochet runs through the whole pattern, while bobbles, puffs and forest green claws, wings and a horn add texture.
Stacking rings make this crochet dragon stacker toy amigurumi land well as a first birthday gift. Baby showers in spring, christenings, any point where someone needs a handmade present with a use. Keep the crochet dragon stacker in the gift pile through December. It beats plastic rings under a tree.
Crochet Dragon Stacker Toy Amigurumi
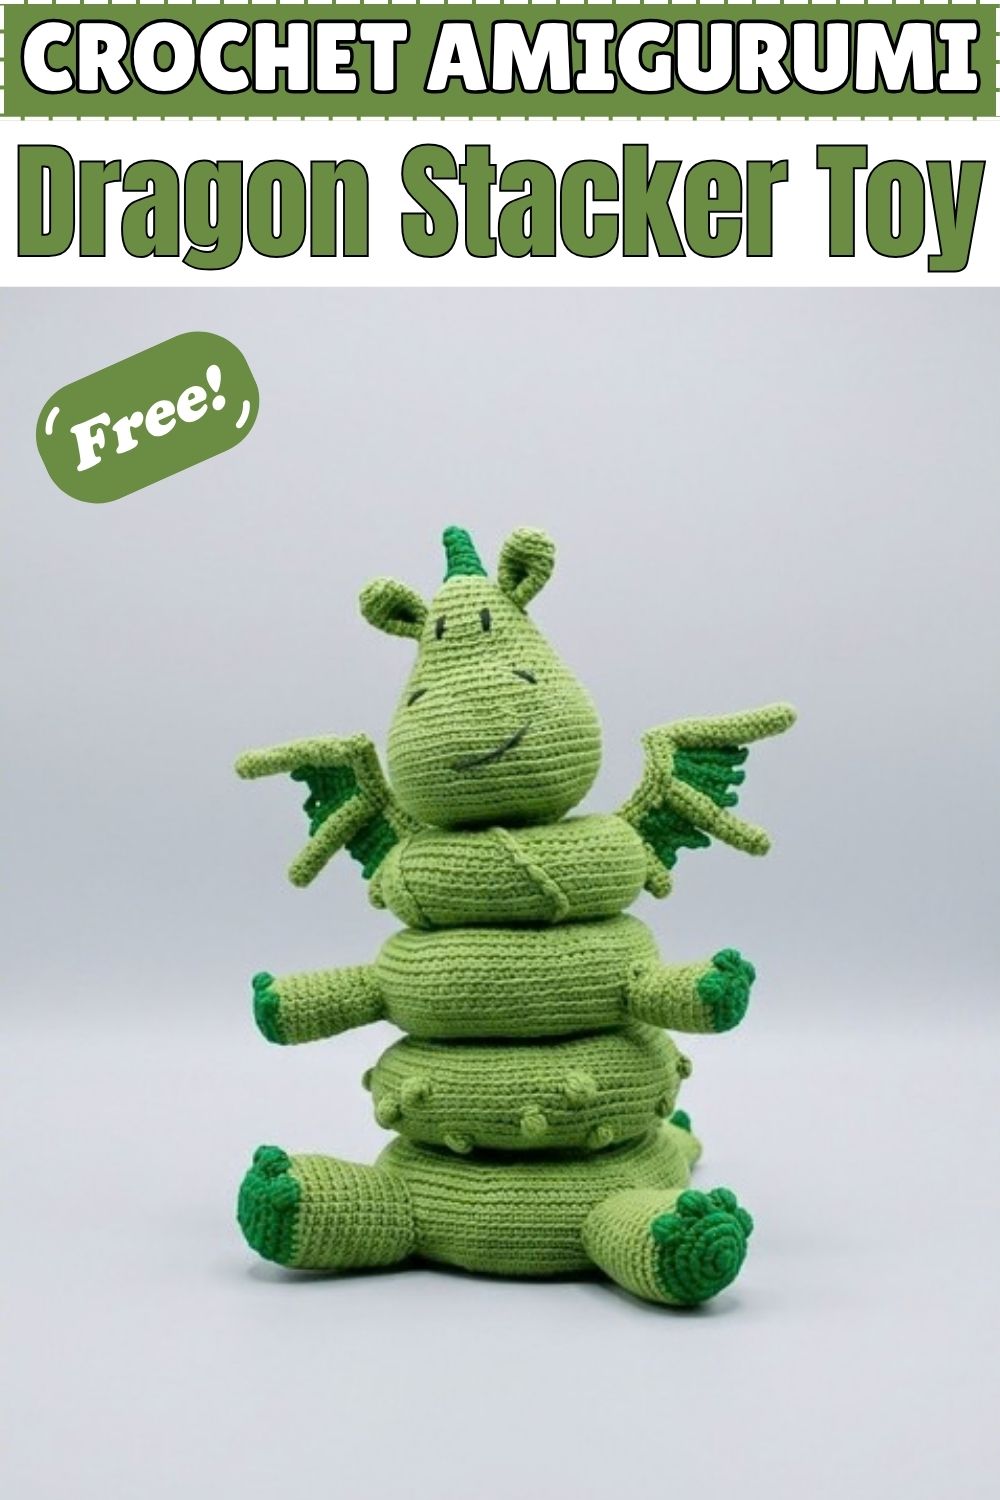
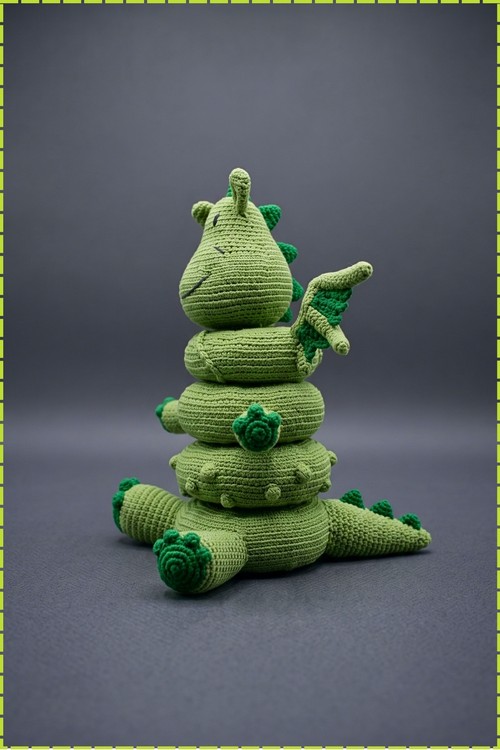
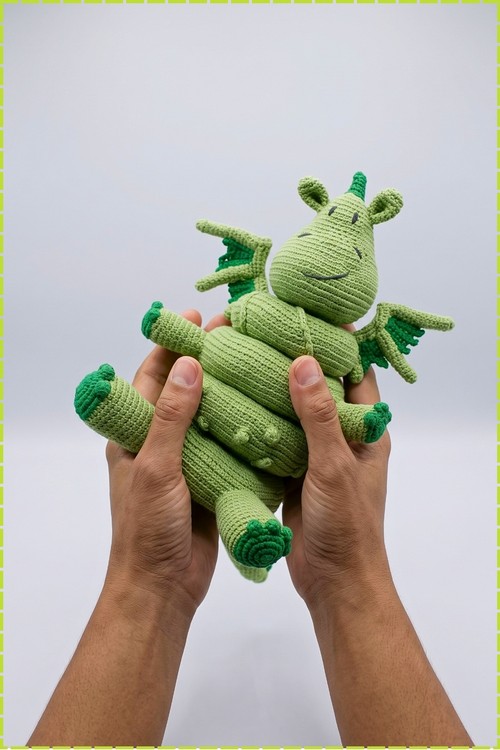
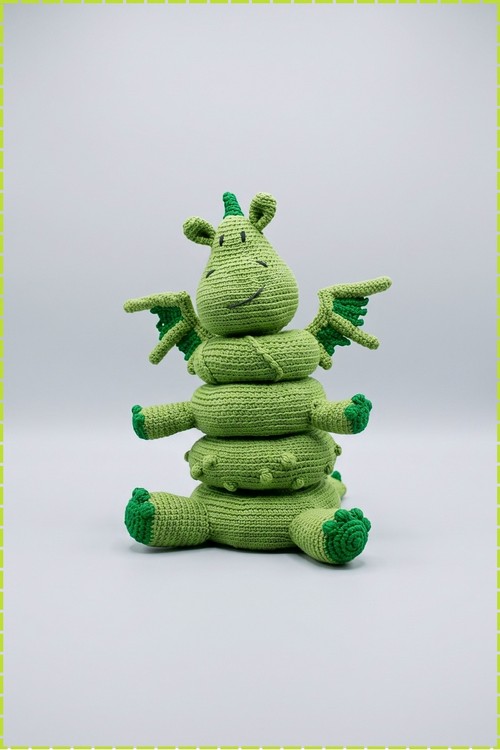
Nine separate parts stack onto a single crocheted core stem to build this crochet dragon stacker toy amigurumi, and every single crochet in the pattern is worked in back loops only unless the instructions say otherwise. My version is worked entirely in light lime green yarn with dark forest green for the claw tips, toe pads, wing details, and the single horn on the head. The finished toy stands four rings tall with the dragon head on top: bottom ring with legs and tail, bobble ring, medium ring with arms, puff ring with wings, and finally the wide round head with ears and spikes. All the rings slide off and back on.
I love this one because it actually functions as a stacker toy a toddler can use, not just a display piece, and the back loop texture gives every ring a clean ridge that makes the stacking satisfying to hold.
Materials And Tools
- Light lime green yarn for all main body parts, rings, head, arms, legs, tail, ears, and spikes
- Dark forest green yarn for claw tips on legs and arms, wing framework fingers, and the single head horn
- Crochet hook sized to your yarn weight, typically 3.0 mm to 4.0 mm for the yarn shown
- Polyester fiberfill
- Tapestry needle
- Stitch markers
- Scissors
- Optional: safety eyes, or embroidered eyes as used on my version
A Note On Technique
Every single crochet in this pattern is worked in the back loop only (BLO, the strand of the stitch furthest from you) unless a round or row specifically states otherwise. This is the most important rule in the entire pattern. The BLO technique is what creates the clean horizontal ridge texture you can see across every ring in the photo. Skipping it even on one round breaks the visual consistency immediately.
Why I Love This One
Stacker toys are almost always plastic, so a crocheted version gets noticed immediately. This one takes a long time to make but the payoff is a finished toy that reads as genuinely handcrafted at every level.
The Pattern
Part 1: The Core Stem
- R1: work 6 single crochet (sc) into a magic ring (MR, an adjustable loop) [6].
- R2: work an increase (inc, 2 sc in the same stitch) in every stitch [12].
- R3: work 1 inc, 1 sc, repeat 6 times [18].
- R4: work 1 inc, 2 sc, repeat 6 times [24].
- R5: work 1 inc, 3 sc, repeat 6 times [30].
- R6: work 1 inc, 5 sc, repeat 6 times [36].
- R7: work 1 inc, 5 sc, repeat 6 times [42].
- R8: work 42 sc around [42].
- R9: work 1 decrease (dec, sc 2 stitches together), 5 sc, repeat 6 times [36].
- R10 to R11: work 36 sc around for 2 rounds [36].
- R12: work 1 dec, 4 sc, repeat 6 times [30].
- R13: work 30 sc around [30].
- R14: work 1 dec, 1 sc, twice, then finish the remainder of the round in sc [28].
- R15 to R20: work 28 sc around for 6 rounds [28]. The stem has narrowed to its pole section here. Stuff firmly as you go so the base does not collapse under the weight of the rings.
- R21: work 1 dec, 5 sc, repeat 4 times [24].
- R22 to R23: work 24 sc around for 2 rounds [24].
- R24: work 1 dec, 10 sc, repeat twice [22].
- R25 to R34: work 22 sc around for 10 rounds [22].
- R35: work 1 dec, 9 sc, repeat twice [20].
- R36 to R44: work 20 sc around for 9 rounds [20].
- R45: work 1 dec, 8 sc, repeat twice [18].
- R46: work 1 dec, 1 sc, repeat 6 times [12].
- R47: work 6 dec [6]. Stuff the stem firmly all the way to the top, cinch the remaining loop closed, and hide the yarn end inside.
Part 2: Ring 1 (Bottom Ring)
- R1: chain 42 in light green yarn, then join with a slip stitch (sl st, insert hook, pull yarn through stitch and loop at once) to the first chain to form a ring [42]. Make sure the chain is not twisted before joining.
- R2: work 6 sc, 1 inc, repeat 6 times [48].
- R3: work 7 sc, 1 inc, repeat 6 times [54].
- R4: work 8 sc, 1 inc, repeat 6 times [60].
- R5: work 9 sc, 1 inc, repeat 6 times [66].
- R6: work 10 sc, 1 inc, repeat 6 times [72].
- R7: work 11 sc, 1 inc, repeat 6 times [78].
- R8: work 12 sc, 1 inc, repeat 6 times [84].
- R9: work 13 sc, 1 inc, repeat 6 times [90].
- R10: work 14 sc, 1 inc, repeat 6 times [96].
- R11 to R18: work 96 sc around for 8 rounds [96]. This is the fattest ring and it takes the most rounds to work. Keep your BLO consistent through all eight straight rounds.
- R19: work 14 sc, 1 dec, repeat 6 times [90].
- R20: work 13 sc, 1 dec, repeat 6 times [84].
- R21: work 12 sc, 1 dec, repeat 6 times [78].
- R22: work 11 sc, 1 dec, repeat 6 times [72].
- R23: work 10 sc, 1 dec, repeat 6 times [66].
- R24: work 9 sc, 1 dec, repeat 6 times [60].
- R25: work 8 sc, 1 dec, repeat 6 times [54].
- R26: work 7 sc, 1 dec, repeat 6 times [48].
- R27: work 6 sc, 1 inc, repeat 6 times [42]. Fasten off leaving a long tail of around 50 cm. Sew R1 to R27 using a tapestry needle, stuffing firmly with fiberfill as you sew the two edges together.
Part 3: Ring 2 (Bobble Ring)
- Spikes on this ring are formed using a 5 double crochet (dc) bobble stitch: work 5 unfinished dc into 1 stitch (yarn over, insert hook, pull up loop, yarn over, pull through 2 loops only, repeat 5 times so 6 loops sit on the hook), then yarn over and pull through all 6 loops at once to close the bobble.
- R1: chain 36, sl st to first chain to form a ring [36].
- R2: work 36 sc around [36].
- R3: work 5 sc, 1 inc, repeat 6 times [42].
- R4: work 6 sc, 1 inc, repeat 6 times [48].
- R5: work 7 sc, 1 inc, repeat 6 times [54].
- R6: work 8 sc, 1 inc, repeat 6 times [60].
- R7: work 9 sc, 1 inc, repeat 6 times [66].
- R8: work 10 sc, 1 inc, repeat 6 times [72].
- R9: work 11 sc, 1 inc, repeat 6 times [78].
- R10: work 12 sc, 1 inc, repeat 6 times [84].
- R11 (Spike Row 1): work 12 sc, 1 bobble spike, repeat 6 times [84].
- R12: work 84 sc around [84].
- R13 (Spike Row 2): work 6 sc, 1 bobble spike, then work 12 sc, 1 bobble spike, repeat 5 times, then 6 sc [84]. The staggered offset placement of this row shifts the spikes so they sit between those in R11 rather than directly above them.
- R14: work 84 sc around [84].
- R15 (Spike Row 3): work 3 sc, then work 1 bobble spike, 12 sc, repeat 5 times, then 1 bobble spike, 9 sc [84].
- R16: work 84 sc around [84].
- R17: work 12 sc, 1 dec, repeat 6 times [78].
- R18: work 11 sc, 1 dec, repeat 6 times [72].
- R19: work 10 sc, 1 dec, repeat 6 times [66].
- R20: work 9 sc, 1 dec, repeat 6 times [60].
- R21: work 8 sc, 1 dec, repeat 6 times [54].
- R22: work 7 sc, 1 dec, repeat 6 times [48].
- R23: work 6 sc, 1 dec, repeat 6 times [42].
- R24: work 5 sc, 1 dec, repeat 6 times [36]. Fasten off, leave a tail, and sew the inner and outer edges together while stuffing firmly.
Part 4: Ring 3 (Medium Ring)
- R1: chain 30, sl st to first chain [30].
- R2: work 30 sc around [30].
- R3: work 4 sc, 1 inc, repeat 6 times [36].
- R4: work 5 sc, 1 inc, repeat 6 times [42].
- R5: work 6 sc, 1 inc, repeat 6 times [48].
- R6: work 7 sc, 1 inc, repeat 6 times [54].
- R7: work 8 sc, 1 inc, repeat 6 times [60].
- R8: work 9 sc, 1 inc, repeat 6 times [66].
- R9: work 10 sc, 1 inc, repeat 6 times [72].
- R10 to R15: work 72 sc around for 6 rounds [72].
- R16: work 10 sc, 1 dec, repeat 6 times [66].
- R17: work 9 sc, 1 dec, repeat 6 times [60].
- R18: work 8 sc, 1 dec, repeat 6 times [54].
- R19: work 7 sc, 1 dec, repeat 6 times [48].
- R20: work 6 sc, 1 dec, repeat 6 times [42].
- R21: work 5 sc, 1 dec, repeat 6 times [36].
- R22: work 4 sc, 1 dec, repeat 6 times [30].
- R23 to R25: work 30 sc around for 3 rounds [30]. Fasten off, sew the ring closed, and stuff.
Part 5: Ring 4 (Puff Ring)
- Note: this ring uses a magic increase and magic poof stitch for the raised puff texture visible in the photo. Follow the video closely for the exact technique on these stitches as they involve multiple loop pulls similar to a bobble.
- R1: chain 30, sl st to first chain [30].
- R2: work 30 sc around [30].
- R3: work 5 sc, 1 magic increase, repeat 6 times [36].
- R4: work 6 sc, 1 magic increase, repeat 6 times [42].
- R5: work 7 sc, 1 magic increase, repeat 6 times [48].
- R6: work 8 sc, 1 magic increase, repeat 6 times [54].
- R7: work 9 sc, 1 magic increase, repeat 6 times [60].
- R8: work 10 sc, 1 magic increase, repeat 6 times [66].
- R9: work 11 sc, 1 magic increase, repeat 6 times [72].
- R10 to R15: work 11 sc, 1 magic poof, repeat 6 times for 6 rounds [72]. The poof stitches create the raised bumps visible along the sides of this ring in the photo.
- R16: work 11 sc, 1 magic decrease, repeat 6 times [66].
- R17: work 10 sc, 1 magic decrease, repeat 6 times [60].
- R18: work 9 sc, 1 magic decrease, repeat 6 times [54].
- R19: work 8 sc, 1 magic decrease, repeat 6 times [48].
- R20: work 7 sc, 1 magic decrease, repeat 6 times [42].
- R21: work 6 sc, 1 magic decrease, repeat 6 times [36].
- R22: work 5 sc, 1 magic decrease, repeat 6 times [30]. Sew the ends together and stuff.
Part 6: The Dragon Head
- R1: work 6 sc in a magic ring [6].
- R2: work an increase in every stitch [12].
- R3: work 1 sc, 1 inc, repeat 6 times [18].
- R4: work 2 sc, 1 inc, repeat 6 times [24].
- R5 to R12: work 24 sc around for 8 rounds [24]. These long straight rounds form the snout section of the head.
- R13: work 9 sc, then work 1 inc in each of the next 6 stitches, then 9 sc [30].
- R14: work 9 sc, then work 1 sc, 1 inc, repeat 6 times, then 9 sc [36].
- R15: work 9 sc, then work 2 sc, 1 inc, repeat 6 times, then 9 sc [42].
- R16: work 9 sc, then work 3 sc, 1 inc, repeat 6 times, then 9 sc [48].
- R17: work 9 sc, then work 4 sc, 1 inc, repeat 6 times, then 9 sc [54].
- R18: work 9 sc, then work 5 sc, 1 inc, repeat 6 times, then 9 sc [60].
- R19: work 9 sc, then work 6 sc, 1 inc, repeat 6 times, then 9 sc [66].
- R20 to R25: work 66 sc around for 6 rounds [66]. This is the widest part of the head, which gives the dragon that wide round face visible from the front.
- R26: work 9 sc, then work 6 sc, 1 dec, repeat 6 times, then 9 sc [60].
- R27: work 9 sc, then work 5 sc, 1 dec, repeat 6 times, then 9 sc [54].
- R28: work 9 sc, then work 4 sc, 1 dec, repeat 6 times, then 9 sc [48].
- R29: work 5 sc, 1 dec, repeat 6 times [36]. Embroider or insert eyes before this round closes the head too far to reach inside comfortably. On my dragon the eyes are embroidered in dark thread as simple curved lines rather than safety eyes.
- R30: work 4 sc, 1 dec, repeat 6 times [30].
- R31: work 30 sc around [30].
- R32 to R40: continue standard decrease rounds working down to 6 sc, stuff the head firmly throughout, then cinch closed.
Part 7: Limbs And Tail
The Tail
- R1: work 6 sc in a magic ring [6].
- R2: work 6 sc around [6].
- R3: work 1 sc, 1 inc, repeat 3 times [9].
- R4: work 9 sc around [9].
- Continue alternating 1 round of increases (X sc, 1 inc, repeat 3 times) with 1 round of plain sc up to R24, so the tail tapers from narrow tip to wider base.
The Big Legs
- Work R1 to R4 in dark forest green yarn starting with a magic ring and increases, building the foot pad.
- R5: switch to light green yarn. Work toe claws: work 5 dc in 1 loop of dark green, then 2 sc in light green, repeat 4 times [30]. The alternating dark toe clusters and light green stitches create the claw detail visible at the bottom of each leg in the photo.
- R6 to R9: work 30 sc around for 4 rounds [30].
- R10: work 5 sc, then work 1 dec, 2 sc, repeat 3 times, then 13 sc [27].
- R11 to R14: work 27 sc around for 4 rounds [27]. Fasten off leaving a long tail. Make 2.
The Small Arms
- Work R1 to R3 in dark forest green yarn.
- R4: switch to light green yarn. Work 3 sc, then work 4 dc in 1 loop of dark green, 2 sc in light green, repeat 3 times, then 6 sc. The shorter arm claws use 4 dc rather than 5, making them visibly smaller than the foot claws.
- R5 to R8: work 18 sc around for 4 rounds [18].
- R9: work 3 sc, then work 1 dec, 2 sc, repeat 3 times, then 6 sc [15].
- R10 to R13: work 15 sc around for 4 rounds [15]. Fasten off leaving a long tail. Make 2.
Part 8: Ears, Spikes, And Wings
The Ears
- R1: work 6 sc in a magic ring in light green [6].
- R2: work an increase in every stitch [12].
- R3 to R7: work 12 sc around for 5 rounds [12].
- Fold in half and sc 6 across the top to close, then fold in half again and sc 3 across. This double fold creates the upright rectangular ear shape visible on the head in the photo. Make 2.
The Spikes
- Large spikes (make 7): R1: work 6 sc in MR [6]. R2: work 1 inc, 2 sc, repeat twice [8]. R3: work 1 inc, 3 sc, repeat twice [10]. R4: work 1 inc, 4 sc, repeat twice [12]. R5: work 1 inc, 5 sc, repeat twice [14]. Fasten off.
- Medium spikes (make 2): work R1 through R4 of the large spike pattern only [12]. Fasten off.
- Small spike (make 1): work R1 through R3 of the large spike pattern only [10]. Fasten off. On my dragon the single head horn is worked in dark forest green rather than light green, and it sits at the very top front of the head.
The Wings
- Green framework: crochet 3 separate tubular fingers in dark forest green yarn, each starting with a magic ring of 7 sc. Work 12 rounds for the large finger, 10 rounds for the medium, and 6 rounds for the small finger.
- Connect the 3 fingers together in a single row of 28 sc total and crochet around to form the upper wing structure in light green.
- White webbing panels in the original pattern: crochet 2 small and 2 large flat triangular webbing inserts using slip stitch and double crochet steps and sew them into the green wing structure. On my dragon the webbing reads as light green rather than white, so I used the same light yarn throughout. Keep the webbing panels as a contrasting colour if you prefer the two tone wing look.
- Make 2 complete wings.
Part 9: Final Assembly
- Bottom ring (Ring 1): sew the tail to the centre back of the ring, and attach the two big legs to the front facing forward. Attach 1 medium spike near the tip of the tail and 2 large spikes along the top of the tail.
- Second ring (Ring 2, bobble ring): attach 1 large spike to the back.
- Third ring (Ring 3, medium ring): attach the two small arms to the sides and 1 large spike to the back.
- Top ring (Ring 4, puff ring): attach the two completed wings securely to the back.
- Head: sew the ears to the sides of the head. Sew 2 large spikes, 1 medium spike, and 1 small spike along the top curve of the head. The dark green single horn on my version replaces the spikes at the very crown.
- Stacking: slide Ring 1, Ring 2, Ring 3, and Ring 4 onto the core stem in order from bottom to top, then set the dragon head on top.
Customisation Ideas
- Use a rainbow gradient of coloured rings instead of all green for a classic stacker toy look.
- Embroider sleepy curved eyes on the head instead of safety eyes for a toy intended for very young children.
- Add a second horn in the same dark green yarn for a more traditional dragon head.
- Make the webbing panels in a contrasting colour such as yellow or teal to add visual contrast to the wings.
- Work the entire toy in one colour for a monochrome display piece.
FAQ
How long does this project take? In my experience this is a multi week project rather than a weekend one. The core stem alone is 47 rounds, and each ring involves anywhere from 24 to 27 rounds. Set aside time in regular sessions rather than planning to finish it in a sitting.
Does the stacker actually work as a toy? Yes. Each ring slides on and off the core stem independently. The rings are sized to stack in a single correct order from largest at the bottom to smallest at the top, which is the same concept as a traditional wooden stacker. Just make sure all the pieces are sewn closed securely and there are no loose parts if this is going to a young child.
What does BLO mean and why does this pattern use it? BLO stands for back loop only. Instead of inserting your hook under both strands of the stitch, you insert it under only the back strand. Every sc in this pattern is worked BLO unless stated otherwise, which is what creates the raised horizontal ridge visible across every ring.
Can I use a different yarn weight? Yes. Going up to DK weight with a 3.5 mm hook will give you a larger, faster stacker. The stitch counts stay the same but the rings will be wider and heavier, so stuff the core stem extra firmly to support the additional weight.