
Crochet Mini Dress Up Plushies Free Pattern - Bear And Frog In Cotton Yarn
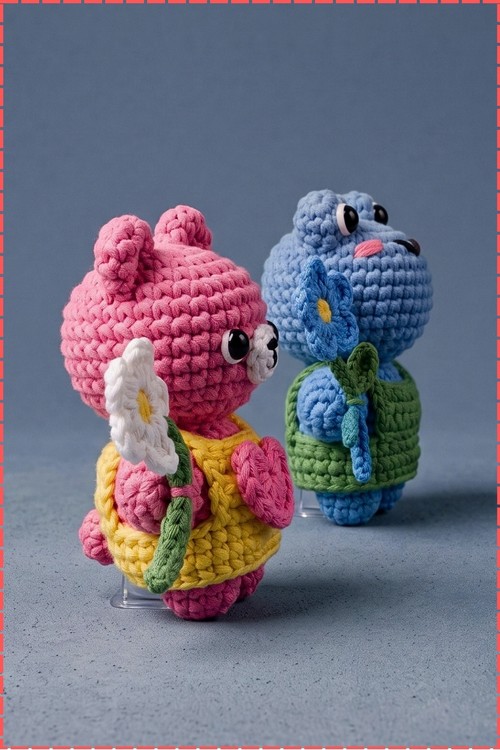
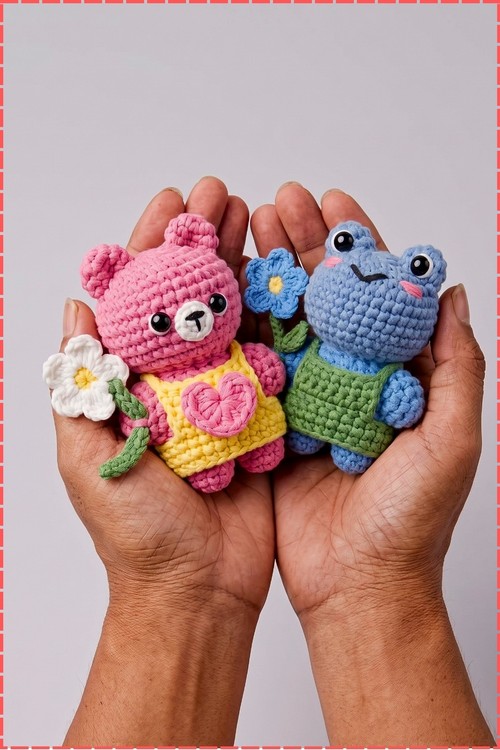
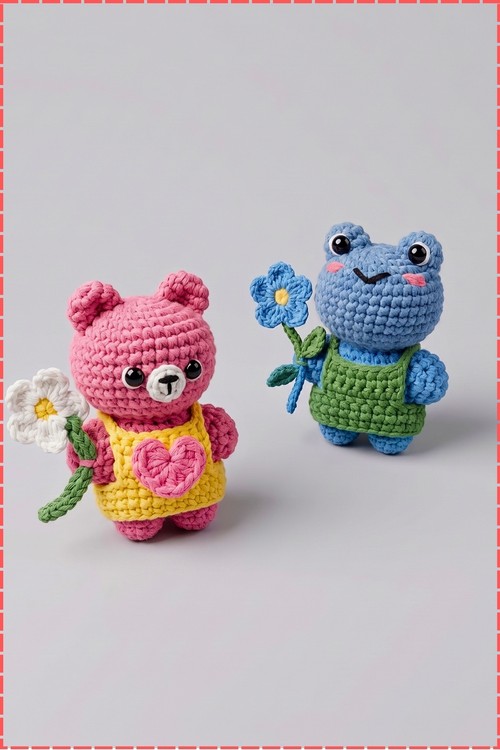
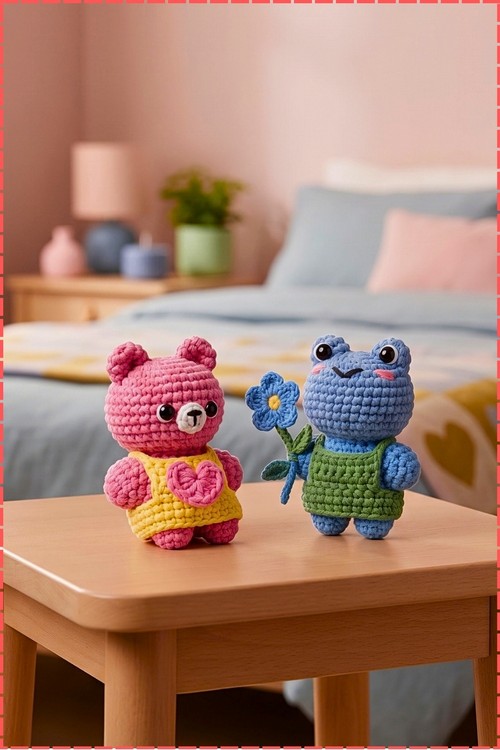
Two cotton plushies share one base pattern here, starting from legs joined mid round so each sits steady. Hot pink becomes a bear with a heart appliqué on a yellow dress, slate blue becomes a frog in a green dress holding a small crocheted flower.
Outfits come off and go back on, which is why these crochet dress up plushies land well with kids who like to fiddle. Parents hunting for a quiet toy will get use from them. Makers with a scrap bin can build a wardrobe. Crochet dress up plushies also suit anyone gifting to a child who already owns too many static toys
Crochet Dress Up Plushies
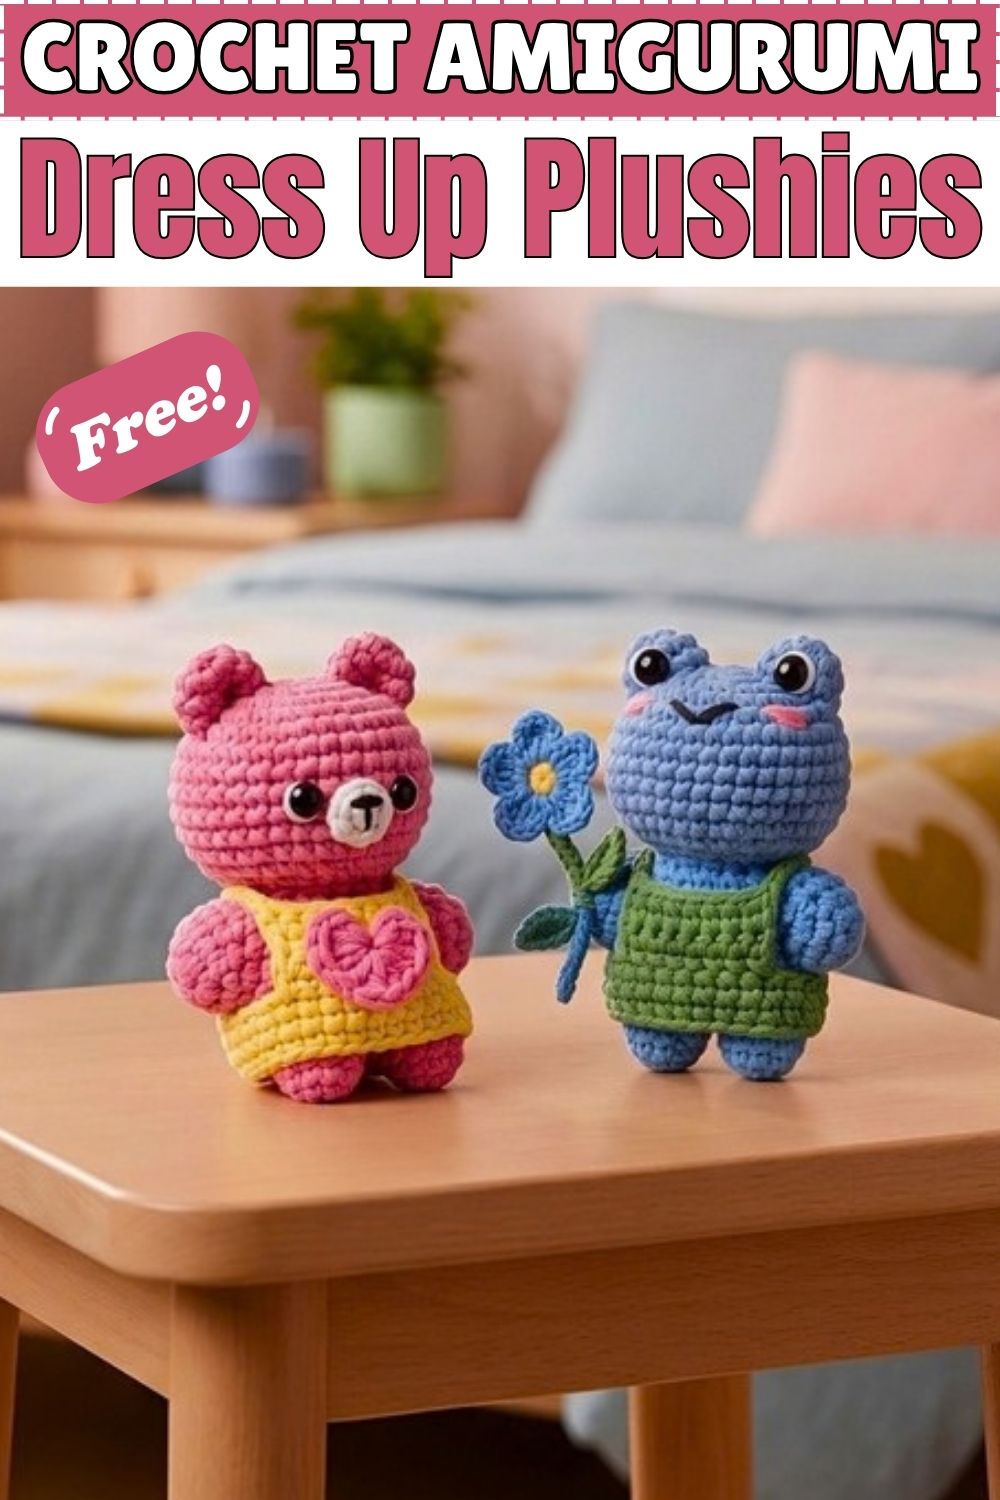
Legs worked first and joined mid-round give these crochet dress up plushies their stable seated base and keep the body count consistent from the waist up. My two versions are a hot pink bear in a yellow dress with a pink heart appliqué, and a slate blue frog in a green dress holding a small blue crocheted flower. Both bodies use the same base construction. The bear gets small rounded ears and an embroidered snout, the frog gets larger protruding eye bumps and a wide embroidered smile. Dresses slip on and off over the head, making them genuinely wearable on the plushie.
Materials And Tools
- Hot pink cotton yarn for the bear body
- Slate blue cotton yarn for the frog body
- White cotton yarn for bear snout detail
- Yellow cotton yarn for the bear's dress
- Green cotton yarn for the frog's dress
- Blue cotton yarn for the frog's small flower accessory
- Crochet hook sized to match your yarn, typically 3.0 mm to 4.0 mm for cotton
- Two pairs of safety eyes, one per plushie
- Black embroidery thread for nose, mouth, and face details
- Pink blush or eyeshadow for cheek colour (optional)
- Polyester fiberfill
- Stitch markers
- Tapestry needle
- Scissors
Difficulty And Time
Intermediate. The hand clusters in round 10 require a multi-stitch technique that beginners may need to practise once before it reads cleanly, and working in front loops only at the head transition is easy to miss. In my experience each plushie takes around three to four hours including the dress, and the flower accessory adds another thirty minutes.
The Pattern
The Legs
- Round 1: work 6 single crochet (sc, insert hook, pull up a loop, yarn over, pull through two loops) into a magic ring (MR, an adjustable loop), pull the tail tight to close the centre [6].
- Round 2: work an increase (inc, 2 sc in the same stitch) in every stitch around [12].
- Rounds 3 to 4: work 1 sc in each stitch around for 2 rounds [12]. Keep your tension even here so both legs match in height before you join them.
- Leg 1: chain 1, fasten off, and cut the yarn.
- Leg 2: repeat rounds 1 to 4 but do not cut the yarn. You will continue working from leg 2 to join both legs in the next round. Make 2 total.
Connecting Legs And Body
- Round 5: join to leg 1 with 1 sc and mark this stitch as the start of round 5. Work 11 more sc around leg 1 to complete 12 stitches on that leg, then continue onto leg 2 with 12 sc [24]. The two legs are now connected into one oval ring that becomes the lower body.
- Rounds 6 to 9: work 1 sc in each stitch around for 4 rounds [24].
Adding Hands
- Before round 10, mark the middle side stitch on each side of the body so you know exactly where each hand cluster will sit.
- Round 10: sc to the first side marker. In the marked stitch, work 5 double crochet (dc, yarn over, insert hook, pull up loop, yarn over pull through two loops, yarn over pull through two loops) in the same stitch to create the first hand cluster. Sc across to the next side marker, work 5 dc in that marked stitch for the second hand, then sc to the end of the round [24 sc plus 2 hand clusters]. The five dc fanning out of one stitch is what creates the spread hand shape visible on both plushies in the photo.
- Round 11: sc in all sc stitches, then work 5 half double crochet (hdc, yarn over, insert hook, pull up loop, yarn over pull through all three loops) across each 5 dc hand cluster [24 sc plus 10 hdc].
- Round 12: sc in all sc stitches, then work 5 hdc across each hand cluster again.
- Round 13: sc across all sc stitches. Over each 5 hdc hand cluster work a 5 hdc cluster decrease into 1 single stitch: yarn over, insert hook, pull up loop, pull through 2 loops, repeat this 5 times until 6 loops sit on the hook, then yarn over and pull through all 6 at once. Sc to end [24]. This collapses each hand from 5 stitches back down to 1, restoring the body count and neatening the wrist.
Body Decreases And Head Transition
- Round 14: work 2 sc, 1 decrease (dec, invisible decrease through front loops joining two stitches into one), repeat 6 times [18]. Stuff the body firmly with fiberfill before continuing. Push stuffing into the leg section in small pieces first.
- Round 15: work 1 sc, 1 dec, repeat 6 times [12].
The Head
- Round 1: working in front loops only (FLO, the strand of each stitch closest to you), work 1 inc in every stitch around [24]. The FLO round creates a visible ridge at the neck that helps the dress sit cleanly at the waist when it is slipped on.
- Round 2: work 1 sc, 1 inc, repeat 12 times [36].
- Rounds 3 to 8: work 1 sc in each stitch around for 6 rounds [36].
- Round 9: work 1 sc, 1 dec, repeat around [24]. Insert safety eyes now between rounds 4 and 5 counting from the top of the head down, leaving 5 stitches of space between them. On my bear the eyes sit close to the snout and on my frog they sit higher and wider apart to match the frog's protruding eye bump placement.
- Round 10: work 2 sc, 1 dec, repeat 6 times [18].
- Round 11: work 1 sc, 1 dec, repeat 6 times [12]. Stuff the head firmly now with fiberfill before the opening gets too small to reach inside comfortably.
- Round 12: work 6 dec [6]. Fasten off, weave the tail through the front loops of the remaining 6 stitches, pull tight to close, and weave in ends.
Bear Ears
- Round 1: work 6 sc into a magic ring in hot pink yarn [6].
- Round 2: work 1 sc, 1 inc, repeat around [9].
- Round 3: work 1 sc in each stitch around [9]. Fasten off leaving a long tail for sewing. Sew onto the top sides of the head, one on each side. Make 2.
Frog Eye Bumps
- Round 1: work 6 sc into a magic ring in slate blue yarn [6].
- Round 2: work 1 sc, 1 inc, repeat around [9].
- Round 3: work 1 sc in each stitch around [9]. Fasten off leaving a long tail for sewing. Lightly stuff each bump before sewing onto the top of the frog's head so they sit rounded rather than flat. The safety eyes sit through the front of these bumps rather than directly on the head. Make 2.
Bear Snout
- Work 6 sc into a magic ring in white yarn. Fasten off leaving a long tail. Sew the small circle onto the centre lower face of the bear, then embroider a T shape in black embroidery thread for the nose and mouth. My bear has a small inverted T with a short vertical line dropping from the centre of the horizontal bar.
Frog Mouth
- Embroider a wide curved smile in black embroidery thread directly onto the lower front of the frog's head. My frog has pink blush strokes on each cheek beside the smile. Apply blush with a dry brush after all sewing is complete.
The Bear's Yellow Dress
- Foundation chain: chain 25 in yellow yarn, or enough chains to wrap around the bear's body comfortably, then join to the first chain with a slip stitch (sl st, insert hook, pull yarn through both the stitch and the loop on hook at once) to form a ring, making sure the chain is not twisted [25 approx].
- Rounds 1 to 3: chain 1, work 1 sc in each stitch around, then sl st to the first sc to join, for 3 rounds. Fasten off and weave in ends. This forms the skirt ring.
- Attach yellow yarn near one underarm area on top of the skirt ring for the bodice.
- Row 1: chain 1, work sc across the front until reaching the opposite underarm, approximately 7 to 8 sc.
- Rows 2 to 3: chain 1, turn, work 1 sc in each stitch across, repeating until the bodice reaches neck height.
- Straps: chain 9 at one top corner of the bodice, then sl st to the back of the dress ring to attach the first strap. Chain 9 again, then sl st back to the front corner of the bodice to complete the second strap. Fasten off and weave in ends.
- Optional collar: attach yellow yarn into the front loop of the second stitch at the top edge of the bodice. Chain 2, work 2 dc in the same stitch. Work 2 dc in the next stitch. Chain 2, sl st in the same stitch. Sl st in the next 2 stitches. Repeat: chain 2, 2 dc in the same stitch, 2 dc in the next stitch, chain 2, sl st in the same stitch. Fasten off and weave in ends.
Pink Heart Appliqué On Bear Dress
- The bear's yellow dress has a pink heart appliqué sewn onto the front skirt. Work a small heart shape in hot pink yarn using a general foundation chain method: chain 2, work several sc and inc stitches into the chain to form two rounded lobes at the top, then decrease down to a point at the bottom. Fasten off leaving a tail and sew centred onto the front of the skirt. Chain counts are not provided for this detail, so adjust the size until it matches your dress proportionally.
The Frog's Green Dress
- Work the frog's green dress following the same skirt, bodice, and strap construction as the bear's yellow dress above, using green yarn throughout. My frog's dress has no collar and no appliqué, giving it a simpler overall silhouette.
Frog's Blue Flower Accessory
- The frog holds a small blue crocheted flower with a stem. Work the flower in blue yarn using a general small flower method: make a magic ring, work sc around it, then work a series of chain and sl st loops around the ring to form petals. A yellow centre sc or French knot can be added. For the stem, chain until the stem reaches a length that suits your plushie's arm, work sl st back along the chain to stiffen it, and fasten off. Add a small crocheted leaf in green yarn by working a pointed oval shape off the stem. Sew or simply place the stem between the frog's hand clusters so it reads as held. No stitch counts are provided for this accessory since the pattern does not include it.
Technique Notes
The hand cluster in round 10 is easier if you hold the work flat and fan the five dc out of one stitch without pulling the neighbouring stitches tight. Squeezing the hook entry point too narrow causes the hand to bunch upward instead of spreading sideways.
The front loop only round at the start of the head is easy to miss after finishing the body decrease. Take a moment to identify the front loop of each stitch before starting, because once you have worked that round in both loops it cannot be undone cleanly.
Joining legs in round 5 works best when leg 1 and leg 2 are held together with the magic ring ends pointing inward and the last worked rounds facing the same direction. A mis-orientation makes the feet point in opposite directions.
FAQ
Can I make just one plushie instead of both? Yes. The body and head construction is identical for both the bear and the frog. Only the ear or eye bump shape changes, and the dress colours and any appliqués swap out. Work whichever character appeals to you and skip the other entirely.
My hand clusters look bunched rather than spread. What went wrong? The most common cause is tight stitches in the rounds leading up to round 10. Loosen your tension slightly in rounds 6 to 9, and when you work the five dc in one stitch, pull each one to the same height before moving to the next. Even loop height is what makes the hand read as a spread open shape.
Can the dress be made removable? Yes, and it is designed to be. The dress slips over the head because the head is wider than the neck ridge. Make sure the foundation chain of the skirt is loose enough to slide over the head when putting it on, but snug enough to stay at the waist on its own.