
Crochet Duck Amigurumi Free Pattern
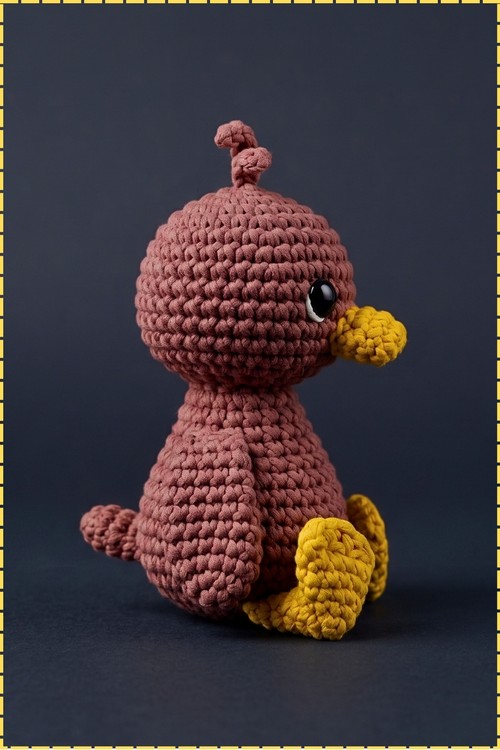
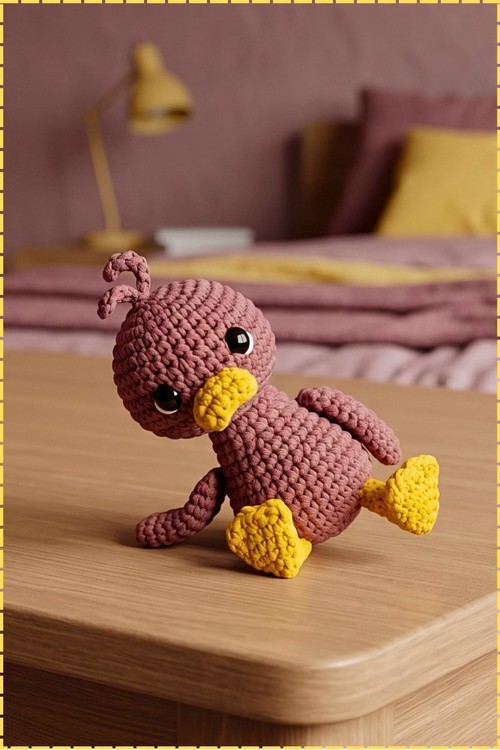
Palm sized and slouching, the duck works up in joined rounds of dusty rose brown sport yarn, each closed with a slip stitch and chain so the rows stay level. Golden yellow forms the beak, wings and feet, while a curled brown topknot crowns the head.
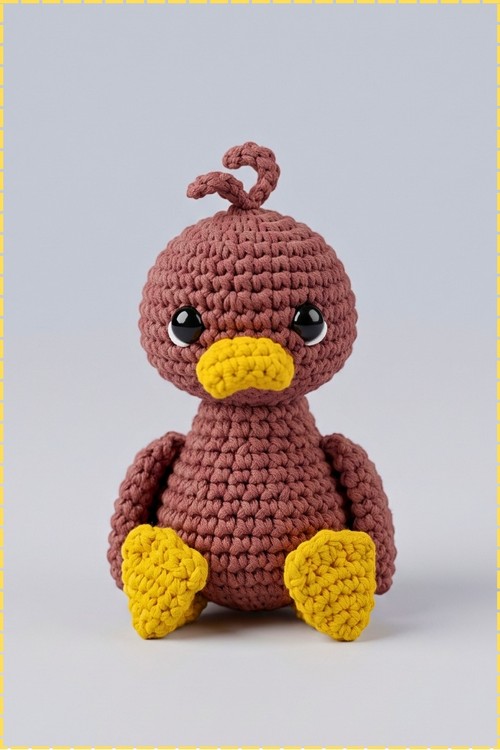
Those two curls on top give this crochet duck amigurumi the look of something just woken up. Eyes sit low, bill sits wide, and the whole face lands somewhere between sleepy and unimpressed. Arms dangle without purpose. The crochet duck slouches wherever you set it down, and it never quite straightens up.
Crochet Duck Amigurumi
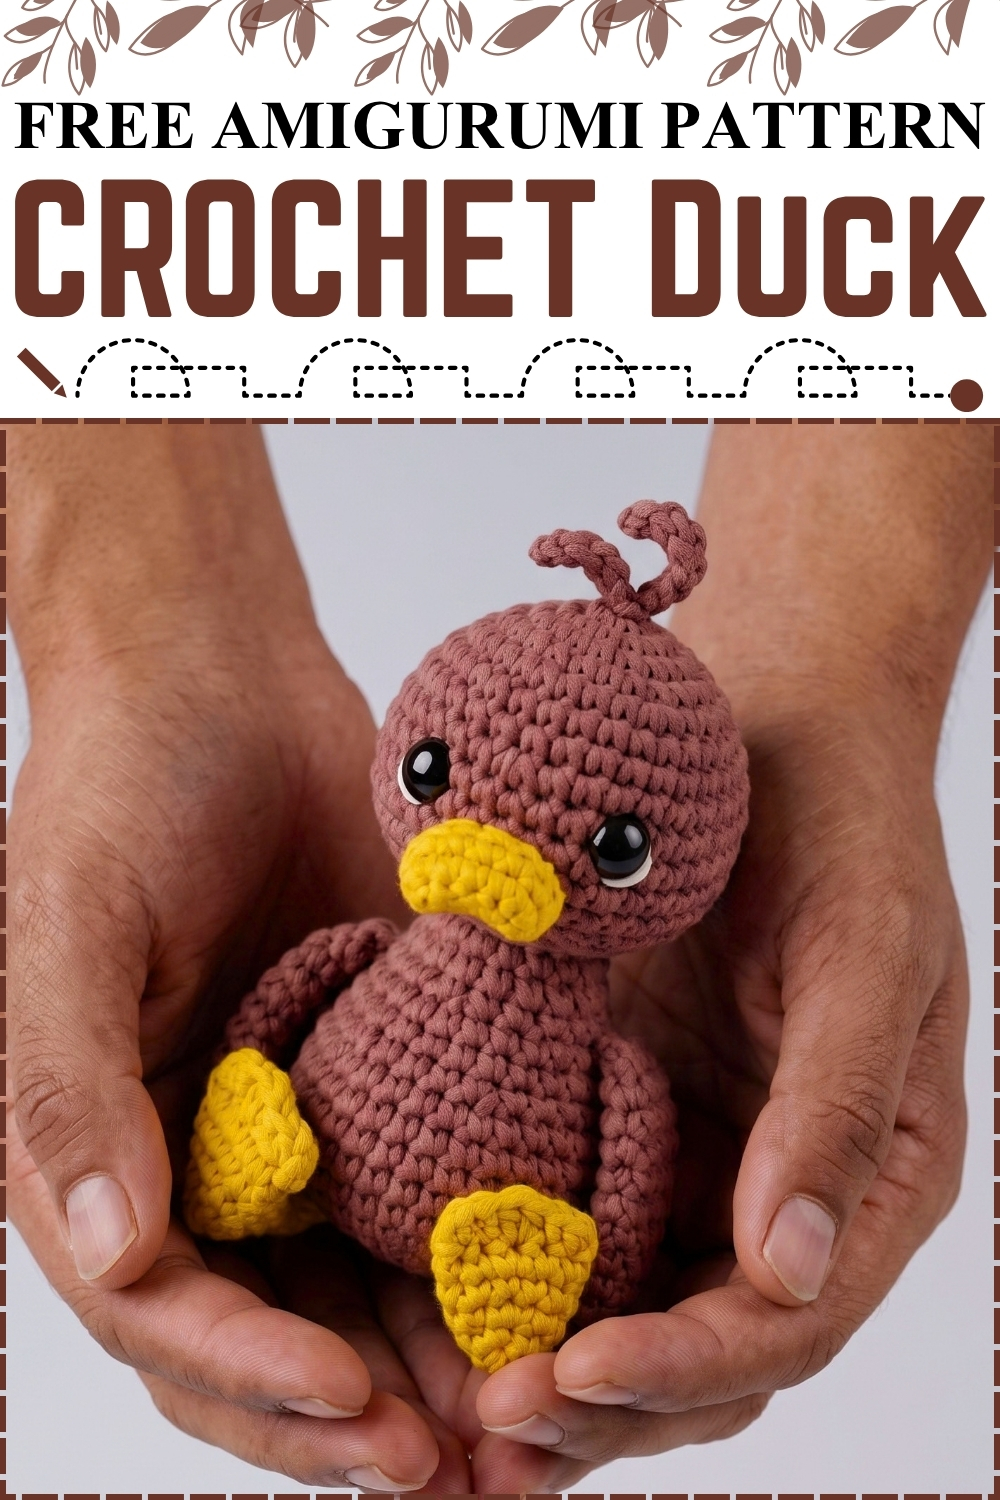
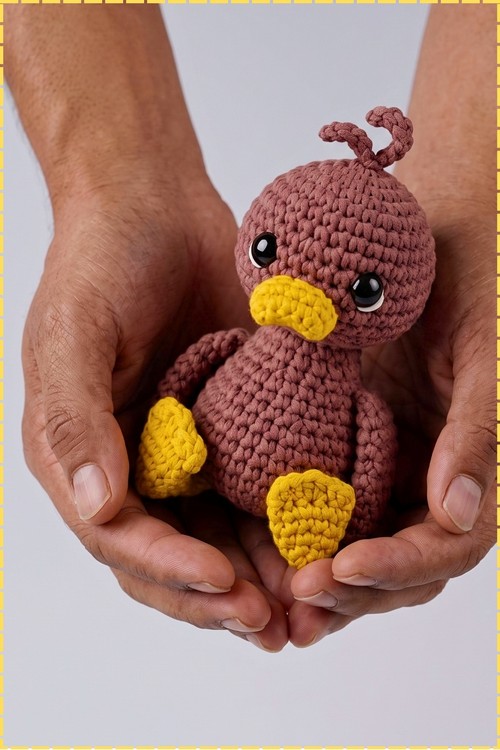
Joined rounds with a slip stitch and chain one at the end of each round give this crochet duck amigurumi its clean horizontal lines and make it easy to count back if you lose your place. My version is worked in a warm dusty rose brown rather than the yellow the original pattern calls for, and the beak, wings, and feet are all in bright golden yellow which pops strongly against the body. Safety eyes with a domed black surface sit on the face, and a small curled topknot of brown yarn sits at the top of the head. The finished duck fits in the palm of a hand.
Materials And Tools
- Dusty rose brown sport weight yarn for the body and head
- Bright golden yellow sport weight yarn for the beak, wings, and feet
- Brown sport weight yarn for the topknot curl (or use a length of the body yarn)
- 1.6 mm crochet hook
- Two small black domed safety eyes
- White embroidery thread for any eye detail (optional)
- Polyester fiberfill
- Tapestry needle
- Stitch marker
- Scissors
Difficulty And Time
Easy to intermediate. The stitch pattern stays entirely in single crochet, but the joined round method with a slip stitch and chain one at the end of each round is slightly different from a continuous spiral and requires attention to where each round begins. In my experience the body alone takes around an hour and a half, and the full duck including all parts and assembly takes around four to six hours.
Beginner Technique Notes
The magic ring, written as MR, creates an adjustable starting loop. Work your round 1 stitches into it, then pull the tail firmly before joining so the centre closes completely.
Joining each round means at the end of every round you slip stitch (sl st, insert hook, pull yarn through the stitch and the loop on the hook at once) into the very first stitch of that round, then chain 1. This chain 1 does not count as a stitch. It just lifts the yarn to the correct height for the next round to begin.
A single crochet increase, written as inc, means working 2 single crochets into the same stitch. It adds one stitch to the total count.
A decrease, written as dec, joins two stitches together into one by inserting the hook into the first stitch, pulling up a loop, inserting into the second stitch, pulling up another loop, then pulling through all three loops at once.
Changing yarn colour at the end of a round: on the final pull through of the last slip stitch join, drop the current colour and pull the new colour through to complete the join. This keeps the colour change sitting cleanly at the join point.
The Pattern
The Body
- Round 1: work 6 single crochet (sc, insert hook, pull up a loop, yarn over, pull through two loops) into a magic ring (MR) in dusty rose brown yarn, then join with a slip stitch (sl st) to the first stitch and chain 1 [6]. Pull the tail tight to close the centre hole before joining.
- Round 2: work an increase (inc, 2 sc in the same stitch) in every stitch around, join with sl st, chain 1 [12].
- Round 3: work 1 inc, 1 sc, repeat 6 times, join with sl st, chain 1 [18].
- Round 4: work 1 sc in each of the next 2 stitches, 1 inc, repeat 6 times, join with sl st, chain 1 [24].
- Round 5: work 1 inc, 1 sc in each of the next 3 stitches, repeat 6 times, join with sl st, chain 1 [30].
- Rounds 6 to 10: work 1 sc in each stitch around for 5 rounds, joining with sl st and chaining 1 at the end of each round [30]. These five straight rounds build the main bulk of the body. Keep your tension consistent here so the sides stay smooth rather than gathering unevenly.
- Round 11: work 1 decrease (dec), 1 sc in each of the next 3 stitches, repeat 6 times, join with sl st, chain 1 [24].
- Rounds 12 to 13: work 1 sc in each stitch around for 2 rounds, joining with sl st and chaining 1 at the end of each [24].
- Round 14: work 1 sc in each of the next 2 stitches, 1 dec, repeat 6 times. At the end of this round change to golden yellow yarn on the final pull through of the slip stitch join [18]. The colour change at round 14 is where the body transitions to the bottom section. On my duck, the yellow sits at the very base and is partly hidden when the duck is held upright.
- Rounds 15 to 16: work 1 sc in each stitch around for 2 rounds in golden yellow yarn, joining with sl st and chaining 1 after each [18].
- Join with a sl st, chain 1, and cut the yarn leaving a tail. Stuff the body firmly with fiberfill before sewing it closed. Press fiberfill into the lower base in small pieces so it sits flat rather than rounding outward.
The Head
- The source pattern covers the body only. The head is worked as a separate piece and sewn on. Work the head in dusty rose brown yarn using the same joined round method as the body.
- Round 1: work 6 sc into a magic ring, join with sl st, chain 1 [6].
- Round 2: work an increase in every stitch, join with sl st, chain 1 [12].
- Round 3: work 1 sc, 1 inc, repeat 6 times, join with sl st, chain 1 [18].
- Round 4: work 2 sc, 1 inc, repeat 6 times, join with sl st, chain 1 [24].
- Round 5: work 3 sc, 1 inc, repeat 6 times, join with sl st, chain 1 [30].
- Rounds 6 to 8: work 1 sc in each stitch around for 3 rounds, joining and chaining 1 after each [30]. Insert the safety eyes between rounds 6 and 7, roughly 5 to 6 stitches apart, before closing the head further. On my duck the eyes sit wide and slightly forward on the face with the dome catching light from the front.
- Round 9: work 3 sc, 1 dec, repeat 6 times, join with sl st, chain 1 [24].
- Round 10: work 2 sc, 1 dec, repeat 6 times, join with sl st, chain 1 [18]. Stuff the head firmly at this point.
- Round 11: work 1 sc, 1 dec, repeat 6 times, join with sl st, chain 1 [12].
- Join with sl st, cut the yarn leaving a long tail, and close any remaining gap by weaving the tail through the front loops. Leave a long tail for sewing.
The Beak
- Work in golden yellow yarn.
- The beak is not detailed in the source pattern. Work a small oval piece using a general foundation chain method: chain 5, then work 3 sc back along the chain, work 3 sc in the last chain stitch, rotate and work 3 sc back along the underside, join to close. Work one round of sc around the oval without increasing to give the beak a little depth, then fasten off leaving a long tail for sewing. My beak is a compact oval shape that sits forward on the face between and just below the eyes.
The Wings
- Work in golden yellow yarn.
- Round 1: work 6 sc into a magic ring, join with sl st, chain 1 [6].
- Round 2: work an increase in every stitch, join with sl st, chain 1 [12].
- Round 3: work 1 sc in each stitch around, join with sl st, chain 1 [12]. Flatten into an oval and fasten off leaving a long tail for sewing. Do not stuff. My wings are small flat ovals that sit pressed against the upper sides of the body. Make 2.
The Feet
- Work in golden yellow yarn.
- The feet are not detailed in the source pattern. Work each foot as a small flat oval using the same foundation chain construction described for the beak, then work one additional round around the oval. Fasten off leaving a tail for sewing. On my duck the feet are wider than the beak and have a more spread shape. Sew them flat onto the bottom base of the body so the duck can sit upright. Make 2.
The Topknot
- Cut two or three short lengths of brown yarn, each around three times the length you want the curl to be.
- Thread them through a stitch at the top centre of the head using the tapestry needle, pull through until equal on both sides, and knot at the base.
- Wrap each strand once or twice around the tip of the needle or a pencil to form a curl, then slide it off and secure the coil shape with a tiny dab of glue at the base. On my duck the topknot reads as two small curled antennae rather than a flat tuft.
Assembly And Finishing
- Sew the head to the top of the body using the long tail, working stitches around the full join so the seam is secure and even. Position the head slightly forward of centre so the duck looks ahead rather than straight up.
- Centre the golden yellow beak on the face between and just below the eyes, and sew it on firmly.
- Sew the two wings onto the upper sides of the body, one on each side, with the flat edge flush against the body.
- Sew or glue the feet flat onto the bottom base so the duck sits level.
- Attach the topknot at the crown of the head as described above.
- Weave in all remaining yarn tails.
Tips And Troubleshooting
- Always count your stitches after each joined round before you chain 1 and move on. The slip stitch join adds no stitches, and the chain 1 adds none either, so every round should match its stated count exactly. A single missed increase in rounds 2 to 5 will throw off every round that follows.
- Join into the very first sc of the round, not into the chain 1 from the previous round. Joining into the chain 1 by mistake is the most common error with this method and makes the duck look twisted when seamed.
- Change colour on the final yarn over of the slip stitch join at the end of round 14, not at the start of round 15. Changing at the join means the first stitch of round 15 is already in the new colour with no loose strand showing on the right side.
- Use a 1.6 mm hook even if your yarn suggests something larger. A tight fabric keeps the stuffing hidden and gives the finished duck a firm shape that holds up to handling.
- Stuff in small pinches rather than one large handful. On a piece this small, a big clump always creates a visible flat spot on one side.
- Sew the head on before attaching any face details so you can position the beak and eyes relative to the finished angle of the head rather than guessing before assembly.
Yarn Substitution
YarnArt Jeans is a cotton acrylic blend at sport weight and works well at this small hook size because it has enough body to hold shape without fraying. Any similar sport weight cotton blend will give the same result. If you use a pure acrylic, it will feel slightly softer and the stitches will have a little more stretch, which can make counting harder at a tight tension. Avoid fluffy or textured yarns for this pattern since the stitch lines need to be visible to count rounds correctly.
Customisation Ideas
- Use classic yellow yarn for a traditional duckling look and swap the beak and feet to orange.
- Embroider small nostrils onto the beak in darker thread for a more detailed face.
- Add a tiny crochet bow in a contrasting colour glued to the side of the head.
- Make the piece larger by switching to DK weight yarn and a 2.5 mm hook. The proportions stay the same.
- Leave off the topknot for a cleaner look, or add a small crocheted hat using the hat rounds from any small amigurumi hat pattern.
FAQ
Why does this pattern use joined rounds instead of a continuous spiral? Joined rounds give you a cleaner stitch definition and a visible round marker at the join point, which makes it easier to recount if you lose your place. The tradeoff is a slight jog at the join, but on a small toy with thick yarn it is nearly invisible once the piece is stuffed.
Can I use a larger hook to make this faster? You can, but go up in yarn weight at the same time. A 2.5 mm hook with DK weight yarn will give you a noticeably larger duck without changing any stitch counts. Using a larger hook with the same sport weight yarn will create a fabric that is too open and the stuffing will show through.
My beak keeps flopping to one side after I sew it on. How do I fix it? Pin the beak in place with two pins and sew through the outer edge of the beak into the head on both the left and right sides, not just through the centre. Anchoring both sides stops it from pivoting around a single attachment point.
How do I make the topknot curls stay curled? A tiny dab of clear fabric glue or even a drop of diluted PVA at the base of the curl holds the shape. If you want a more permanent set, wrap the yarn around a pencil, steam it briefly with an iron held a few centimetres away, and let it cool before sliding it off.
Is this suitable for a child's toy? Use embroidered eyes instead of safety eyes if the toy is for a very young child, and make sure all yarn tails are woven in securely. The body is well stuffed and the small size means this works best as a display toy or gift for older children rather than a chewable infant toy.