
Crochet Duck Amigurumi Hair Clip Free Pattern
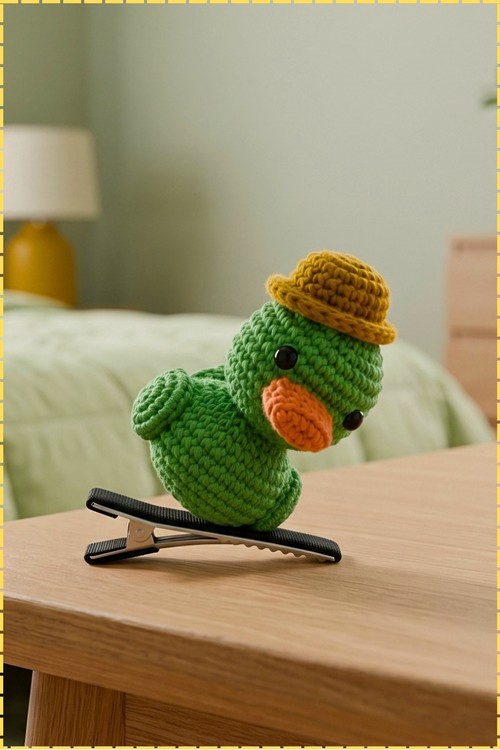
Glue a black alligator clip under a green crochet duck and you have a hair accessory with a peach beak and a tiny mustard hat. Head, body, wings and tail stitch up as separate pieces from a small amount of yarn, then sew together before the hat goes on.
Green plus the little hat is why this crochet duck amigurumi hair clip keeps getting requested. People ask after seeing one on someone else. The hat is what sells it, and the crochet duck hair clip reads as a whole character, not a motif. Makers end up taking orders by accident.
Crochet Duck Amigurumi Hair Clip
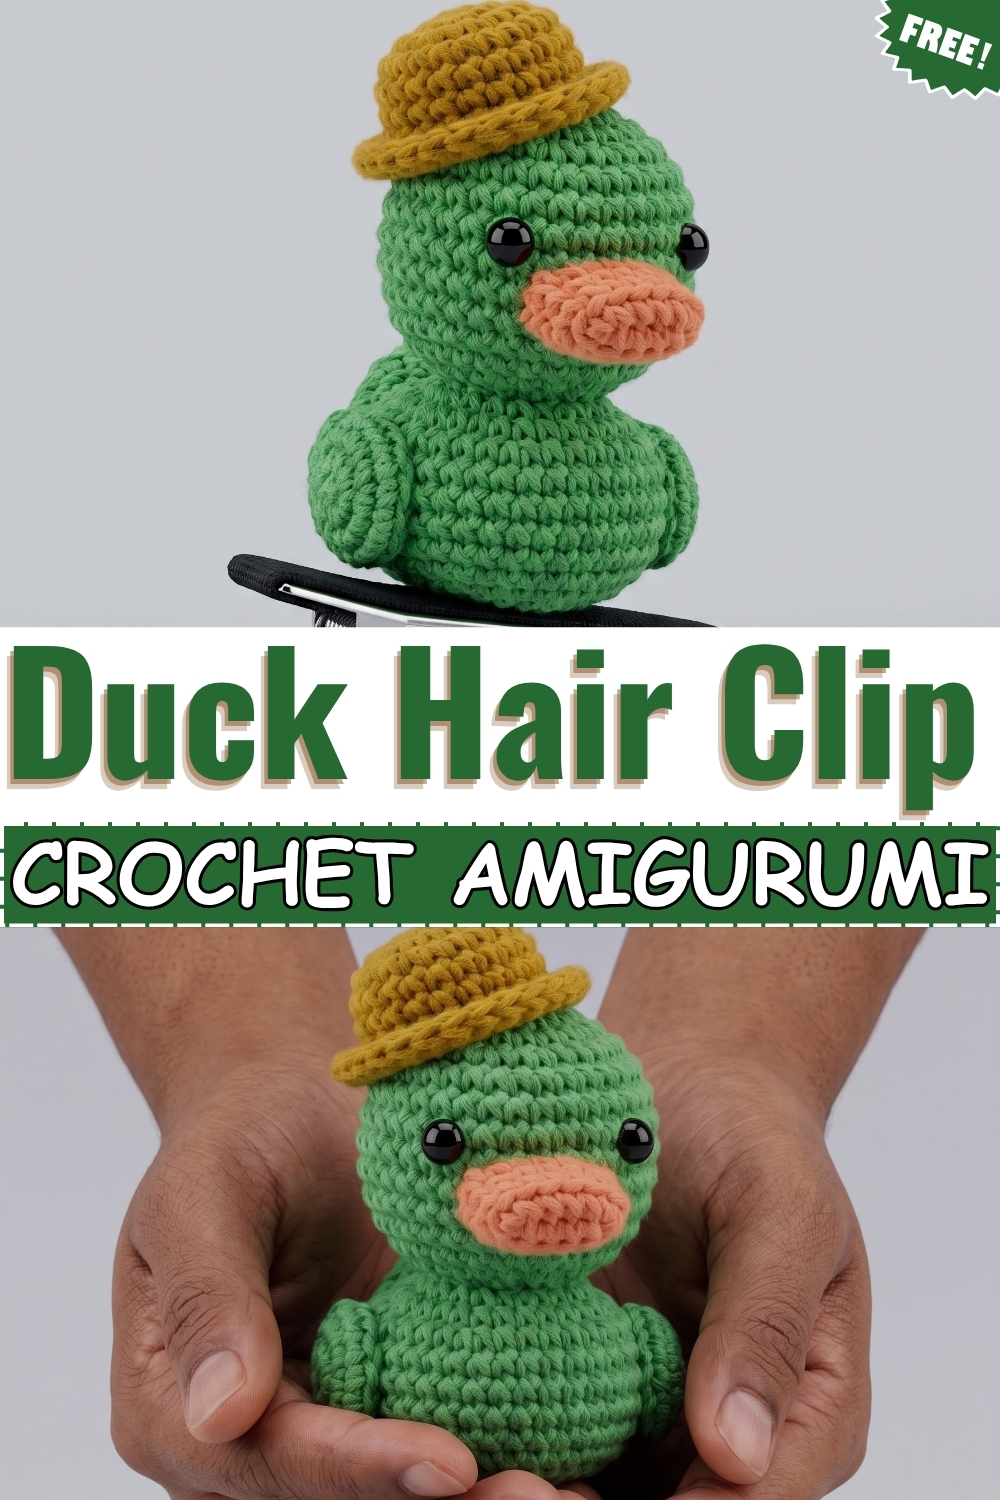
Separate pieces sewn together and glued onto a hair clip turn a small amount of yarn into a crochet duck amigurumi hair clip that sits firmly in place and reads clearly from a distance. Mine is worked in medium green yarn for the head and body, with a peachy salmon beak and a small mustard yellow hat crocheted separately and glued on top. Black safety eyes give the face its expression. Wings and a small tail are sewn onto the sides and back of the body. A plain black alligator clip on the underside finishes it as a wearable piece.
Beginner Technique Notes
The magic ring, written as MR, is an adjustable loop you close tightly after the first round so no hole remains at the centre. If you find it tricky, chain 2 and work your stitches into the second chain from the hook instead, then pull the tail to tighten.
Single crochet, written as sc, is the core stitch here. Insert the hook into the stitch, pull up a loop, yarn over, and pull through both loops. Every round in this pattern uses it.
An increase, written as inc, means working 2 single crochets into the same stitch. This is how each piece grows outward.
A decrease, written as dec, joins two stitches into one. The invisible decrease keeps the surface tidy: insert the hook through the front loop only of the first stitch, then the front loop only of the next, yarn over and pull through both loops, yarn over and pull through the remaining 2 loops.
Working in continuous spiral rounds means you never join at the end of a round. Place a stitch marker in the last stitch of each round and move it up as you go so you always know where one round ends and the next begins.
Back loops only, written as BLO, means you insert the hook into only the back strand of the stitch. This creates a visible ridge that separates the crown of the hat from its brim.
Front loops only, written as FLO, means inserting the hook into only the front strand. It is used here to close the body neatly at the end.
Materials And Tools
- Medium green DK or sport weight yarn for the head, body, wings, and tail
- Peach or salmon yarn in the same weight for the beak
- Mustard yellow yarn in the same weight for the hat
- 2.0 mm crochet hook
- Two 6 mm black safety eyes
- Polyester fiberfill
- Tapestry needle
- Stitch marker
- Scissors
- One black alligator hair clip
- Hot glue or strong fabric glue
Difficulty And Time
Easy. In my experience this project takes around two to three hours including all the small pieces and assembly. The stitch count stays low throughout, so it moves quickly even for beginners who are counting carefully.
The Pattern
The Head
- Round 1: work 6 sc into a magic ring [6]. Pull the tail firmly to close the centre hole before moving to round 2.
- Round 2: work an increase (inc, 2 sc in the same stitch) in every stitch around [12].
- Round 3: work 1 sc, 1 inc, repeat 6 times [18].
- Round 4: work 2 sc, 1 inc, repeat 6 times [24].
- Round 5: work 3 sc, 1 inc, repeat 6 times [30].
- Rounds 6 to 11: work 1 sc in each stitch around for 6 rounds [30]. These straight rounds create the full round head shape. Count the last stitch of round 6 and place your marker there so you do not lose track across the six identical rounds.
- Round 12: work 3 sc, 1 decrease (dec, invisible decrease through front loops), repeat 6 times [24].
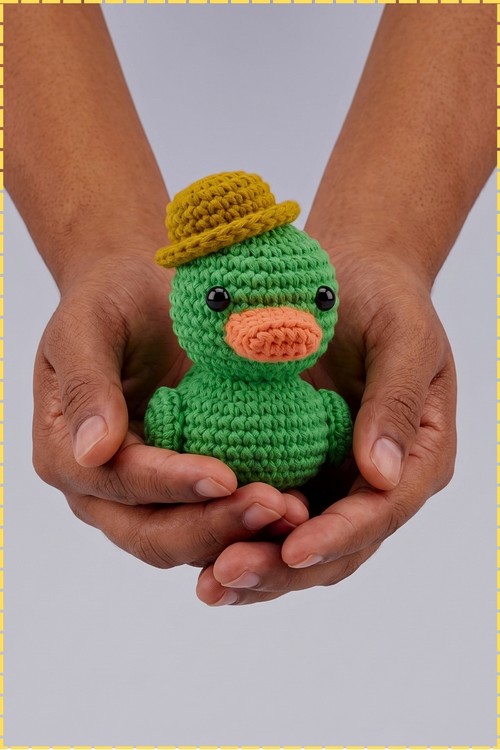
- Round 13: work 2 sc, 1 dec, repeat 6 times [18]. Insert the 6 mm black safety eyes between rounds 7 and 8, spaced 5 stitches apart, before the opening gets too small to reach inside. On my duck the eyes sit fairly wide and low on the face. Stuff the head firmly with fiberfill now, pressing it into the sides in small pieces so the shape stays round.
- Round 14: work 1 sc, 1 dec, repeat 6 times [12]. Fasten off and leave a long tail for sewing the head to the body.
The Body
- Foundation: chain 6 in green yarn.
- Round 1: starting in the 2nd chain from the hook, work 1 inc (2 sc in the same stitch), then 3 sc, then 3 sc in the last chain stitch. Rotate the work to crochet along the underside of the foundation chain, work 3 sc, then 1 sc in the last stitch [12]. Working around both sides of a foundation chain like this creates a flat oval base, which is what gives the body its rounded bottom.
- Round 2: work 1 sc, 1 inc, repeat 6 times [18].
- Round 3: work 2 sc, 1 inc, repeat 6 times [24].
- Round 4: work 3 sc, 1 inc, repeat 6 times [30].
- Rounds 5 to 7: work 1 sc in each stitch around for 3 rounds [30].
- Round 8: work 3 sc, 1 dec, repeat 6 times [24].
- Round 9: work 2 sc, 1 dec, repeat 6 times [18].
- Round 10: work 1 sc, 1 dec, repeat 6 times [12]. Stuff the body firmly now before the opening closes any further.
- Round 11: work 1 sc, 1 dec, repeat 4 times [8]. Cut the yarn and weave the tail through the front loops only (FLO, the strand closest to you) of the remaining 8 stitches, pull tightly to close the hole, tie off, and weave in the end. Pulling through the front loops only keeps the base looking tidy rather than leaving a visible gathered star on the bottom.
The Wings
- Round 1: work 6 sc into a magic ring in green yarn [6].
- Round 2: work an increase in every stitch [12].
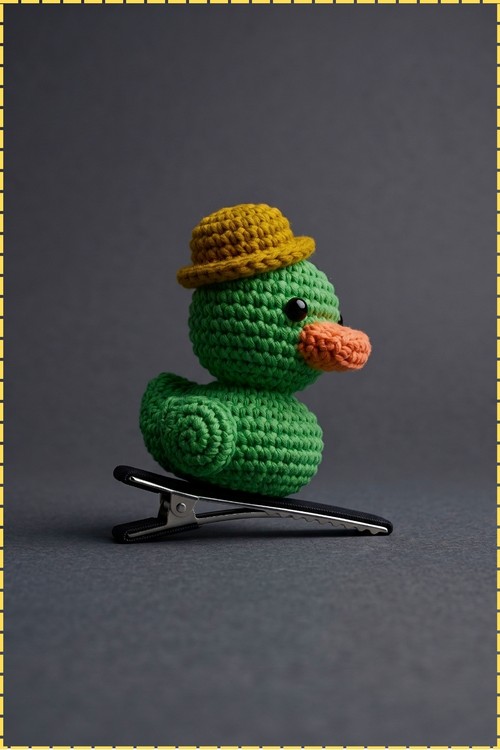
- Round 3: work 1 sc in each stitch around [12]. Flatten the piece into a semi circular oval shape. Fasten off, leaving a tail for sewing. The wings on my duck are small and flat with no stuffing, and they sit pressed against the sides of the body rather than sticking out. Make 2.
The Tail
- Round 1: work 6 sc into a magic ring in green yarn [6].
- Round 2: work 1 sc in each stitch around [6]. Fasten off, leaving a tail for sewing. This tiny piece sits at the lower back of the body and reads as a small bump from the side.
The Beak
- Foundation: chain 5 in peach or salmon yarn.
- Round 1: starting in the 2nd chain from the hook, work 3 sc, then 3 sc in the last chain stitch. Rotate the work to crochet along the underside of the chain, work 3 sc [9]. The beak starts as a small oval, the same construction as the body base but much smaller.
- Round 2: work 1 sc in each stitch around [9]. Fasten off, leaving a long tail for sewing.
The Mustard Hat
- Round 1: work 6 sc into a magic ring in mustard yellow yarn [6].
- Round 2: work an increase in every stitch [12].
- Round 3: work 1 sc, 1 inc, repeat 6 times [18].
- Round 4: working in back loops only (BLO, the strand furthest from you), work 1 sc in each stitch around [18]. The BLO round creates the ridge that marks where the crown of the hat meets the brim, which is the most visible detail of the hat in the photo.
- Round 5: working in front loops only (FLO) of the stitches from round 4, work 2 sc, 1 inc, repeat 6 times [24]. This round forms the brim that flares out around the base of the crown. Fasten off and weave in ends.
Assembly And Finishing
- Position the head onto the top of the body with round 1 of the body base facing downward, and sew securely all the way around using the long tail from the head. Work stitches through both layers consistently so the join does not gap or shift sideways.
- Centre the peach beak on the face between and just below the level of the safety eyes, and sew it firmly into place using the long tail.
- Sew the tail piece onto the lower back of the body, centred at the base.
- Flatten each wing and sew one onto each side of the body, sitting roughly midway up with the flat edge flush against the body.
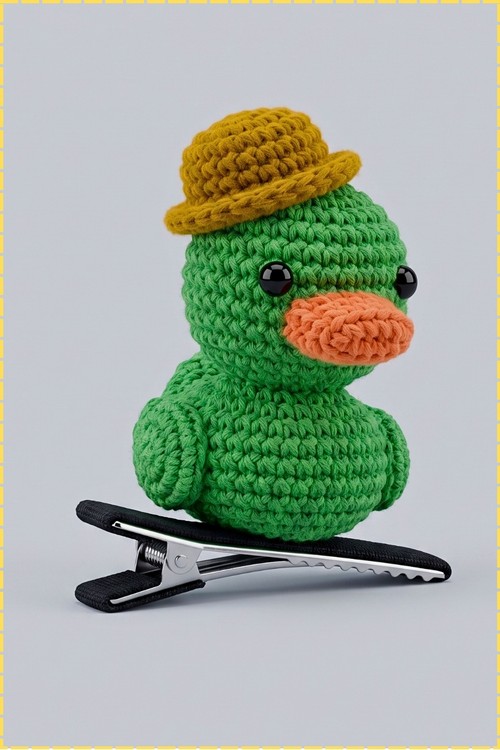
- Place the mustard hat on top of the head, tilted very slightly forward as it appears in my photo, and sew or glue it securely. A few stitches around the brim edge hold it better than glue alone.
- Apply hot glue or strong fabric glue to the top of a black alligator clip and press it firmly onto the underside of the body. Hold it in place until the glue sets fully. My clip is plain black with no ribbon wrapping, and it shows behind the body when viewed from the side.
Tips And Troubleshooting
- Count every round, especially rounds 6 to 11 on the head where all six rounds look identical in green yarn. An accidental extra round makes the head too tall and throws off the eye placement.
- Insert safety eyes before round 14 on the head. The opening narrows fast and reaching inside to attach the back of an eye after that point is very difficult at this small scale.
- Use a 2.0 mm hook even if it feels tight. Loose stitches at this size let the white stuffing show through coloured yarn, which is very visible in photos and in use.
- Sew the beak on last among the face details so you can adjust the height after seeing how it reads with the eyes already in place.
- If the hat slips sideways after gluing, add one or two yarn stitches through the brim into the head to anchor it. Glue alone can loosen over time with regular wear.
FAQ
I have never made a magic ring before. Can I start with a chain instead? Yes. Chain 2, work your round 1 stitches into the second chain from the hook, then pull the yarn tail tight to close the small hole. It is a perfectly solid substitute and many beginners find it easier than the adjustable ring.
What does working in continuous spiral rounds mean? It means you never join at the end of a round with a slip stitch. Instead you just keep crocheting around without stopping, which creates a smooth seamless surface. Use a stitch marker to track where each new round begins.
My finished head looks lumpy. What went wrong? Lumps almost always come from stuffing in one large piece rather than small pinches. Pull a tiny amount of fiberfill and poke it in with the eraser end of a pencil to fill corners evenly. Also check that your hook size is right, because a loose tension lets the fibrefill shift inside and bunch up.
How do I keep the hair clip from sliding around in fine hair? Run a strip of thin foam tape or velvet ribbon along the inside of the clip jaw before gluing the duck on. This adds grip and also protects the clip from the glue seeping into the spring mechanism.
Can I make this without the hat? Yes. The duck stands on its own without any accessory. Leaving off the hat also lets you add a bow, a tiny flower, or nothing at all, depending on who you are making it for.
Crochet hair accessories like this one are a lovely way to practise small scale amigurumi without committing to a large project, and this duck is a satisfying place to start.