
Crochet Fox Amigurumi Free Pattern In Plush Yarn
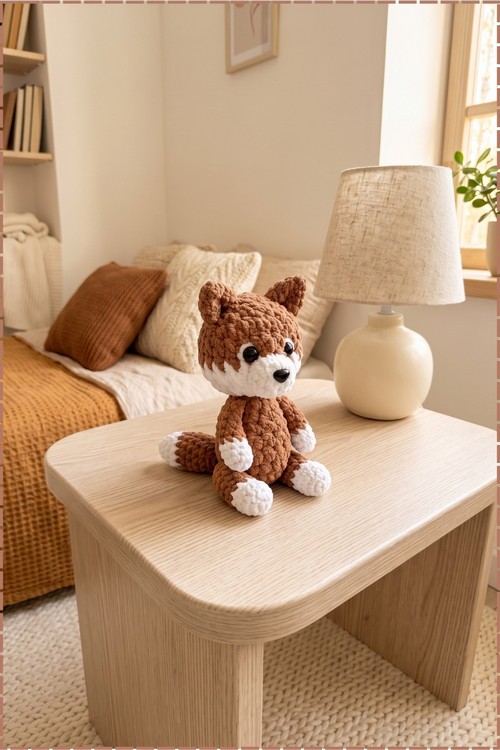
Sculpting the face with a long metal needle and strong thread gives the crochet fox amigurumi its defined cheeks and eye sockets. Cinnamon brown and white plush yarn on a 4.0 mm hook keeps it soft, finished with a heat flattened safety nose, white paws and a white tail tip.
Babies and toddlers are the clearest match for the Crochet Fox Amigurumi because the plush yarn stays soft after washing and there are no small parts hanging off. Nursery shelves suit it too. New crocheters making a shower gift can finish a Crochet Fox Amigurumi before the due date arrives.
Crochet Fox Amigurumi
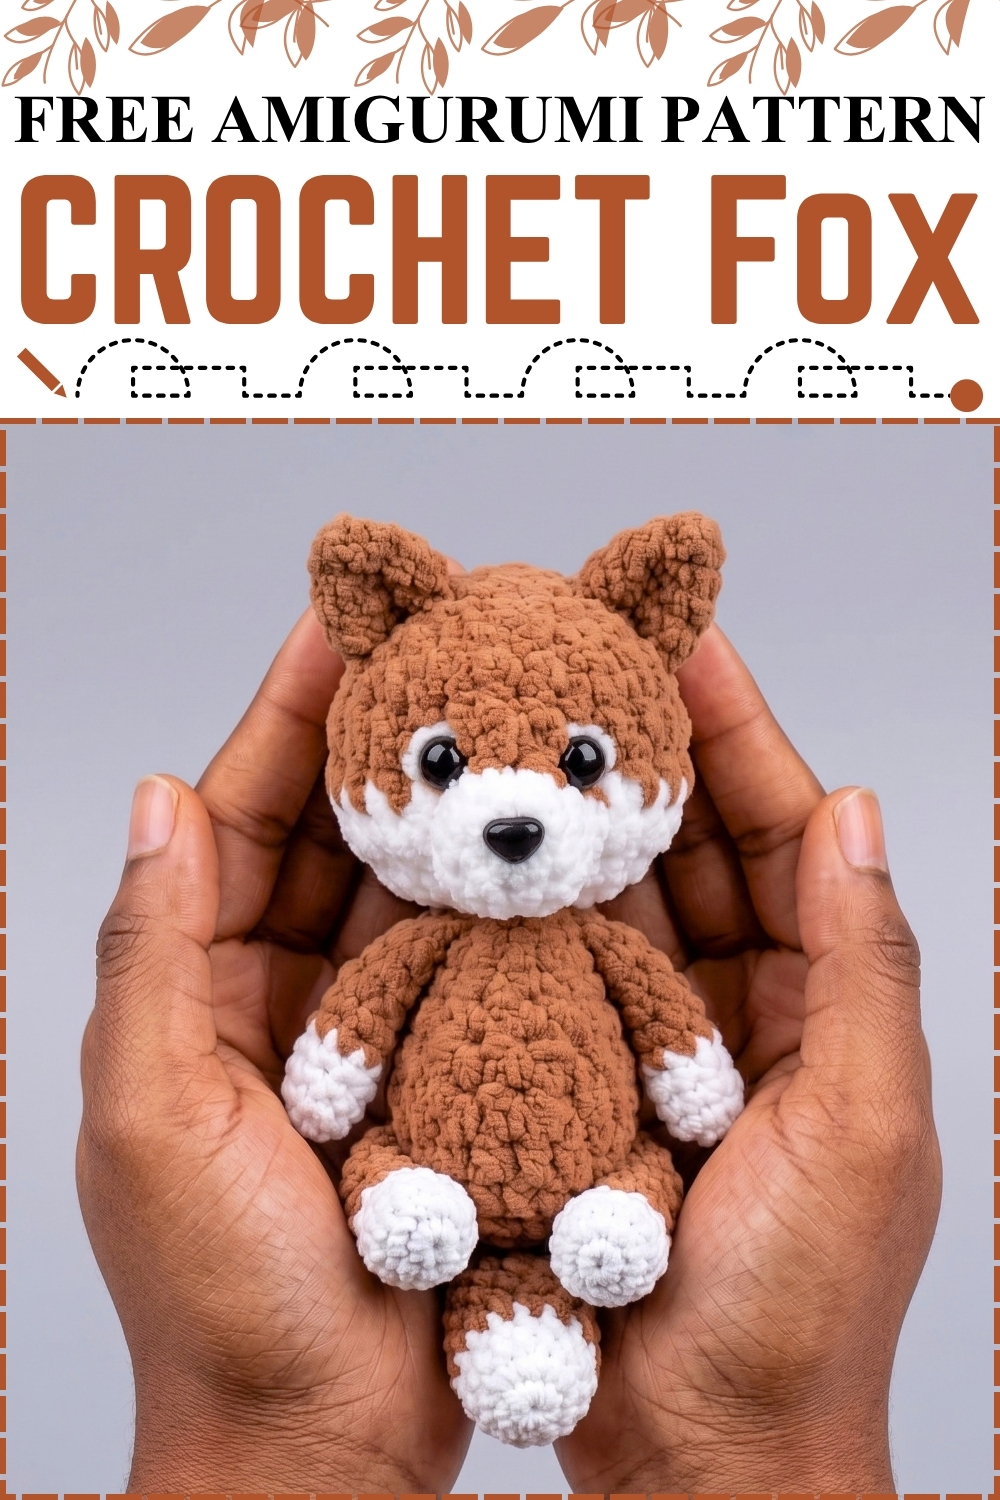
Puff stitches form all four limbs on this crochet fox amigurumi, which means the arms and legs appear as you work past them instead of waiting to be sewn on. Body and head run as one continuous piece from the bottom chain right up to the crown. Tail gets crocheted directly into round 3, so even that is never stitched on afterward. My version uses a warm cinnamon brown as the main colour with white for the muzzle, cheeks, paws and tail tip. Sculpting the face at the end is what gives it the soft, settled expression.
Materials and Tools
- Plush or velvet yarn in Cinnamon Brown as the main colour. The original pattern calls this orange
- Plush or velvet yarn in White for the muzzle, cheeks, tail tip and all four paws. The original pattern uses a third brown shade for the paws
- 4.0 mm crochet hook
- Small amigurumi safety eyes
- A small safety nose, secured with a washer and flattened with heat
- Fiberfill stuffing
- A wide eyed plastic needle for sewing plush yarn
- A long metal needle for sculpting the face
- Strong thread for the sculpting stitches
- A length of contrasting thread to use as a stitch marker
- Scissors
- Optional keychain ring if you want to carry it
Difficulty and Time
I would call this easy to confident beginner, with the one caveat that plush yarn is harder to see into than any other fibre. The stitches themselves are simple. Finding them under the pile is the real skill. From my own making this took a single long evening, maybe two to three hours including the face sculpting, which I would not rush. A smooth yarn version would go noticeably faster.
Beginner Technique Notes
- Chain, written as ch, starts the tail, the muzzle and the body.
- Single crochet, written as sc, carries most of the piece.
- Increase, written as inc, means two single crochet in the same stitch.
- Decrease, written as dec, means joining two stitches into one. The invisible decrease is specified here and it matters on plush yarn, since a standard decrease leaves a visible ridge.
- Puff stitch, written as puff, forms each limb. Yarn over, insert your hook, pull up a loop and draw through two loops, then repeat that three times into the same stitch until four loops sit on the hook. Yarn over and pull through all four at once, then chain one to lock it. The result is a soft rounded bobble, which is exactly what the paws on my fox look like.
- Work in continuous rounds throughout. There is no joining and no turning except in the ear rows.
- Use a contrasting thread as your marker rather than a plastic clip. Plush yarn swallows clips and you will lose your place.
- Count every round. On a 14 stitch body one extra stitch throws the limb placement visibly off centre.
The Pattern
Tail
- Start with White yarn.
- R1: ch 2, then work 4 sc into the first chain, or use a magic ring instead [4]
- R2: 4 inc [8]. Do not complete the final stitch of this round fully, and change to Cinnamon Brown on that last pull through.
- R3 to R6: 1 sc in each stitch around for 4 rounds [8]. The white tip should now sit as a small neat cap at the closed end.
- R7: (2 sc, 1 dec) repeated 2 times [6]
- Do not stuff the tail. Fold the opening flat and work 2 sc through both edges to close it.
- Cut the yarn without leaving a long tail, since this piece gets crocheted straight into the body rather than sewn on.
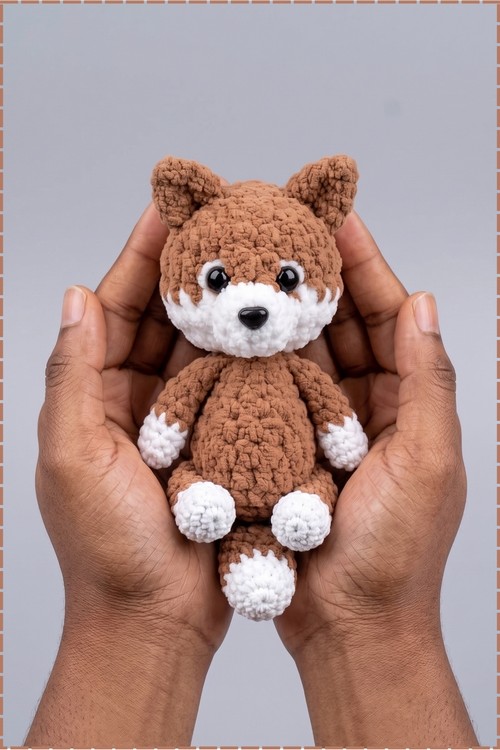
Muzzle
- Use White yarn.
- R1: ch 2, then work 4 sc into the first chain [4]
- R2: (1 sc, 1 inc) repeated 2 times [6]. The piece should be a tiny flat white disc at this point.
- Cut the yarn leaving a long tail for sewing.
- Insert the safety nose between rounds 1 and 2, fit the washer on the back and melt the plastic post slightly with a lighter so it flattens and locks tight.
- On my fox the nose sits right at the top edge of the muzzle, which is what gives the face its forward tilt. Fit it before you sew the muzzle on, since you cannot reach the washer afterward.
Body
- Start with Cinnamon Brown yarn.
- R1: ch 4, then starting in the second chain from the hook work 1 inc, 1 sc in the next chain, and 4 sc into the last chain, then rotate to work along the opposite side of the chain with 1 sc and finally 1 inc in the last stitch [10]. The shape should now be a small flat oval, which becomes the base of the body.
- R2: 1 inc, 3 sc, 2 inc, 3 sc, 1 inc [14]
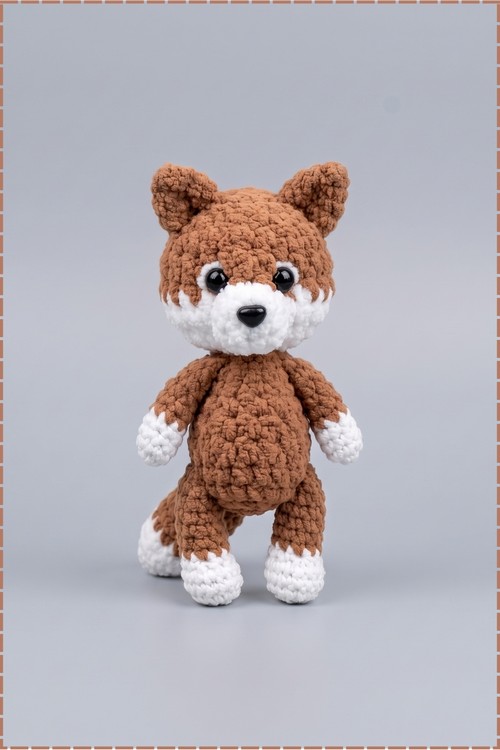
- R3: work 2 sc, changing to White on the last step of the second sc, then make a puff stitch for the first leg and change back to Cinnamon Brown with ch 1 to close it, then 4 sc, changing to White on the last step, then make a puff stitch for the second leg and change back to Cinnamon Brown with ch 1 to close it, then 3 sc, then attach the tail by inserting your hook through both the tail piece and the body together and working 2 sc, then 1 sc to finish the round [14]. On my fox the two white leg puffs sit at the front with the tail directly opposite at the back, which is what lets it sit upright.
- R4 to R5: 1 sc in each stitch around for 2 rounds [14]
- R6: 1 sc, 1 dec, 3 sc, 1 dec, 6 sc [12]
- R7: work 2 sc, changing to White, then make a puff stitch for the first arm and change back to Cinnamon Brown, then 3 sc, changing to White, then make a puff stitch for the second arm and change back to Cinnamon Brown, then 5 sc to finish the round [12]. The arm puffs should line up directly above the leg puffs, set slightly wider apart.
- Stuff the body firmly with fiberfill at this point.
- R8: 6 dec [6]. Do not cut the yarn. Change to White on the final pull through of the last decrease, since the head continues straight on from here.
Head
- Continue directly from the body, starting with White yarn.
- R1: 6 inc [12]
- R2: (1 sc, 1 inc) repeated 6 times [18]
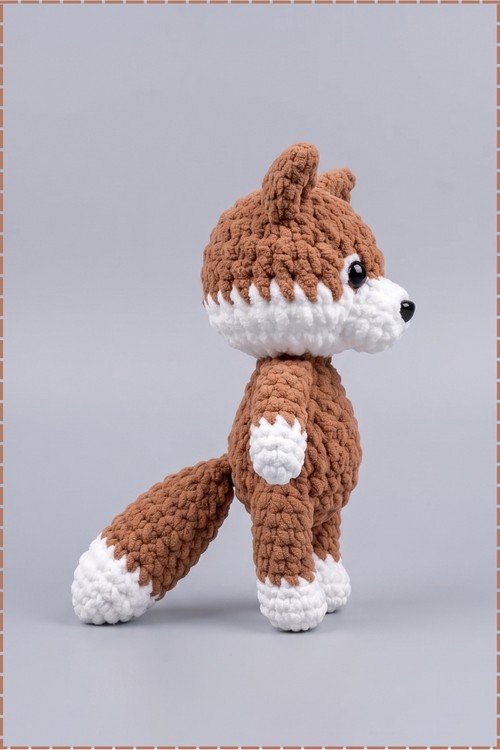
- R3: (2 sc, 1 inc) repeated 6 times [24]. Change back to Cinnamon Brown on the last step of the final stitch. This white section forms the muzzle area and the cheek patches that wrap around the sides of my fox's face.
- R4 to R5: 1 sc in each stitch around for 2 rounds [24]
- R6: (2 sc, 1 dec) repeated 6 times [18]
- R7: (1 sc, 1 dec) repeated 6 times [12]
- Insert the safety eyes between rounds 4 and 5 of the head, which is rounds 12 and 13 counting from the very bottom, leaving 3 stitches of space between them. On my fox they sit right on the line where the brown meets the white, which is what makes them stand out.
- Stuff the head firmly with fiberfill.
- R8: 6 dec [6]
- Cut the yarn, thread it onto the plastic needle, weave through the front loops of the final 6 stitches, pull tight to close the hole, knot and weave the end inside.
Ears, Make 2
- Use Cinnamon Brown yarn and work these directly onto the top sides of the head.
- Row 1: attach the yarn to the head, work 1 sc into the attachment stitch and 1 sc into the next stitch along, then ch 1 and turn [2]
- Row 2: work 1 dec across the two single crochet from the first row.
- Cut the yarn, pull through to secure and weave the tails into the head to hide them.
- Repeat the same two rows on the opposite side for the second ear.
- On my fox the ears stand upright and sit wide apart near the top of the head, well above the eyes. Space them evenly before you start, since there is nothing to unpick once the yarn is woven in.
Assembly and Face Sculpting
- Pin the white muzzle centrally just below the eyes, then sew it on using the long tail you left earlier.
- Thread the long metal needle with strong double strand thread for the sculpting.
- Insert the needle from the bottom of the head near the neck, bring it out at the outer corner of one eye, cross to the inner corner, then take it down to the bottom of the muzzle.
- Pull tight to indent the eye and define the cheek, then repeat the same path on the other eye and knot the ends at the bottom to secure.
- Pull both sides to the same tension or the face will come out crooked. Stop and look at it from the front before you knot anything off.
- Embroider a small white crescent along the outer lower edge of each eye with spare white plush yarn and the plastic needle, then knot and hide the tails inside the head.
- Attach a keychain ring at the top of the head if you want to carry it. Thread a doubled strand through several stitches rather than one and knot it inside. My photo shows no ring, so treat this as optional.
Tips and Troubleshooting
- Use a lighter hand than usual with plush yarn. It has almost no give, and pulling hard snaps the strand right where you cannot repair it invisibly.
- Work your stitches by feel as much as by sight. Push the pile aside with your hook tip to find the actual V of each stitch before you insert.
- Count the stitches in every round out loud. The pile hides stitch tops so completely that a missed stitch is almost impossible to spot afterward.
- Practise the puff stitch on a scrap first. Getting all four loops off the hook in one pull takes a couple of attempts, and the first puff on the actual body is not the place to learn.
- Keep the puffs on the right side as you work. It is easy to let one pop through to the inside, and you will not notice until the body is stuffed.
- Melt the nose post carefully and briefly. A second too long and the plastic deforms past the washer.
- Stuff the body before round 8, not after. Six stitches is too small an opening to work through properly.
- Do the face sculpting last, in good light, and go gently. Each pull changes the expression and you can always tighten further, but loosening is much harder.
Yarn Substitution
Plush yarn is what gives my fox its soft rounded surface and makes the puff stitch paws read as proper bobbles. Velvet and chenille behave much the same way. If you want an easier working experience, a smooth worsted cotton will produce a crisper, smaller fox with far more visible stitch definition, and you will find the puffs much easier to count. Acrylic sits between the two. Whatever you pick, go down a hook size from the band recommendation so the fabric stays dense enough to hide the stuffing.
Customization Ideas
- Work the main colour in classic bright orange, grey for an arctic fox or black for a night fox.
- Keep the original brown paws rather than white for a different marking.
- Skip the safety nose and embroider a small triangle in black yarn instead.
- Add a white chest patch by surface stitching a small oval below the head.
- Leave off the face sculpting for a rounder, flatter expression.
- Attach a lobster clasp instead of a plain ring so it clips onto a bag.
- Make a second one in a contrasting colour and attach them to the same ring.
Alt Text Suggestions for Photos
- Cinnamon brown crochet fox amigurumi in plush yarn with a white muzzle and white puff stitch paws held in two hands
- Small no sew amigurumi fox with black safety eyes and a safety nose made from velvet yarn
- Handmade plush crochet fox with upright ears and white tipped tail resting in open palms
- Close up of the white muzzle, sculpted cheeks and safety nose on a plush crochet fox
Frequently Asked Questions
How big does it finish? Mine fits neatly into one cupped hand, which with plush yarn on a 4.0 mm hook lands somewhere around four inches tall in my experience. No measurement is given in the pattern, so treat that as a guide. A smooth worsted version of the same rounds will come out considerably smaller.
What does the face sculpting actually do? It pulls the fabric inward at each eye and draws the cheeks forward, which turns a flat ball into a face with structure. Skip it and you still have a perfectly good fox, just a rounder and more generic looking one. On my piece it is the single step that made the biggest visual difference.
Why is it so hard to see my stitches? That is plush yarn, not you. The pile covers the stitch tops entirely. Work in strong light, push the pile back with your hook before inserting, and keep a contrasting thread marker in the first stitch of each round. Many makers find counting by feel works better than counting by eye here.
Can I sew the limbs on separately instead of using puff stitches? You could, but the whole appeal of this pattern is that nothing gets sewn on. The puffs are worked into the body rounds themselves, so swapping them for separate pieces means reworking the round counts, and I would not recommend that on your first attempt.
Is it safe for a baby? Not as written, because of the safety eyes and the safety nose. For a baby, embroider both features in black yarn instead and make sure every knot is buried deep inside the stuffing.