
Crochet Heart Shaped Amigurumi Pattern Keychains
Four foods share one heart shaped base here, pizza, apple pie, sugar cookie and chocolate chip cookie, with only the front face changing between them. Light brown milk cotton forms every back piece, and a crocheted strap with a key ring turns each finished heart into a keychain.
Lattice pie and sprinkled cookie, both heart shaped, make this crochet heart shaped foods amigurumi set an easy handover to anyone who bakes. Give one to a friend who keeps feeding you. The heart shaped foods amigurumi also suits teens who collect bag charms rather than toys.
Crochet Heart Shaped Foods Amigurumi
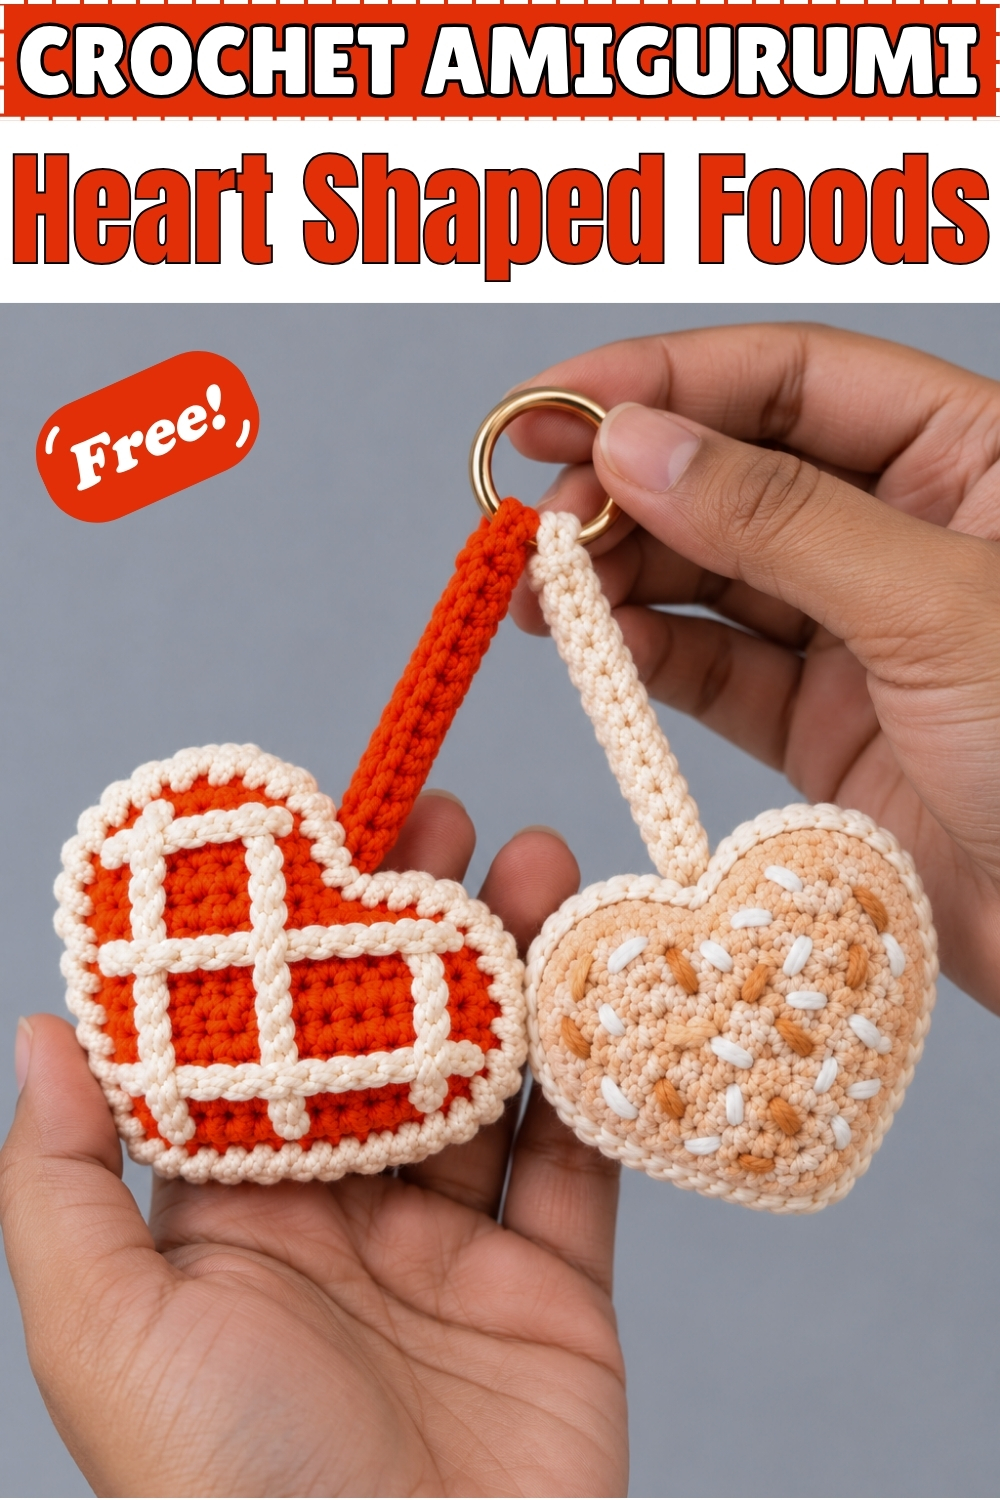
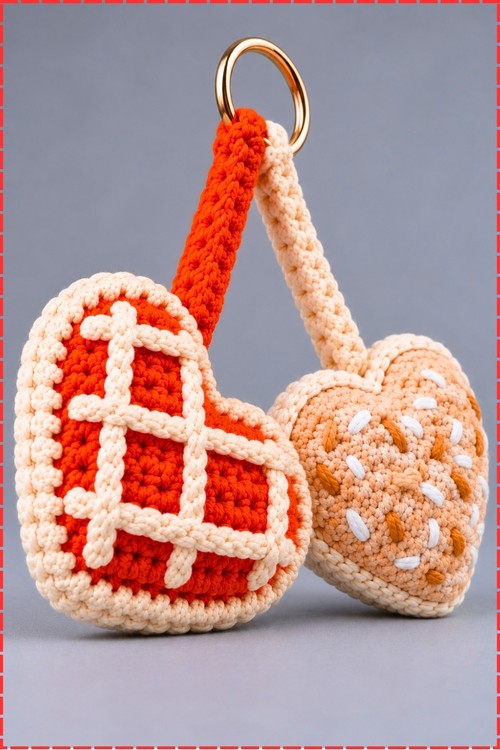
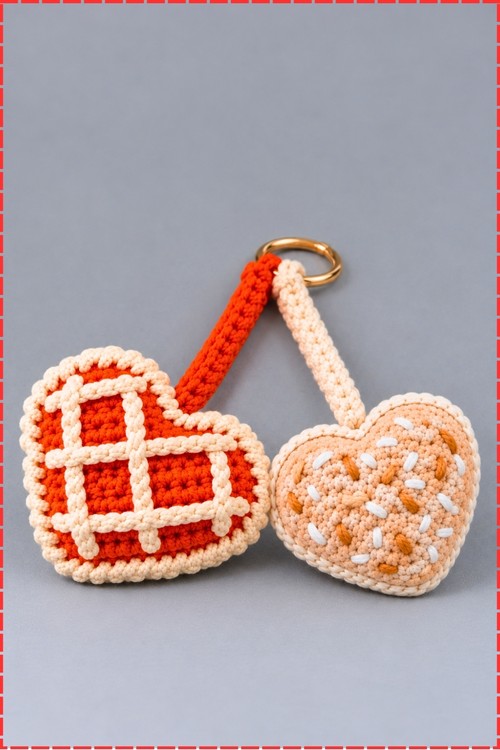
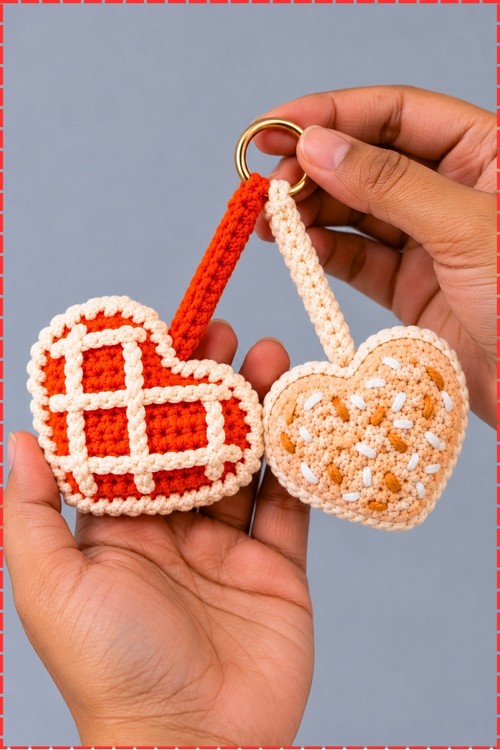
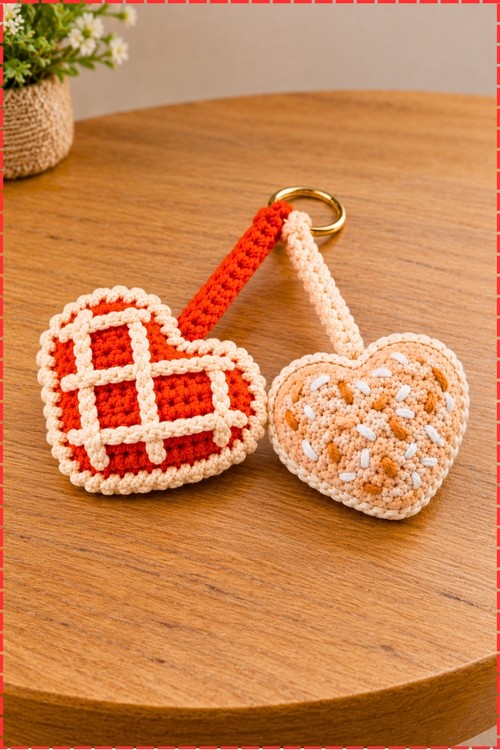
One universal base piece builds every food in this set, and the front face is all that changes between a pizza, an apple pie, a sugar cookie and a chocolate chip cookie crochet heart shaped amigurumi. Both pieces work from the same four round foundation and the same foundation chain, so once that sequence is in your hands the individual items come together quickly. My photo shows the apple pie and the sugar cookie as finished keychains, each with a flat crocheted strap and a metal ring. All four patterns are included below so you can make whichever combination you want.
Materials And Tools
- Milk cotton yarn in light brown for all back pieces, cookie bases and cookie crust details
- Milk cotton yarn in yellow for the pizza cheese layer
- Milk cotton yarn in cherry red or orange red for the pizza sauce, the apple pie front and the apple pie keychain strap
- Milk cotton yarn in hot pink for the sugar cookie frosting layer
- Milk cotton yarn in light peach or tan for the sugar cookie body, and for the sugar cookie keychain strap in my version
- Milk cotton yarn in chocolate brown for the chocolate chip cookie chips
- Milk cotton yarn in blue and yellow for the sugar cookie sprinkles
- Milk cotton yarn in white for the sprinkle embroidery as visible in my photo
- Small amount of white or cream yarn for the apple pie lattice strips
- 2.5 mm crochet hook
- Stitch markers
- Yarn needle
- Fiberfill stuffing
- Metal keychain ring, one per pair of hearts
- Scissors
The sprinkles on my sugar cookie are worked in white rather than the blue and yellow described in the plain pattern.
Difficulty And Time
All four items use single crochet with a few surface details and edging variations. The base piece takes the longest to learn on the first run and goes much faster once you know the shape. In my experience each finished heart takes around one hour, so the full set of four runs between three and five hours depending on how quickly the base stitch pattern clicks.
The Pattern
Universal Base Back Piece In Light Brown
Use this same four round sequence for every back piece and as the starting point for every front piece.
- Foundation: make a slip knot and chain 14.
- Round 1: starting from the 2nd chain from the hook, work 1 single crochet and mark this stitch, work 1 more single crochet in the same chain to complete an increase, work 1 single crochet in each of the next 4 chains, then work a 3 single crochet cluster decrease by inserting the hook into the next chain and pulling up a loop, inserting into the next chain and pulling up a loop, inserting into the next chain and pulling up a loop so you have 4 loops on the hook, yarn over and pull through all 4 loops, work 1 single crochet in each of the next 4 chains, work 3 single crochets into the last chain, then working along the opposite side of the foundation chain work 5 single crochets while carrying along the yarn tail, work 3 single crochets into the next chain space, then work 6 single crochets in the next 6 chains.
- Round 2: remove the stitch marker, work 1 single crochet in the first stitch and replace the marker, work 2 increases meaning 2 single crochets in each of the next 2 stitches, work 3 single crochets in the next 3 stitches, work a special decrease by inserting the hook into the next stitch and pulling up a loop then skipping the middle stitch and inserting the hook into the following stitch and pulling up a loop so you have 3 loops on the hook then yarn over and pull through all 3 loops, work 3 single crochets in the next 3 stitches, work 3 increases meaning 2 single crochets in each of the next 3 stitches, work 6 single crochets in the next 6 stitches, work 3 single crochets into the next single stitch, work 6 single crochets in the next 6 stitches, work 1 increase in the last stitch.
- Round 3: remove the marker, work 1 single crochet in the first stitch and replace the marker, work the sequence of 1 single crochet then 1 increase twice, work 2 single crochets in the next 2 stitches, work the special skip middle stitch decrease, work 2 single crochets in the next 2 stitches, work the sequence of 1 single crochet then 1 increase three times, work 7 single crochets in the next 7 stitches, work 3 single crochets into the next single stitch, work 8 single crochets in the next 8 stitches, work 1 increase in the last stitch.
- Round 4: remove the marker, work 1 single crochet in the first stitch and replace the marker, work 1 increase in the next stitch, work 2 single crochets in the next 2 stitches, work 1 increase in the next stitch, work 2 single crochets in the next 2 stitches, skip 1 stitch and work 1 slip stitch in the next stitch, skip 1 stitch and work 1 single crochet in the next stitch, work the sequence of 2 single crochets then 1 increase three times, work 9 single crochets in the next 9 stitches, work 3 single crochets into the next stitch, work 9 single crochets in the next 9 stitches, work 1 increase in the next stitch, work 1 single crochet in the last stitch, then cut the yarn, thread it onto a needle, skip the first stitch, insert the needle into the second stitch and back through the last stitch to create an invisible join and weave in the ends.
- Keep the stitch marker moving at the start of every round or the heart shape drifts without you noticing. The indentation in the top centre of the heart comes from the special decrease that skips the middle stitch, and both sides of the heart must mirror each other for the shape to look symmetrical.
Part 1: Pizza Heart
Pizza Front Piece In Yellow And Red
- Rounds 1 through 3: work identically to the base back piece using yellow yarn for the cheese base.
- Round 3 colour change: on the very last stitch of round 3 complete the first half of the increase in yellow, then switch to red yarn to finish the second half of the stitch.
- Round 4: work identically to round 4 of the base back piece using red yarn, crocheting over the yarn tail, to form the red sauce layer, then fasten off and weave in the ends.
Pepperoni, Make Six, In Cherry Red
- Make a magic ring.
- Work 5 single crochets into the magic ring.
- Pull tight to close, slip stitch to the first stitch and cut the yarn leaving tails for sewing.
- Place all 6 pepperoni randomly on the red front sauce piece, insert the tails through to the back, double tie the ends securely on the wrong side and trim.
Joining Pizza Front And Back
- Place the front and back pieces together with wrong sides facing inward.
- Start at the bottom centre of the heart at the 3 single crochet group from round 1, insert the hook through the middle stitch of both the front and back pieces.
- Join light brown yarn, chain 1 and work 23 single crochets around one side of the edge, carrying along the yarn tail.
- Work 1 slip stitch right at the middle indentation of the heart.
- Continue with 22 single crochets around the remaining side.
- Pause before closing and lightly stuff the heart with fiberfill to keep it flat rather than overstuffing.
- Slip stitch to the first stitch, fasten off and weave in the ends invisibly.
Part 2: Apple Pie Heart
Apple Pie Pieces
- Back piece: crochet standard rounds 1 through 4 using light brown yarn.
- Front piece: crochet standard rounds 1 through 4 using cherry red yarn to represent the apple filling.
Pie Crust Lattice Strips
- Long strips, make four: using cream or light brown yarn, chain 12, then cut the yarn.
- Short strips, make two: using cream or light brown yarn, chain 7, then cut the yarn.
- Weave and layer the four long strips and two short strips in a lattice pattern across the red front piece as visible in my photo, with the strips crossing each other at roughly equal intervals.
- Sew down the ends of each strip firmly onto the front piece using a yarn needle, knotting securely on the back so the lattice sits flat and does not lift.
- The lattice on my apple pie is cream coloured against the red front, which gives the strongest contrast.
Joining Apple Pie Front And Back
- Align the front and back pieces with wrong sides facing inward.
- Insert the hook into the middle stitch of the bottom 3 single crochet group on both front and back pieces.
- Join light brown yarn and chain 1.
- Work 46 reverse single crochets, also called crab stitch, working from left to right all the way around the edge.
- Stuff lightly with fiberfill before closing.
- Fasten off and weave in the yarn tails.
- The crab stitch border on the apple pie creates a twisted rope effect at the edge, which looks different from the plain single crochet border on the pizza, so keep the two joining methods distinct.
Part 3: Sugar Cookie Heart
Sugar Cookie Front Piece In Hot Pink And Light Brown
- Rounds 1 through 3: work identically to the base back piece using hot pink yarn for the frosting.
- Round 3 colour change: on the last stitch increase switch to light brown yarn for the cookie base.
- Round 4: using light brown yarn, work round 4 entirely in the back loop only, then fasten off and weave in the ends.
- Frosting edge trim: attach pink yarn into the front loops of round 3 and work slip stitches between round 3 and round 4 around the contour, skipping stitches where necessary around curves to shape cleanly for around 30 slip stitches total, then fasten off and weave in.
Sprinkles
- Thread a needle with white yarn and a knot at the end, and stitch small straight lines randomly across the hot pink frosting surface to mimic sprinkles, securing and trimming the tails on the back.
- My sprinkles are worked in white rather than the blue and yellow in the plain pattern, which gives the cookie a cleaner, simpler look as visible in my photo.
- Blue and yellow sprinkles from the original pattern are equally valid and make the cookie more colourful.
Joining Sugar Cookie Front And Back
- Align the front and back pieces with wrong sides facing inward.
- Join light brown yarn into the middle stitch at the bottom, working through the front loop only of the front piece and the back loop only of the back piece.
- Chain 1 and work 45 slip stitches all the way around the edge through those designated loops.
- Stuff lightly with fiberfill before closing the final stitches.
- Slip stitch to the first chain, fasten off and hide the tails.
Part 4: Chocolate Chip Cookie Heart
Cookie Front And Back Pieces
- Both the front and back pieces are crocheted identically to the standard base back piece using light brown yarn throughout all four rounds.
Adding Chocolate Chips
- Thread chocolate brown yarn onto a needle with a knot at the end and make short individual stitches randomly across both the front and back light brown cookie pieces to represent chocolate chips, then secure and trim the knots on the inside.
Joining Chocolate Chip Cookie Front And Back
- Join the front and back pieces together using the same technique as the sugar cookie, working through the front loop of the front piece and the back loop of the back piece with 45 slip stitches around, with light stuffing before finishing.
Keychain Strap And Ring
- The plain pattern gives a 50 chain loop as the keychain option, but on my piece each heart has a flat crocheted strap that threads through a metal ring.
- To make a flat strap, chain until the strip reaches your preferred strap length, then work rows of single crochet back and forth across those chains until the strap is as wide as you want it, matching the colour of the heart it attaches to: red for the apple pie strap and cream for the sugar cookie strap as in my photo.
- Thread both ends of the strap through the top centre indentation of the heart piece, double tie tightly on the inside and trim, then loop the strap through the metal keychain ring before finishing.
- Multiple hearts can share a single keychain ring, which is how my pair is assembled.
Troubleshooting Tips
- If the heart shape comes out lopsided, the cluster decrease and the skip middle stitch decrease are the two points most likely to be off. Work them slowly on the first base piece and check from above that both lobes of the heart look equal before moving to round 2.
- Keep the lattice strips pinned down before sewing to prevent them from shifting while you work the needle through the pie front. Pins or clips hold the position while both hands are on the needle.
- The reverse single crochet border on the apple pie pulls tighter than it looks as you work, so keep your tension slightly looser than usual on those stitches or the border will pucker the edge.
Customisation Ideas
- Make a set of four and attach all of them to a single large ring.
- Work the pizza front in orange yellow rather than standard yellow for a deeper cheese colour.
- Try a lavender sugar cookie frosting layer instead of hot pink for a spring version.
- Add a tiny embroidered face onto any of the hearts to turn it into a food character.
- Use the plain back piece in a single colour as a standalone heart keychain without any food details.
FAQ
Do all four items use the same hook and yarn weight? Yes. The 2.5 mm hook and the same milk cotton yarn weight carry through every piece in the set, so you never need to change your tools between items.
Can I make just one or two of the four items? Completely. Each food item is self contained and the base piece works the same way for all of them, so pick the ones you want and skip the rest.
My heart base is too elongated rather than round. What is causing it? The 14 chain foundation sets the width of the heart. If the chains are too loose the piece stretches long and narrow. Keep the foundation chain slightly tighter than usual or use a hook one size smaller for the foundation chain only before switching back for the rounds.