
Crochet Cupid My Melody Amigurumi Free Pattern
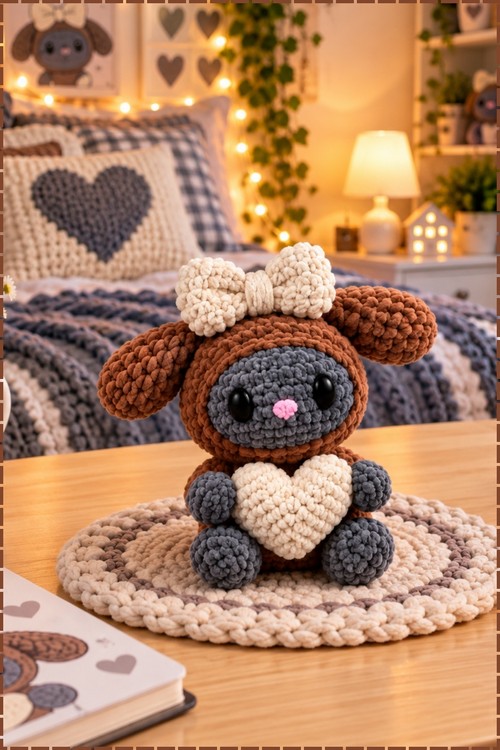
Separate rounds for the head, hood, bunny ears, limbs, bow and heart keep this crochet Cupid My Melody amigurumi easy to track and assemble. Slate grey velvet, warm brown and cream give it a cosy Valentine look, while safety eyes and a pink stitched nose finish the face.
Shoppers hunting a Valentine gift usually land on the Crochet Cupid My Melody Amigurumi because the cream heart does the talking for them. Good for a partner, a sister, a friend who collects soft things. Anyone making a crochet cupid my melody amigurumi is giving it away, rarely keeping it.
Crochet Cupid My Melody Amigurumi
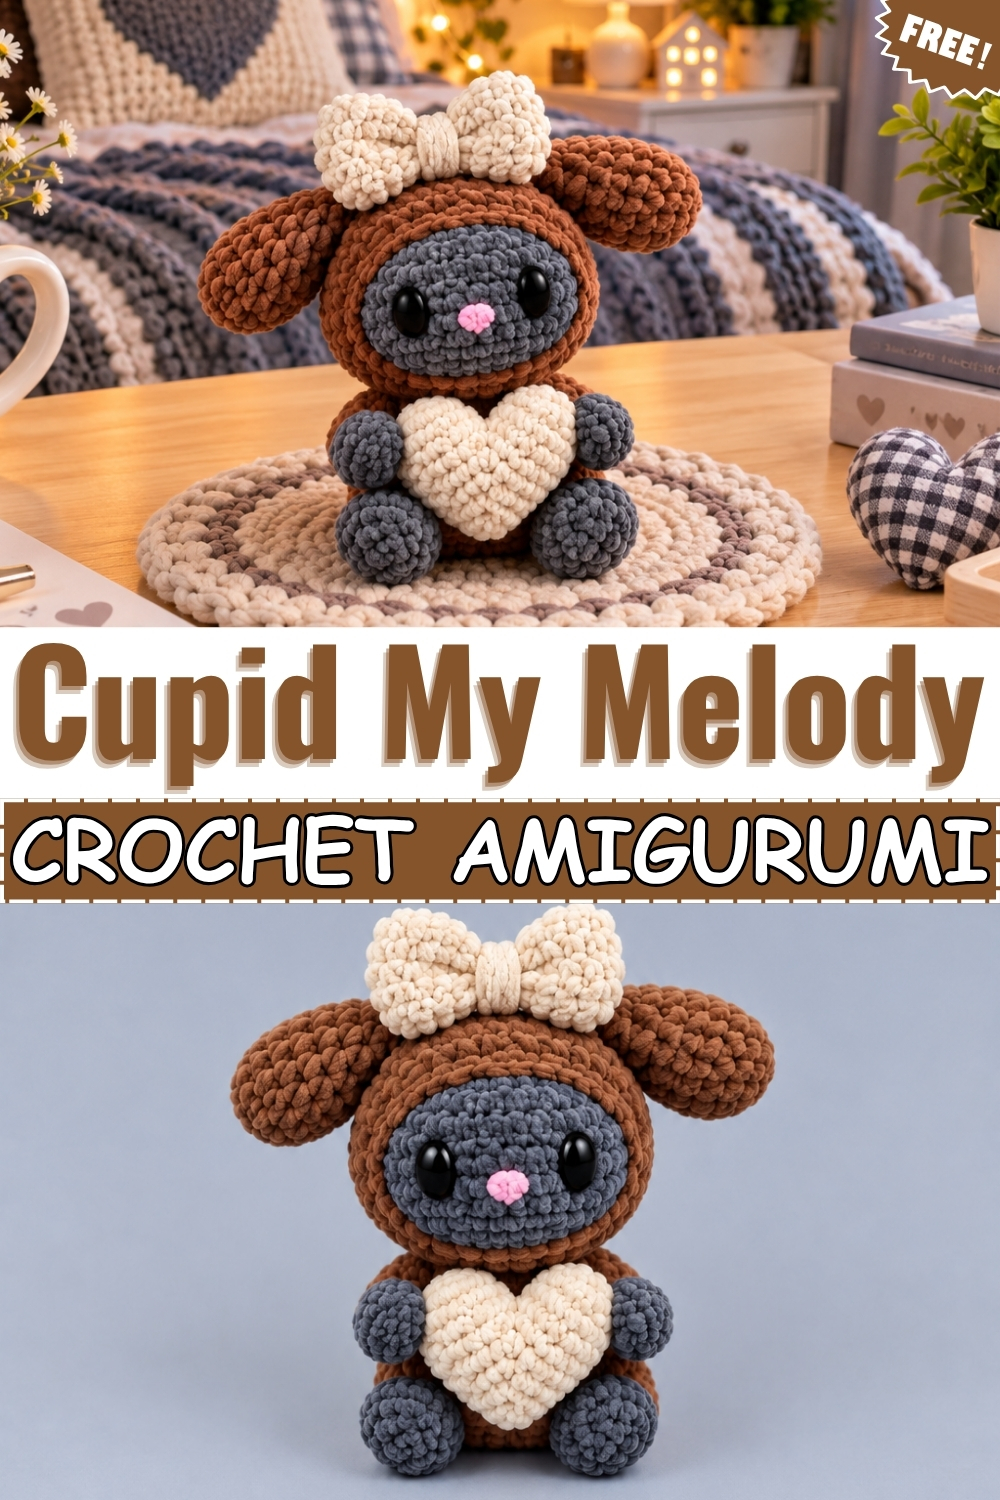
Velvet yarn turns this cupid my melody amigurumi into a plush, rounded toy that holds its shape without any wire or armature. Building happens in separate pieces, so the head, hood, ears, body, limbs, bow, and heart all come off the hook individually before assembly. Mine uses slate grey for the face and limbs, warm brown for the hood and body, and cream for the bow and the heart. Black safety eyes and a small pink embroidered nose finish the face. Sitting height lands around palm size, which makes it an easy shelf piece or a gift that travels well.
Materials And Tools
- Chenille or velvet yarn in slate grey for the head, arms, and legs
- Chenille or velvet yarn in warm brown for the hood, ears, and body
- Chenille or velvet yarn in cream for the bow and the heart
- A small amount of pink yarn or embroidery floss for the nose
- Two black safety eyes, medium size, or black embroidery floss if the toy is for a baby
- Hook sized to grip velvet yarn without splitting it, usually 4.0 mm to 5.0 mm depending on your brand
- Polyester fiberfill
- Blunt yarn needle with a large eye
- Stitch markers
Difficulty And Time
Straightforward beginner project in terms of stitches. Every piece uses single crochet, increases, and decreases, apart from the wings, which add half double and double crochet. The difficulty comes entirely from the yarn. Velvet hides your stitches, so counting is slower than it would be in cotton. From experience, expect around four to five hours spread across a couple of sessions, with assembly taking longer than you think because pinning the pieces square matters more than the crochet itself.
Technique Notes And Tips
- Velvet yarn splits and worms. Use a hook with a deep throat and a blunt point, keep your tension slightly tighter than usual, and stop to untwist your working yarn every few rounds.
- Counting is the main problem with this fibre. Place a marker in the first stitch of every round and do not rely on seeing the stitch definition, because you will not see it.
- Round 9 of the head uses a front loop only decrease. That is deliberate. Working into front loops only keeps the decrease from bulking up on the surface, which matters on a face where every lump shows.
- Stuff in small pieces and push them into the edges first, then fill the centre. Velvet stretches, so overstuffing makes the fabric gape and the white fiberfill shows through dark colours.
- Pin every piece before you sew. Check the placement from the front, from the side, and standing the toy upright, then sew. Unpicking velvet is unpleasant and the fibre fuzzes when you frog it.
- Sew with the same velvet yarn but split off a thinner strand if your brand allows it, or use a matching cotton thread. Full weight velvet makes visible lumps at the seams.
- Insert the safety eyes before you close and stuff the head. Once the hood goes on and the stuffing is in, the backs are unreachable.
The Pattern
Head In Slate Grey
- Round 1: Make 6 single crochet (sc) in a magic ring (MR), pull the tail tight to close the centre, and place a marker in the last stitch. [6]
- Round 2: Increase (inc) in each stitch around. [12]
- Round 3: Work (1 sc, 1 inc) around. [18]
- Round 4: Work (2 sc, 1 inc) around. [24]
- Round 5: Work (3 sc, 1 inc) around. [30]
- Round 6: Work (4 sc, 1 inc) around. [36] The piece should now sit as a shallow dome with a flat rim.
- Rounds 7 and 8: Work 1 sc in each stitch around for two rounds. [36] These straight rounds give the face its height and the side wall where the eyes will sit.
- Round 9: Work (4 sc, 1 dec) around, making every decrease (dec) through the front loops only. [30]
- Round 10: Work (3 sc, 1 dec) around. [24]
- Round 11: Work (2 sc, 1 dec) around. [18]
- Face: Fit the black safety eyes now, spaced evenly across the flat front of the face and set roughly level with rounds 7 and 8, then secure the washers from inside. My eyes sit wide apart with a clear gap between them, which gives the face its calm look. Embroider a small upright pink nose centred between and just below the eyes, keeping the stitches short so the nose stays a compact triangle rather than spreading.
- Stuffing: Stuff the head firmly with fiberfill, filling the sides before the middle so the face stays flat rather than bulging.
- Round 12: Work (1 sc, 1 dec) around. [12]
- Finish: Slip stitch (sl st) into the next stitch, fasten off, and leave a medium tail. Thread the tail on a yarn needle, run it through the front loops of the remaining stitches, pull tight to close, and bury the tail inside the head.
Hood In Brown
- Round 1: Make 6 sc in a MR. [6]
- Rounds 2 to 6: Work the same increase sequence as the head, ending with the (4 sc, inc) round. [36]
- Rounds 7 to 9: Work 1 sc in each stitch around for three rounds. [36] Three straight rounds instead of the head's two is what makes the hood large enough to sit over the head without squashing it.
- Round 10: Work (4 sc, 1 dec) around. [30]
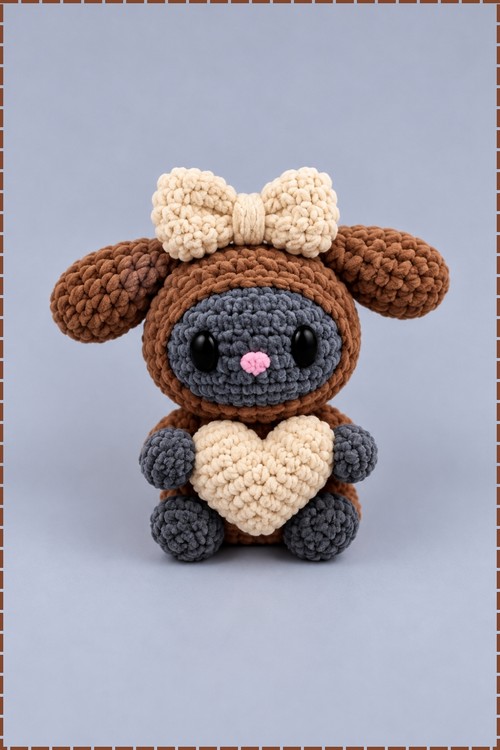
- Assembly point: Slide the finished slate grey head inside the brown hood now and keep it there while you work the remaining rounds, so the hood closes around the head. Position the face opening before you continue, because after round 11 the hood will not shift.
- Round 11: Work (3 sc, 1 dec) around. [24]
- Round 12: Work (2 sc, 1 dec) around. [18]
- Finish: Sl st, fasten off, and leave a tail for weaving in. On my version the hood sits low at the back and frames the face tightly, leaving only the flat grey front visible.
Ears In Brown, Make Two
- Round 1: Make 5 sc in a MR. [5]
- Round 2: Inc in each stitch around. [10]
- Round 3: Work (1 sc, 1 inc) around. [15]
- Rounds 4 and 5: Work 1 sc in each stitch around for two rounds. [15] This is the widest part of the ear and where it hangs fullest.
- Round 6: Work (1 sc, 1 dec) around. [10]
- Rounds 7 and 8: Work 1 sc in each stitch around for two rounds. [10]
- Finish: Stuff the ears lightly, sl st, fasten off, and leave a long sewing tail. Light stuffing is the point here, because my ears flop outward and down rather than standing up. Make two.
Body In Brown
- Round 1: Make 6 sc in a MR. [6]
- Rounds 2 to 5: Work the same increase sequence as the head through the (3 sc, 1 inc) round. [30]
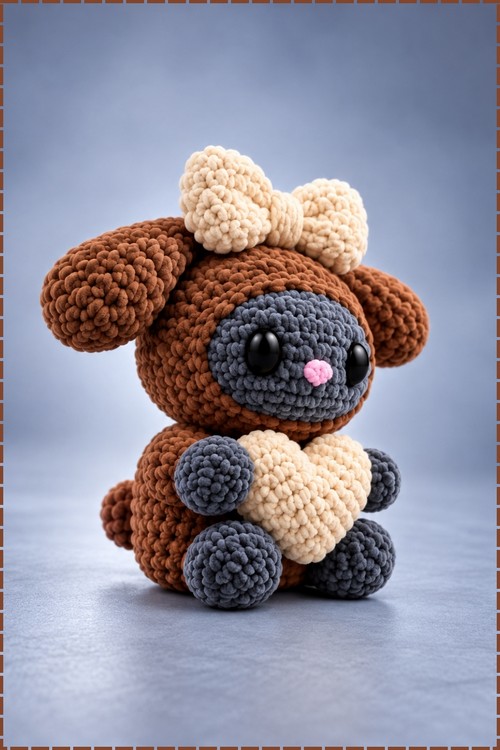
- Rounds 6 to 10: Work 1 sc in each stitch around for five rounds. [30] The body should now read as a short open cylinder with a rounded base that lets the toy sit flat.
- Finish: Sl st, fasten off, and cut the yarn. Stuff the body firmly before you sew the head on, keeping the base full so it does not tip.
- Note: The original pattern works the body in the same colour as the head. Mine is brown to match the hood, so the grey reads as skin and the brown reads as the costume.
Arms And Legs In Slate Grey, Make Four
- Round 1: Make 6 sc in a MR. [6]
- Rounds 2 to 8: Work 1 sc in each stitch around for seven rounds. [6]
- Finish: Sl st, fasten off, and leave a tail for sewing. Make four in total, two arms and two legs.
- Stuff these very lightly or not at all. Velvet at six stitches around is already dense, and mine hold their round chunky shape without much filling.
Bow In Cream
- Row 1: Make a slip knot, chain (ch) 21, then starting in the second chain from the hook work 1 sc in each chain across. [20]
- Rows 2 and 3: Turn, ch 1, and work 1 sc in each stitch across. [20]
- Finish: Ch 1 and cut the yarn, leaving an extremely long tail for shaping and sewing.
- Shaping: Fold the rectangle so the two short edges meet, sew those short edges together, then sew the horizontal gap closed to form a loop. Push the needle out at the centre of the loop and wrap the long tail tightly around the middle several times until it pinches into a bow. Keep wrapping until the centre is properly cinched, since a loose wrap lets the bow sag flat within a day.
- Placement: My bow sits centred on the very top of the hood rather than off to one side, standing upright with both loops level. Sew through the wrapped centre and into the hood so it cannot spin.
Heart In Cream
- First half, round 1: Make 6 sc in a MR. [6]
- First half, round 2: Inc in each stitch around. [12]
- First half, round 3: Work 1 sc in each stitch around. [12] Fasten off and cut the yarn, leaving a tail for later.
- Second half, rounds 1 to 3: Repeat the same three rounds exactly, but do not fasten off.
- Round 4: Insert your hook into the first half at the stitch beside where you fastened off, make a sl st to join the two halves, and count that as your first stitch. Work 11 more sc around the first half, then cross back and work 12 sc around the second half. [24] The two bumps now sit side by side as the top lobes of the heart.
- Round 5: Work (1 sc, 1 dec) around.
- Round 6: Work 1 sc in each stitch around.
- Closing the join: Use the tail left on the first half to sew the small gap between the two lobes shut, working from the inside so the stitches stay hidden in the valley of the heart.
- Round 7: Work (2 sc, 1 dec) around.
- Stuffing: Stuff both top lobes firmly so they stay plump and separated, then fill down toward the point.
- Round 8: Dec all around.
- Finish: Sl st, fasten off, and weave the tail through the front loops to draw the bottom point closed permanently.
- Placement: My heart sits at the front of the body, held between both arms and resting on the legs, sewn lightly at the back so it stays put.
Cupid Wings, Optional
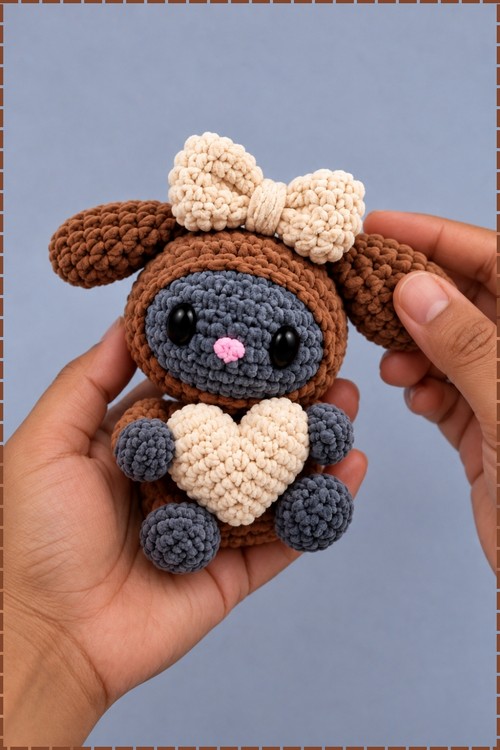
- My finished piece has no wings, so treat this section as optional. Add them if you want the full cupid version.
- Row 1: Ch 15.
- Starting in the second chain from the hook, work into the chains in this order: 1 half double crochet (hdc), 1 double crochet (dc), 1 dc, 1 hdc, then sl st into the next 5 chains, then 1 hdc, 1 dc, 1 dc, 1 hdc.
- Finish: Ch 1, cut the yarn, and leave a tail for sewing. The slip stitch section in the middle forms the narrow centre, and the taller stitches at each end curve up into the two wing shapes.
- Sew the centre of the strip to the upper back of the body so both wings sit level.
Assembly
- Ears: Flatten the base of each ear and sew it to the side of the hood, catching a stitch from the hood and then a stitch from each side of the flattened base so the seam stays secure. Mine attach low on the sides, roughly level with the face opening, and hang outward and slightly down.
- Head to body: Sew the bottom edge of the hood to the top opening of the body, working all the way around and checking from the front that the face points straight ahead.
- Arms: Sew one arm to each side of the body directly beneath the hood line, angled forward so they frame the heart.
- Legs: Sew the legs to the front of the base, pointing forward and set slightly apart so the toy balances in a seated position.
- Bow: Sew the cream bow to the top of the hood, centred between the ears.
- Heart: Tack the heart to the body between the arms.
- Weave all remaining tails deep into the stuffing and trim close to the surface.
Yarn Substitution
Velvet is doing real work in this design. The plush pile is what gives the piece its rounded, squishy look and hides the seams at every join. Swapping to cotton will give you crisp stitch definition and a much smaller, firmer toy at the same stitch counts, which is a fine result but a visibly different one. Acrylic worsted lands in between. If you do substitute, keep all three colours in the same yarn and weight so the pieces scale together, and adjust your hook until the fabric is dense enough that no stuffing shows through.
Customization Ideas
- Swap the brown hood and body for pink and the head for white to get the classic colourway.
- Use cream for the hood and a deeper colour for the bow to reverse the contrast.
- Embroider the eyes instead of using safety eyes if the toy is going to a child under three.
- Make the heart in red and the bow in the same red for a Valentine set.
- Skip the heart and give the piece a small crocheted star or flower to hold instead.
- Add the wings for a true cupid version, or leave them off for a plain sitting toy.
Frequently Asked Questions
Why does my head look lumpy where the decreases are?
Most likely you worked round 9 through both loops. That round calls for front loop only decreases specifically to stop the decrease ridge from standing proud on the face. In velvet yarn the loops are hard to see, so slow down and feel for the front loop with your hook tip.
Can I skip putting the head inside the hood mid round?
No, and it is worth doing it properly. The hood closes around the head as you crochet rounds 11 and 12, which is what holds the two pieces together without any sewing at the top. If you finish the hood separately you will have to seam it on, and the join will show.
How do I stop the arms and legs from twisting after they are sewn on?
Sew each one at two points rather than one. Anchor the flattened top of the limb to the body with a few stitches across the front of the base and a few across the back. A single anchor point lets a six stitch tube rotate freely, which is what makes assembled amigurumi look crooked after handling.