
Little Bunny Crochet Pattern Free Amigurumi With A Tiny Red Bow
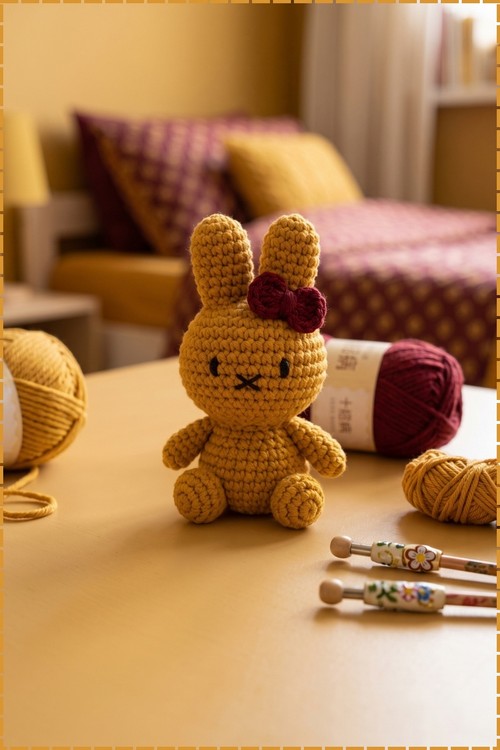
Easter baskets and baby shower tables both suit this little bunny crochet pattern, worked top down in worsted mustard yarn. Embroidered eyes keep the free amigurumi safe for small hands, and a tiny red bow sewn between the upright ears adds the finishing pop.
Those upright ears and the tiny red bow give this Crochet Bunny Free Amigurumi a bossy streak, like it already has opinions about your yarn stash. The stitched X nose keeps the face blank enough to read as smug. Make a crochet bunny free amigurumi with this much attitude and it gets named the same day.
Crochet Bunny Free Amigurumi
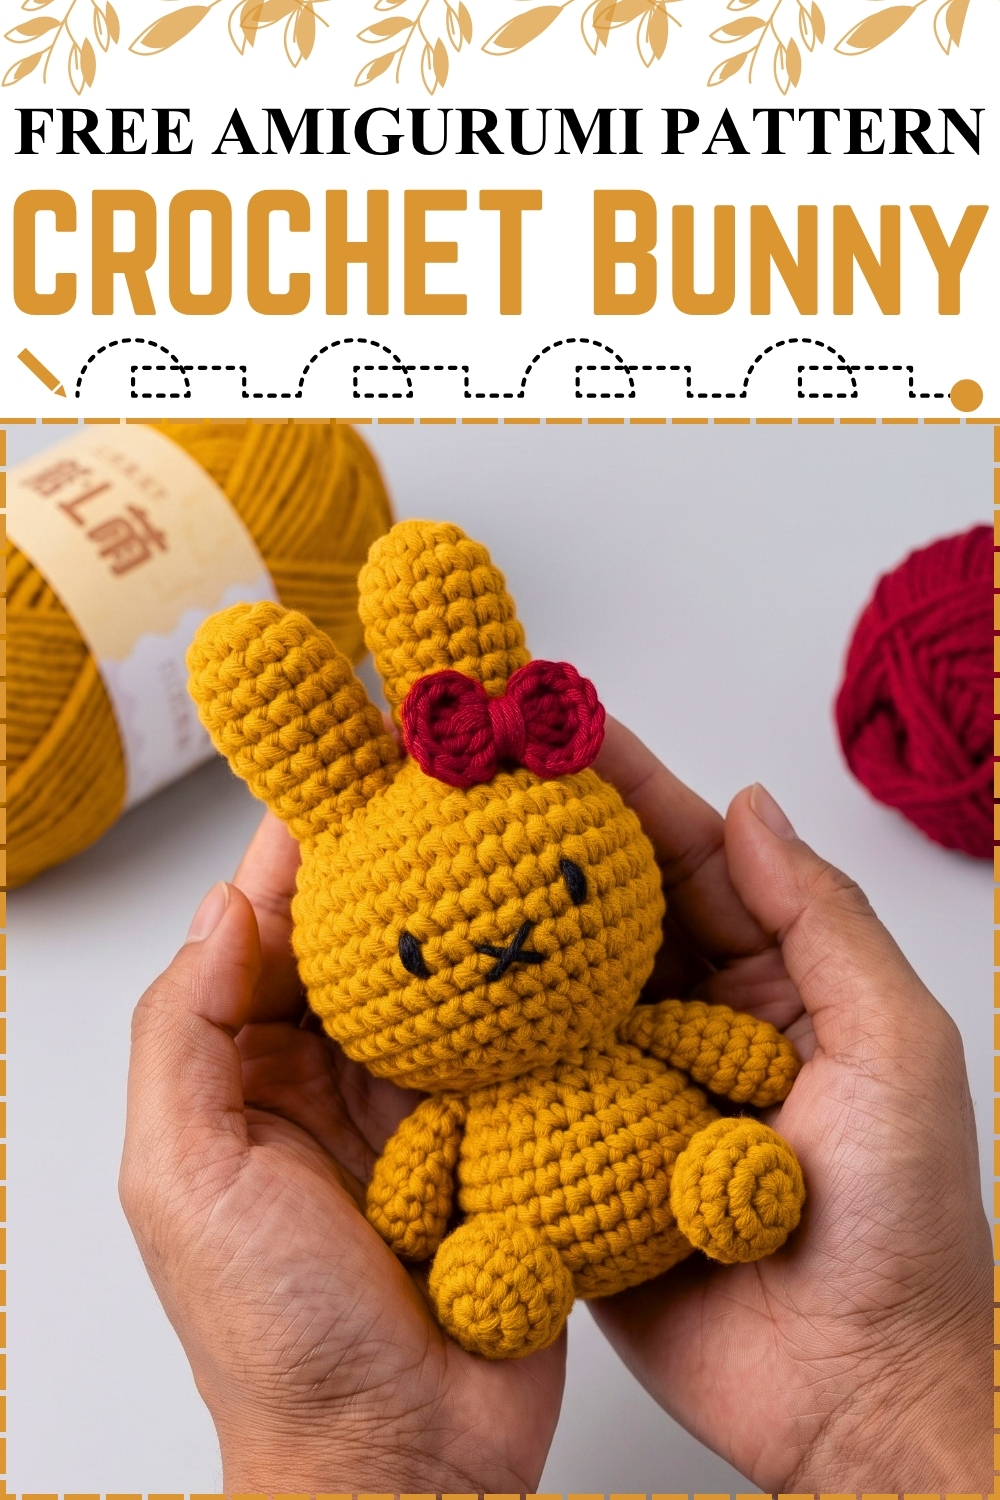
Working this crochet bunny from the top down means both ears leave your hook before anything else, then join into a single round that grows straight into the head. Seamless shaping like that removes almost all the sewing that usually slows beginners down. Mustard gold yarn gave mine a warm, slightly vintage look that photographs beautifully. Embroidered eyes and a small black X for the nose replaced safety eyes, which keeps the face soft and baby friendly. Red makes the little bow pop against the gold. Anyone comfortable with single crochet and a magic ring can finish one in an afternoon.
Materials And Tools
- Worsted weight acrylic or cotton blend yarn in mustard gold for the ears, head, body, arms, and legs
- A small amount of red yarn in the same weight for the bow
- Black embroidery floss or thin black yarn for the eyes and nose
- A 3.0 mm or 3.5 mm hook, going a size smaller than the yarn label suggests so the stuffing never peeks through
- Polyester fiberfill for stuffing
- A blunt yarn needle for closing rounds, embroidering the face, and attaching the limbs
- Stitch marker to track the start of each round, since the whole piece works in a continuous spiral
- Small scissors
Difficulty And Time
In my experience this sits comfortably at the easy end of amigurumi. You only need a magic ring, single crochet, increases, and decreases for the whole head. The bow adds double crochet and chains, which stay simple because they all go into one ring. Working steadily, I finished the ears and head in roughly two hours, and the body with limbs took about the same again. Beginners should plan for a relaxed afternoon rather than a rushed hour.
Beginner Technique Notes
- A magic ring closes tight and leaves no hole at the tip of each ear. Pull the tail firmly before you move into round two, because tightening later is far harder once the stitches sit under tension.
- Every round here works in a continuous spiral with no joining slip stitch and no turning chain. Drop a marker into the first stitch of each round and move it up as you go.
- Increase means two single crochets worked into the same stitch. Decrease means pulling two stitches together into one, and the invisible decrease method gives the smoothest surface on a piece this small.
- Stuffing wants to go in gradually and firmly. Under stuffed amigurumi slumps, over stuffed amigurumi shows gaps between stitches.
The Pattern
Bunny Ears (Make Two)
- Round 1: Make a magic ring and work 6 single crochet (sc) into the ring, then pull the ring tight. [6 sts] The closed tip should feel firm with no visible hole at the centre.
- Round 2: Work 6 increase (inc), placing 2 sc in each stitch around. [12 sts] Your piece now flares into a small shallow cup.
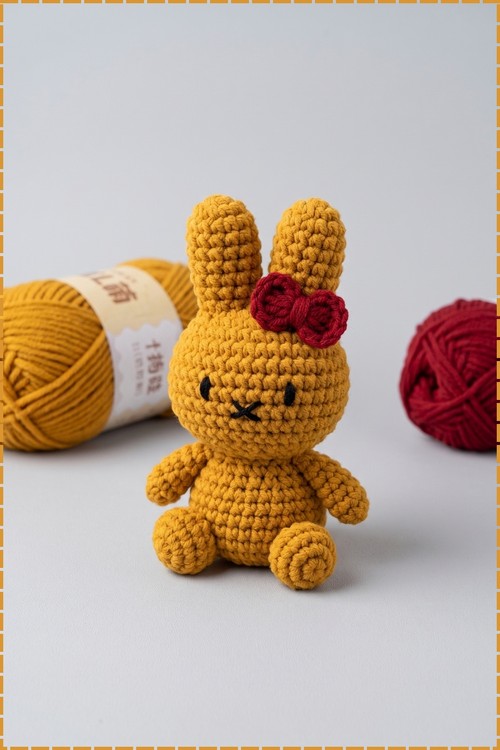
- Rounds 3 to 8: Work 12 sc, one in each stitch, for six consecutive rounds. [12 sts each round] The ear grows into a straight narrow tube with a softly rounded tip, exactly like the two ears standing up in my photo.
- Fasten off the first ear and weave the tail inside, then leave the second ear on your hook with the yarn still attached, because that working yarn carries you straight into the head.
- Leave both ears unstuffed so they stay flat and flexible and lean naturally the way mine do.
Bunny Head
- Round 9: Join the ears by working 1 sc into each of the 12 stitches of the first ear, then 1 sc into each of the 12 stitches of the second ear. [24 sts] Keep both ears facing the same direction as you join so neither one twists.
- Round 10: Work (3 sc, inc) six times around. [30 sts] The join between the ears begins to close and the top of the head takes shape.
- Round 11: Work (2 sc, inc, 2 sc) six times around. [36 sts] Spacing the increase in the middle of the repeat keeps the head round rather than hexagonal.
- Round 12: Work (5 sc, inc) six times around. [42 sts] This is the widest point of the head.
- Rounds 13 to 18: Work 42 sc, one in each stitch, for six consecutive rounds. [42 sts each round] You now have a tall rounded head with a straight side wall, ready for the face.
- Face: Work the face now while the opening is still wide and your hand fits inside. My bunny has embroidered eyes rather than safety eyes, so I used black floss to stitch two short vertical ovals across rounds 13 to 15 with a gap of 7 stitches between them, then added a small black X just below and centred between the eyes for the nose. Safety eyes remain an option if you prefer them, and they would sit in the same position.
- Round 19: Work (5 sc, dec) six times around. [36 sts] The head starts curving inward at the base.
- Round 20: Work 18 decrease (dec) around, pulling every pair of stitches together. [18 sts] The bottom closes quickly here, so check your face placement before going further.
- Stuffing: Stuff the head firmly with fiberfill before the opening narrows any further, shaping it plump and round as you push the filling up into the crown between the ears.
- Round 21: Work (1 sc, dec) six times around. [12 sts] Add a little more stuffing through the gap if the head feels soft.
- Round 22: Work 6 dec around to close the base of the head. [6 sts] Only a small ring of stitches remains.
- Finishing: Cut the yarn leaving a tail, thread it onto a yarn needle, run it through the front loop of each remaining stitch, and pull tight to close the hole cleanly. Weave the tail into the head and trim.
The Red Bow
- Step 1: Make a magic ring in red yarn.
- Step 2: Chain (ch) 3.
- Step 3: Work 3 double crochet (dc) directly into the ring. This cluster forms the first loop of the bow.
- Step 4: Chain 3 again and slip stitch (sl st) into the ring to close, which forms the second loop and balances the shape.
- Step 5: Pull the magic ring tight so both loops sit snugly against the centre, then fasten off and leave a long tail for sewing. Pinching the middle as you tighten gives the bow its neat waist.
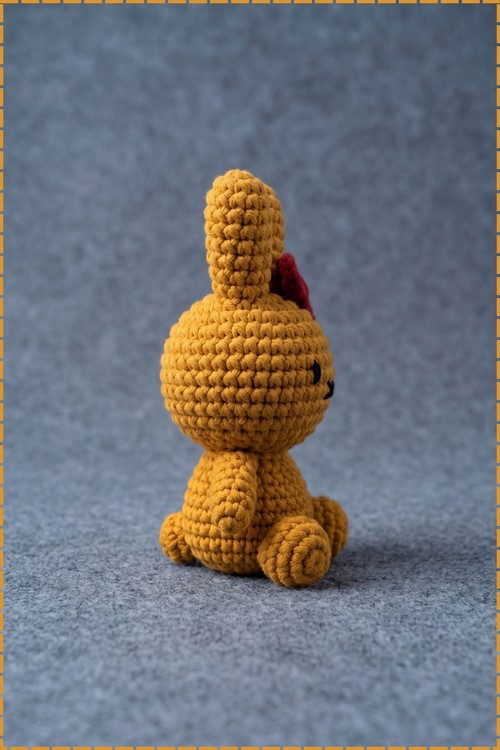
- Placement: My bow sits low at the base of the right ear, tilted slightly forward and resting against the top of the head rather than on the ear itself. Sew through the centre of the bow and into the head so it lies flat and cannot spin. A second bow is optional if you want a matching pair.
Body, Arms, And Legs
The original pattern stops at the head, so these pieces follow general amigurumi shaping. Use the same mustard gold yarn and hook throughout, and work every piece in a continuous spiral.
- Body: Start with a magic ring, work sc into the ring, then increase evenly on each round until the base measures a little wider than half the width of the finished head. Work even rounds without shaping until the body reaches your preferred height, which on mine is roughly two thirds the height of the head. Decrease evenly over the last few rounds to close the shoulders, stuffing firmly as you go so the bunny sits upright on its own.
- Legs (make two): Begin with a magic ring, increase to form a rounded foot, then work even rounds until the leg reaches the length you want. My legs are short and stubby, stretching out straight in front of the body. Stuff the foot lightly and leave the top open for sewing.
- Arms (make two): Begin with a magic ring, increase to form the rounded paw, then work even rounds for a shorter length than the legs. Stuff only the paw end so the arms stay soft enough to fall naturally against the sides.
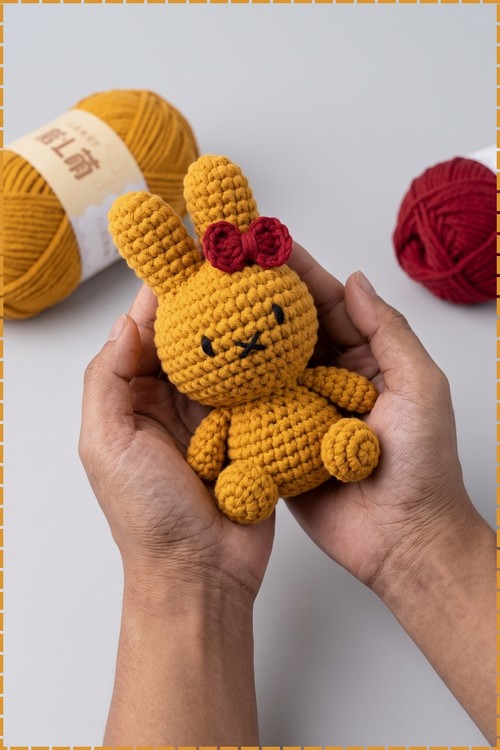
- Assembly: Sew the head to the top of the body first, checking from the front that the face points straight ahead and the ears stay level. Pin the legs to the lower front of the body so the feet face forward and the bunny balances in a sitting position. Attach the arms high on the sides just below the neck join, angled slightly downward the way mine hang. Weave all tails deep into the body and trim close.
Tips And Troubleshooting
- Go down a hook size from whatever the yarn label recommends. Tight fabric is the single biggest difference between a professional looking bunny and a lumpy one with stuffing showing through.
- Mark round one of every piece and move the marker as you work. On a 42 stitch round, losing your place costs far more time than placing the marker did.
- Embroider the face before you close the head. Reaching inside to anchor your floss is easy at 42 stitches and almost impossible at 12.
- Count the 7 stitch gap between the eyes twice before stitching. Eyes set too close read as anxious, eyes set too wide flatten the face.
- Stuff in small pinches rather than large handfuls. Small amounts distribute evenly and stop lumps forming under the surface.
- Pin the limbs before sewing and stand the bunny up to check balance. Legs sewn even slightly too far back will tip it over backwards.
- Keep both ears untwisted when you join them in round 9. A twisted ear cannot be corrected later without frogging back to the join.
Yarn Substitution
Cotton gives the crispest stitch definition and holds the ear shape upright, which suits this design well. Acrylic works just as nicely and stays softer for a child, though the ears may lean a little more. A cotton acrylic blend, which is what mine looks closest to, lands in the middle and is the easiest to work with for long stretches. Stay within the same weight family whatever you choose, because switching to a bulkier yarn changes the finished size considerably even though the stitch counts stay identical. Match the red bow yarn to the body yarn in weight so it sits flat.
Customization Ideas
- Swap the mustard gold for soft cream, dusty pink, or pale grey for a completely different mood while keeping every stitch count the same.
- Make the bow in a contrasting colour for each bunny in a set, or skip it entirely for a plain version.
- Use safety eyes instead of embroidery if the bunny is going on a shelf rather than into a baby's hands.
- Add a tiny embroidered blush circle on each cheek in pale pink.
- Work a small pompom tail in the same gold and sew it to the back of the body.
- Lengthen the even rounds on the body to make a taller, slimmer bunny.
- Sew a narrow ribbon around the neck if you want a scarf rather than a bow.
Frequently Asked Questions
Can I make this bunny without any sewing at all?
The head needs none, because the ears join directly into it and everything continues in one piece. The body, arms, and legs do need sewing, so if you want a truly sew free project, stop at the head and add a hanging loop to turn it into an ornament.
Why do my ears look twisted after round 9?
One ear almost certainly got flipped as you moved onto it. Check that both ear tips point the same way and that the marker sides line up before you work that joining round. Catching it in round 9 saves a lot of frogging later.
My head came out pointy instead of round. What happened?
Pointy heads usually come from stuffing too little or stuffing unevenly at the crown. Push a small amount of fiberfill right up between the ears before you start the decrease rounds, then keep adding through each shrinking opening.
Should I use safety eyes or embroider them?
Embroidery is the safer choice for anyone under three, and it is what I did on mine. Safety eyes give a glossier commercial look and go in easily between rounds 13 and 15 while the head is still open, so pick based on who will be holding it.
How do I stop the bunny from tipping over when it sits?
Balance comes from leg placement rather than stuffing. Pin the legs to the lower front of the body, not the underside, and make sure both feet point forward at the same angle. Stuff the body firmly at the base so it does not compress and shift the centre of gravity.