
Crochet Dog Keychain Free Pattern In Grey Plush Yarn
Bubble stitch beginners get a forgiving first project here, since grey plush yarn hides tension wobbles and the whole dog keychain grows from one magic ring up through the head. Only the two ears come off the hook separately, and you crochet them into the closing rounds.
Floppy ears and a dark muzzle make this Crochet Dog land well with anyone who grew up wanting a puppy. Gift it to a child learning to hold things carefully, or to a friend between pets. The Crochet Dog fits small hands, and quiet ones too. Beginners can gift it proudly.
Crochet Dog
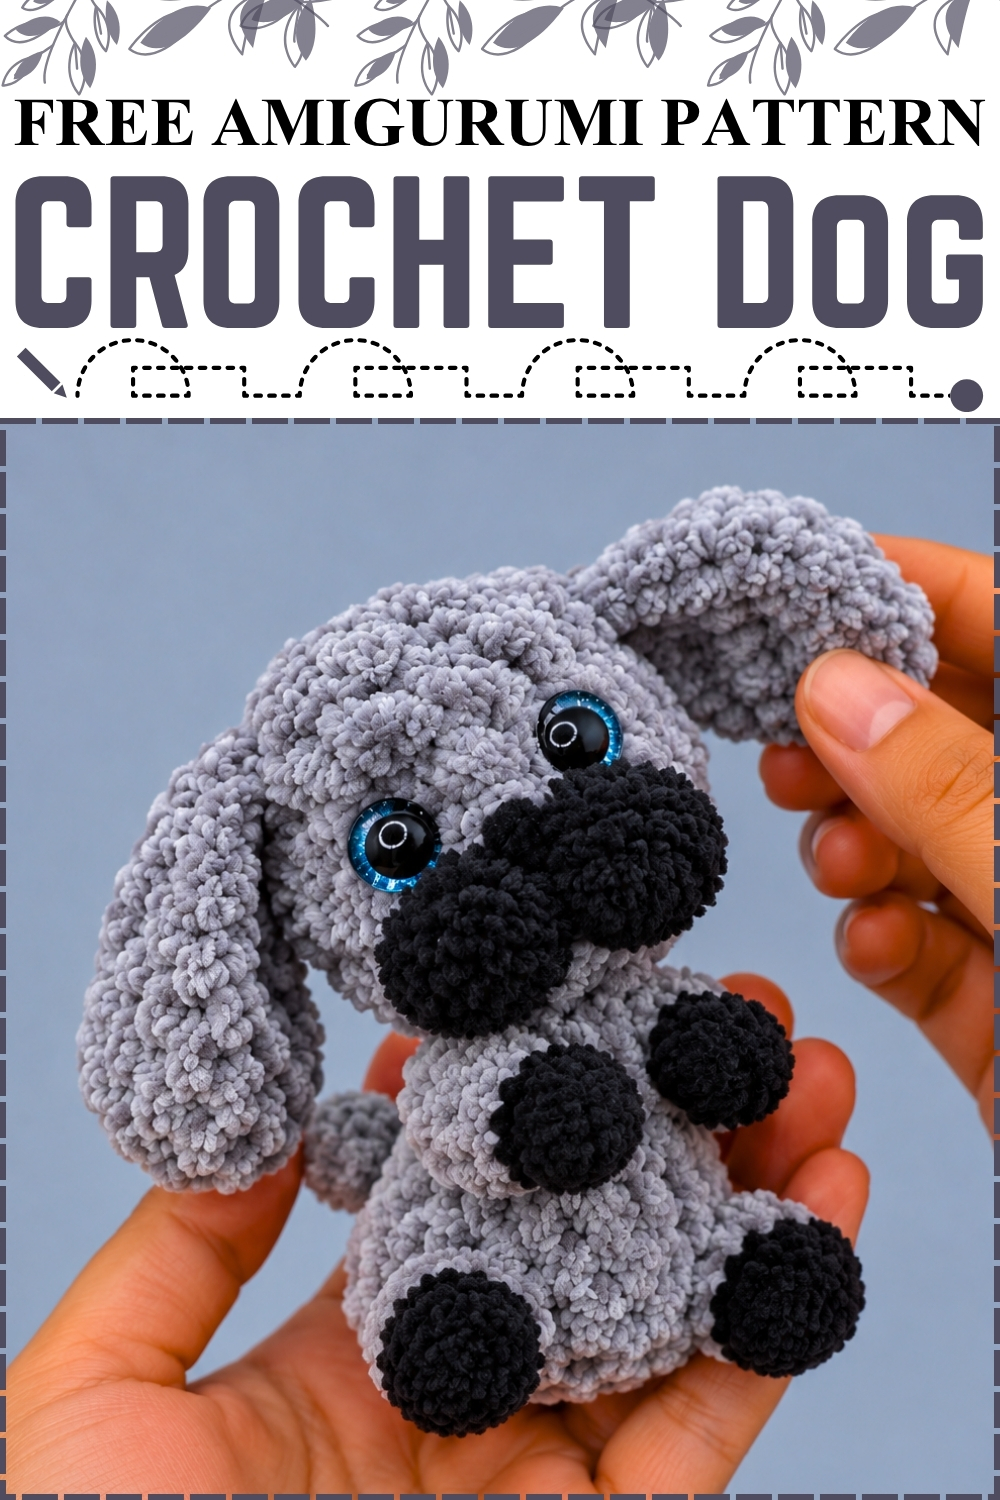
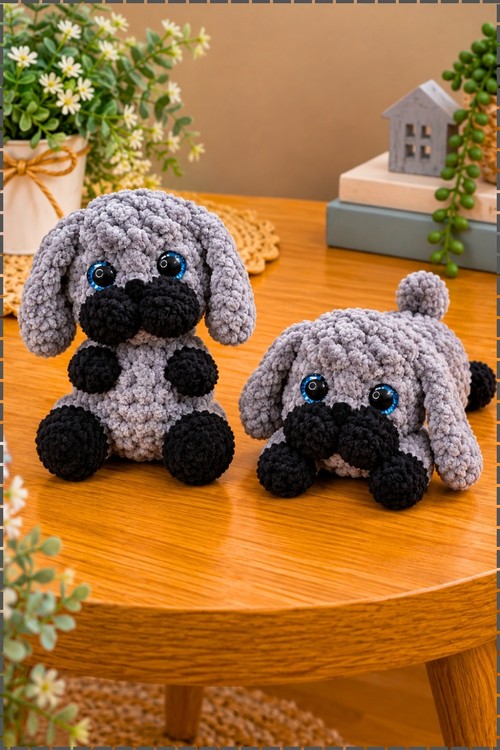
Worked bottom up in a single piece, this crochet dog keychain grows from a magic ring at the base straight through to the top of the head. Bubble stitches form the paws, feet and muzzle, so no separate limb ever needs sewing on. Ears are the only pieces made apart, and they get crocheted into the head during the closing rounds. My version pairs grey plush yarn with charcoal black details and blue glitter safety eyes. Plush yarn hides tension wobbles well, which makes this puppy a forgiving first project for anyone new to bubble stitch.
Materials and Tools
- Plush or chenille yarn in grey as the main colour. I used a soft mid grey for the body, head, ears and tail.
- Plush yarn in charcoal black for the secondary colour. My paws, feet and both muzzle bubbles are black rather than white.
- 3.5 mm or 4.0 mm crochet hook.
- Two 4 mm safety eyes and one safety nose. Mine are blue glitter eyes with a black pupil and a small black nose.
- Fiberfill stuffing.
- Stitch markers, yarn needle, scissors.
- A keyring or lobster clip if you want to finish it as a keychain rather than a small toy.
Difficulty and Time
This is an easy make once bubble stitch clicks. From my own experience it takes roughly one to two hours, and a first attempt with colour changes may run closer to three. The finished puppy sits small enough to fill a palm, though plush yarn thickness varies a lot between brands, so treat any size as an estimate rather than a fixed measurement.
Abbreviations Used
- MR means magic ring.
- ch means chain.
- sc means single crochet.
- inc means increase, two single crochet worked into the same stitch.
- dec means decrease, and the invisible decrease works best here.
- sl st means slip stitch.
- 3-dc-bo and 4-dc-bo mean a three or four double crochet bubble stitch, worked into one stitch and closed together at the top so it pops out of the fabric.
Technique Notes
Bubble stitch is the whole build. You work three or four double crochet into one stitch, leaving the last loop of each on the hook, then pull through all loops at once. The bubble sits on the outside of the fabric as a rounded lump, which is how the paws, feet and muzzle appear without any sewing. Push each bubble firmly to the right side as you close it, because a bubble left on the inside of the piece disappears once you stuff it and there is no fixing it later. Colour changes matter more than the bubbles themselves. Switch yarn on the final pull through of the stitch before the bubble, never at the start of the bubble itself, or you get a grey streak running through the black paw. Carry the unused colour loosely up the inside rather than cutting each time, since plush yarn ends are bulky and awkward to weave in. Count with markers, not by eye. Plush yarn hides stitch definition almost completely, so move a marker into the first stitch of every round as you go. If you lose your place, count the bubbles instead, since they are the only landmarks you can see clearly. Stuff in small pinches as you close the head. Once the opening narrows past the ear round you cannot reach inside, and an understuffed head flattens under the weight of the ears.
The Pattern
Ears (Make 2)
Use the grey main colour.
- Row 1: Ch 7. Starting in the 2nd chain from the hook, work 6 sc. Turn. You should have a short flat strip.
- Row 2: Work along the edge with 2 sl st, 3 sc, 2 inc, 3 sc, 2 sl st. The increases round out the lower end so the ear falls with a soft curve rather than a point.
- Fasten off and tie the ends together. Do not stuff the ears. Set both aside until the head is ready.
Base and Lower Body
Worked bottom up in one continuous piece.
- Round 1: Work 6 sc in MR (6 sts). Pull the ring tight, since plush yarn hides a gap until stuffing pushes through it.
- Round 2: Work 4 inc, then make the tail by ch 3 and working 2 sl st starting from the 2nd chain from the hook, then work 2 inc onto the body (12 sts). The tail sits low at the back of the body and stays short and stubby in my finished piece.
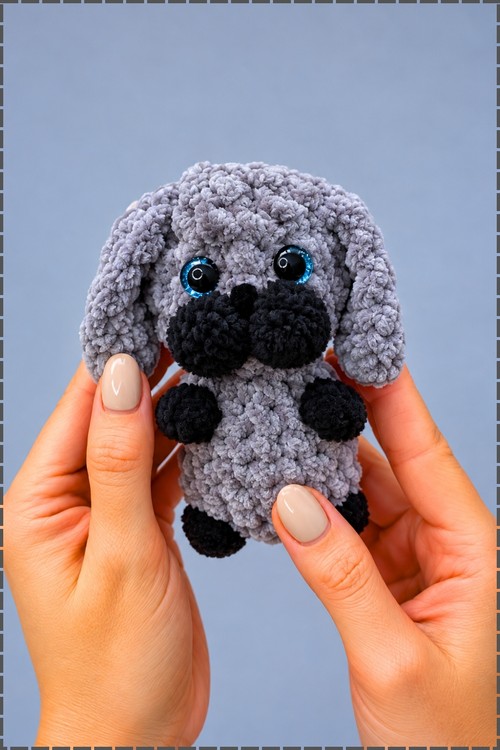
- Round 3 (Legs Round): Work 1 sc and switch to black on the last pull through, work a 3-dc-bo in black for the first foot then switch back to grey, work 2 inc, work a 3-dc-bo in black for the second foot then switch back to grey, work 2 sc, skip the tail, work 2 sc, 1 inc, 1 sc (16 sts). Both feet should sit at the front of the body with a small gap between them, exactly as they do in my photo.
- Rounds 4 to 5: Work 16 sc around (16 sts). These straight rounds build the rounded belly.
- Round 6: Work (2 sc, 1 dec) 4 times (12 sts). The body starts pulling in toward the shoulders here.
Arms and Neck
- Round 7 (Arms Round): Work 1 sc and switch to black, work a 3-dc-bo in black for the first arm then switch back to grey, work 3 sc switching to black on the last sc, work a 3-dc-bo in black for the second arm then switch back to grey, work 6 sc (12 sts). The two black paws should sit at the front, roughly above and between the feet.
- Round 8: Work (2 sc, 1 dec) 3 times (9 sts). This is the neck and the narrowest point of the whole piece.
Head and Muzzle
- Round 9: Work 9 inc (18 sts). The head flares out sharply from the neck in one round.
- Round 10 (Muzzle Round): Work 5 sc switching to black on the 5th sc, work a 4-dc-bo in black, 1 sc, a 4-dc-bo in black, then switch back to grey and work 11 sc (18 sts). Two black bubbles side by side form the muzzle, sitting front and centre below where the eyes go.
- Rounds 11 to 12: Work 18 sc around (18 sts). Keep these rounds even so the head stays a ball rather than a cone.
Assembly and Finishing
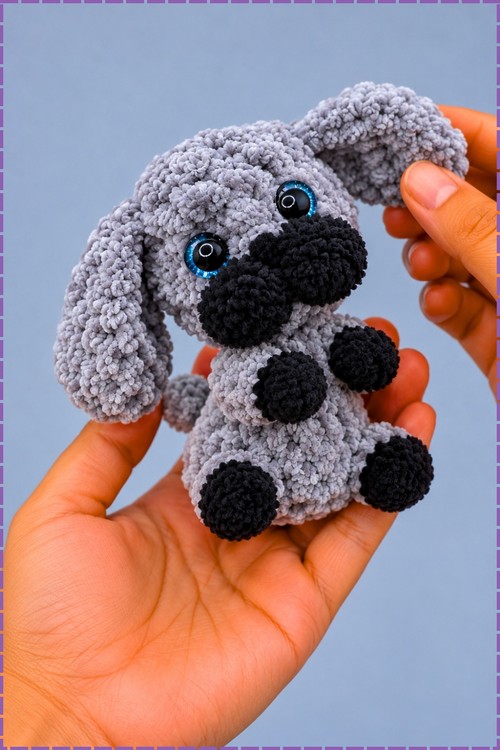
- Insert the safety eyes between Rounds 12 and 13, spaced about 3 stitches apart. Mine are blue glitter eyes and they sit directly above the muzzle bubbles, close enough that the top of each bubble almost touches the eye.
- Attach the safety nose onto the centre of the muzzle, at the join between the two black bubbles. Push it in firmly, because plush pile resists the washer and a loose nose slides sideways.
- Stuff the body and head firmly with fiberfill as you work, filling the lower body before the neck closes over.
- Round 13 (Joining Ears): Hold the ears against the sides of the head, level with the eyes and matched for height. Work 1 sc, dec through the first ear and the head, 1 sc through the ear and head, 1 dec, 2 sc. Then repeat on the second side with a dec through the second ear and the head, 1 sc through the ear and head, dec, 1 sc, 1 dec. Working the ears in means no sewing, and it is why both ears hang flat and symmetrical in my photo.
- Round 14 (Closing): Work decreases around until the opening is small, adding extra stuffing before it closes. Fasten off leaving a tail, weave the tail through the front loops of the remaining stitches, pull tight to close and hide the end inside the head.
- Attach a keyring or clip to the top of the head or into the stitching between the ears if you want a keychain finish. My piece is shown as a small toy, so treat the hardware as optional.
Troubleshooting
If a bubble looks flat or vanishes, it closed on the wrong side of the fabric. Push it out with your thumb before you tighten the final pull through. If stuffing peeks through the grey, add less rather than dropping a hook size, since plush yarn already runs dense. If one ear sits higher than the other, undo Round 13 and redo it, because there is no way to adjust a worked in ear afterwards. If the head leans forward, the neck rounds are empty and need a pinch of fiberfill pushed up from the body.
Yarn Substitution
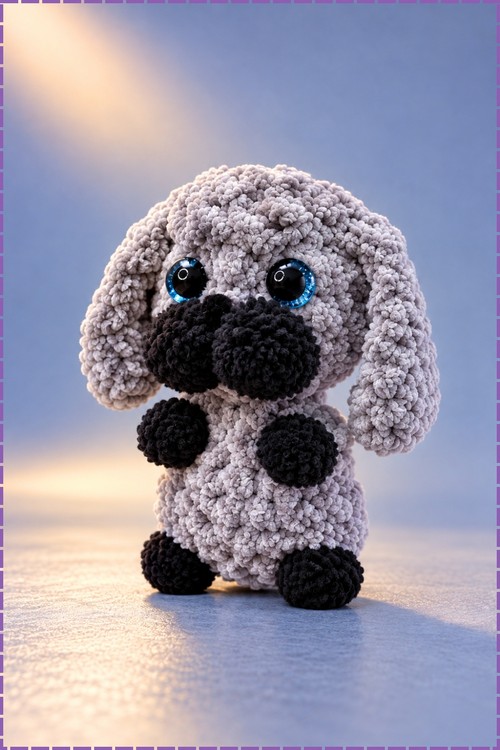
Plush chenille yarn gives the soft pile and the fat rounded bubbles that make this puppy work. Himalaya Dolphin Baby and similar velvet yarns all behave the same way. Cotton or acrylic will work the pattern fine, but expect a much smaller, firmer puppy with sharply defined bubbles instead of soft lumps, and drop to a smaller hook to match. Avoid anything slippery, since plush already has a habit of sliding off the hook and a slick yarn makes bubble stitch genuinely frustrating.
Customization Ideas
- Change the two colours to suit a real dog. Cream with brown paws and muzzle, or black with tan details, both read clearly at this size.
- Use plain black or brown safety eyes instead of the blue glitter ones on my version.
- Embroider a small tongue in pink below the nose if you want a panting face.
- Chain a hanging loop from the top of the head, chaining until the loop is the length you want, rather than counting stitches.
- Add a thin chain collar around the neck, chaining until it fits comfortably and joining with a slip stitch.
- Leave the tail off entirely by skipping the chain in Round 2 and working the increases straight through.
Frequently Asked Questions
Why do my bubble stitches look uneven? Plush yarn hides tension, so bubbles vary more than they would in cotton. Keep each double crochet the same height before closing the bubble, and make sure all three or four are worked into the same single stitch. A bubble spread across two stitches always sits flatter. Can I skip the safety eyes and nose? Yes. Embroider them in black yarn instead, doing it before Round 13 so you can reach inside to secure the ends. This is the better choice if the puppy is going to a baby or a small child. Does this have to be a keychain? No. Leave the hardware off and it works as a small pocket toy or shelf sitter. The pattern itself is identical either way.