
Crochet Doll With Flower Embroidery Pattern
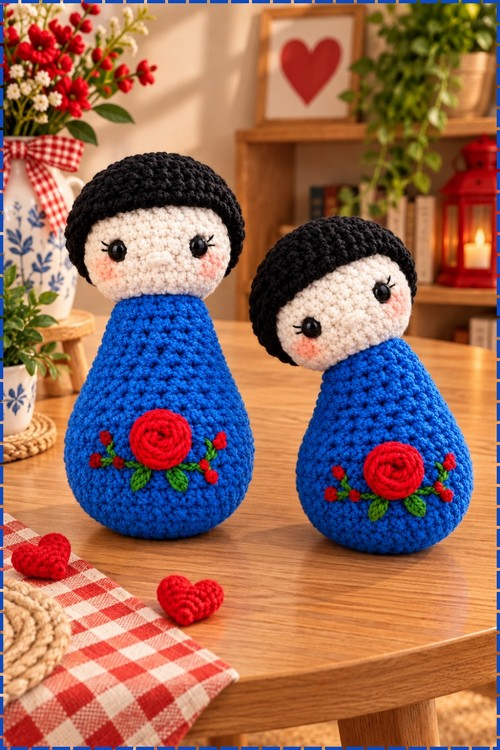
Red woven wheel roses, green lazy daisy leaves and tiny red french knot buds turn a plain blue kokeshi style crochet doll into a keepsake. You stitch every flower with a tapestry needle straight onto finished fabric, so the hook stays in the bag.
Working the red rose onto the blue body of this Crochet Doll Flower Embroidery is the part that hooks people, because the crochet finishes fast and then the needle comes out. Stitching those leaves feels closer to painting. Crochet doll flower embroidery rewards taking your time on that last step.
Crochet Doll Flower Embroidery
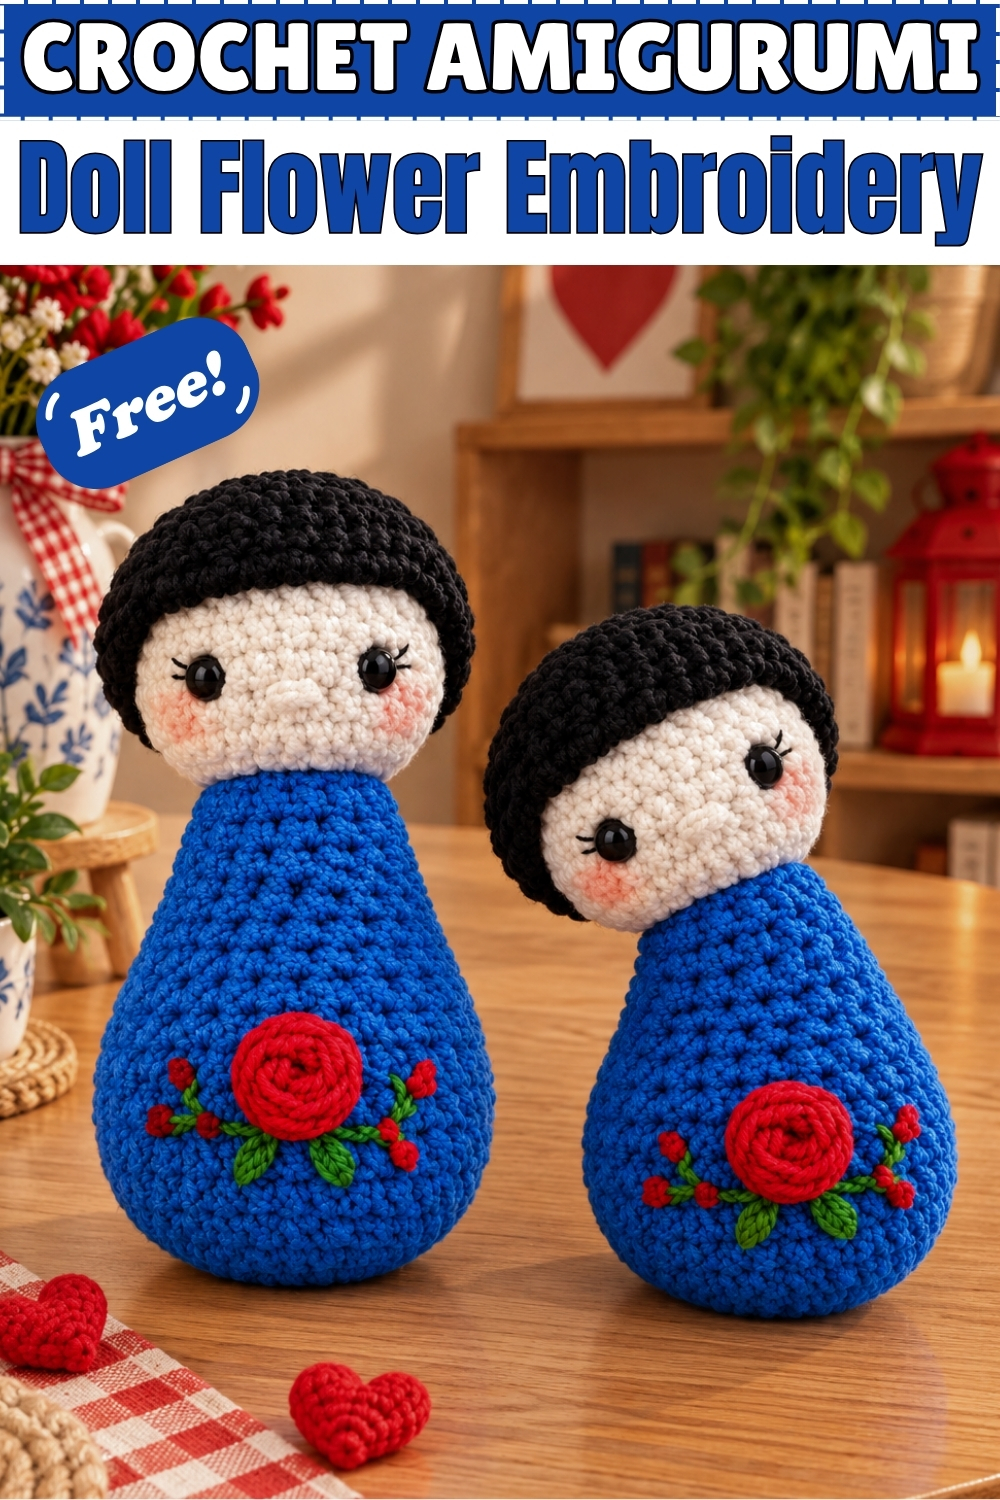
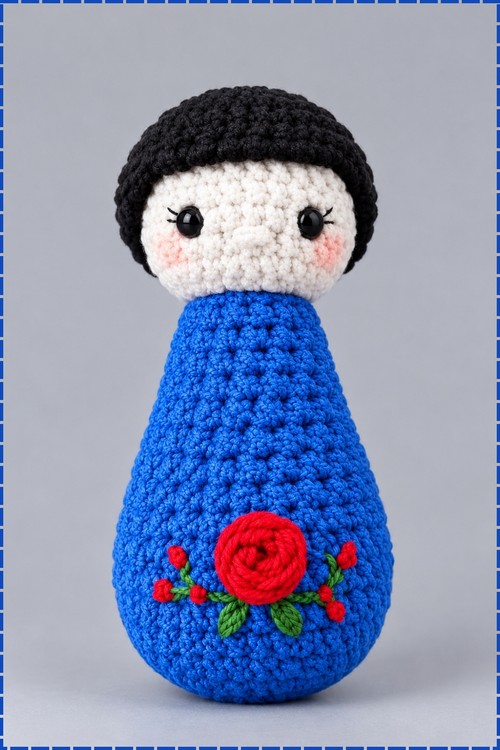
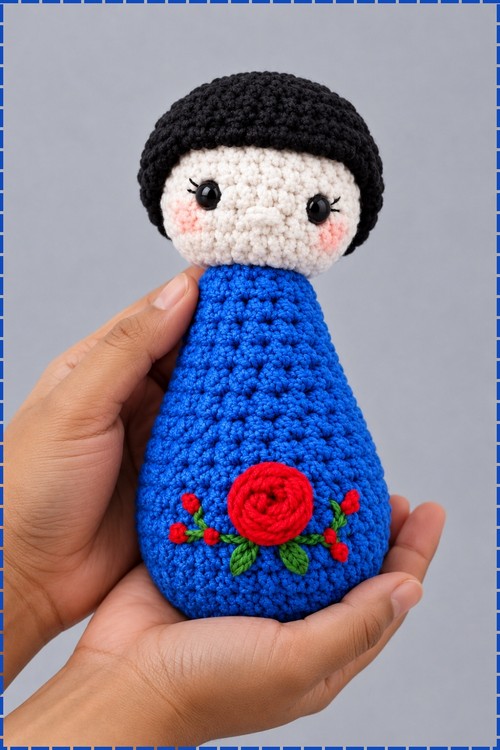
Surface embroidery lets you add a full flower spray to a finished crochet doll without touching a hook, because every stitch is worked with a tapestry needle straight onto the completed fabric. Mine sits on a pair of blue kokeshi style dolls with cream faces and black bobbed hair. Red woven wheel roses anchor the centre of each body, green lazy daisy leaves fan out on both sides, and small red french knots read as rosebuds. Working this way means you can decorate plain dolls you already own. Placement matters far more here than perfect symmetry does.
Quick Facts
- Difficulty: easy, with one intermediate stitch. The woven wheel rose is the only technique that takes real practice.
- Time: from experience, around thirty to forty five minutes per doll once you have done one rose, and closer to an hour and a half on your first attempt.
- Skills needed: none in crochet. Everything is needle work on finished fabric.
- Works on: any finished amigurumi with a firm, evenly stitched surface and polyfill inside.
Materials And Tools
- Worsted weight yarn in red for the rose and the buds, used doubled for the rose so it sits plump and full
- Worsted weight yarn in green for the leaves, used as a single strand
- A bent tip metal tapestry needle, which gives you far more mobility for small stitches on a curved surface
- Small sharp scissors
- A water soluble fabric marker, optional but genuinely useful for placing the rose spokes
- Yellow yarn if you also want daisy centres, which my version does not use
Test any fabric marker on a hidden part of the doll first, such as under the hairline, and check that it wipes away cleanly with a damp cloth before you draw on the front.
Customization Ideas
- Change the rose to soft pink or cream against the blue for a quieter look.
- Work three small roses in a row instead of one large centred rose.
- Add a few white lazy daisy flowers among the leaves for a mixed bouquet.
- Use a variegated green so the leaves shift tone naturally across the spray.
- Scatter extra french knot buds outward to widen the design across the body.
- Mirror the layout on the back of the doll so it looks finished from every angle.
- Work the whole spray in tonal blues for a subtle embroidered effect rather than a contrast one.
Preparation
- Lay all your yarn colours across the doll before you start and look at them together in daylight. Colours that work in a ball often disappear against the body colour, and red against strong blue is exactly the kind of contrast that carries.
- Aim your needle into the middle of a crochet stitch rather than into the gap between stitches. Stitch centres hold the embroidery securely and give you much finer control over placement and size.
- Let the layout stay a little uneven. Slight asymmetry is what gives handmade flower embroidery its character, and a perfectly measured spray reads as printed rather than stitched.
- Plan where the rose sits before anything else. On my dolls the rose is centred on the widest part of the body, roughly at the middle of the height, with the leaves and buds radiating outward from it in a horizontal line.
The Embroidery
The Lazy Daisy Stitch
Use a double strand of worsted weight yarn for a full petal. My dolls use this stitch only for leaves, so treat the daisy petals themselves as optional.
- Insert your needle off to one side of the doll, well out of the way, and bring it up exactly where you want the centre of the daisy to sit. Leave a long tail hanging at the entry point, because you will tie off against it at the end.
- Insert the needle back into the exact same hole you just came out of, push it through the stuffing, and bring it out at the spot where you want the tip of the first petal to end.
- Pull the yarn through slowly and watch the loop begin to close flat against the fabric, then stop before it closes. Bring your needle up through the middle of that loop so the yarn catches around it.
- Pull the loop down until it is the petal size you want, then anchor it by inserting the needle into the fabric just outside the loop at the petal tip. That small anchoring stitch is what holds the petal shape.
- Push the needle through the stuffing again and bring it back out at the centre point of the daisy.
- Repeat the loop, catch, anchor, and return sequence around the centre until you have 5 or 6 petals.
- Bring your finishing tail out of the exact same hole where your starting tail is resting, then secure the ends as described at the end of this post.
The French Knot
This makes both the daisy centres and, on my version, the small red rosebuds scattered along the spray.
- Thread your needle with the knot colour. Use red for buds like mine, or yellow if you are working daisy centres.
- Insert the needle off to the side, leave a tail, and bring it out exactly where you want the knot to sit.
- Hold the needle very close to the fabric surface and wrap the working yarn around the tip of the needle two to three times, depending on how bulky you want the knot.
- Hold the wraps taut against the needle with a finger from your other hand so they cannot unravel while you move.
- Insert the needle back into the fabric very close to where you came out, but not into the same hole. Going back into the same hole pulls the knot straight through the stuffing and it vanishes, so catch a small piece of the crochet stitch beside the hole instead.
- Keep your finger pressed on the wraps as you push the needle all the way through toward your starting tail. The wraps slide off and settle into a neat raised knot on the surface.
- On my dolls the red buds sit in small groups on the outer ends of the leaf spray, which keeps the eye moving outward from the rose.
Lazy Daisy Leaves
Leaves use the same lazy daisy technique, usually with a single strand of green yarn.
- Bring your needle up where you want the base of the leaf to begin, tucking it in close under or beside the rose.
- Insert the needle back into that base hole, bring it out at the tip of the leaf, catch the loop, and anchor it down exactly as you did for a petal.
- Work a second lazy daisy stitch in the same placement if you want a thicker leaf while still working with a single strand.
- My leaves run outward from both sides of the rose in a roughly horizontal spray, with a few shorter ones sitting below the rose to fill the gap. Vary the leaf lengths slightly so the spray looks grown rather than measured.
The Woven Wheel Rose
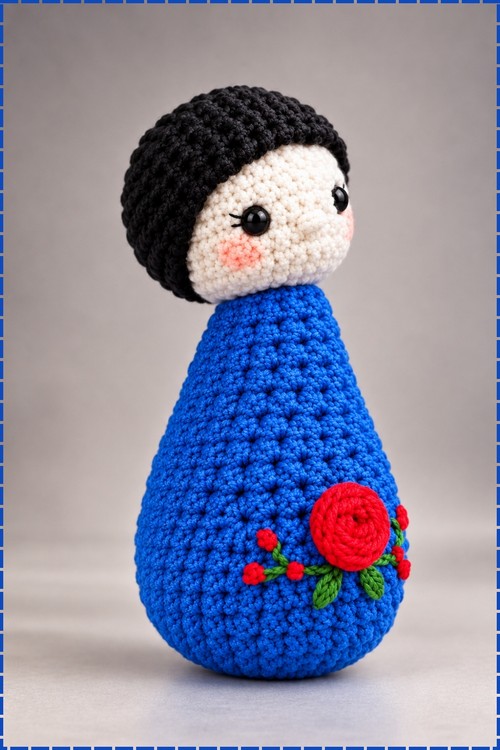
This is the stitch that makes the dimensional red rose at the centre of each of my dolls.
- Use your fabric marker to draw a 5 point star where you want the rose to sit. The length of the star arms determines the finished width of the rose, so draw it to the size you actually want.
- Stitch 5 straight lines radiating out from a single centre point to form that star. These are your spokes.
- Bring your working yarn out to meet your starting tail and tie the two tails together securely. Loose spokes will shift under the weaving and warp the rose, so do not skip this.
- Thread your needle with the rose colour, using a double strand of worsted weight yarn for a plush, full rose like mine.
- Bring the needle up through the exact centre point of the star.
- Begin weaving in a circle by taking the needle over the first spoke and under the next.
- Continue the same over and under pattern outward in a continuous spiral. Because there are 5 spokes and 5 is odd, the sequence staggers itself automatically on each rotation, which is what creates the swirl.
- Pull gently as you weave and nudge the threads into place with your fingers rather than the needle, since pulling hard warps the circle into an oval.
- Add new yarn by pushing the needle into the fabric just before the next spoke you were about to go under, bringing the old tail out of the way, then bringing the new yarn up on the far side of that same spoke so it mimics passing underneath. Carry on weaving from there.
- Keep weaving until all 5 spokes are completely covered and no straight lines show through the spiral.
- Finish by pushing the needle into the fabric tucked slightly under the outer edge of the rose, then bringing the tail out to where your starting tail sits.
- Apply a tiny dot of fabric glue under the outer edges if you have made a very large rose and want the threads locked permanently. Mine did not need it at this size.
Securing And Weaving In Ends
- Always bring your finishing tail out through the exact same hole as your starting tail. Working to that one point is what makes a clean tie off possible.
- Tie the starting and finishing tails together in a firm double knot right against the fabric.
- Thread both tails onto the tapestry needle and push it deep into the doll, weaving through the internal polyfill rather than skimming the surface.
- Avoid pushing the needle through any weighted poly pellets or beans in the base if your doll has them, and keep to the polyfill areas.
- Push until you feel real resistance as the needle travels. That friction is what grips the yarn and traps it inside the doll for good.
- Pull the needle out the far side, draw the yarn slightly taut, and snip both tails close to the body. The cut ends will spring back inside and disappear.
Tips And Troubleshooting
- Work the rose before the leaves and the buds. The rose is the largest element and the hardest to reposition, so let everything else arrange itself around where the rose actually landed rather than where you planned it.
- If your woven rose looks flat instead of dimensional, you are almost certainly pulling too tight as you weave. The spiral needs to sit slightly loose and stacked on the surface. Doubling the yarn helps here more than anything else.
- Watch the surface between stitches as you travel through the stuffing. If the fabric puckers or dimples when you pull, your travel stitch is too short and is pulling two points of the body together. Go in further from where you came out.
Frequently Asked Questions
Can I do this on a doll that is already finished and stuffed?
Yes, and that is the whole point of surface embroidery. Every stitch here works on the outside of completed fabric, travelling through the polyfill between points. You do not need to open the doll, undo any seams, or plan for the flowers while you crochet.
Why does my french knot keep disappearing into the doll?
You are going back into the same hole you came out of. At amigurumi gauge the holes are large enough for the whole knot to slip through the fabric and vanish into the stuffing. Move over by a thread or two and catch a piece of the crochet stitch beside the hole instead.
Do I have to use a bent tip needle?
Not strictly, but it makes a real difference on a curved body. The bend lets you enter and exit at a shallow angle without fighting the roundness of the doll, which matters most on the small repeated movements of a woven wheel rose. A straight tapestry needle works if that is what you have.
How do I keep the embroidery from wearing out if the doll gets handled?
Anchor properly and the embroidery is remarkably durable. The weak point is never the stitches themselves, it is the tails. Tie the double knot tight, weave deep enough through the polyfill that you feel resistance, and the flowers will outlast the handling.