
Crochet Dolls Amigurumi Disney Princess Free Pattern
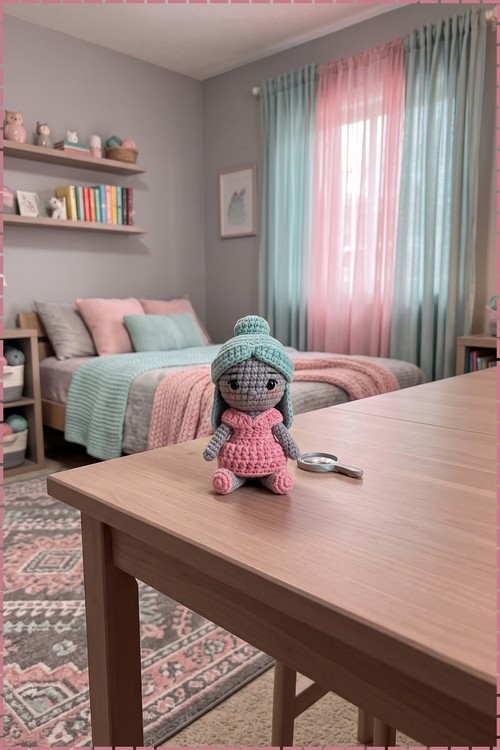
Set a crochet princess doll amigurumi on a nursery shelf and her mint top bun and pink ruffled skirt pick up pastel bedding colours. Little princess fans can carry an amigurumi princess doll in grey, mint, and pink to tea parties, sleepovers, and car rides.
Grey ears under a mint veil give this crochet Disney princess dolls amigurumi its storybook look. Made for gift givers with a princess fan at home. Crochet Disney princess dolls amigurumi suit birthday boxes, shelf displays, and little hands that name every doll they own.
Crochet Disney Princess Dolls Amigurumi
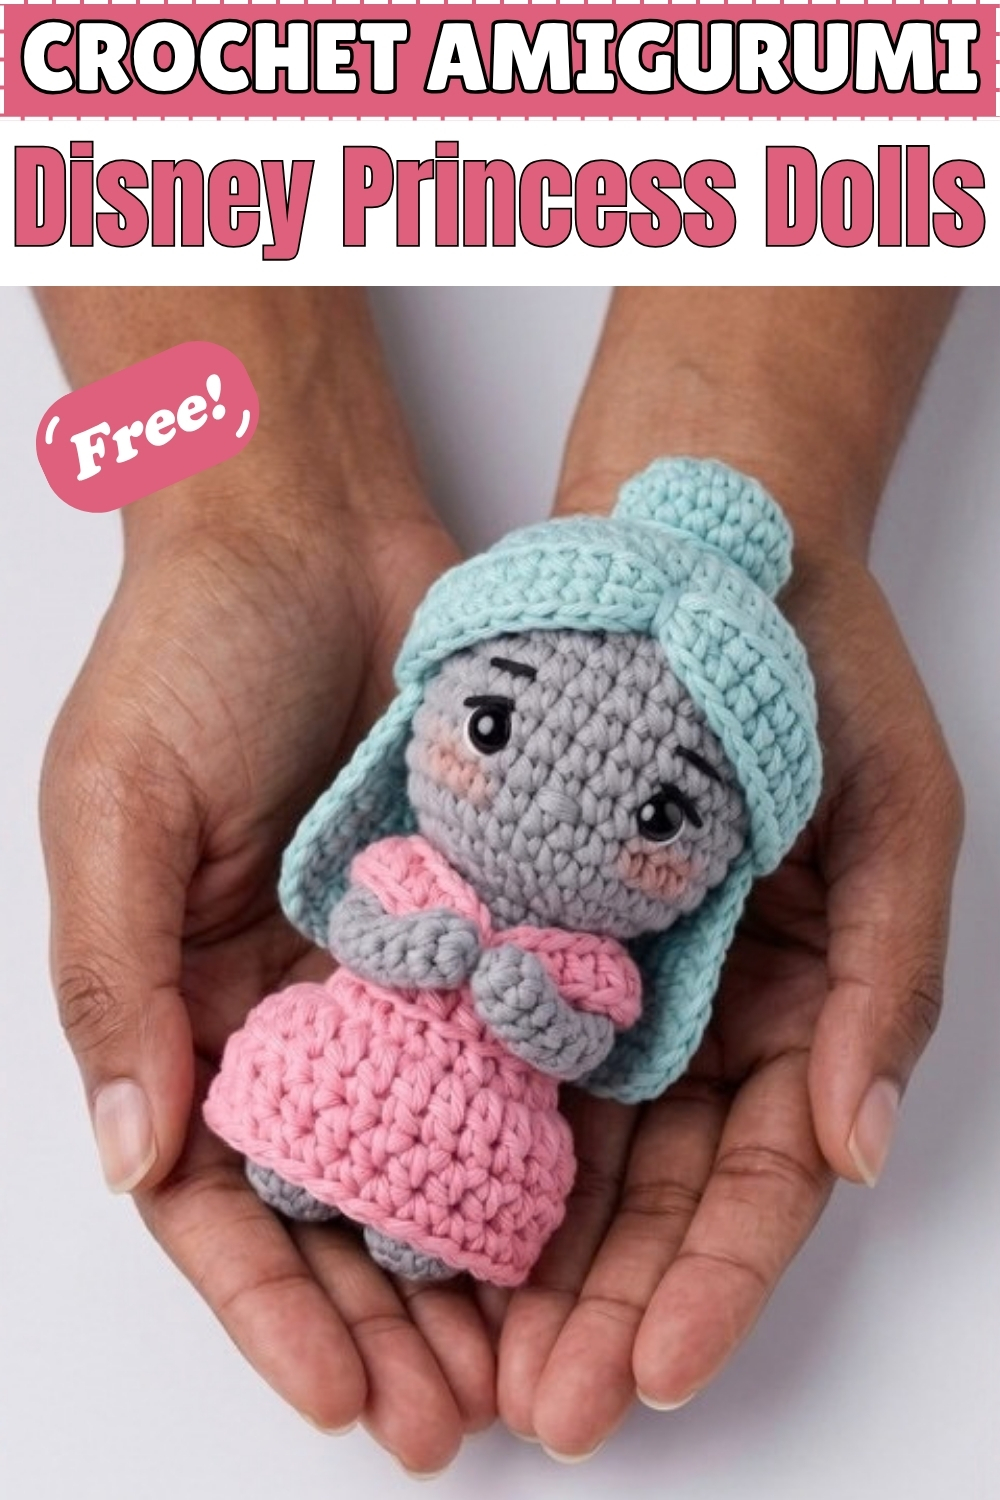
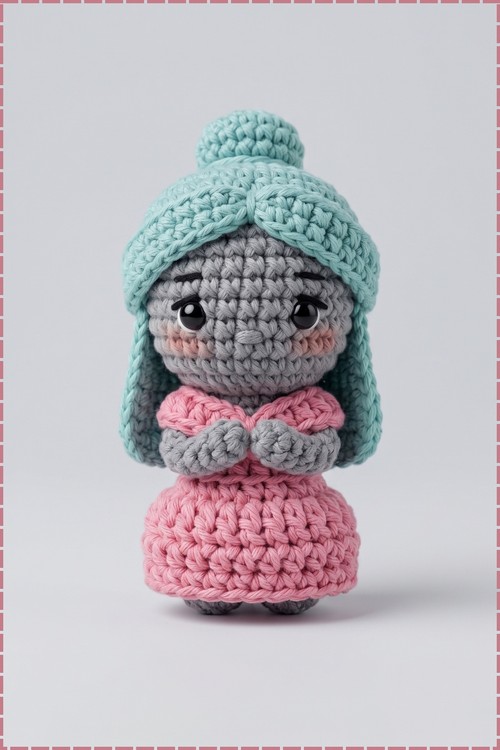
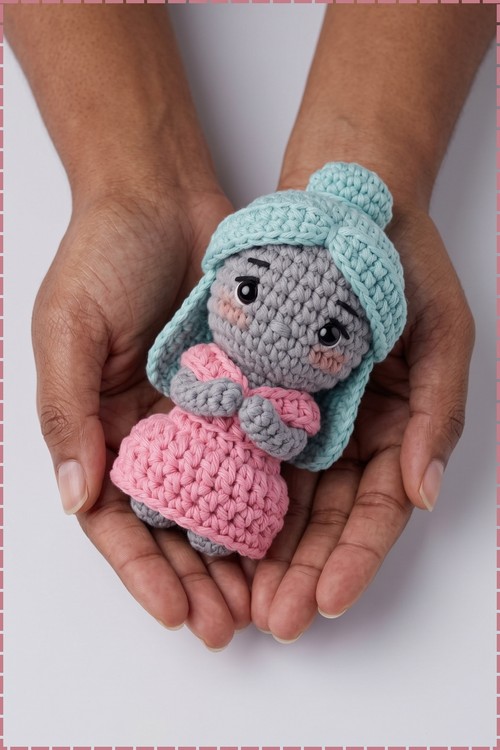
Working this doll from the feet up in one piece means the base, body and head all grow out of the same spiral, and the skirt gets added later into a row of front loops you left free early on. My crochet Disney princess dolls amigurumi stands roughly the height of a coffee cup, made in soft grey for the skin and body, pink for the dress and sleeves, and mint green for the hair. Hooks change once, only for the wig cap. Everything else stays on one hook throughout.
Materials and Tools
- Grey yarn for the base, body, head and arms
- Pink yarn for the skirt, bodice round and sleeves
- Mint green yarn for the wig cap, hair strands, bun and hair band
- Scrap black yarn for the eyebrows
- Scrap of pink or brown yarn for the nose, or embroider it in grey
- 4.0 mm crochet hook for the body, dress, arms, strands and bun
- 5.0 mm crochet hook for the wig cap
- Two 9 mm safety eyes with flat backings
- Stuffing
- Tapestry needle
- Stitch markers
- Blush and a small applicator
- Hot glue, optional, for holding the hair pieces in place
The original pattern calls for gold, skin tone and brown. Mine swaps those for pink, grey and mint, and the colour change point stays exactly where the pattern puts it.
Difficulty and Time
Lower intermediate. You need magic circles, back loop only work, increases, decreases, and a short run of double and half double crochet for the skirt and sleeves. From my own build this took a few hours across two sittings, with the hair assembly taking longer than expected because everything needs test fitting before it is fixed down.
Technique Notes and Tips
- Work in continuous rounds unless a round says to join, and keep a marker in the first stitch. Rounds 4 and 7 of the body are back loop only, and losing your place there will throw the skirt line off.
- Back loop only (BLO) means working into the back loop of each stitch and leaving the front loops free. Those free loops from Round 4 become the join line for the skirt, so do not pull them tight or you will struggle to get a hook in later.
- Change colour at the very last yarn over of the stitch before the new colour begins, not after. Doing it at the end of Round 8 as written gives a clean line at the neck with no stray grey showing.
- Stuff the base firmly before Round 11. Once the head starts widening you cannot reach back down into the body.
- Fit the safety eyes before the head is stuffed and check the spacing from the front. Four visible stitches apart looks right on mine.
- Flatten and close the arms as written rather than stuffing them. Stuffed arms will not sit against the pink sleeves properly.
- Test fit the wig cap on the head before you attach anything. If it slides down over the eyes, pull your tension tighter or leave off one round.
- Pin the hair strands, bun and band in place and look at the doll straight on before gluing. Glue is very hard to undo on cotton.
- Apply blush last, in light taps, building the colour up gradually.
The Pattern
Base and Body
- Use the 4.0 mm hook and grey yarn
- Round 1: 6 single crochet (sc) into a magic circle [6]
- Round 2: increase (inc), meaning 2 sc in the same stitch, in each stitch around [12]
- Round 3: 1 sc, inc, repeat around [18]
- Round 4: in back loop only (BLO), 1 sc in each stitch around [18] and the free front loops left behind on this round are where the skirt will be joined later, so keep them visible
- Rounds 5 and 6: 1 sc in each stitch around [18]
- Round 7: BLO, 4 sc, decrease (dec), repeat around [15]
- Round 8: 1 sc in each stitch around, changing to grey on the final stitch if you are using a separate body colour [15] and on my doll the base and body are both grey, so no change happens here
- Round 9: 1 sc in each stitch around [15]
- Round 10: 1 sc, dec, repeat 5 times [10] and the piece should now look like a short weighted cone with a narrow neck opening on top
- Stuff the base and body firmly before starting the head
Head
- Round 11: inc in each stitch around [20]
- Round 12: 4 sc, inc, repeat around [24]
- Rounds 13 to 18: 1 sc in each stitch around [24] and after six straight rounds the head should sit clearly wider than the neck below it
- Insert the 9 mm safety eyes between Rounds 14 and 15, about 4 visible stitches apart, and secure the backings from inside
- Stuff the neck area firmly now, pushing the stuffing down into the narrow part with the blunt end of a hook
- Round 19: 2 sc, dec, repeat around [18]
- Round 20: 1 sc, dec, repeat around [12]
- Stuff the rest of the head firmly and check the shape from the front, since a lightly stuffed head goes square at the corners
- Round 21: dec in each stitch around [6]
- Cut the yarn leaving a long tail, thread it through the front loops of the remaining 6 stitches, pull tight to close the hole, and weave the end in
Arms (Make 2)
- Use the 4.0 mm hook and grey yarn
- Round 1: 6 sc into a magic circle [6]
- Rounds 2 to 5: 1 sc in each stitch around [6]
- Do not stuff, flatten the arm, and work 2 sc across the top through both layers to close it
- Leave a tail for sewing
Dress Skirt
- Use the 4.0 mm hook and pink yarn
- Turn the body upside down and join the pink yarn to the free front loops left from Round 4
- Round 1: chain 2, which does not count as a stitch, then work 2 double crochet (dc) in the first stitch, 1 dc in each of the next 2 stitches, repeating that sequence all the way around, and join with a slip stitch
- Round 2: chain 1, work 1 half double crochet (hdc) in each stitch around for a total of 20 hdc, and join with a slip stitch
- Round 3: chain 1, work 1 sc in each stitch around, and join with a slip stitch
- Fasten off and weave in the ends, and the skirt should now flare out into a firm bell that lets the doll stand on its own
Dress Sleeves (Make 2)
- Use the 4.0 mm hook and pink yarn
- Chain 20
- Starting in the 2nd chain from the hook, work 1 slip stitch
- Work 1 sc in each of the next 2 chains
- Work 1 hdc in each of the next 2 chains
- Work 1 dc in each of the next 2 chains
- Work 1 hdc in each of the next 2 chains
- Work 1 slip stitch in the next chain
- Work 1 hdc in each of the next 2 chains
- Work 1 dc in each of the next 2 chains
- Work 1 hdc in each of the next 2 chains
- Work 1 sc in each of the next 2 chains
- Work 1 slip stitch in the last chain
- Fasten off leaving a tail for sewing, and the strip should curve naturally where the taller stitches sit, which is what forms the puff
Sleeve and Arm Assembly
- Sew the arms to the sides of the body right where the neck meets the shoulders, angling them slightly forward so the hands meet at the front as they do on my doll
- Drape the middle of each sleeve over one shoulder and arm, then tack it down at the front and the back so it gathers into an off the shoulder puff
- Repeat on the second side, and check both sleeves sit at the same height before securing them fully
Facial Features
- Optional eyeliner in black yarn: bring the yarn out at the outer corner of an eye, move one stitch up and across on the diagonal, cross it over, and repeat on the second eye, then tie both tails at the top of the head where the hair will cover them. My doll leaves the eyeliner off
- Eyebrows in black yarn: place each eyebrow one stitch above the eye, spanning 3 stitches, and on my doll they are worked in black rather than brown and curve slightly downward at the outer end for a soft expression
- Nose: embroider a small vertical line centred between and just below the eyes, which my version has and the original pattern does not mention
- Dab blush on both cheeks just outside the eyes using the applicator
Hair Wig Cap
- Use the 5.0 mm hook and mint green yarn
- Round 1: 6 sc into a magic circle [6]
- Round 2: inc in each stitch around [12]
- Round 3: 1 sc, inc, repeat around [18]
- Round 4: 2 sc, inc, repeat around [24]
- Rounds 5 to 8: 1 sc in each stitch around [24]
- Test fit the cap on the head now, and it should sit above the eyes without covering them
- Row 1: slip stitch in the next stitch to finish the round, chain 1, turn, work 1 hdc in the next 12 stitches, chain 1, turn
- Rows 2 to 4: work 1 hdc in each of the 12 stitches across, chain 1, turn
- After Row 4, chain 1 and turn so the right side faces out
- Work 1 sc in each stitch down the side of the hair flap
- Work 3 sc in the corner stitch to round the corner
- Slip stitch loosely across the front of the cap over the forehead area
- Work 1 sc evenly up the other side of the flap and place 3 sc in the final corner
- Slip stitch to finish, fasten off, and weave in the end, and the flap should now hang flat down the back of the head
Hair Strands (Make 2)
- Use the 4.0 mm hook and mint green yarn
- Chain 20
- Starting in the 2nd chain from the hook, work 1 slip stitch, 2 sc, 2 hdc, 2 dc, 2 hdc, 1 slip stitch, 2 hdc, 2 dc, 2 hdc, 2 sc, and 1 slip stitch
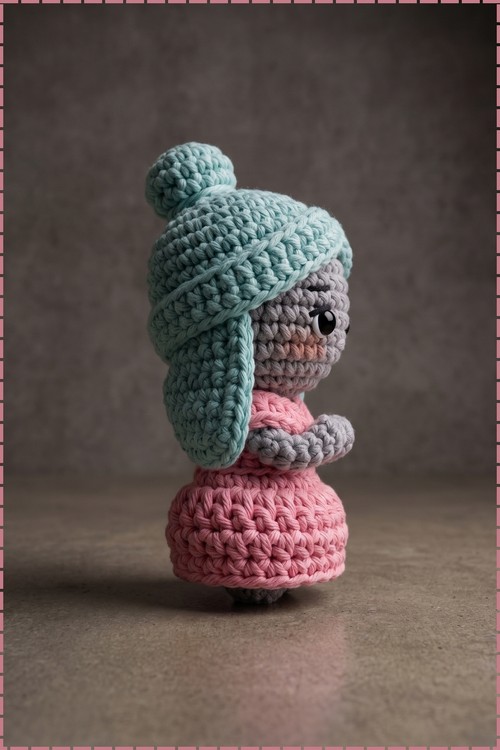
- Fasten off leaving a tail, and on my doll these two strands hang down the sides of the face and reach roughly to shoulder level
Hair Bun
- Use the 4.0 mm hook and mint green yarn
- Round 1: 6 sc into a magic circle [6]
- Round 2: inc in each stitch around [12]
- Round 3: 1 sc in each stitch around [12]
- Round 4: BLO, dec in each stitch around [6]
- Fasten off, add a small amount of stuffing, and weave through the front loops to close, and the bun should end up firm and round rather than flat
Hair Band
- Use the 4.0 mm hook and mint green yarn
- Chain 15 and fasten off, and my doll uses mint here to match the hair rather than a contrasting colour
Final Assembly
- Sew or glue the wig cap onto the back and top of the head, making sure the back flap lies flat against the head
- Attach the two hair strands at the front centre of the cap and curve them down either side of the face
- Attach the bun to the top centre of the head, just behind the centre line of the cap
- Wrap the chain 15 band around the base of the bun and tie it in a small bow, which on my doll sits across the front of the cap and reads as a headband rather than a tie
- Finish with a light dab of blush on each cheek
Yarn Substitution
Any smooth cotton or acrylic in a similar weight will work as long as you keep the 4.0 mm and 5.0 mm hook pairing. The size difference between the two hooks is what makes the wig cap large enough to slip over the head, so do not use one hook for both. Cotton holds the skirt flare better and helps the doll stand. Avoid fuzzy yarns, since the facial embroidery and the sleeve stitch sequence both need clear definition.
Customization Ideas
- Swap the pink and mint for any two shades and you have a different princess entirely.
- Leave off the bun and let the back flap hang loose for long hair.
- Add the black eyeliner for a more defined face.
- Work the hair band in a contrasting colour and tie it as a visible bow at the bun.
- Embroider a small mouth below the nose if you want more expression.
- Add a tiny chain loop at the top of the head to hang her from a shelf or a tree.
FAQ
Why does my skirt sit crooked? Almost always the join. The skirt goes into the free front loops from Round 4, and if you start in the wrong loop or miss one, the whole round shifts. Count the front loops before joining.
Can I make this without safety eyes? Yes. Embroider two black ovals between Rounds 14 and 15, the same four stitches apart, and add a small white highlight stitch in each if you want the glossy look.
Do I have to glue the hair? No. Everything can be sewn instead, and sewing is the better choice for a doll that will be handled. Glue is faster but shows on cotton if it seeps through.