
Crochet Dragon Amigurumi Free Pattern Plushie In Green With Yellow Spikes
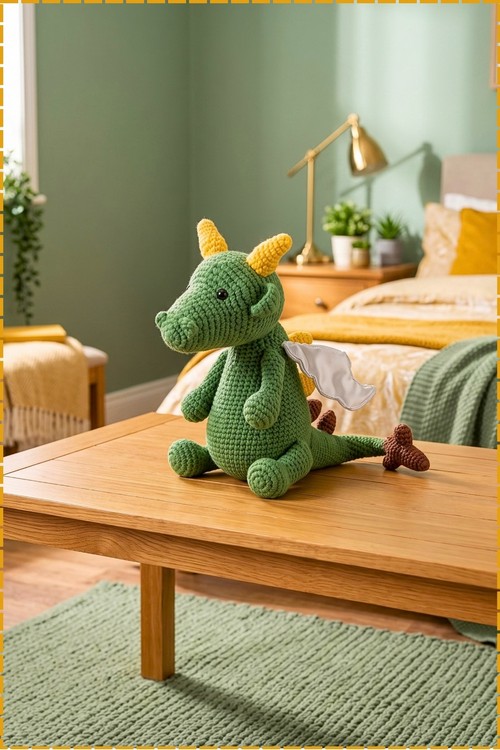
Once the head, body and tail come off the hook as one continuous green piece, you sew white satin wings to the upper back and line yellow spikes down the spine. Sturdy legs with warm brown feet let the crochet dragon plushie lie flat instead of sitting upright.
Four legs, a ridged back, and satin wings make this crochet dragon amigurumi plushie read as a full creature rather than a round toy. Shelf sitter, floor toy, or desk companion. The crochet dragon plushie holds its shape without wire. Green body, two spine colours, one long tail.
Crochet Dragon Amigurumi Plushie
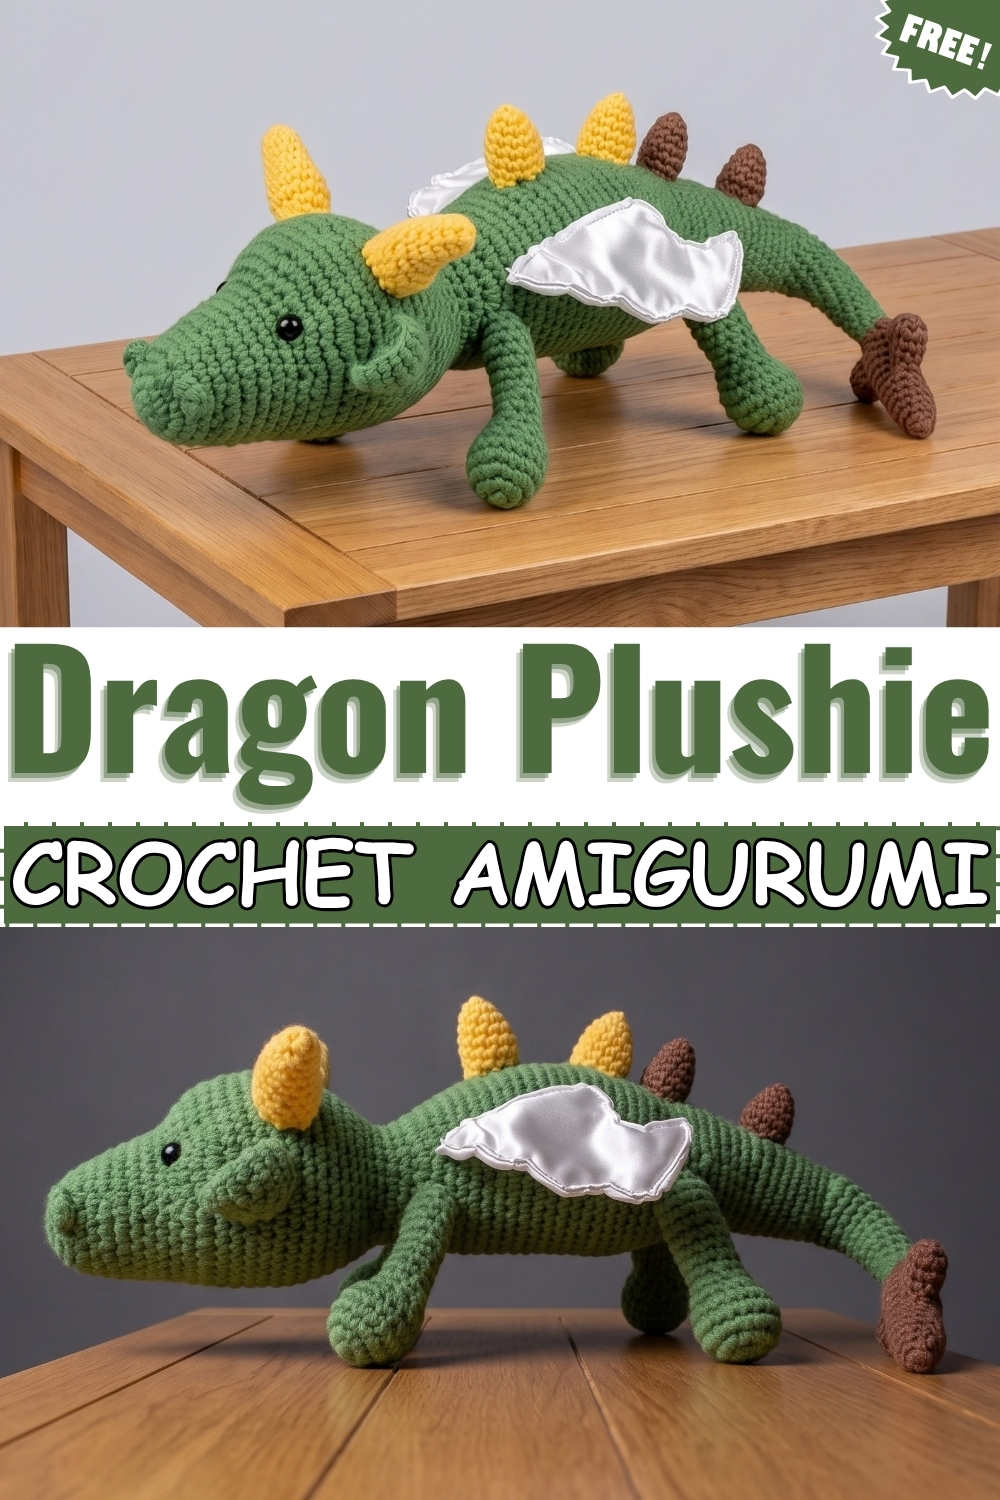
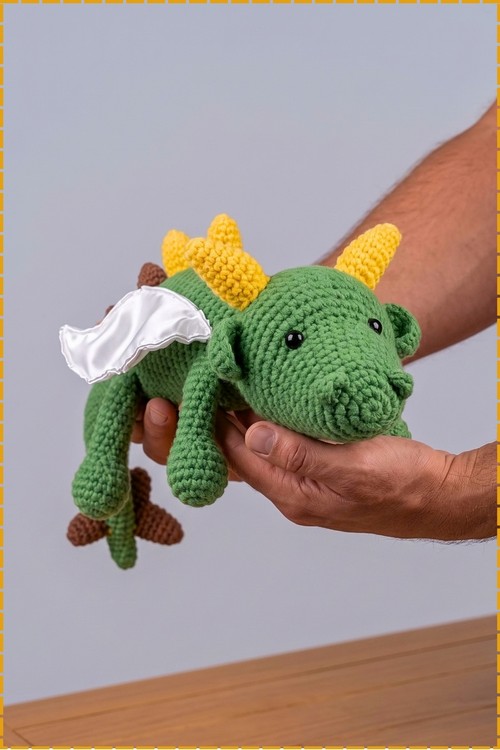
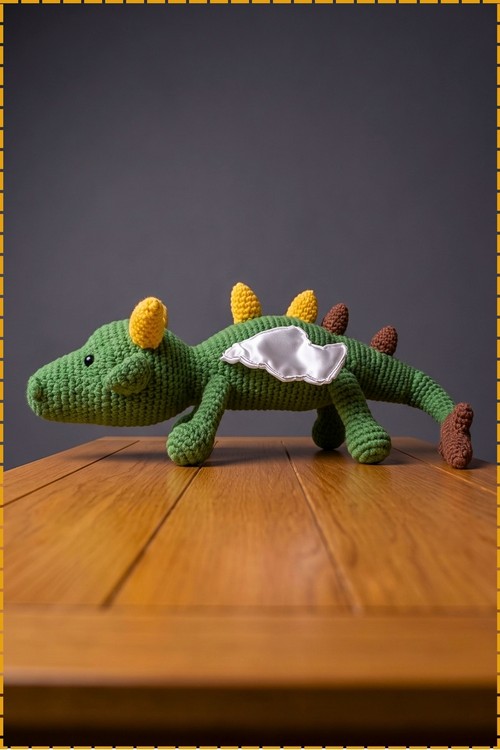
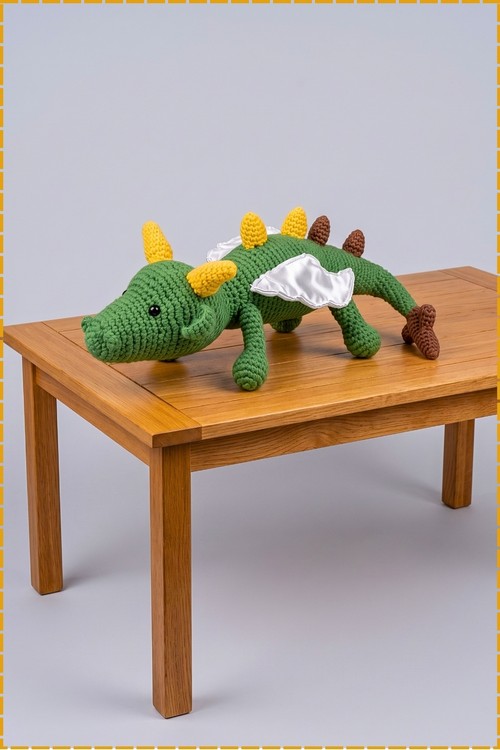
Head, body, and tail work as one long continuous piece in this crochet dragon amigurumi plushie, which means the snout, neck, chest, and tail all flow from a single unbroken strand. Mine is crocheted in medium green yarn with bright yellow horns and back spikes, warm brown feet, and a pair of white satin fabric wings sewn onto the upper back. The face sits low and long rather than round, and four sturdy legs let the finished dragon lie flat on a surface rather than sit upright. Black safety eyes complete the reptile expression without needing any embroidery.
Materials And Tools
- Medium green worsted weight yarn for the body, head, tail, and legs
- Bright yellow worsted weight yarn for the horns and back spikes
- Warm brown worsted weight yarn for the feet
- White satin fabric cut to wing shape, or white satin ribbon formed into two wing panels
- 3.75 mm crochet hook
- Black safety eyes, one pair
- Polyester fiberfill
- Tapestry needle
- Stitch marker
- Scissors
Difficulty And Time
Intermediate. The continuous body is long and the assembly involves many separate pieces. In my experience allow ten to fifteen hours spread across multiple sessions. The tail section alone covers more than twenty rounds of straight single crochet, so this is not a quick evening project.
The Pattern
Head And Continuous Body
- Round 1: work 6 single crochet (sc, insert hook, pull up a loop, yarn over, pull through two loops) into a magic ring (MR, an adjustable loop) [6].
- Round 2: work an increase (inc, 2 sc in the same stitch) in each stitch around [12].
- Round 3: work 1 sc, 1 inc, repeat 6 times [18].
- Round 4: work 2 sc, 1 inc, repeat 6 times [24].
- Rounds 5 to 7: work 1 sc in each stitch around for 3 rounds [24].
- Round 8: work 3 sc, 1 inc, repeat 6 times [30].
- Rounds 9 to 12: work 1 sc in each stitch around for 4 rounds [30].
- Round 13: work 3 sc, then working in front loops only (FLO, the strand of the stitch closest to you) work 2 sc, 1 inc, repeat 6 times, then return to regular sc for 9 stitches [36]. The FLO section creates the face groove ridge that separates the snout from the forehead, and on my dragon this line sits just below the eye level.
- Round 14: work 4 sc, then work 2 sc, 1 inc, repeat 7 times, then 11 sc [43].
- Round 15: work 4 sc, then work 3 sc, 1 inc, repeat 6 times, then 15 sc [49].
- Insert safety eyes now between rounds 12 and 13 where the FLO groove runs, approximately 5 stitches apart. On my dragon the eyes sit close to the snout groove and read as small and alert from the front.
- Rounds 16 to 23: work 1 sc in each stitch around for 8 rounds [49].
- Round 24: work 8 sc, then work 3 sc, 1 decrease (dec, an invisible front loop decrease joining two stitches into one), repeat 6 times, then 11 sc [43].
- Round 25: work 8 sc, then work 2 sc, 1 dec, repeat 6 times, then 11 sc [37].
- Round 26: work 8 sc, then work 1 sc, 1 dec, repeat 6 times, then 11 sc [31].
- Round 27: work 8 sc, then work 6 dec, then 11 sc [25].
- Rounds 28 to 30: work 1 sc in each stitch around for 3 rounds [25]. These three rounds form the neck, and the piece narrows noticeably here before the body begins to widen again.
- Round 31: work 7 sc, then work 2 sc, 1 inc, repeat 4 times, then 6 sc [29].
- Round 32: work 7 sc, then work 3 sc, 1 inc, repeat 4 times, then 6 sc [33].
- Round 33: work 4 sc, 1 inc, repeat 6 times, then 3 sc [39].
- Rounds 34 to 38: work 1 sc in each stitch around for 5 rounds [39].
- Stuff the head and snout firmly at this point, pushing fiberfill into the snout tip in small pieces before the body continues to close around it.
- Round 39: work 6 sc, then work 5 sc, 1 inc, repeat 5 times, then 3 sc [44].
- Round 40: work 5 sc, then work 4 sc, 1 inc, repeat 7 times, then 4 sc [51].
- Rounds 41 to 50: work 1 sc in each stitch around for 10 rounds [51].
- Round 51: work 15 sc, then work 4 sc, 1 dec, repeat 5 times, then sc to end of round [46].
- Round 52: work 15 sc, then work 3 sc, 1 dec, repeat 5 times, then sc to end [41].
- Round 53: work 15 sc, then work 2 sc, 1 dec, repeat 5 times, then sc to end [36].
- Round 54: work 4 sc, 1 dec, repeat 6 times [30].
- Rounds 55 to 66: work 1 sc in each stitch around for 12 rounds [30]. Continue adding stuffing gradually through this section so the body stays firm as you close it down.
- Round 67: work 3 sc, 1 dec, repeat 6 times [24].
- Rounds 68 to 70: work 1 sc in each stitch around for 3 rounds [24].
- Round 71: work 2 sc, 1 dec, repeat 6 times [18].
- Rounds 72 to 79: work 1 sc in each stitch around for 8 rounds [18].
- Round 80: work 1 sc, 1 dec, repeat 6 times [12].
- Rounds 81 to 91: work 1 sc in each stitch around for 11 rounds [12].
- Round 92: work 6 dec [6]. Fasten off, weave the yarn tail through the front loops of the remaining 6 stitches, pull tight to close, and bury the end.
The Wings
- The wings on my version are cut from white satin fabric rather than crocheted. Cut two matching wing shapes, roughly triangular with a slightly curved outer edge, and hem the edges or seal them with a thin line of fabric glue so they do not fray.
- If you prefer crocheted wings, work in your accent yarn as follows.
- Row 1: chain 3, work an increase in the 2nd chain from the hook, work an increase in the last chain, chain 1 and turn [4].
- Row 2: work an increase in the first stitch, sc in each stitch across to the last stitch, increase in the last stitch, chain 1 and turn.
- Rows 3 to 12: repeat row 2, increasing at the start and end of every row until you reach 24 stitches.
- Slip stitch along the edge to the top corner.
- Work surface crochet (sl st, insert hook, pull yarn through both the fabric and the loop on hook) down and across the wing to divide it into 4 segmented rib sections.
- Scalloped outer border: along the bottom edge work 1 sc, 1 double crochet (dc, yarn over, insert hook, pull up a loop, yarn over, pull through two loops, yarn over, pull through two loops), 2 treble crochet (tr, yarn over twice, insert hook, pull up loop, yarn over pull through two, yarn over pull through two, yarn over pull through two), 1 dc, 1 sc, repeating this cluster across to form natural scallop shapes. Fasten off, leaving a long tail for sewing. Make 2.
- Sew or pin the wide flat edge of each wing along the upper back slightly above the neck region, one on each side of the spine. On my dragon the satin wings sit centred on the upper back between the first and third back spikes.
The Legs
- Round 1: work 6 sc into a magic ring [6].
- Round 2: work an increase in every stitch [12].
- Round 3: work 1 sc, 1 inc, repeat 6 times [18].
- Rounds 4 to 5: work 1 sc in each stitch around for 2 rounds [18].
- Round 6: work 1 sc, 1 dec, repeat 6 times [12].
- Round 7: work 1 sc, 1 dec, repeat 4 times [8].
- Rounds 8 to 16: work 1 sc in each stitch around for 9 rounds [8]. The long narrow tube becomes the upper leg, and the wider base at the bottom becomes the foot pad.
- Lightly stuff the foot base only, leaving the leg tube unstuffed so it stays flexible and the dragon can lie flat. Fasten off leaving a long tail for sewing. Make 4.
- On my dragon the feet are worked in warm brown yarn and the leg tube in green, switching colours at round 6 where the foot narrows into the leg. The feet read as distinct brown paws when the dragon is lying on a surface.
The Ears
- Round 1: work 6 sc into a magic ring [6].
- Round 2: work an increase in every stitch [12].
- Round 3: work 1 sc, 1 inc, repeat 6 times [18].
- Round 4: work 2 sc, 1 inc, repeat 6 times [24].
- Slip stitch in the next stitch and fasten off leaving a long tail. Fold the piece in half lengthways before attaching to give it a cupped ear shape. Pinch the base together when sewing so the ear stands slightly upright on the side of the head above the eye line.
The Horns
- Round 1: work 6 sc into a magic ring in yellow yarn [6].
- Rounds 2 to 3: work 1 sc in each stitch around for 2 rounds [6].
- Round 4: work 1 sc, 1 inc, repeat 3 times [9].
- Round 5: work 1 sc in each stitch around [9].
- Round 6: work 2 sc, 1 inc, repeat 3 times [12].
- Rounds 7 to 9: work 1 sc in each stitch around for 3 rounds [12]. The horn starts narrow at the tip and widens toward the base, which is what gives it the tapered look visible in the photo. Stuff lightly before sewing on.
- Slip stitch in the next stitch and fasten off leaving a long tail. Make 2.
- Attach directly above the ears on the top of the head.
The Back Spikes
- Round 1: work 6 sc into a magic ring in yellow yarn [6].
- Round 2: work 1 sc in each stitch around [6].
- Round 3: work 1 sc, 1 inc, repeat 3 times [9].
- Round 4: work 2 sc, 1 inc, repeat 3 times [12].
- Rounds 5 to 7: work 1 sc in each stitch around for 3 rounds [12].
- Fasten off leaving a tail for sewing. Lightly stuff and sew 4 back spikes in a straight line down the spine starting at the back of the neck. On my dragon the first two spikes are yellow and the remaining two shift to brown toward the tail end. Make 4.
The Tail Spikes
- Work rounds 1 to 4 of the back spike pattern above.
- Round 5: work 3 sc, 1 inc, repeat 3 times [15].
- Round 6: work 4 sc, 1 inc, repeat 3 times [18].
- Round 7: work 1 sc in each stitch around [18].
- Fasten off leaving a tail for sewing. Flatten and attach the 3 tail spikes along the end of the tail. On my dragon these are brown, matching the feet. Make 3.
The Nostrils
- Work 4 sc into a magic ring [4]. Pull the ring closed and pull the loop through to fasten off, leaving a short tail to attach to the snout. Make 2.
- Sew one small nostril circle on either side of the front snout tip. Keep them close together so they read as a pair rather than sitting too far apart.
Tips
- Count stitches at the end of every round during the head section. The FLO round and the asymmetric decrease rounds at the head close are the two places where a missed stitch is almost impossible to fix later.
- Switch the foot colour at round 6 where the pattern decreases into the leg. That natural narrowing point hides the colour join cleanly without a visible seam.
- Satin fabric wings are quicker than crocheted ones and hold their shape much better. Cut both wings from the same piece so they match exactly.
FAQ
Can a beginner make this pattern? It is better suited to someone who has already made at least one or two amigurumi pieces. The stitch count is simple but the piece is very long, and keeping accurate count through ninety two rounds without losing your place takes practice. Start with a shorter pattern first if this is your first amigurumi.
How do I keep the dragon lying flat and not rolling onto its side? Four evenly spaced legs do most of the work. Position the front two legs at a forward angle and the back two slightly further back so the weight spreads across four points. Leave the leg tubes unstuffed so they remain flexible and press flat against the surface.
Can I use a different yarn weight? Yes, with a proportional hook change. Bulky yarn and a 5.5 mm hook will give you a much larger dragon in the same number of rounds. Fingering weight and a 2 mm hook will give a miniature version. The body proportions stay the same.