
Crochet Frog Amigurumi Free Pattern With Popcorn Arms and Legs
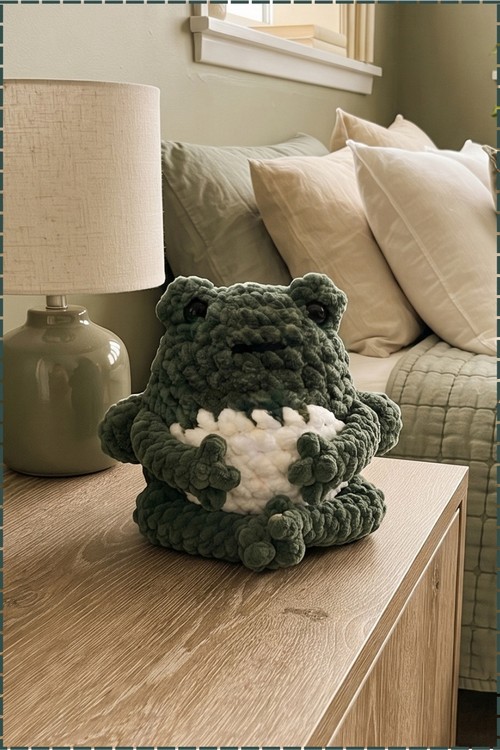
Squishy, round and wearing a bright white belly, the forest green crochet frog amigurumi looks right at home on a pillow pile or tucked under a toddler's arm. Popcorn stitch eye bumps and chubby little legs give it a cheerful pose that survives plenty of hugs.
Anyone who wants a first plush project will find the Crochet Frog Amigurumi easy to get right. Beginners get fat chenille stitches that forgive mistakes. Kids get something squeezable that survives being dropped. Teen crocheters making gifts can finish a Crochet Frog Amigurumi without needing fiddly shaping or tiny pieces.
Crochet Frog Amigurumi
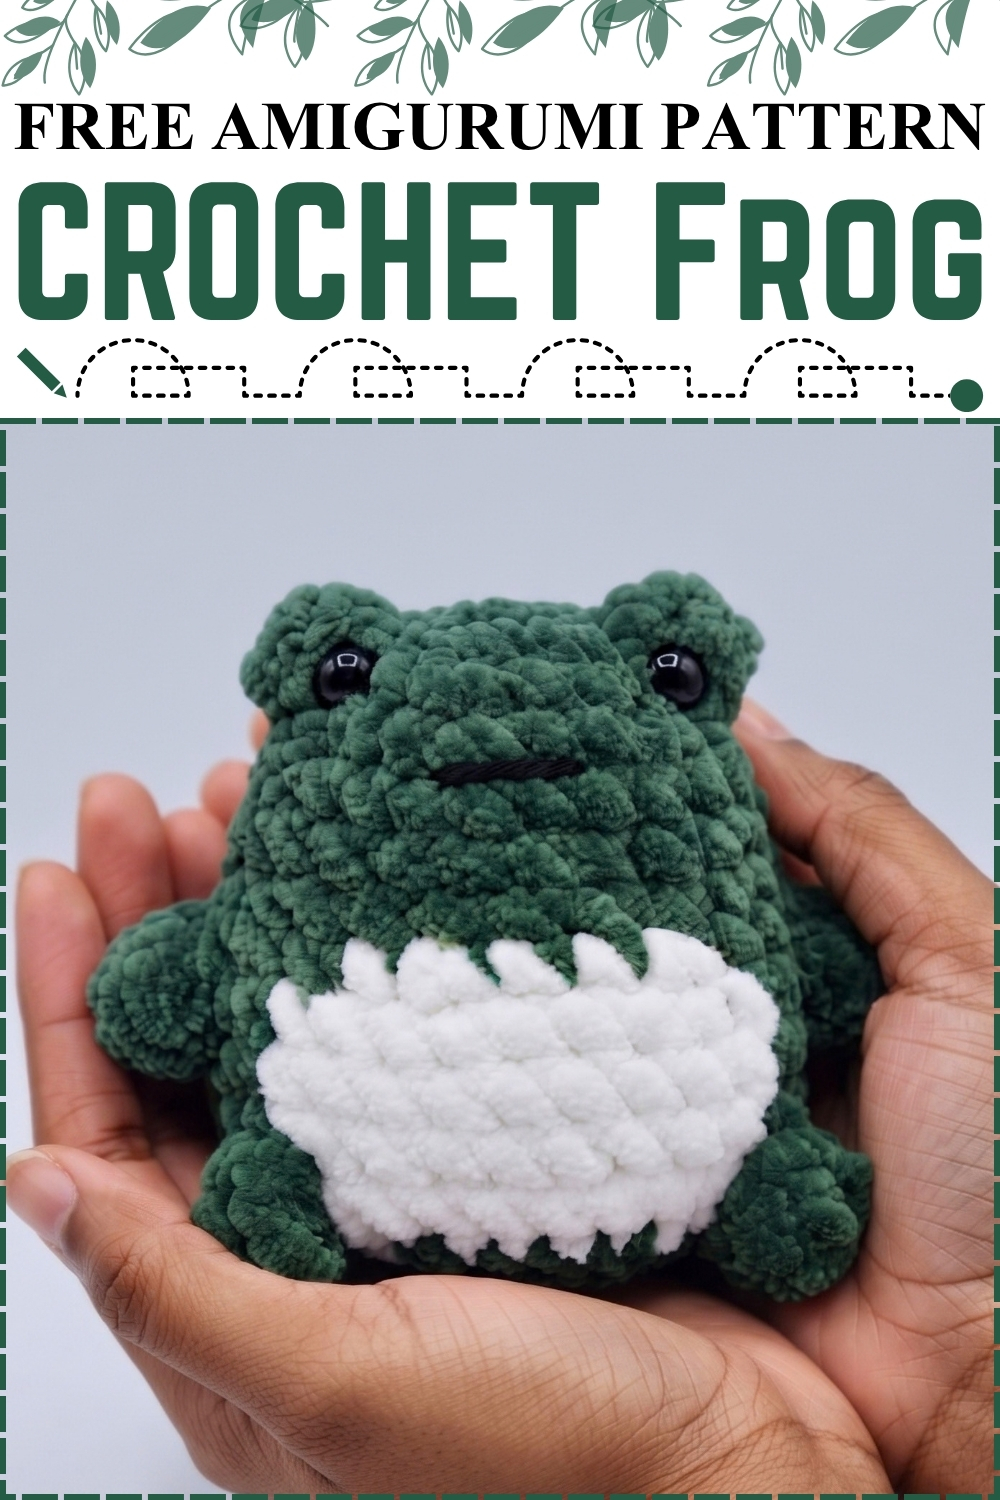
Everything on this crochet frog amigurumi grows from one continuous spiral, so nothing gets sewn on at the end. Popcorn stitches form the eye bumps, the arms and the legs right as you work past them. Chenille yarn fills in the gaps between stitches and hides any wobble in your tension, which makes the whole thing forgiving. My version uses deep forest green for the body and plain white for the belly instead of a second green. Safety eyes sit at the base of the eye bumps and a single black stitch forms the mouth.
Materials and Tools
- Chenille or velvet yarn in Dark Green for the body
- Chenille or velvet yarn in White for the belly. The original calls for light green, mine is white
- A small amount of black cotton yarn for the mouth
- Crochet hook sized to your chenille yarn, usually 5.0 mm to 6.5 mm
- Stitch marker
- Darning needle
- Safety eyes
- Polyester fiberfill stuffing
Difficulty and Time
Easy once you can work a popcorn stitch. The shaping is simple and there is no assembly at all, which removes the part most people dislike. From my own making this takes a couple of hours, maybe three if popcorn stitches are new to you. Chenille works up fast because the yarn is thick, so expect it to move quicker than a cotton amigurumi of the same round count.
Technique Notes and Working Tips
- Magic ring, written as MR, is an adjustable starting loop. Chenille snaps if you yank it, so close the ring with steady pressure rather than a sharp pull. If the strand does break, start over rather than knotting it, since a knot inside round 1 shows.
- Single crochet, written as sc, carries the whole piece. The yarn under method gives a tighter fabric and less stuffing show through on chenille. Standard yarn over works fine if that is what you are used to. Pick one and stay with it.
- Increase, written as inc, means two single crochet in the same stitch. Decrease, written as dec, means working two stitches together into one.
- Double crochet, written as dc, only appears inside the popcorn stitches.
- A 4 stitch popcorn, written as 4 dc pc, means four double crochet into the same stitch, then slip your hook out of the working loop, push it through the top of the first double crochet, pick the dropped loop back up and pull it through. A 5 stitch popcorn, written as 5 dc pc, works the same way with five double crochet.
- Popcorn stitches are easy to lose on chenille because the pile hides the stitch tops. Count the dc out loud as you make each one.
- Work in a continuous spiral and move your stitch marker every round. Chenille makes it almost impossible to find your place again if you lose the marker.
- On the round after any popcorn, insert your hook into the base of the popcorn rather than the top. Going into the top pushes the bump backwards and flattens it.
- Change colour on the final yarn over of the stitch before the new colour starts. Cut the old yarn each time and leave a medium tail to knot later.
- Stuff in small handfuls, not one lump. Chenille stretches, so a firm stuff holds the squat shape in my photo while a soft stuff gives a squishier frog. Either is correct.
The Pattern
Body, Worked in One Piece
- Start with Dark Green yarn.
- R1: 6 sc in a MR [6]. Close the ring gently so the chenille does not snap.
- R2: inc in every stitch around [12]. The disc stays flat here.
- R3: work the eye bumps as follows, 1 sc, 1 inc, 1 sc, then a 4 dc pc in the next stitch with 1 sc squeezed into that same stitch, then 1 sc, 1 inc, 1 sc, 1 inc, then a 4 dc pc in the next stitch counting as one stitch with no increase, then 1 inc, 1 sc, 1 inc [18]. Two raised bumps should now sit side by side with a small gap between them.
- R4: (2 sc, inc) repeat 6 times around [24]. Work into the base of each popcorn as you pass it.
- R5: 1 sc in every stitch around [24]
- R6: 1 sc in every stitch around [24]
- R7: 1 sc in every stitch around [24]. The piece should look like a deep green cup with two bumps at the closed end.
- R8: in Dark Green work (2 sc, inc) 3 times then 1 sc, changing to White on the final pull through of that sc, then in White work 1 sc, 1 inc, 2 sc, 1 inc, changing back to Dark Green on the final pull through of that inc, then in Dark Green work (2 sc, inc) 3 times [32]. The white panel should sit centred on the front, directly below the eye bumps.
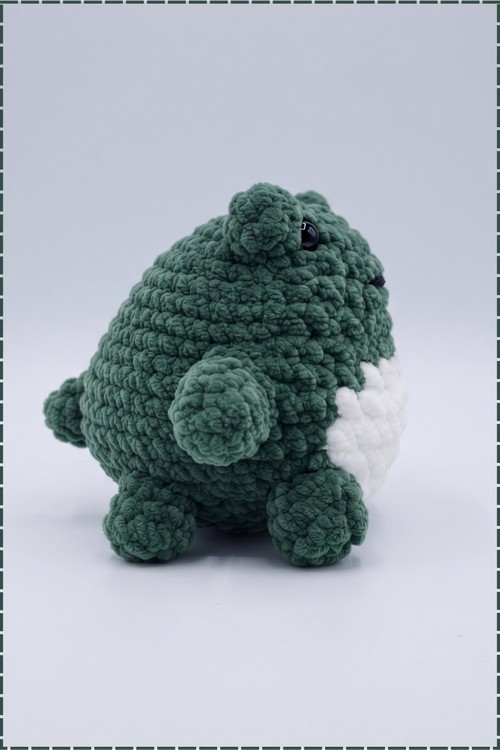
- R9: in Dark Green work 9 sc, then a 5 dc pc in the next stitch, then 2 sc, changing to White on the last sc, then in White work 9 sc, changing to Dark Green on the last sc, then in Dark Green work 2 sc, then a 5 dc pc in the next stitch, then 8 sc [32]. Both arms now sit at the sides, level with each other and just outside the white panel.
- R10: in Dark Green work 12 sc, change to White, work 9 sc in White, change to Dark Green, work 11 sc [32]
- R11: in Dark Green work 13 sc, change to White, work 8 sc in White, change to Dark Green, work 11 sc [32]. The white belly should now read as a wide rounded shield across the front.
- R12: in Dark Green work 12 sc, then a 5 dc pc in the next stitch and change to White on the closing pull through loop of that popcorn, then in White work 8 sc, changing to Dark Green on the last sc, then in Dark Green work a 5 dc pc in the next stitch, then 10 sc [32]. The legs sit lower than the arms and closer to the front, which is why my frog sits forward rather than upright.
Eyes and Inside Clean Up
- Fit the safety eyes between rounds 3 and 4, right at the base of each eye bump, before you decrease any further.
- Angle the eye stems slightly downward so the washers seat flat inside the head.
- Push the pile aside with your hook to find the actual stitch before you punch through. Chenille hides the hole and an eye set a half stitch off is obvious from the front.
- Turn the frog inside out and tie each pair of cut colour change tails together in a double knot. This replaces weaving in ends entirely.
- Turn the frog right side out again and check that no knots press against the fabric from the inside.
Decreasing and Closing
- Switch permanently back to Dark Green.
- R13: (2 sc, dec) repeat 8 times around [24]
- R14: (1 sc, dec) repeat 8 times around [16]
- Pull your working loop long so it cannot unravel, then stuff the body with polyester fiberfill. Firm gives the shape in my photo, soft gives a squishier frog.
- R15: 8 dec [8]
- Work exactly 2 more decrease stitches to shrink the hole as far as it will go [6]
- Cut the yarn leaving a tail and fasten off.
- Thread the tail onto a darning needle and run it through the front loops only of the final 6 stitches.
- Pull the tail firmly to cinch the hole shut, knot once directly over the closed hole, then bury the tail inside the body.
Mouth
- Thread a strand of black cotton yarn onto the darning needle.
- Enter through the back of the head and come out at the front where you want one end of the mouth.
- Insert the needle back into the face to form a single straight line, then bring the needle out through the exact hole you started from at the back.
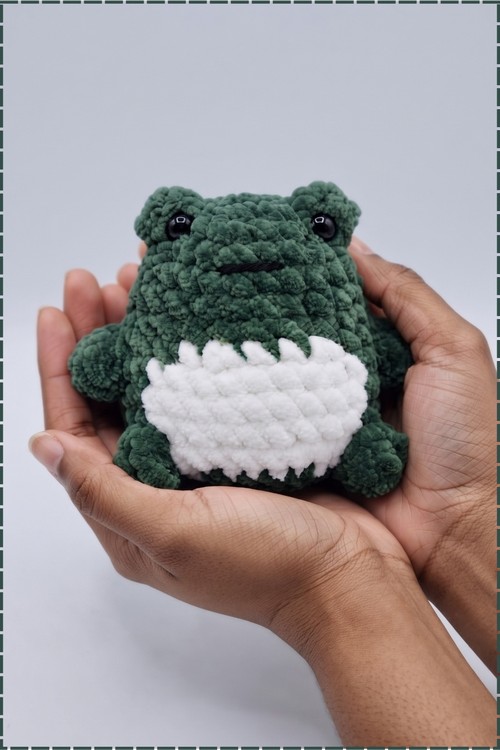
- On my frog this line is short, straight and sits low between the eyes, just above the white belly. It does not curve.
- Knot the two black ends together gently, push the knot inside the body and trim the excess.
- If the stitch sinks into the chenille pile, use a doubled strand of black rather than pulling the single strand tighter.
Yarn Substitution
Chenille is doing real work here, so the swap matters. The pile fills the space between stitches and hides the stuffing, which is what lets a 32 stitch round look solid. Plain worsted acrylic or cotton will work the same rounds but you must drop two or three hook sizes and expect stuffing show through at the colour changes. Popcorn stitches also behave differently, standing crisper in cotton and softer in chenille. If you do switch to a smooth yarn, the finished frog will come out noticeably smaller.
Customization Ideas
- Use light green for the belly as the original pattern does, or cream, pale yellow or pink for a different look.
- Work the whole frog in one colour and skip every colour change for the simplest possible version.
- Add a second short black stitch angled down at each end of the mouth for a smile instead of a straight line.
- Embroider two tiny nostril stitches above the mouth.
- Stitch a small flower or leaf onto the top of the head between the eye bumps.
- Thread a key ring through the back of the head if you want to carry it, anchoring through several stitches rather than one.
- Stuff with poly pellets in the base and fiberfill above for a frog that sits without tipping.
Alt Text Suggestions for Photos
- Dark green chenille crochet frog amigurumi with a white belly and black safety eyes held in two hands
- No sew crochet frog made from velvet yarn showing popcorn stitch arms and legs
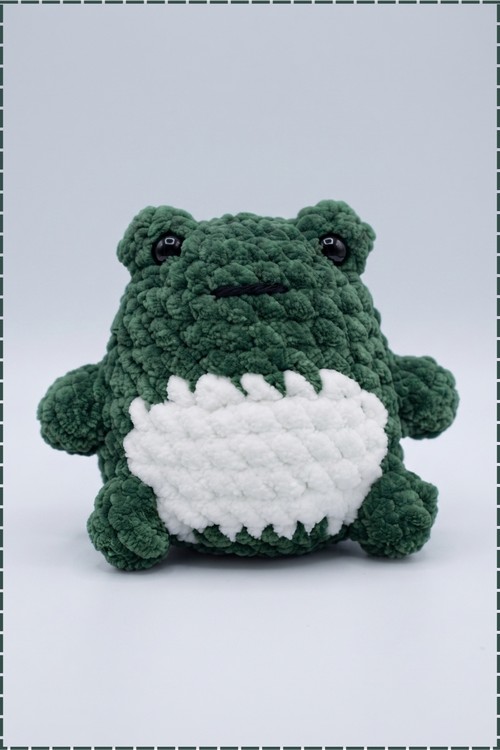
- Squishy green and white amigurumi frog with a straight embroidered black mouth
- Close up of the raised popcorn eye bumps and safety eyes on a chenille crochet frog
Frequently Asked Questions
How big does it finish? Mine fills a cupped hand, which in my experience lands somewhere around four to five inches wide. The pattern gives no measurement, so your result depends entirely on your chenille brand and hook. Thicker chenille makes a noticeably bigger frog from the same counts.
My popcorn stitches disappear into the fabric. What went wrong? Two likely causes. Either you worked the following round into the top of the popcorn instead of its base, which tips the bump inward, or your double crochets were too loose. Pull each dc snug before closing the popcorn and the bump stands up on its own.
Can I skip the safety eyes? Yes. Embroider two solid black circles in cotton yarn at the base of each eye bump instead. Do this for any frog going to a child under three, since safety eyes can work loose over time.