
How To Crochet Fox Keychain Amigurumi Free Pattern
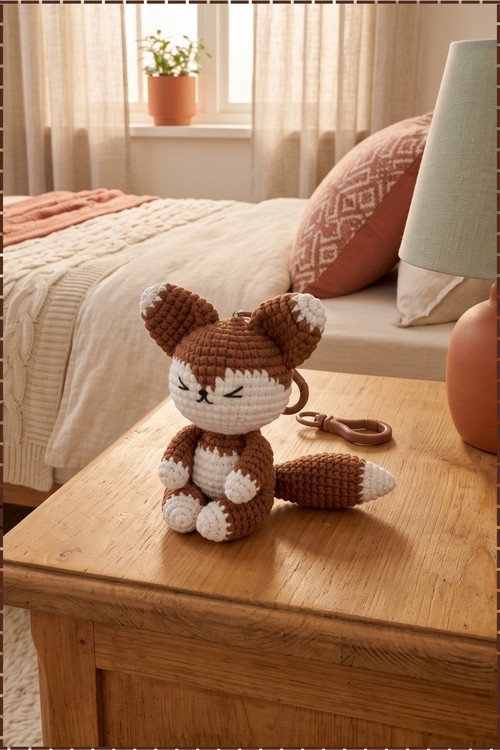
Keys, zips and pencil cases get a calm little companion in this crochet fox keychain, a sleepy caramel fox hanging from a swivel clasp. White ear tips, a soft white belly and closed embroidered eyes make it look mid nap, a sweet pocket gift for fox fans.
Crochet Fox Amigurumi keychain
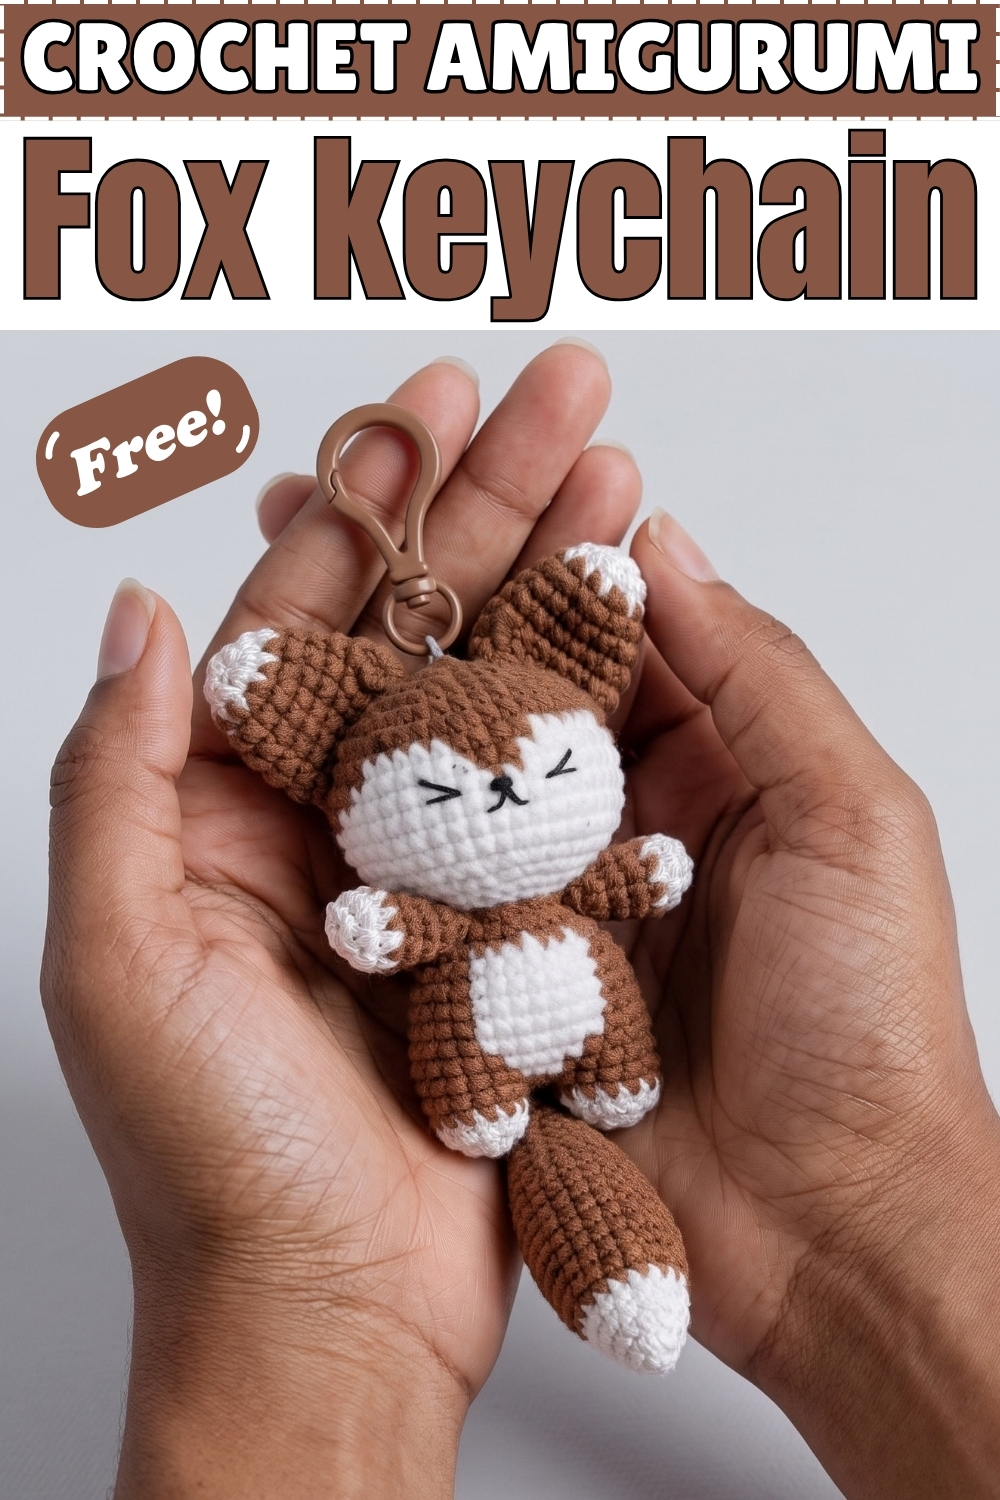
Six single crochet in a magic ring begin this crochet fox amigurumi keychain, and the rest grows from there in one quiet evening. Caramel brown yarn carries the head, body and tail, while white marks the face, belly, paws and ear tips. My version skips the usual orange for a softer brown, which reads warmer in person and photographs beautifully. Stuffing goes in firmly so the head keeps its round shape once it hangs from a ring. Embroidered sleeping eyes give the little face a calm, settled look. You finish by clipping a swivel clasp straight into the crown.
Materials and Tools
- Light worsted weight or sport weight cotton yarn in Caramel Brown and White
- Crochet hook in 2.0 mm or 2.5 mm, sized down from the yarn band so the fabric stays tight
- Fiberfill stuffing
- Yarn needle for sewing and weaving in ends
- Stitch markers to mark the start of each round
- Black embroidery thread for the eyes and nose
- Scissors
- A swivel lobster clasp keychain, plus a small jump ring if your clasp does not open
- Optional dark brown yarn if you want the deeper fox markings described in the original pattern
A note on the yarn I used. Mine has a slightly nubby, textured finish, which is why the stitches in my photo look rounded and plush rather than flat. Smooth cotton works just as well and shows the stitch definition more sharply.
Difficulty and Time
From my own making, this sits at an easy to confident beginner level. You need a magic ring, single crochet, increases, decreases and a colour change worked mid round. Nothing else. I finished mine across about two evenings of relaxed crocheting, though an experienced maker could likely close it out in a single sitting of two to three hours. Treat that as a rough guide, since hook speed and sewing care vary a lot between makers.
Beginner Technique Notes
- Magic ring, abbreviated MR, is an adjustable loop you crochet into and then pull closed. Pull it tight before you move past round three or a gap will open at the nose.
- Single crochet, abbreviated sc, is the only stitch used in the whole piece.
- Increase, abbreviated inc, means two single crochet worked into the same stitch.
- Decrease, abbreviated dec, means joining two stitches into one. I use the invisible decrease, picking up only the front loops of both stitches, because it leaves no visible bump on a small piece like this.
- Slip stitch, abbreviated sl st, closes a round neatly when you need it.
- Stitch counts in brackets tell you how many stitches you should have at the end of that round. Count every round on a piece this small, since one missed stitch shows immediately.
- Work in continuous spirals, not joined rounds, and move your stitch marker up as you go.
- For the colour changes, carry the resting yarn loosely along the back of your work. Pull it too tight and the fabric puckers inward.
The Pattern
Head
- Start with Caramel Brown yarn.
- R1: 6 sc in a MR [6]. You should have a tiny closed circle with no hole in the centre.
- R2: inc x 6 [12]. The circle still lies flat at this stage.
- R3: (sc, inc) x 6 [18]
- R4: (2 sc, inc) x 6 [24]
- R5: (3 sc, inc) x 6 [30]
- R6: (4 sc, inc) x 6 [36]. The disc should now be the full width of the head and still flat.
- R7 to R10: 36 sc, worked over 4 rounds [36]. The sides pull up here and the piece turns from a disc into a shallow bowl.
- Now bring in the White yarn for the face patch. On my fox this patch is large and sits low on the front of the head, wrapping from cheek to cheek.
- R11: 13 sc in Caramel Brown, 10 sc in White, 13 sc in Caramel Brown [36]
- R12: 12 sc in Caramel Brown, 12 sc in White, 12 sc in Caramel Brown [36]
- R13: 11 sc in Caramel Brown, 14 sc in White, 11 sc in Caramel Brown [36]. The white area should now read as a clear rounded muzzle shape from the front.
- R14: (4 sc, dec) x 6, following the colour changes as they line up with the edges of the white patch [30]
- R15: (3 sc, dec) x 6 [24]
- Start stuffing the head firmly at this point. Push small pinches of fiberfill in at a time rather than one large lump, or the head goes lumpy instead of round.
- R16: (2 sc, dec) x 6 [18]
- R17: (sc, dec) x 6 [12]
- Fasten off and leave a long tail for sewing to the body. Top up the stuffing through the opening before you close it, since this is your last chance to shape the head.
Body
- Start with Caramel Brown yarn.
- R1: 6 sc in a MR [6]
- R2: inc x 6 [12]
- R3: (sc, inc) x 6 [18]
- R4: (2 sc, inc) x 6 [24]
- R5 to R7: 24 sc, worked over 3 rounds [24]. The body should look like a short straight sided cup.
- The white belly comes next. Keep it centred on the same side as the face patch, or the finished fox will look twisted.
- R8: 9 sc in Caramel Brown, 6 sc in White, 9 sc in Caramel Brown [24]
- R9: 10 sc in Caramel Brown, 4 sc in White, 10 sc in Caramel Brown [24]. On my fox the belly ends up as a soft oval, a little wider than it is tall.
- R10: (2 sc, dec) x 6, worked entirely in Caramel Brown [18]
- R11: 18 sc [18]
- Fasten off and stuff the body firmly. The body is smaller than the head, so keep it dense enough to carry the weight without slumping.
Ears, Make 2
- Start with White yarn. On my version the ear tips are white rather than dark brown, which matches the white paws and tail tip.
- R1: 4 sc in a MR [4]
- R2: (sc, inc) x 2 [6]
- Change to Caramel Brown yarn.
- R3: (sc, inc) x 3 [9]
- R4: (2 sc, inc) x 3 [12]
- R5: 12 sc [12]
- Fasten off and leave a tail for sewing. Do not stuff the ears. Pinch them flat so the white tip sits at the point and the brown forms the base.
Arms and Legs, Make 4
- Start with White yarn so each limb ends in a white paw, exactly as on my fox.
- R1: 5 sc in a MR [5]
- Change to Caramel Brown yarn.
- R2 to R4: 5 sc, worked over 3 rounds [5]. Each piece should look like a short narrow tube with a white cap at one end.
- Fasten off and leave a tail for sewing. No stuffing is needed, though a single wisp of fiberfill keeps them from looking creased.
Tail
- Start with White yarn.
- R1: 4 sc in a MR [4]
- R2: (sc, inc) x 2 [6]
- R3: (sc, inc) x 3 [9]
- Change to Caramel Brown yarn. The white section stays small on my fox, just a neat tip rather than a wide band.
- R4: (2 sc, inc) x 3 [12]
- R5 to R7: 12 sc, worked over 3 rounds [12]
- R8: (2 sc, dec) x 3 [9]
- Stuff the tail lightly. Too much filling makes it stand stiffly instead of hanging in a soft curve.
- R9: (sc, dec) x 3 [6]
- Fasten off, pinch flat and leave a long tail for sewing. On my fox the tail is nearly as long as the body and hangs straight down.
Assembly
- Sew the head to the body first, lining up the white face patch directly above the white belly. Use the long tail from the head and work around the join twice so the neck cannot wobble.
- Attach the ears high on the head, roughly between rounds 3 and 7, set wide apart and tilted slightly outward. On my fox they sit far enough to the sides that the clasp has clear space between them at the crown.
- Embroider the face next, while you can still turn the head freely. Stitch two short curved lines on the white patch for closed sleeping eyes, each one dipping down in the middle like a soft V turned upside down. Add three or four tiny straight stitches at each outer corner if you want the lash detail visible on mine.
- Embroider a small nose between and just below the eyes, low on the white patch, then run two short stitches down and out from it to suggest a little muzzle.
- Sew the arms to the sides of the body right at the head and body join, angled gently outward with the white paws facing forward.
- Sew the legs to the bottom front of the body, set close together and pointing downward so the fox hangs straight rather than splaying when it swings from a bag.
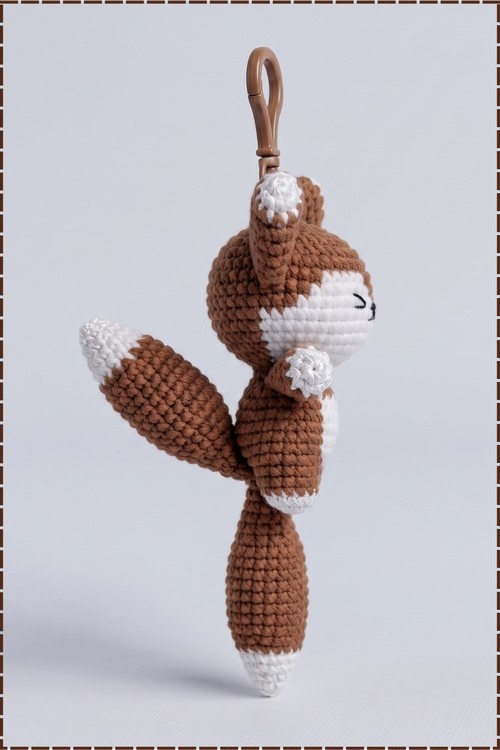
- Sew the tail to the lower back of the body, centred, so it drops below the legs. My tail hangs down rather than sweeping to the side, which keeps the whole keychain narrow.
- Attach the keychain last. Thread a doubled strand of Caramel Brown yarn through the stitches at the very top of the head around round 1, knot it securely on the inside, then slip the swivel clasp onto the loop. A jump ring works just as well if your clasp does not open.
- Weave every remaining end deep into the stuffing rather than cutting it close to the surface, since a keychain gets handled constantly.
Tips and Troubleshooting
- Go down a hook size from whatever your yarn band recommends. Loose stitches on a piece this small let the white fiberfill peek through the brown fabric, and you will see it in every photo.
- Count your stitches at the end of every single round. On a 36 stitch head, one missed increase throws the whole face patch off centre and you will not notice until round 13.
- Change colours on the last yarn over of the previous stitch, not at the start of the new one. The join disappears and the edge of the white patch stays crisp.
- Keep the carried yarn relaxed behind the work. Mine puckered badly on my first attempt because I pulled the brown too tight behind the white section.
- Stuff the head in small pinches and keep checking the shape from the front. Lumps in a round head show far more than lumps in a body.
- Pin every part in place with stitch markers or sewing pins before you sew. Hold the piece at arm's length and look at it straight on, since ears set even slightly unevenly read as wrong immediately.
- Embroider the eyes before attaching the limbs. If the spacing comes out wrong you can unpick and redo it without fighting past arms and legs.
- Anchor the keychain loop through several stitches, not one. All the weight of the finished fox hangs from that single point.
- Make the second of any pair straight after the first. Tension drifts between sessions and mismatched ears are hard to hide.
Yarn Substitution
Cotton is my first choice here because it holds stitch definition and takes handling well, which matters for something living on a set of keys. Mercerised cotton gives a slight sheen and crisp stitches. Acrylic works and is more forgiving to frog, though it fuzzes faster with daily use. Velvet or chenille yarn produces a lovely plush finish close to the texture in my photo, but it is slippery to work at this gauge and the embroidered face sinks into the pile. If you switch yarn weight, go up or down a hook size to match and expect the finished size to shift accordingly.
Customization Ideas
- Swap the caramel brown for classic red orange and the white for cream if you want a traditional red fox.
- Work the ear tips, paws and tail tip in dark brown or black for the original markings, keeping white only on the face and belly.
- Add tiny safety eyes instead of the embroidered sleeping eyes if you prefer an awake expression, though stitch them only on a keychain intended for an older child or adult.
- Embroider a small blush circle in pale pink on each cheek just outside the eyes.
- Chain a short cord from the top of the head before adding the clasp if you want the fox to hang lower on a bag. Chain until the cord reaches your preferred length, then join it back into the head.
- Make the tail in a contrasting colour for a fantasy fox in grey, lilac or deep teal.
- Skip the clasp entirely and sew a loop at the crown to turn it into a tree ornament or rear view mirror hanger.
Alt Text Suggestions for Photos
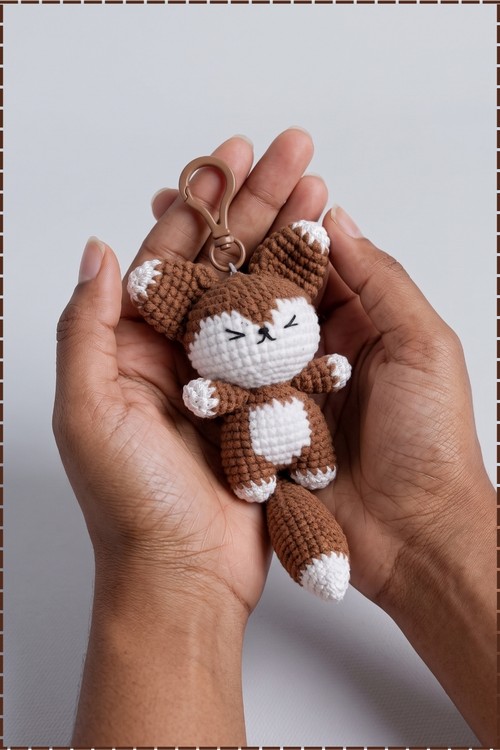
- Caramel brown crochet fox amigurumi keychain with a white face patch and closed sleeping eyes held in two open hands
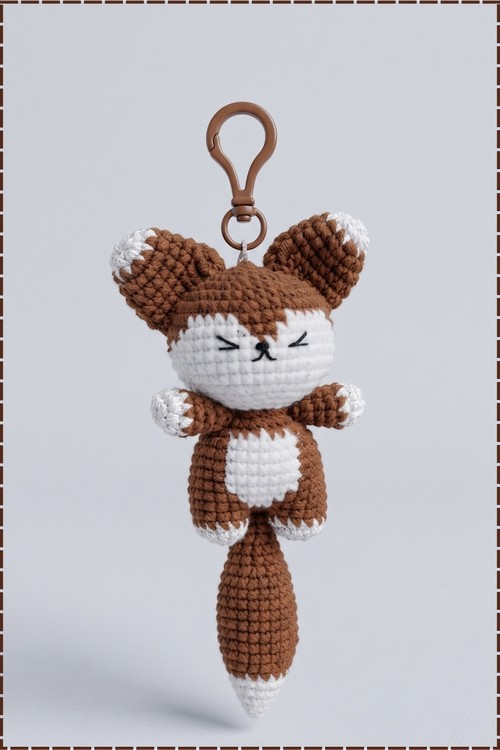
- Small crochet fox keychain with white tipped ears, paws and tail and a bronze swivel clasp at the top of the head
- Handmade amigurumi fox keychain in brown and white cotton showing the white belly patch and embroidered nose
- Close up of the embroidered sleeping eyes and small nose on a crochet fox amigurumi keychain
Frequently Asked Questions
How big does this crochet fox amigurumi keychain finish? Mine sits comfortably in the palm of one hand, which in my experience lands somewhere around four to five inches from the top of the ears to the tip of the tail. Your result will differ with yarn weight and tension, so treat that as an estimate rather than a measurement from the pattern.
Can I make it without changing colours mid round? You can. Work the head and body entirely in caramel brown, then cut an oval of white felt or surface crochet a patch on afterward. The colour change is tidier in the long run, but skipping it is a reasonable first attempt if carrying yarn feels like too much at once.
Why does the stuffing show through my fabric? Your hook is almost certainly too large for your yarn. Drop down a size or two until the fabric feels firm and slightly stiff. White fiberfill shows through brown stitches very easily, so you can also stuff with a scrap of matching brown yarn in the thinnest areas.
Do I need to stuff the arms and legs? No. They are only five stitches around, so they close up naturally when flattened and sewn. I add the smallest wisp of fiberfill to each one purely to stop them creasing, but the pattern works perfectly well without it.
Will it survive being clipped to a bag every day? It holds up well if you anchor the clasp properly. Thread your yarn through several stitches at the crown rather than one, knot it inside the head, and weave the ends deep into the stuffing. Cotton handles friction better than acrylic for something carried daily.