
Crochet Hot Air Balloon Pattern Free Amigurumi With Daisy Garland
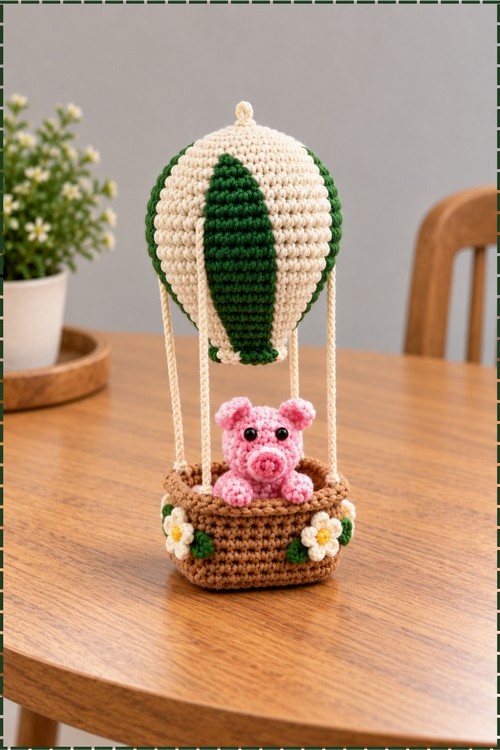
Nursery ceilings and baby shower tables both suit the green and cream balloon, hung from its tan loop with a pink pig riding in the woven basket below. White and yellow daisies ring the middle, and the pig can trade places with any small charm you have already made.
Pig riding in the basket is the reason this crochet hot air balloon amigurumi keeps getting requested. Makers see the passenger and want to swap in their own animal. Bunny, bear, kitten. That one change makes a crochet hot air balloon amigurumi feel personal, which is why the pattern circulates the way it does.
Crochet Hot Air Balloon Amigurumi
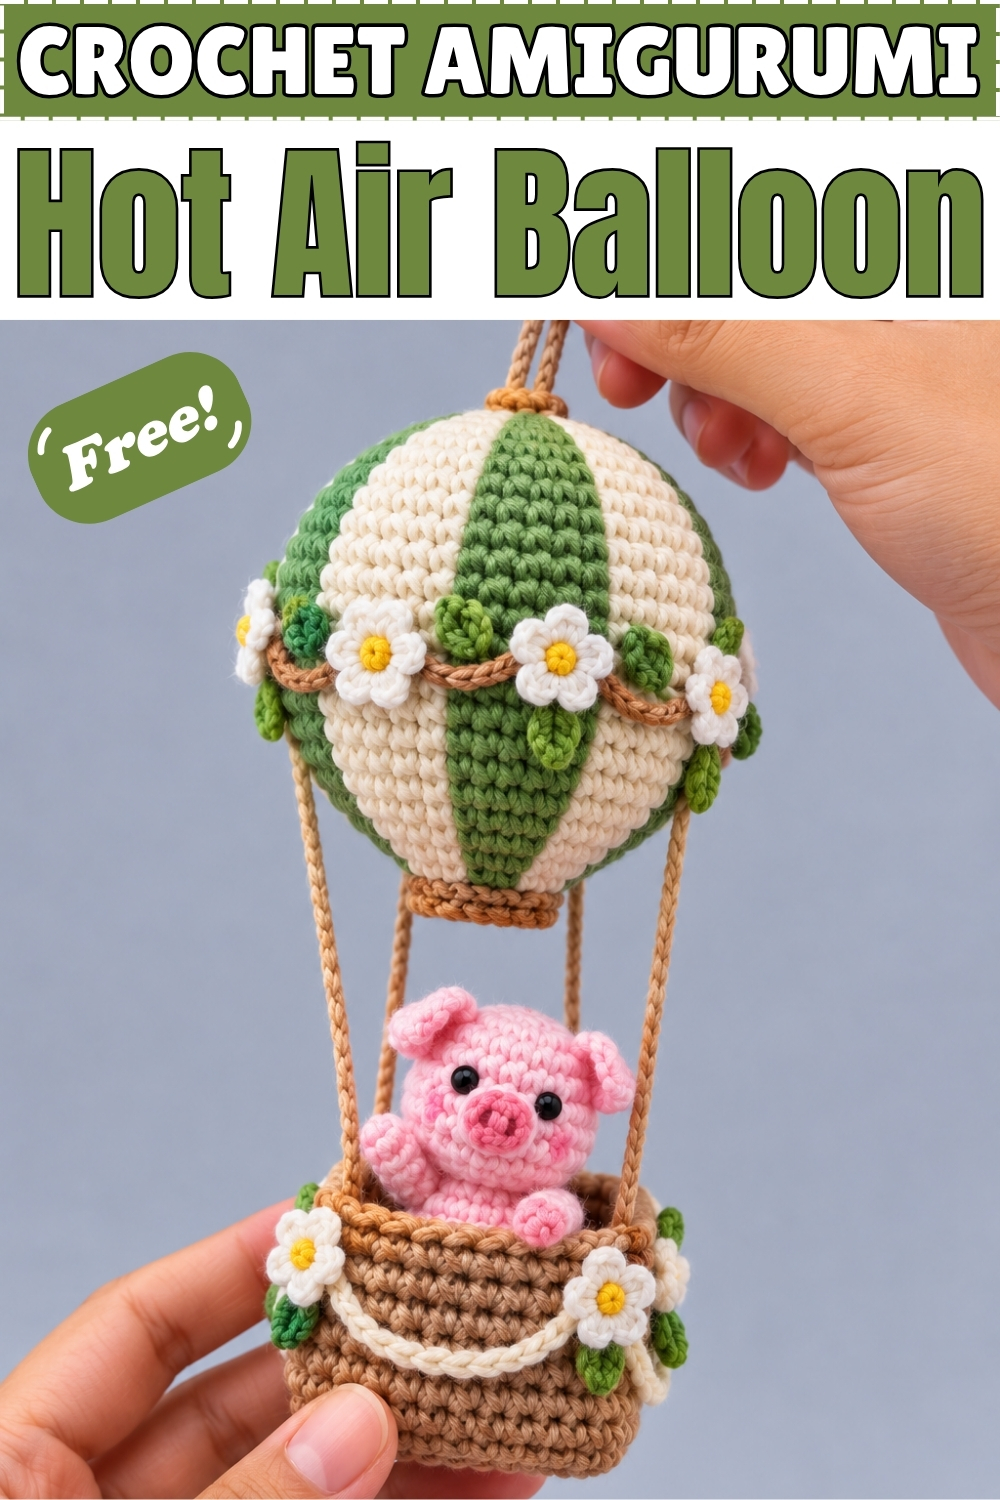
Tapestry crochet builds the striped body of this crochet hot air balloon amigurumi, carrying both yarns around every round so six colour panels run top to bottom without a single seam. Increases sit in staggered positions inside each panel, which keeps the shape round instead of pulling into six flat corners. Eighteen rounds of straight work give the balloon its height before the taper begins. Mine pairs medium green with cream, then adds tan rims, a daisy garland, a hanging loop, a woven looking basket and a small pink pig riding inside.
Materials and Tools
- Worsted or DK cotton yarn in medium green for the main colour
- The same yarn in cream for the contrasting colour
- Tan or caramel yarn for the rims, cords, hanging loop and basket
- Small amounts of white and yellow for the daisies, and green for the leaves
- Pink yarn for the pig, with a deeper pink for the snout and inner ears
- Two small black safety eyes for the pig
- Polyfill stuffing
- Yarn needle, stitch marker and scissors
Any smooth yarn works, but pick a hook a size or two below the label. Tight stitches matter more than usual here, because carried yarn and firm stuffing both show through loose fabric.
Difficulty and Time
This is an intermediate project rather than a true beginner one, mostly because of the tapestry colour work. The balloon itself took me close to three hours, and the basket, cords, garland and pig added another two or three on top. Treat those as rough figures, since colour work slows almost everyone down at first.
Beginner Technique Notes
- Single crochet, written as sc, is the only stitch used across the whole balloon, so the challenge here is colour handling rather than stitch skill.
- Increase, written as inc, means two single crochet worked into one stitch, and it is what widens the balloon.
- Decrease, written as dec, here means the invisible decrease, worked by crocheting two front loops together. The invisible version matters on a striped piece because standard decreases leave bumps that break the clean colour lines.
- Tapestry crochet means carrying the yarn you are not using along the top of the previous round and crocheting over it as you go. The carried strand hides inside the fabric and keeps the stripes from puckering once the balloon is stuffed.
- Hold the carried yarn with gentle, even tension. Pulling it tight is the single most common beginner mistake, and it cinches the balloon narrower than the counts intend.
- Change colours on the last pull through of the previous stitch, not at the start of the new one. Doing it any other way leaves a half stitch of the wrong colour at every boundary, and with six panels across twenty seven rounds that adds up fast.
- Staggered increases look wrong while you work them, since the increase moves to a different spot inside the panel on several rounds. Trust the written placement, because that shifting is exactly what rounds the balloon off.
- Work in a continuous spiral without joining, and keep a stitch marker in the first stitch of every round. On a piece with 54 stitches per round, finding your place again after losing the marker is genuinely painful.
- Count your panel widths rather than the whole round. Each of the six blocks should match the width stated at the end of its round, and checking six small numbers is far easier than recounting 54.
The Pattern
Balloon, Increasing from the Top
- Work in a continuous spiral and always begin each round with the main colour, written as MC, which is green on my version. The contrasting colour, written as CC, is cream.
- Round 1: Using MC, make a magic ring with 6 sc inside and pull it closed [6 sts]. Close the ring tightly now, because the top of the balloon sits right where your hanging loop will attach later.
- Round 2: Introduce CC here and repeat [inc in MC, inc in CC] 3 times around [12 sts, each colour block now 2 stitches wide].
- Round 3: Repeat [(1 sc, 1 inc) in MC, (1 sc, 1 inc) in CC] 3 times around [18 sts, blocks 3 stitches wide].
- Round 4: Repeat [(1 sc, 1 inc, 1 sc) in MC, (1 sc, 1 inc, 1 sc) in CC] 3 times around [24 sts, blocks 4 stitches wide].
- Round 5: Repeat [(2 sc, 1 inc, 1 sc) in MC, (2 sc, 1 inc, 1 sc) in CC] 3 times around [30 sts, blocks 5 stitches wide].
- Round 6: Repeat [(3 sc, 1 inc, 1 sc) in MC, (3 sc, 1 inc, 1 sc) in CC] 3 times around [36 sts, blocks 6 stitches wide]. The piece should look like a shallow striped bowl here, with the colour lines running straight out from the centre.
- Round 7: Repeat [(1 sc, 1 inc, 4 sc) in MC, (1 sc, 1 inc, 4 sc) in CC] 3 times around [42 sts, blocks 7 stitches wide].
- Round 8: Repeat [(3 sc, 1 inc, 3 sc) in MC, (3 sc, 1 inc, 3 sc) in CC] 3 times around [48 sts, blocks 8 stitches wide].
- Round 9: Repeat [(1 sc, 1 inc, 6 sc) in MC, (1 sc, 1 inc, 6 sc) in CC] 3 times around [54 sts, blocks 9 stitches wide]. This is the widest point of the balloon and every block should measure the same width across all six panels.
Balloon, Building the Height
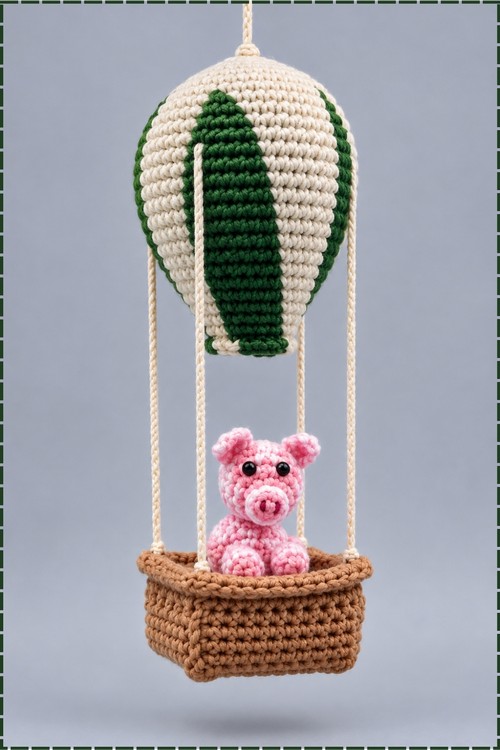
- Rounds 10 to 17, 8 rounds total: No increasing. Repeat [9 sc in MC, 9 sc in CC] 3 times around [54 sts per round]. These straight rounds give the balloon its tall body, and the panels should run as clean vertical stripes with no drift sideways.
- Check your colour change points every round or two during this stretch. If a stripe starts leaning, a change landed one stitch early or late, and catching it now saves unpicking eight rounds later.
Balloon, Decreasing and Tapering
- Round 18: Repeat [(3 sc, 1 dec, 4 sc) in MC, (3 sc, 1 dec, 4 sc) in CC] 3 times around [48 sts, blocks 8 stitches wide].
- Round 19: No decreasing. Repeat [8 sc in MC, 8 sc in CC] 3 times around [48 sts].
- Round 20: Repeat [(3 sc, 1 dec, 3 sc) in MC, (3 sc, 1 dec, 3 sc) in CC] 3 times around [42 sts, blocks 7 stitches wide].
- Round 21: No decreasing. Repeat [7 sc in MC, 7 sc in CC] 3 times around [42 sts].
- Round 22: Repeat [(2 sc, 1 dec, 3 sc) in MC, (2 sc, 1 dec, 3 sc) in CC] 3 times around [36 sts, blocks 6 stitches wide].
- Round 23: No decreasing. Repeat [6 sc in MC, 6 sc in CC] 3 times around [36 sts].
- Round 24: Repeat [(2 sc, 1 dec, 2 sc) in MC, (2 sc, 1 dec, 2 sc) in CC] 3 times around [30 sts, blocks 5 stitches wide].
- Round 25: No decreasing. Repeat [5 sc in MC, 5 sc in CC] 3 times around [30 sts].
- Round 26: Repeat [(2 sc, 1 dec, 1 sc) in MC, (2 sc, 1 dec, 1 sc) in CC] 3 times around [24 sts, blocks 4 stitches wide].
- Round 27: Final tapering round, no decreasing. Repeat [4 sc in MC, 4 sc in CC] 3 times around [24 sts]. The alternating plain rounds between every decrease are what give the gentle curve at the bottom instead of a sharp cone.
Stuffing and the Base Plug
- Cut both yarns, tie the two tails together in a secure knot and tuck them inside the balloon.
- Stuff the balloon firmly with polyfill. The carried yarn keeps the sides rigid, so push the filling out toward the widest round and massage the shape until it reads as a proper balloon.
- Work the base plug in CC, which is cream: Round 1, magic ring with 6 sc [6 sts].
- Round 2: Increase in every stitch [12 sts].
- Round 3: (1 sc, 1 inc) repeated 6 times [18 sts].
- Round 4: (2 sc, 1 inc) repeated 6 times [24 sts].
- Fasten off leaving a long tail, then sew this 24 stitch flat circle directly into the 24 stitch opening at the bottom of the stuffed balloon.
- Top up the stuffing just before the last few stitches close, since this is your final chance to firm up the base.
Tan Rims
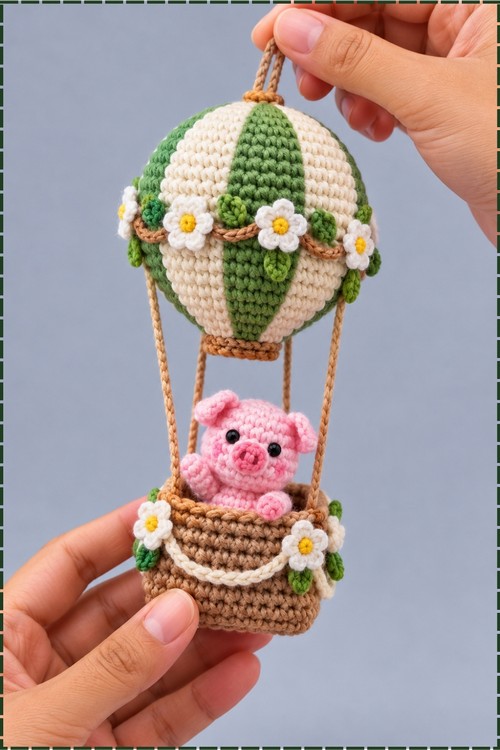
- My balloon has a tan band at the very top and another around the bottom opening, which the plain pattern does not include.
- Work each rim as a short strip in tan yarn, chaining until the strip wraps the top or the base of the balloon, then working a row or two of single crochet along the chain.
- Sew the ends of each strip together into a ring, then stitch the ring flat onto the balloon so it covers the colour change at the top and the seam at the base.
- Keep your stitches on the lower edge of each rim so the sewing disappears under the band.
Hanging Loop
- Chain in tan yarn until the loop reaches your preferred length, then slip stitch back along the chain so the cord is firm and double thick.
- Fold the cord and sew both ends into the centre of the top rim, anchoring through several stitches since this carries the whole weight.
Basket and Cords
- A tan basket hangs below my balloon, which the plain pattern does not cover, so work it as a small open cylinder.
- Begin with a magic ring and increase in flat rounds until the base is as wide as you want the basket.
- Work straight rounds in back loops only for the first round of the sides, which gives the crisp bottom edge visible in my photo, then continue in plain rounds until the basket reaches the height you like.
- Add a contrasting cream stripe partway up and a cream round at the rim if you want the woven look mine has.
- Finish the top edge with a round of slip stitch or a tan border so the rim sits firm.
- Make the cords by chaining in tan until each one reaches your preferred length, then slip stitching back along the chain, and make them all the same length so the basket hangs level.
- Sew one end of each cord to the underside of the balloon rim and the other to the top edge of the basket, spacing them evenly around so the basket hangs square.
- Hold the piece up before the final knots and adjust any cord that is pulling short, because a tilted basket is very hard to correct once everything is sewn.
Daisy Garland
- A garland of white daisies with yellow centres and green leaves wraps around the middle of my balloon and across the front of the basket.
- Work each daisy by making a small yellow centre ring, then working a round of petals around it in white, making as many flowers as you need to span the garland.
- Work the leaves as small green ovals or short chained spikes, keeping them smaller than the flowers.
- Chain a tan vine long enough to run around the balloon, then sew it in a gentle curve across the widest section.
- Sew the daisies along the vine at even intervals and tuck a leaf or two beside each one.
- Add two or three more daisies with leaves directly onto the front of the basket, which is where mine sit.
The Pig Passenger
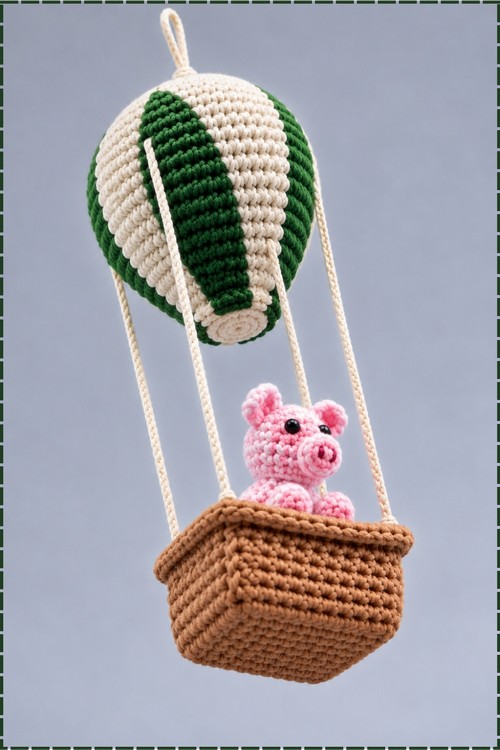
- A small pink pig rides in my basket, and no pig appears in the plain pattern, so work it as a simple seated amigurumi.
- Make the head as a stuffed ball in pink, increasing to your chosen width, working straight rounds and then decreasing back down.
- Work a flat oval snout in a deeper pink and sew it to the centre of the face, then add two small nostril stitches in dark thread.
- Attach small black safety eyes either side of the snout before closing the head.
- Make two ears as small triangles or folded flat pieces, sewing them to the top of the head with a slight forward tilt.
- Work the body as a smaller stuffed ball and the arms as two short stuffed tubes, sewing the arms to the sides so they rest on the basket rim.
- Sit the pig inside the basket and tack its base to the basket floor so it stays upright.
Tips and Troubleshooting
- Wind each colour into its own small ball before you start. Two full skeins tangle constantly when you are carrying yarn around 54 stitch rounds.
- If your stripes spiral instead of running vertically, your colour changes are drifting. Mark the first stitch of each colour block with a scrap of thread for the first few rounds until the rhythm settles.
- Check that the carried yarn is not visible through the stitches after round 9. If it peeks through, drop a hook size and the fabric will tighten up.
- Stuff in layers rather than all at once, pushing filling to the widest round first so the balloon does not go lumpy in the middle.
- Pin the base plug all the way around before sewing. A 24 stitch circle sewn into a 24 stitch opening only looks right if the two line up exactly.
- Make all the cords at once from the same chain count so they match. Measuring them separately almost always gives you one short cord.
Yarn Substitution
Cotton gives the sharp stripe edges and firm shape in my photo, and it is the better pick for tapestry work since it does not fuzz over the colour lines. Acrylic works fine and is softer to handle, though the balloon holds its shape a little less crisply. Use the same yarn and weight for both colours, because one thicker strand pulls the panels uneven. Skip anything fluffy or variegated, since both hide the stripes the whole pattern is built around.
Customization Ideas
- Swap the green for blue, coral or lavender and keep the cream for a different nursery palette.
- Use two shades of the same colour for a softer tonal balloon.
- Leave the garland off for a cleaner look, or run it lower down the balloon body.
- Put a different animal in the basket, or fill the basket with small crochet flowers instead.
- Sew the hanging loop longer and hang the whole piece from a nursery ceiling or a mobile.
Frequently Asked Questions
I have never done tapestry crochet. Can I still make this? Yes, and this is a good first project for it since there are only two colours and the panels are wide. Work the first three rounds slowly, and the rhythm of carrying the yarn becomes automatic well before round 10.
What does carrying the yarn actually mean? It means laying the unused colour along the top of the stitches you are about to work into, then crocheting over it so it sits hidden inside the fabric. The strand travels with you all the way around instead of being cut and rejoined at each colour change.
Why does my balloon look hexagonal instead of round? Your increases are stacking in the same spot each round. The pattern deliberately shifts the increase position inside the panel on several rounds, so follow the exact placement written for each round rather than putting the increase in the same place every time.
My colour changes look messy. What am I doing wrong? Almost certainly the timing. Make the switch on the final yarn over of the last stitch in the old colour, so the top of that stitch is already the new colour when you begin.
Can I skip the base plug and just close the bottom with decreases? You can, but the flat 24 stitch circle gives the balloon its proper base shape and a firm surface for the cords to hang from. Decreasing to a point makes the bottom look like a bauble rather than a balloon.