
Plush Hippo Crochet Pattern Free With Toothy Smile
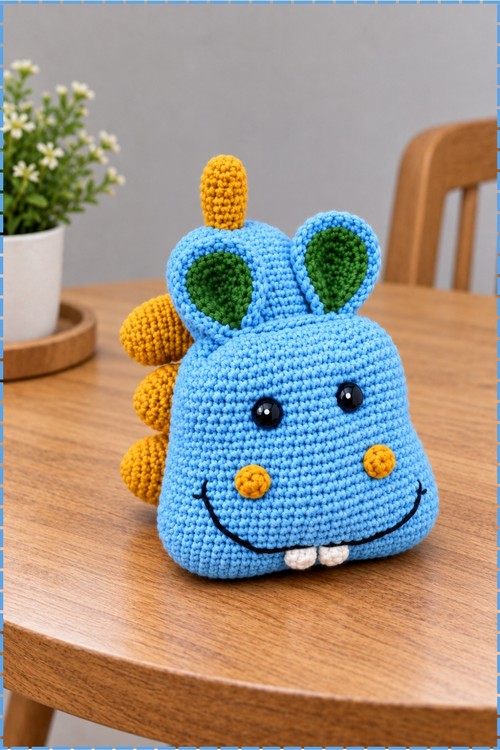
Leg placement stops being guesswork here, because a single back loop round leaves a ridge that marks where all four legs attach. Bright blue cotton, green lined ears, yellow spikes and pink cheeks give the toothy hippo a playful look on any nursery shelf.
Teeth poking out under a crooked grin give this crochet hippo plush the look of something pleased with itself. Spikes down the back say dinosaur, the face says otherwise. That mismatch is the joke. Kids pick up the crochet hippo plush and decide for themselves what animal they are holding.
Crochet Hippo Plush
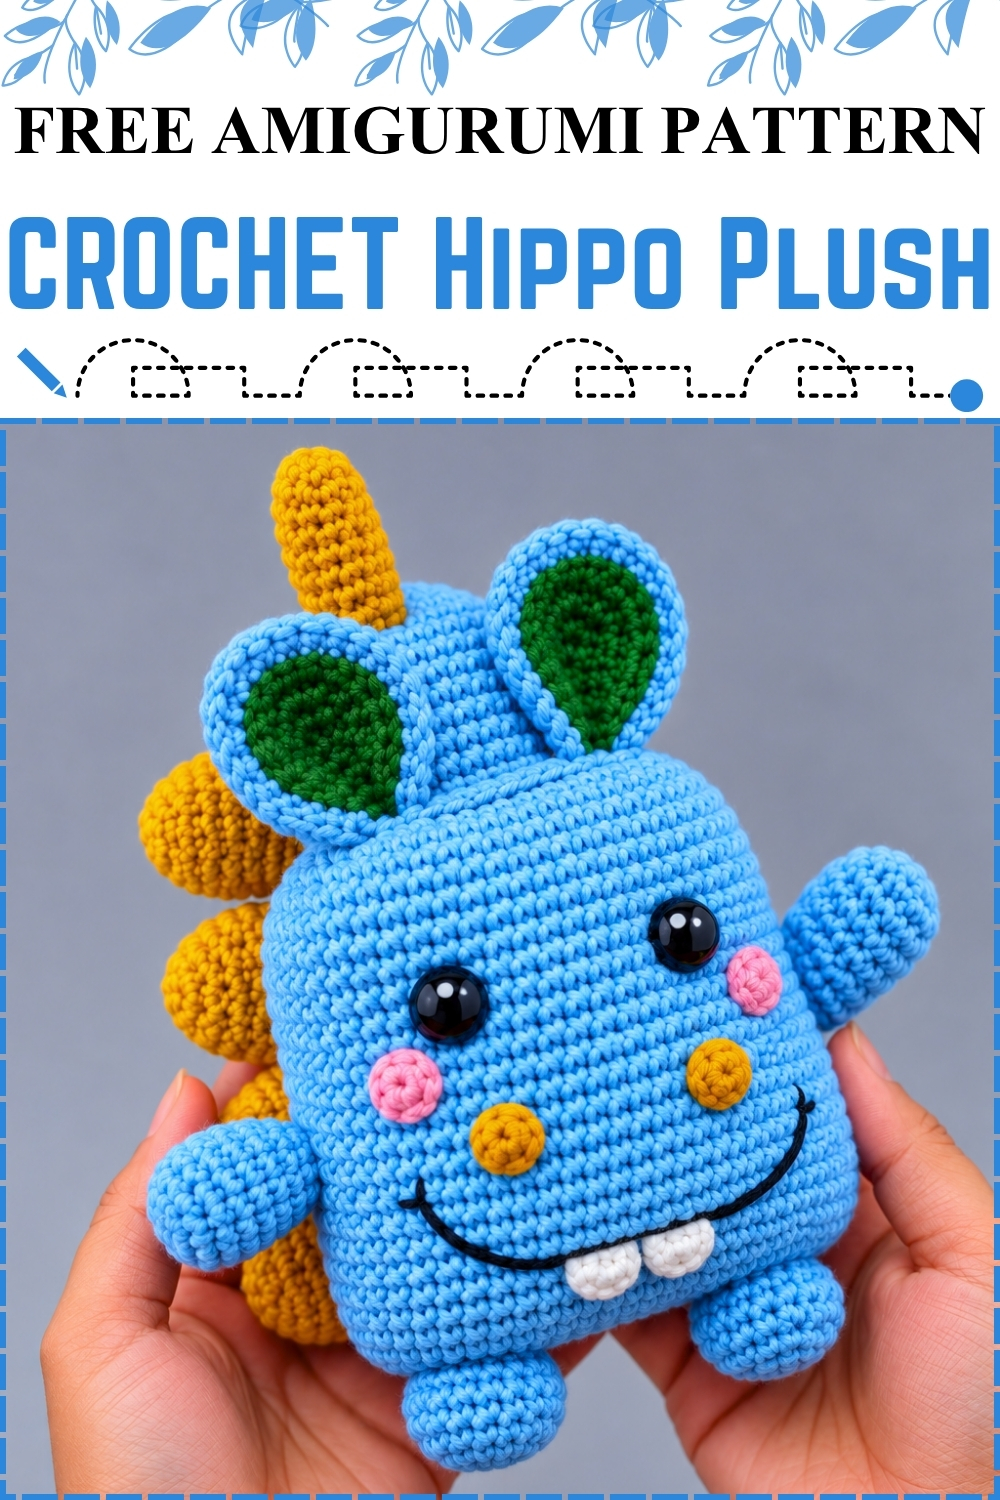
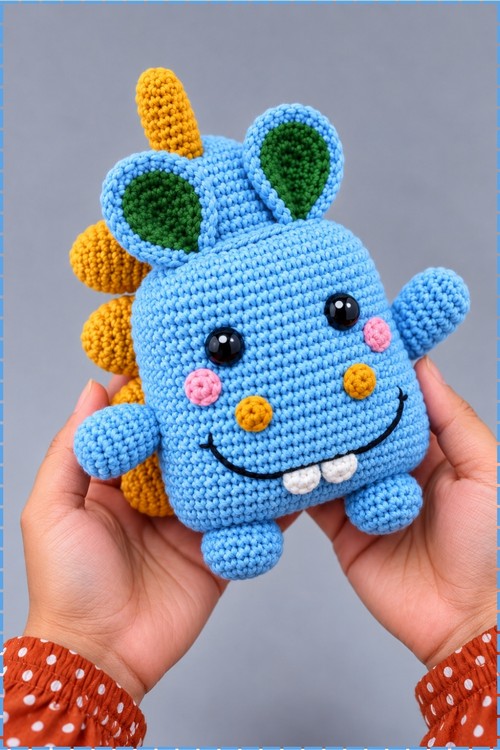
Rows rather than rounds shape the main body of this crochet hippo plush, growing outward to 68 stitches across both sides before narrowing and widening again into a broad squared torso. One round worked in back loops only leaves a visible ridge partway down, and that ridge becomes the placement line for all four legs later, which saves a lot of guessing at assembly. Mine came out bright blue with green lined ears, yellow nostrils and a row of yellow spikes running down the back. Black safety eyes and pink cheeks finish the face.
Materials and Tools
- Blue worsted or DK cotton yarn for the main body, legs, ears, arms and tail
- Green yarn in the same weight for the inner ears
- Golden yellow yarn for the nostrils and the back spikes
- Pink yarn for the cheeks
- Black yarn or embroidery thread for the mouth
- White yarn for the teeth
- Black safety eyes, or black yarn if you prefer the crocheted eyes the plain pattern gives
- Polyfill stuffing
- Tapestry needle, stitch marker and scissors
- A hook one or two sizes below your yarn label so the stuffing stays hidden
I used a smooth cotton, which is what keeps the squared body looking crisp rather than slumping once it is stuffed.
Difficulty and Time
I would call this an intermediate make, mostly because the body shaping runs through several expansion and decrease sections rather than a single predictable sequence. The body took me a long evening, and the legs, ears, spikes and face details filled another. Those timings are my own pace and yours will shift with hook speed and how fussy you get about the face.
Beginner Technique Notes
- Single crochet, written as SC, carries the entire plush, so there is no complicated stitch work here.
- Increase, written as INC, means two single crochet in one stitch, and decrease, written as DEC, joins two stitches into one.
- Magic ring, written as MR, is the adjustable loop that starts the small round pieces.
- Back loops only, written as BLO, means inserting your hook under just the back strand. The round worked this way deliberately leaves a ridge on the surface, so do not try to hide it.
- Chain is written as CH.
- Keep a stitch marker in place through the body rows, since the counts shift often and losing your spot mid section is hard to recover from.
- Stuff firmly in the body and lightly in the legs. A rigid body with soft legs is what gives this hippo its sturdy sit.
The Pattern
Main Body and Head
- Work the body as one large piece starting around the snout and neck area, expanding outward before decreasing into the torso.
- Expansion: Work in rounds using single crochet and increases placed at the edges, building the count gradually to 32 and then 34 on each side, which brings you to [68 sts] in total.
- Straight rows: Once you reach 68 stitches, work 8 straight rows of single crochet with no increases or decreases [68 sts]. These rows set the height of the upper body, so keep your tension even or one side will read taller than the other.
- First decrease section: Begin decreasing down to [60 sts], then [58 sts], then [56 sts].
- Second expansion for the lower body: Increase back up to [60 sts], then [76 sts]. The piece should now be clearly wider at the belly than at the chest, which is what gives the hippo its bottom heavy look.
- Back loops only round: Work 1 round of 76 single crochet in back loops only [76 sts]. The front ridge this leaves behind is your leg placement guide, so resist the urge to tidy it away.
- More straight rows: Work 8 straight rows of 76 single crochet [76 sts].
- Final decreases: Decrease steadily down to [71 sts], then [46 sts], then [36 sts].
- Stuff the body firmly, pushing filling right into the corners so the squared shape holds.
- Squeeze the final 36 stitch opening flat into a triangular shape and sew it closed. This flat triangle becomes the neck joint where the head attaches.
Legs, Make 4
- Round 1: Start with a magic ring and increase up to [12 sts].
- Middle rows: Continue increasing, then work a short decrease sequence that brings the working round to [14 sts], and adjust finally to a base of [22 sts].
- Length: Work 6 straight rows of 22 single crochet [22 sts].
- Stuff each leg lightly so it stays soft and bends against the body rather than sticking out stiffly.
- Fold the top opening flat and single crochet through both sides, about 10 single crochet, to close it.
- My hippo uses two of these as front arms held out to the sides and two as lower legs, all in blue.
Ears, Make 2
- Work the outer ear in blue: magic ring with 6 single crochet [6], increase around [12], then [1 SC, INC] around [18], then [2 SC, INC] around [24], then [3 SC, INC] around [30].
- Work the inner ear in green: magic ring with 6 single crochet [6], increase around [12], then [1 SC, INC] around [18], then [2 SC, INC] around [24].
- Place the green inner ear over the blue outer ear, fold both slightly into a cupped shape and single crochet the edges together.
- The green circle is smaller on purpose, which leaves the blue border visible all the way around as it does on mine.
- Cup the ears firmly as you join them, since flat ears read as leaves rather than hippo ears.
Nostrils, Make 2
- Using yellow yarn, make a magic ring with 4 single crochet [4 sts].
- Slip stitch to close and leave a long tail for sewing.
- Mine sit as two small raised yellow dots side by side on the snout.
Eyes, Make 2
- Make a magic ring with 6 single crochet [6 sts].
- Squeeze the circle gently so it takes on an oval, longitudinal shape.
- My hippo uses black safety eyes with a white highlight instead of these crocheted ovals, so treat this step as the alternative if you prefer a soft toy with no plastic parts.
Tail
- Chain 7 and skip the last chain.
- Work 6 single crochet down one side of the chain and 6 single crochet up the opposite side [12 sts].
- Work 10 straight rows of 12 single crochet [12 sts].
- Flatten the top and close with 5 single crochet.
- Stuff the tail only lightly so it keeps a soft droop rather than standing out stiff.
Back Spikes
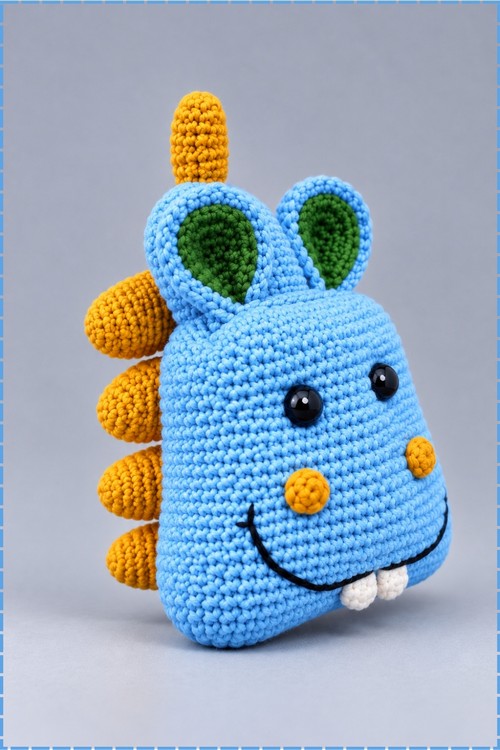
- A row of golden yellow spikes runs down the back of my hippo, which the plain pattern does not include, so work them as small stuffed cones in yellow yarn.
- Start each spike with a magic ring, increase for a few rounds until it reaches the width you want, then work straight rounds until it is as tall as you like.
- Make the spikes in graduated sizes, with the tallest at the top of the back and each one smaller as you move down toward the tail.
- Stuff each spike lightly and leave the base open with a long tail for sewing.
- Sew them in a single line down the centre back, starting just behind the ears and spacing them evenly so the row tapers naturally.
Cheeks
- Two pink cheeks sit on my hippo's face, which the plain pattern leaves out, so work each as a small flat circle in pink yarn.
- Begin with a magic ring and increase for a round or two until the circle reaches the size you want, then fasten off with a tail for sewing.
- Sew one cheek on each side of the face, level with the lower edge of the eyes and set outward toward the sides of the head.
Assembly
- Sew the four folded legs to the bottom of the body, using the back loops only ridge as your placement guide and attaching them directly in front of that ridge so they face forward.
- Pin all four before sewing any of them, since a leg set even slightly off makes the hippo lean.
- Sew the tail to the back centre of the body, positioned slightly below the bottom seam line where the body was closed off.
- Position the head over the triangular closed section at the neck joint and sew it securely in place.
- Sew the oval eyes onto the face between rows 9 and 11, or insert safety eyes at the same position if you are using them as I did.
- Sew the two yellow nostrils onto the snout, about 5 to 6 rows directly below the eyes.
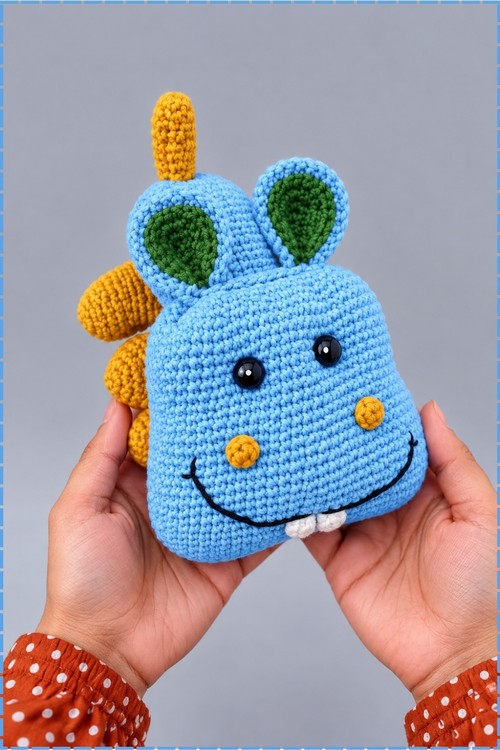
- Embroider a wide smiling mouth line in black yarn below the nostrils, curving the ends upward past the nostril line.
- Embroider two square teeth in a doubled strand of white yarn, resting them on the bottom lip so they sit just under the centre of the smile.
- Sew the ears to the top of the head with the green side facing forward, angling them slightly outward.
- Attach the pink cheeks last, holding the piece at arm's length first to check they sit level.
Tips and Troubleshooting
- Mark the back loops only ridge with a scrap of contrast yarn as soon as you finish that round. It is easy to lose once the body is stuffed, and it is the only thing keeping your four legs in line.
- Stuff the body in stages while you still have a wide opening. Once you reach the 36 stitch close, there is barely room to correct a thin spot.
- Pin the face before sewing anything down. Eyes, nostrils, mouth and cheeks all shift the expression, and a single centimetre changes the whole character.
- Keep the mouth embroidery in one continuous line rather than short stitches. Broken lines look wobbly on a curved surface.
- Make the spikes in one sitting so they stay consistent in tension. Spikes crocheted days apart rarely match.
- If the body leans forward, your front legs are set too far ahead of the ridge. Move them back a stitch or two and the weight evens out.
Yarn Substitution
Cotton gives the clean stitch definition and firm squared body in my photo, which matters on a plush with large plain surfaces and no texture to hide behind. Acrylic works and makes a softer toy, though the body holds its shape less crisply once handled. Use the same weight across all colours so the spikes, ears and nostrils stay in proportion. Avoid fuzzy yarns, since the embroidered mouth and teeth disappear against any pile.
Customization Ideas
- Swap the blue for grey, lilac or mint and keep the yellow details for contrast.
- Leave the back spikes off for a plain hippo, or add more of them for a dinosaur crossover.
- Skip the teeth for a softer, younger looking face.
- Use crocheted eyes instead of safety eyes for a baby safe version.
- Make the tail longer by adding straight rows, keeping the stitch count at 12.
Frequently Asked Questions
Should I use safety eyes or the crocheted ovals? Both work and the placement is identical. I chose black safety eyes for the glossy finish, but the crocheted ovals from the pattern are the right call for anything going to a baby.
Why does my body look round instead of squared? Under stuffing in the corners. Push filling deliberately into each corner of the body before closing, because fiberfill naturally settles toward the middle and leaves the edges soft.
How do I keep the four legs even? Use the back loops only ridge as a straight line and count stitches between each leg before sewing. Eyeballing the spacing on a 76 stitch round almost always drifts.
My teeth look lumpy. What is the fix? Keep the white stitches short, parallel and side by side, and work them over the black mouth line rather than beside it. Two tidy squares read far better than a wide block of white.
Can I make the hippo without the spikes? Yes. The back is a plain blue surface underneath and looks complete on its own. The spikes are an addition on my version, not a structural part of the pattern.