
Crochet Amigurumi Duckling Free Pattern
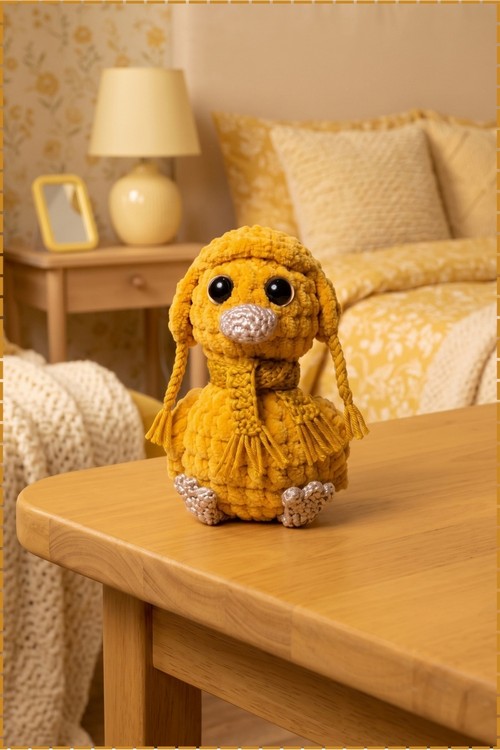
Makers twist two or three strands of mustard yarn into cords for the tasselled scarf, the detail that lifts this crochet duckling above a plain round duck. Plush yarn on a 4 mm hook builds the head and body in one piece, with grey beak, feet and copper rimmed eyes.
Spring baskets and Easter tables are where this crochet duckling amigurumi belongs, scarf and all. Make a few in the weeks before, since the crochet duckling suits a hunt prize better than chocolate. Cold mornings in March still call for that fringe. Keep one out through the whole season.
Crochet Duckling Amigurumi
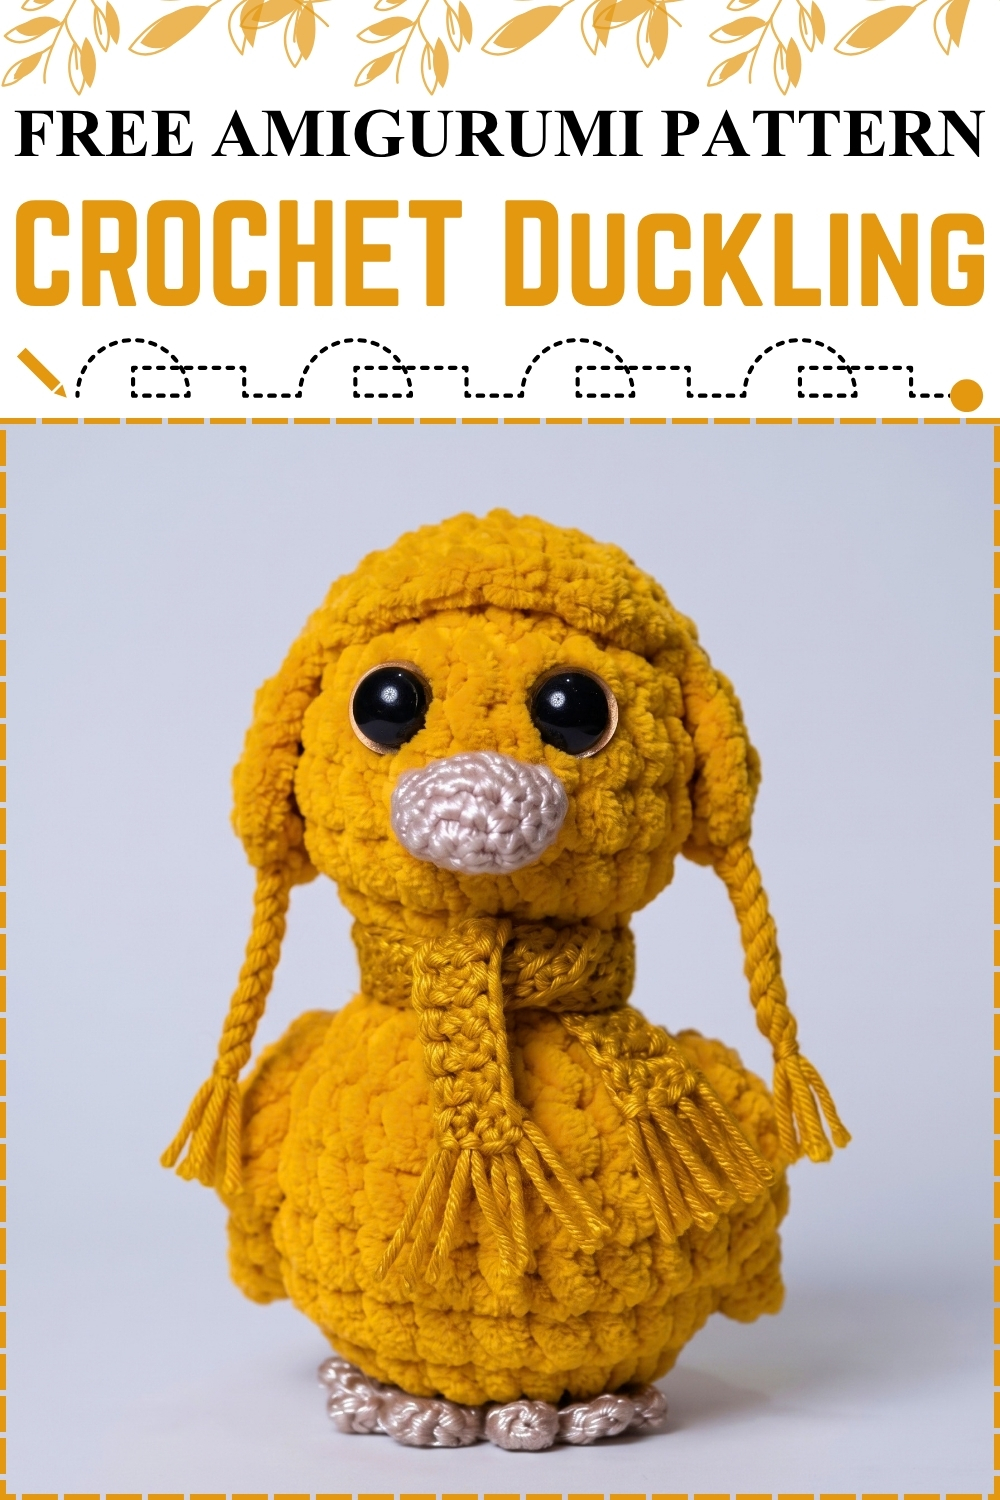
Picture a small golden duck sitting upright on a shelf, round head resting on an equally round body, tiny tassel scarf looped at the neck, wings trailing down each side like stubby arms. That is exactly what this crochet duckling amigurumi becomes by the time the last end is woven in. Head and body work as one continuous piece in deep mustard yellow plush yarn, so the neck pinch happens naturally without any sewing. The pale grey beak and feet add just enough contrast to make the face pop. Big domed safety eyes with copper rims finish the look.
I love this one because the scarf detail transforms a plain round duck into something with real personality, and it takes almost no extra time to add.
Materials And Tools
- Deep mustard yellow plush or chenille yarn for the head, body, wings, and scarf
- Pale grey or beige plush yarn for the beak and feet
- Crochet hook 4.0 mm to 4.5 mm, or the size that gives tight stitches with your plush yarn
- Large domed safety eyes, around 14 mm to 16 mm, with copper or gold coloured backing rings
- Polyester fiberfill
- Tapestry needle
- Stitch marker
- Scissors
Why I Love This One
The scarf is the whole reason this duck stands apart from every other round plush bird. Two lengths of yarn twisted into cords and finished with small cut tassels take about five minutes and make the finished toy look considered rather than basic. If you ever make a batch of these as gifts, the scarf is the detail people comment on first.
The Pattern
The Beak
- Round 1: chain 5 in pale grey yarn, starting in the second chain from the hook, work 3 single crochet (sc, insert hook, pull up a loop, yarn over, pull through two loops), then 3 sc in the last chain. Working along the bottom of the foundation chain, work 2 sc, then an increase (inc, 2 sc in the same stitch) in the last chain [10]. The oval beak shape appears as soon as you close this first round, and mine reads as a small flat oval rather than a rounded puff.
- Round 2: work 10 sc around [10]. Keep your tension even here so the beak stays symmetrical front to back.
- Fasten off, leaving a long tail for sewing. Add only a tiny pinch of stuffing before sewing on if you want the beak to sit forward slightly, as mine does in the photo.
The Head And Body
- Round 1: work 6 sc into a magic ring (MR, an adjustable loop) [6].
- Round 2: work an increase in every stitch [12].
- Round 3: work 1 sc, 1 inc, repeat 6 times [18].
- Round 4: work 2 sc, 1 inc, repeat 6 times [24].
- Round 5: work 3 sc, 1 inc, repeat 6 times [30].
- Round 6: work 4 sc, 1 inc, repeat 6 times [36].
- Rounds 7 to 11: work 36 sc around for 5 rounds [36]. These straight rounds build the tall rounded head that gives the duckling its oversized cute proportion.
- Round 12: work 4 sc, 1 decrease (dec, two stitches joined invisibly into one), repeat 6 times [30].
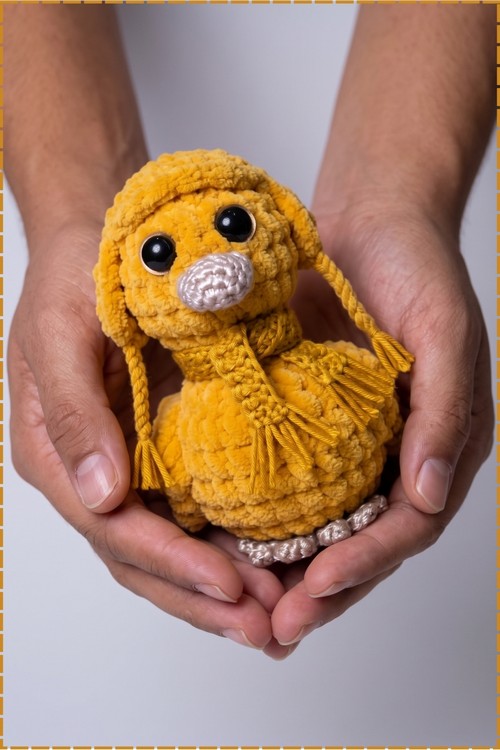
- Round 13: work 3 sc, 1 dec, repeat 6 times [24]. Insert the large domed safety eyes between rounds 9 and 10 now, roughly 6 to 7 stitches apart. On my duck the eyes sit wide and low, which is what creates that wide eyed look with the copper rings catching the light. Sew the pale grey beak centred between the eyes at this point too, because closing the head any further makes positioning much harder.
- Round 14: work 2 sc, 1 dec, repeat 6 times [18].
- Round 15: work 1 sc, 1 dec, repeat 6 times [12]. Stuff the head firmly now with fiberfill in small pieces, packing the cheek sides full so they stay round.
- Round 16: work 1 sc, 1 inc, repeat 6 times [18]. This is where the body begins widening again from the neck point, and you will feel the piece naturally cinch at the neck as you work.
- Round 17: work 2 sc, 1 inc, repeat 6 times [24].
- Round 18: work 3 sc, 1 inc, repeat 6 times [30].
- Round 19: work 4 sc, 1 inc, repeat 6 times [36].
- Rounds 20 to 24: work 36 sc around for 5 rounds [36]. The body should now mirror the head in size, which is what gives the finished duck its stacked ball look.
- Round 25: work 4 sc, 1 dec, repeat 6 times [30].
- Round 26: work 3 sc, 1 dec, repeat 6 times [24].
- Round 27: work 2 sc, 1 dec, repeat 6 times [18]. Stuff the body firmly before the opening gets too small to work through comfortably.
- Round 28: work 1 sc, 1 dec, repeat 6 times [12].
- Round 29: work 6 dec [6]. Fasten off, weave the yarn tail through the front loops of the remaining 6 stitches, pull tight to close, and bury the end through the centre of the body.
The Wings
- Round 1: work 6 sc in a magic ring [6].
- Round 2: work 1 sc, 1 inc, repeat 3 times [9].
- Round 3: work 2 sc, 1 inc, repeat 3 times [12].
- Round 4: work 12 sc around [12].
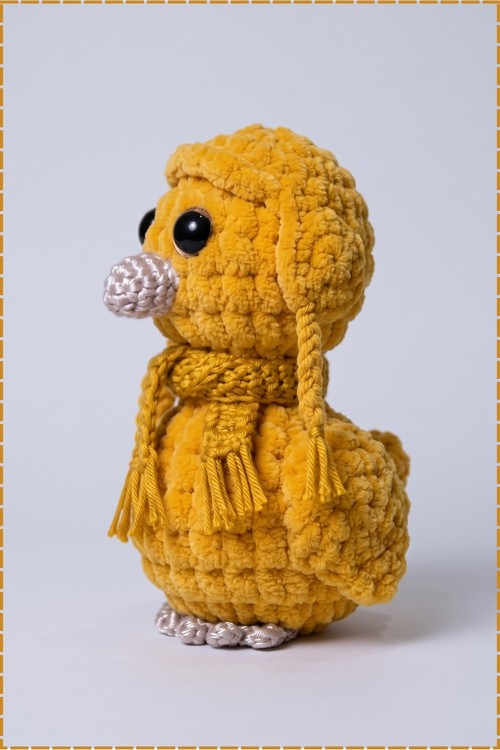
- Round 5: work 2 sc, 1 dec, repeat 3 times [9]. Do not stuff the wings. Flatten each wing and crochet across the top edges together with 4 sc to close them flat. Fasten off leaving a long tail for sewing. On my duck the wings hang straight down either side of the body rather than sticking out, so I sewed them flush against the body sides rather than at an angle. Make 2.
The Feet
- Round 1: work 6 sc in a magic ring in pale grey yarn [6].
- Round 2: work an increase in every stitch [12].
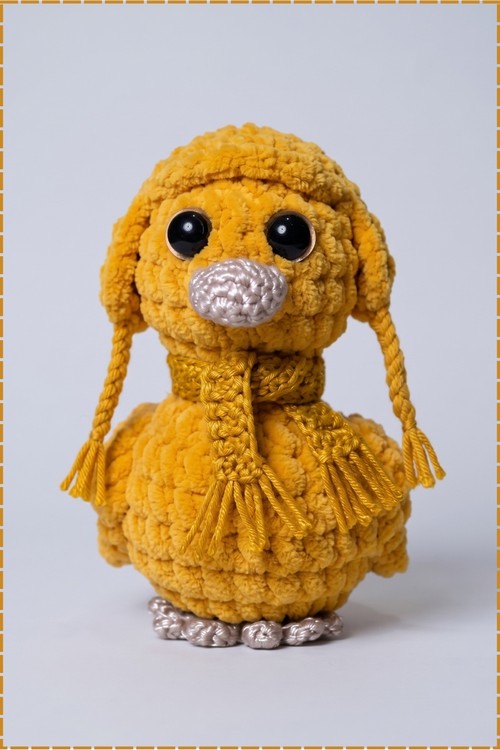
- Round 3: work 12 sc around [12]. Flatten and sew each foot flat onto the bottom base of the body. My feet are oriented with the flatter edge inward so the duck sits level. Make 2.
The Scarf
- Cut several lengths of deep mustard yellow yarn, each around three times the length you want your finished scarf tails.
- Hold two or three strands together and twist them tightly in one direction until the length starts to kink back on itself, then fold the twisted length in half and let it twist back on itself to form a cord. This makes one scarf side.
- Repeat to make a second cord of the same length for the other side.
- Trim the loose ends on each cord into small cut tassels, three to five strands each, and knot them close to the end so they splay out.
- Loop both cords together around the neck of the duck at the natural cinch between head and body, knot loosely at the front so both tasselled ends hang down, and arrange them so the tassels fan out slightly at the bottom. Mine hangs asymmetrically in the photo, which reads as more natural than a perfectly centred knot.
Customisation Ideas
- Swap the scarf for a tiny crocheted bow in a contrasting colour, or leave the neck plain for a simpler look.
- Use orange yarn for the beak and feet if you want a more classic duck colour scheme instead of the grey my version has.
- Make the eyes smaller, around 10 mm, for a less dramatic expression.
- Add a simple chain loop at the back of the head to turn it into a hanging ornament for an Easter tree or spring wreath.
- Work the scarf cords in a different colour, cream or white, for a winter duck.
Yarn Substitution
Plush or chenille yarn gives the dense fluffy texture you see in my photo, and it is worth sticking with that family for this project. Standard acrylic will work but looks flat by comparison. If you do switch to acrylic, go down a hook size to keep the fabric tight enough to hide the stuffing. Avoid velvet yarn with this pattern since the stitches are already hard to see in plush, and velvet makes counting rounds on the decrease sections genuinely frustrating.
FAQ
Can I make this without the scarf? Absolutely. The pattern gives you a complete duck before the scarf step. Skip it entirely or replace it with a simple chain necklace in a contrasting colour.
Why does my duck lean forward instead of sitting upright? The most common cause is the feet not sitting flat under the centre of the body base. Reposition them slightly toward the back of the base so they prop the weight of the head. Heavier stuffing at the bottom of the body also helps.
My plush yarn keeps splitting on the hook. What should I do? Use a hook with a rounded tip rather than a sharp one, and slow down on the pull through. Blunt tipped hooks, sometimes sold as amigurumi hooks, grip plush fibres without catching and splitting them.
How long does this take to make? In my experience a relaxed sitting of around four to six hours covers everything from the beak to sewing on the feet, with the scarf taking perhaps fifteen minutes on top of that. Plush yarn is slow to count but fast to stitch.