
Crochet Donut Amigurumi Free Pattern
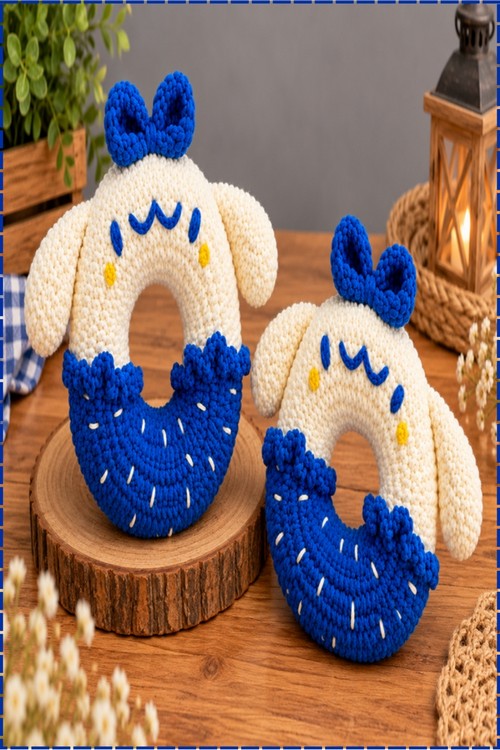
Folded from one long hollow tube and seamed into a ring, the crochet donut grows into a cushion sized plush that fills two hands. Royal blue icing with wavy drips and white stitched sprinkles covers the cream base, and embroidery forms the whole face.
Floppy ears and a bow turn this Crochet Donut into a birthday gift that beats anything shop bought. Spring parties and baby showers suit it too. Work the Crochet Donut in holiday shades and it becomes a seasonal table piece. Keep one Crochet Donut back for Easter baskets next spring.
Crochet Donut
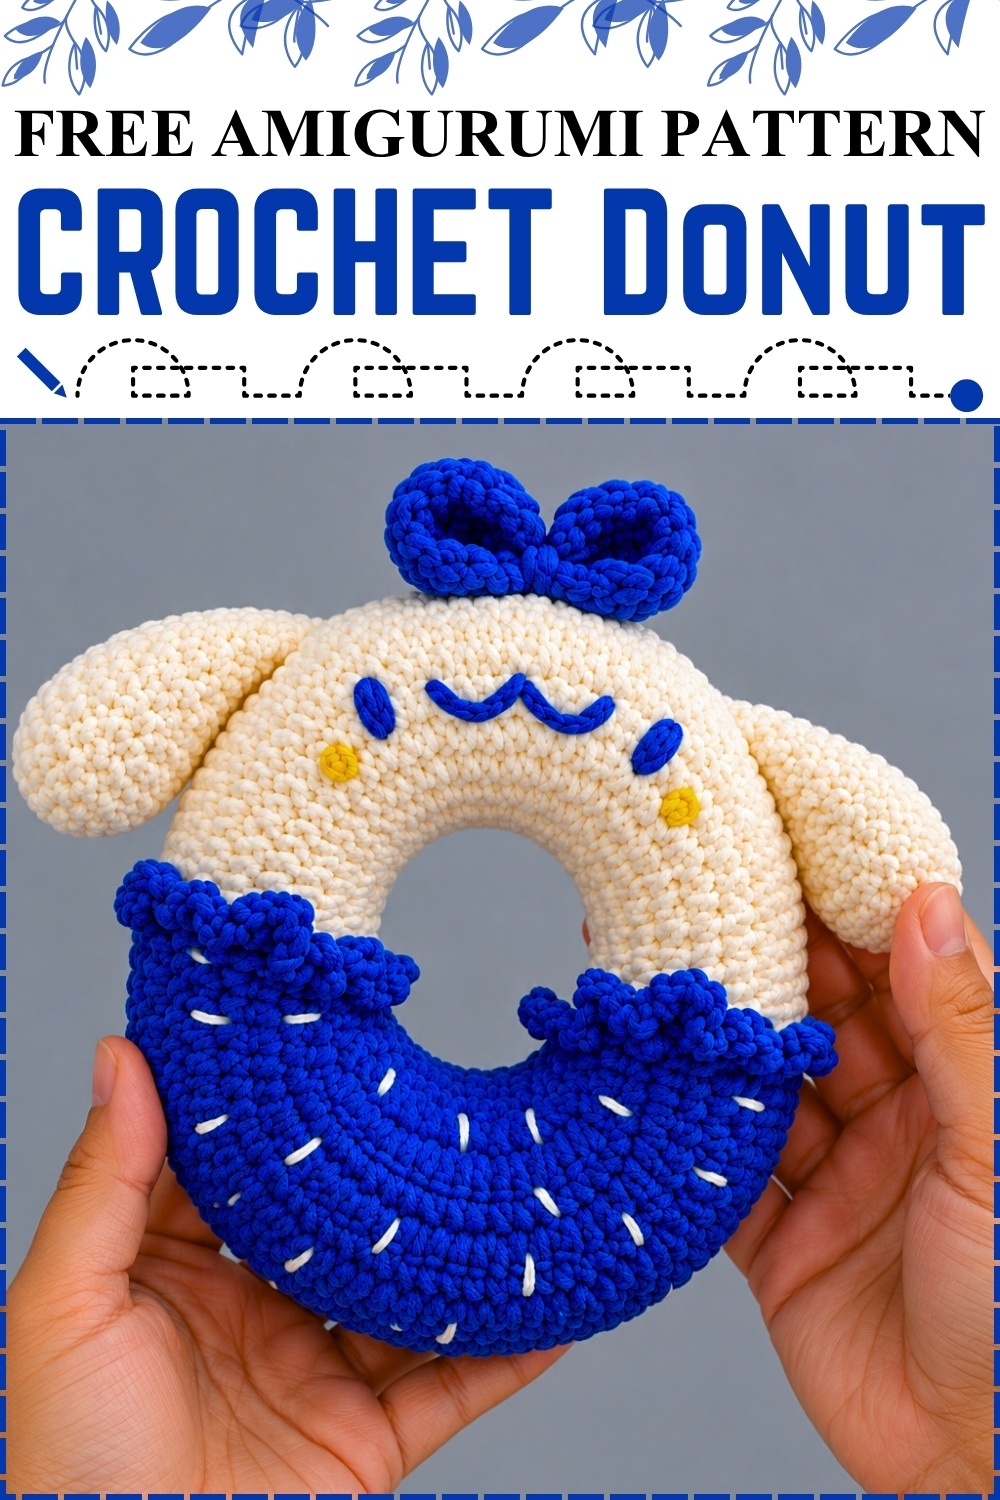
Built as a long hollow tube that gets folded and seamed into a ring, this crochet donut turns into a cushion sized plush big enough to fill two hands. Royal blue icing sits over the lower half of my cream body with wavy drips and scattered white sprinkles stitched across it. Long floppy ears hang from each side, and a small blue bow perches at the top. Embroidery handles the whole face, so no safety eyes are needed anywhere. Stuffing happens gradually as you close the seam, which keeps the ring plump and even all the way around.
Why I Love This One
Mine ended up as the plush everyone picks up first, because the long ears beg to be flopped around and the ring shape makes it easy to carry by the hole.
The Story Behind My Version
I started this one meaning to follow the pink icing exactly, then pulled a ball of royal blue velvet out of the basket and held it against the cream body. The contrast was so much stronger that the pink never made it back into the project. Once the blue was in, the face had to follow, so the eyes and the smile went in blue too, and the cheeks became small yellow dots instead of pink patches. The bow came last, after the ears looked a little bare on top. White sprinkles across the blue icing finished it, and the whole thing suddenly read like a real character rather than a food plush.
Materials and Tools
- Super chunky or plush velvet yarn in cream for the donut body, the ears, and the bow base if you want it to match
- Royal blue velvet or chunky yarn for the icing layer, the eyes, the smile, and the bow
- Small amount of white yarn for the sprinkle stitches
- Small amount of yellow yarn for the cheek dots
- Crochet hook between 6.0 mm and 8.0 mm, sized to suit your plush yarn
- Fiberfill polyester stuffing
- Tapestry needle, stitch markers, scissors
Difficulty and Time
This sits at an intermediate level, not because any single stitch is hard but because the assembly takes patience. Everything is single crochet, increases, and decreases, with taller stitches only in the drip edge. From my own run at it, the body and icing took one long evening and the ears, bow, face, and sewing filled a second. Plush yarn hides stitches, so expect to work slower than usual and to count by feel more than by sight.
The Pattern
Part 1: The Cream Donut Body
- Chain 30, or more if you want a wider inner hole, then join with a slip stitch to the first chain to form a ring, keeping the chain flat and untwisted. A twist here cannot be corrected later without pulling everything out.
- Rounds 1 to 3: Work 1 single crochet in each chain and stitch around for all three rounds. This short tube is the inner wall of the donut hole. (30 sc)
- Round 4: Work 4 single crochet, then 1 increase, which is 2 single crochet in the same stitch, and repeat that sequence around. (36 sc)
- Round 5: Work 5 single crochet, then 1 increase, and repeat that sequence around. (42 sc)
- Round 6: Work 6 single crochet, then 1 increase, and repeat that sequence around. (48 sc)
- Round 7: Work 7 single crochet, then 1 increase, and repeat that sequence around. The piece now flares outward like a wide collar. (54 sc)
- Rounds 8 to 15: Work 1 single crochet in each stitch around for all eight rounds. These straight rounds build the depth of the donut, so skipping any of them gives you a flat ring instead of a plump one. (54 sc per round)
- Round 16: Work 7 single crochet, then 1 decrease, and repeat that sequence around. (48 sc)
- Round 17: Work 6 single crochet, then 1 decrease, and repeat that sequence around. (42 sc)
- Round 18: Work 5 single crochet, then 1 decrease, and repeat that sequence around. (36 sc)
- Round 19: Work 4 single crochet, then 1 decrease, and repeat that sequence around. The two open edges should now match in size. (30 sc)
- Fasten off leaving a long cream tail, at least three times the circumference of the opening, since running out mid seam on velvet yarn is miserable to fix.
- Fold the outer edge inward so the final round meets the starting chain ring, matching them stitch for stitch all the way around.
- Sew the starting ring and the final round together one stitch at a time with the long tail, stuffing the tube firmly with fiberfill as you work your way around rather than all at once at the end. Feeding stuffing in gradually is what keeps the ring even instead of lumpy on one side.
- Keep stuffing firm enough that the donut holds its shape when squeezed but still gives a little, then close the final stitches and bury the tail inside the body.
Part 2: The Blue Icing Layer
- Chain 30 in royal blue and join with a slip stitch to form a ring, again checking for twists.
- Rounds 1 to 3: Work 1 single crochet in each chain and stitch around for all three rounds. (30 sc)
- Round 4: Work 4 single crochet, then 1 increase, and repeat that sequence around. (36 sc)
- Round 5: Work 5 single crochet, then 1 increase, and repeat that sequence around. (42 sc)
- Round 6: Work 6 single crochet, then 1 increase, and repeat that sequence around. (48 sc)
- Round 7: Work 7 single crochet, then 1 increase, and repeat that sequence around. Lay the piece over the donut now to check it covers the area you want before adding the drips. (54 sc)
- Round 8, the dripping edge: Work 1 single crochet, 1 half double crochet, 3 double crochet in the next stitch, 1 half double crochet, 1 single crochet, then 1 slip stitch, and repeat around, mixing in slip stitches, single crochet, half double crochet, and double crochet in different combinations so the drips come out at uneven heights. Even drips look mechanical, while uneven ones look like icing that actually ran down the side.
- Fasten off leaving a long blue tail for sewing.
Part 3: The Long Ears, Make 2 in Cream
- Round 1: Work 6 single crochet into a magic ring. (6)
- Round 2: Work 1 increase in each stitch around. (12)
- Round 3: Work 1 single crochet, then 1 increase, and repeat that sequence around. (18)
- Round 4: Work 2 single crochet, then 1 increase, and repeat that sequence around. (24)
- Rounds 5 to 12: Work 1 single crochet in each stitch around for all eight rounds. (24)
- Round 13: Work 10 single crochet, then 1 decrease, and repeat that sequence once more for two repeats total. (22)
- Round 14: Work 1 single crochet in each stitch around. (22)
- Round 15: Work 9 single crochet, then 1 decrease, and repeat that sequence once more for two repeats total. (20)
- Rounds 16 to 22: Work 1 single crochet in each stitch around for all seven rounds. (20)
- Round 23: Work 8 single crochet, then 1 decrease, and repeat that sequence once more for two repeats total. (18)
- Round 24: Work 1 single crochet in each stitch around. (18)
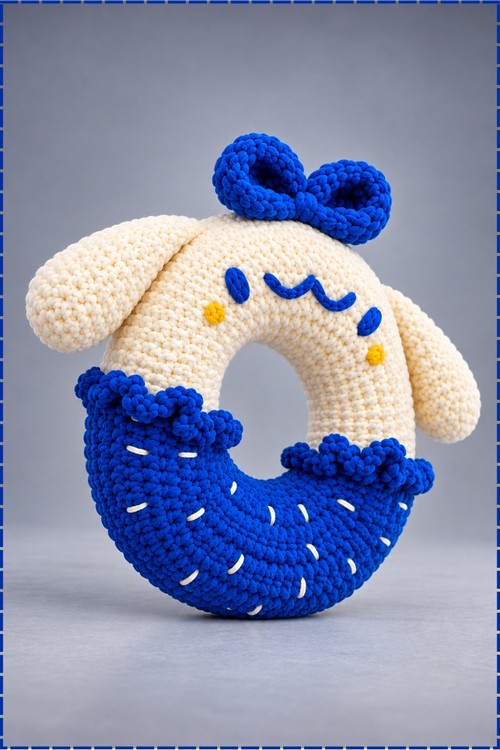
- Fasten off leaving a long tail, then flatten each ear. Mine are stuffed very lightly at the rounded tip only and left empty along the rest, which is what lets them droop sideways the way they do in my photo instead of standing up stiff.
Part 4: The Bow
- Chain in blue until the strip reaches the width you want the bow loops to be, then work single crochet back and forth in rows until the strip is as wide as you like, keeping it small enough to sit between the two ears.
- Fasten off, bring the two short ends together to form a loop, and pinch the middle.
- Wrap a separate short length of blue yarn tightly around the pinched centre several times and secure it at the back, which pulls the strip into two rounded loops.
- Leave a tail from the centre wrap for sewing the bow in place. Shape the loops with your fingers so they sit slightly apart rather than flat against each other.
Part 5: Assembly and Face
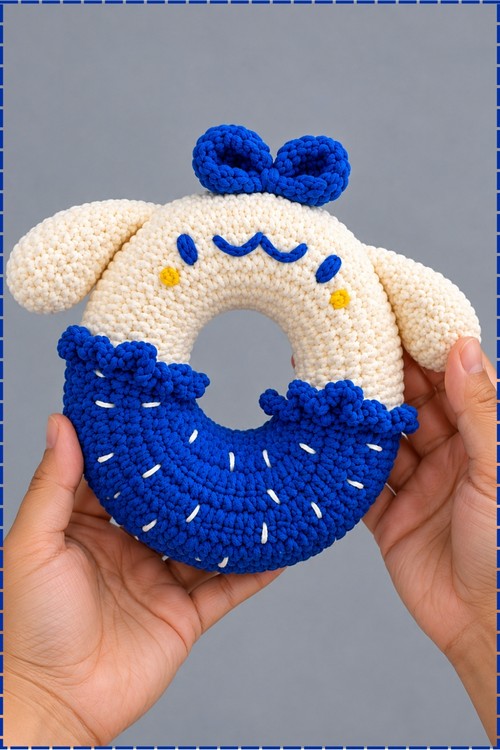
- Position the blue icing over the donut so it covers the lower portion of the ring and leaves the upper cream area clear for the face. My icing sits across the bottom half with the drips pointing upward onto the cream, which is the opposite of the usual top placement and gives the face room.
- Sew around the inner ring edge of the icing first with the long blue tail, keeping stitches small so they vanish into the velvet.
- Sew the outer edge next, catching the flat sections and leaving the drip tips loose so they lift slightly off the surface.
- Embroider the white sprinkles across the blue icing with straight stitches, placing them at varied angles and spacing them unevenly around the ring rather than in rows.
- Embroider the two eyes onto the cream upper section with blue yarn, working each as a short vertical oval and setting them well apart with the donut hole below the gap between them.
- Embroider the smile in blue between and slightly above the eyes as a soft wavy line, two gentle curves meeting in the middle.
- Add the cheeks as small yellow dots, one below the outer edge of each eye. Mine are yellow rather than pink, worked as a few tight stitches bundled into a small round patch.
- Sew one ear to each side of the donut at the widest point, angling them outward and slightly down so they hang rather than stick out. Stitch all the way around the flattened base of each ear so they stay put under handling.
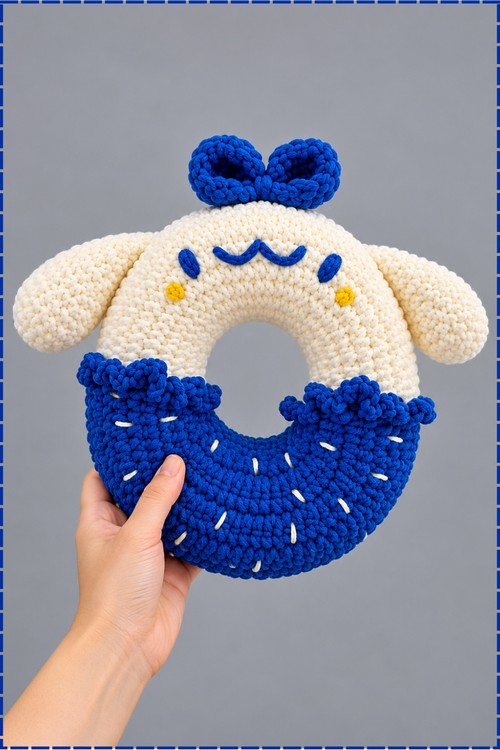
- Sew the bow to the top centre of the donut, directly above the smile and between the two ear positions, anchoring it through the centre wrap so it does not tip forward.
Tips and Troubleshooting
- Count in plush yarn by feeling for the stitch bumps rather than looking for them. Velvet hides stitch definition completely under a lamp.
- Use a stitch marker in the first stitch of every round and move it up. Losing your place in the eight straight rounds of the body is the easiest mistake to make here.
- Work tightly enough that stuffing does not show through. Chunky velvet on too large a hook leaves gaps that white fiberfill peeks out of.
- Pin the icing in place before sewing and look at it from a distance. Once it is stitched down through velvet, unpicking leaves marks.
- Embroider the face before the ears go on, while the surface is still easy to reach from the back.
- Do the eyes first and look at them before committing to the smile. Eye spacing sets the whole expression, and everything else is positioned relative to them.
Yarn Substitution
Plush velvet gives the soft rounded look in my photos, but it is slippery and splits easily. A super chunky acrylic in the same weight works with the same hook and counts, holds its stitches better, and makes the face embroidery far easier to place. Chenille sits between the two. If you drop to a worsted weight yarn with a smaller hook, every count still works and you simply get a much smaller donut, closer to a toy than a cushion. Keep the body and ears in the same yarn type so the ears drape the way the body expects.
Customization Ideas
Change the icing colour and the whole character changes with it, since the eyes, smile, and bow all follow from that choice. Pink icing with pink facial details gives the softer original look. Chocolate brown icing with cream sprinkles reads as a food plush rather than a character. Short rounded ears instead of long ones shift it from bunny to bear. A longer strip of chain sewn to the back turns the cushion into a hanging decoration for a nursery door. You can also skip the bow entirely and add a tiny crochet flower in the same spot.
Frequently Asked Questions
Can I use safety eyes instead of embroidery? You can, though the flat embroidered ovals are what give this version its expression. If you switch, place them before stuffing the body, since the backs become unreachable once the ring is seamed closed.
Should the ears be stuffed? Only lightly at the tips, if at all. Fully stuffed ears stand upright and lose the floppy drape that makes this one work. Mine are flattened with a small amount at the rounded end.
My donut looks lumpy after seaming. What went wrong? Almost always the stuffing went in all at once near the end. Add it in small handfuls as you sew around, and work it into the section you just closed before moving on.
How big does this come out? Mine fills two hands comfortably, roughly cushion sized, worked in super chunky velvet on a large hook. Yarn weight and tension change that a lot, so treat it as an estimate from my own piece rather than a measurement.