
Crochet Cooky BT21 Amigurumi Free Pattern
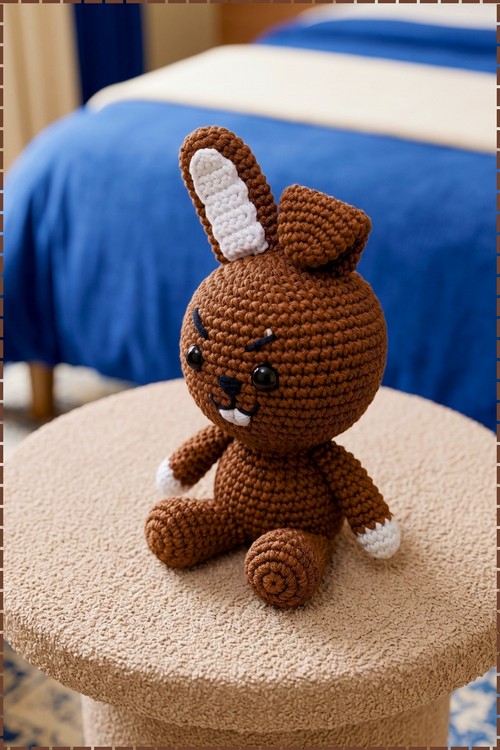
From Round 12 on, the Cooky BT21 amigurumi grows as one continuous piece above the joined legs, so no seam runs down the front. Chocolate brown cotton carries the body, and white yarn covers only the inner ear panel and the arm tips.
That raised eyebrow and lopsided ear make the Crochet Cooky BT21 Amigurumi an easy win for any BTS fan in your life. Give it to a friend who collects the whole lineup, or to a teen who wants something handmade. The Crochet Cooky BT21 Amigurumi clips onto a backpack too.
Crochet Cooky BT21 Amigurumi
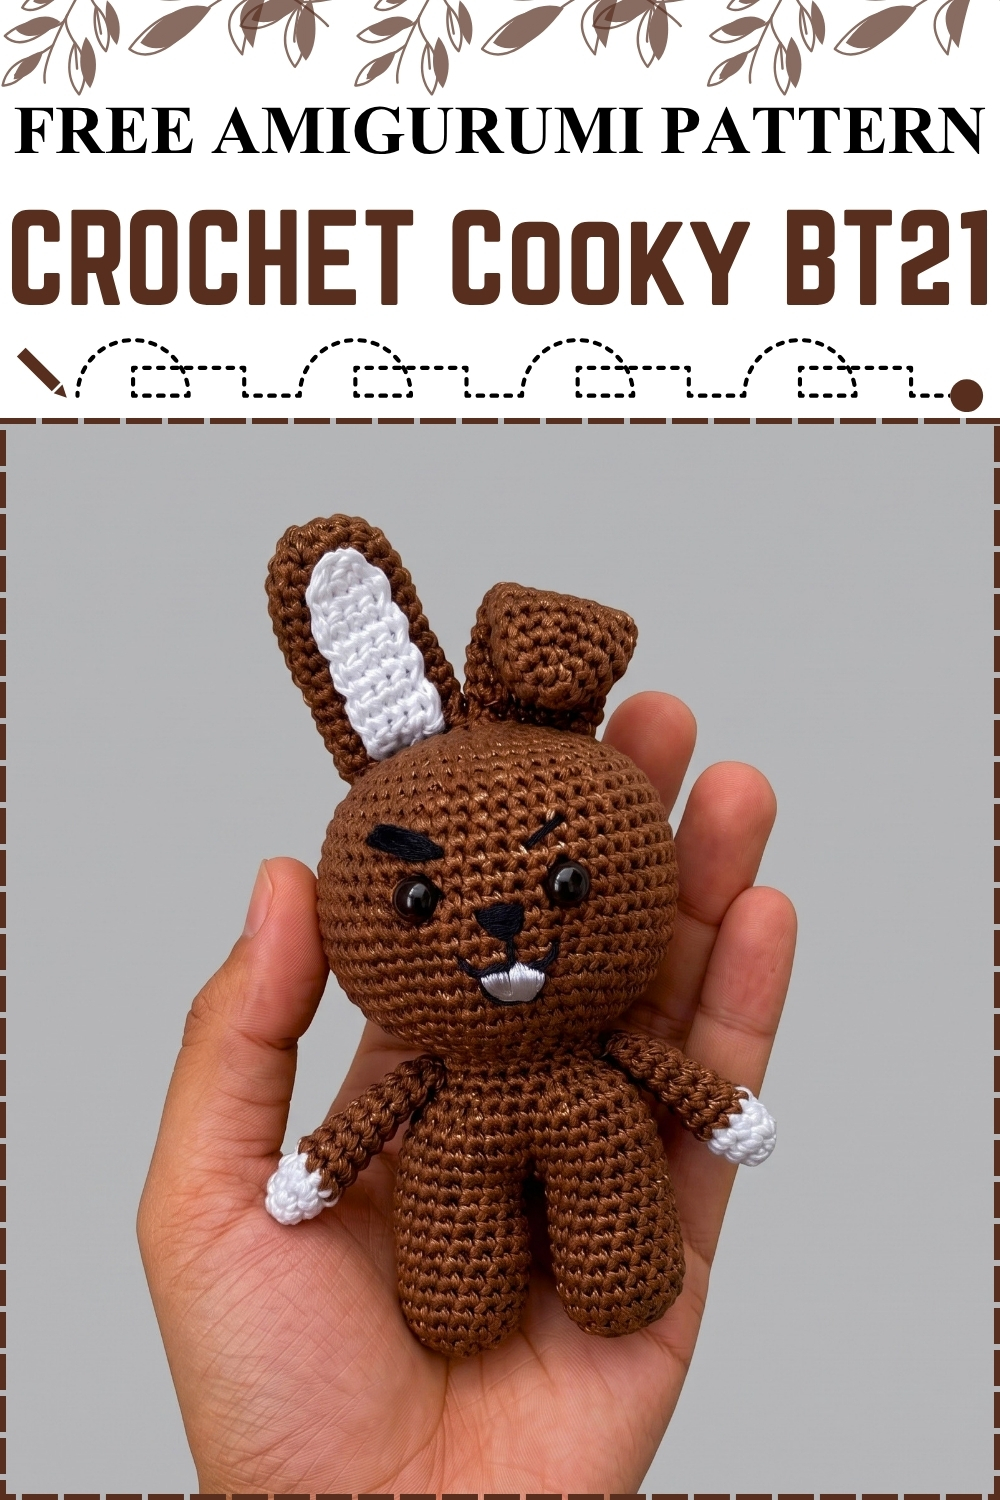
Two legs grow separately and then merge into one body, and that single join is where this crochet Cooky BT21 amigurumi starts becoming recognisable. From Round 12 onward everything is continuous, from the waist pinch up through the expanding chest to the big round head, so the finished doll has no seam anywhere along the front. The characteristic bent ear and the mismatched embroidered eyebrows are what separate Cooky from a plain bunny, and both are quick to add once the main piece is closed. My version came out in deep chocolate brown with white inner ear detail and white arm tips.
Why I Love This One
The folded ear is so small a detail and so immediately recognisable. Every BTS fan who picks it up spots it before they even look at the face.
Materials and Tools
- Cotton or sport weight yarn in deep chocolate brown for the main body, legs, arms and ears.
- White or off white yarn for the inner ear panel and the arm tips.
- Black embroidery thread for the nose, mouth and eyebrows.
- White or silver embroidery thread for a small mouth highlight. My finished piece has a silver white accent on the lower mouth.
- 2.5 mm crochet hook.
- Two 9 mm black safety eyes. Mine are plain glossy black.
- Fiberfill stuffing.
- Tapestry needle, stitch marker, scissors.
- A small amount of silicone glue for the inner ear panel and the ear fold.
Difficulty and Time
Intermediate, mainly because of the leg join and the body waist shaping, which ask for careful counting. The face embroidery takes patience but no special skill. From my own making this takes around three to four hours including assembly and face work. The finished doll sits in a palm, though tension and yarn brand will shift that.
The Pattern
Legs (Make 2)
Work in a continuous spiral in chocolate brown yarn throughout.
- Round 1: Make a MR (magic ring) and work 6 sc (single crochet) into the ring [6 sts].
- Round 2: Work 6 inc (increase, 2 sc in the same stitch) [12 sts].
- Round 3: Work (1 sc, 1 inc) 6 times [18 sts].
- Rounds 4 to 11: Work 1 sc in each st around for 8 rounds [18 sts per round]. Each leg is a long cylindrical tube at this point.
- Fasten off the first leg and cut the yarn, leaving a short tail. When the second leg is finished, do not cut the yarn. Continue directly from the second leg to join them and begin the body.
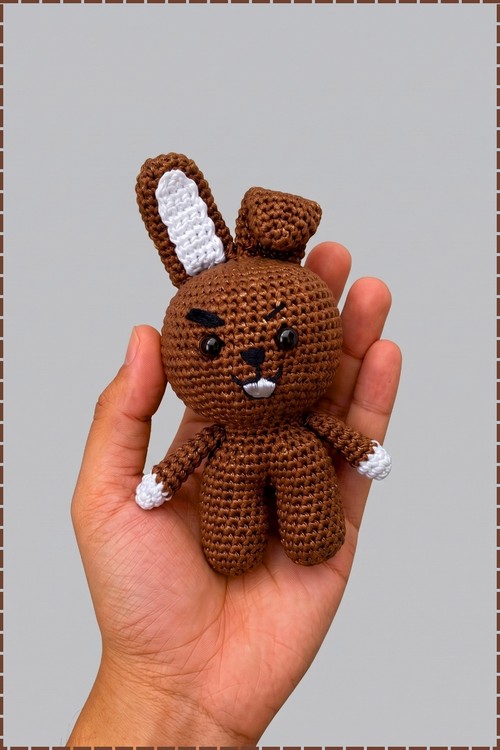
Body and Head
- Join Legs: From the second leg, sl st (slip stitch) into any stitch on the first leg to connect them.
- Round 12: Work 1 sc in the same stitch where you joined, then 17 sc around the rest of the first leg, then 18 sc around the second leg [36 sts]. The two tubes are now one continuous round.
- Rounds 13 to 15: Work 1 sc in each st around [36 sts per round].
- Round 16: Work (4 sc, 1 dec (decrease)) 6 times [30 sts].
- Round 17: Work (3 sc, 1 dec) 6 times [24 sts]. Begin stuffing the body firmly now and keep adding small pinches as you go. The waist pinch here is deliberate and gives Cooky his distinctive shape between legs and chest.
- Rounds 18 to 19: Work 1 sc in each st around [24 sts per round].
- Round 20: Work (3 sc, 1 inc) 6 times [30 sts].
- Round 21: Work (4 sc, 1 inc) 6 times [36 sts].
- Round 22: Work (5 sc, 1 inc) 6 times [42 sts].
- Round 23: Work (6 sc, 1 inc) 6 times [48 sts].
- Round 24: Work (7 sc, 1 inc) 6 times [54 sts].
- Rounds 25 to 33: Work 1 sc in each st around for 9 rounds [54 sts per round]. These straight rounds build the large round head.
- Eye placement: Insert the safety eyes between Rounds 29 and 30, counting up from the feet, leaving 8 stitches between them. Do this before the opening narrows so you can reach inside to lock the washers.
- Round 34: Work (7 sc, 1 dec) 6 times [48 sts].
- Round 35: Work (6 sc, 1 dec) 6 times [42 sts].
- Round 36: Work (5 sc, 1 dec) 6 times [36 sts].
- Round 37: Work (4 sc, 1 dec) 6 times [30 sts].
- Round 38: Work (3 sc, 1 dec) 6 times [24 sts].
- Round 39: Work (2 sc, 1 dec) 6 times [18 sts].
- Round 40: Work (1 sc, 1 dec) 6 times [12 sts].
- Round 41: Work 6 dec [6 sts]. Cut the yarn leaving a long tail, thread a tapestry needle, weave through the front loops of the remaining 6 stitches, pull tight to close the hole and hide the tail inside the head.
Arms (Make 2)
- Round 1: Make a MR and work 6 sc in white yarn [6 sts].
- Round 2: Work (1 sc, 1 inc) 3 times [9 sts].
- Round 3: Work 1 sc in each st around [9 sts]. On the last pull through of this round, switch to chocolate brown yarn.
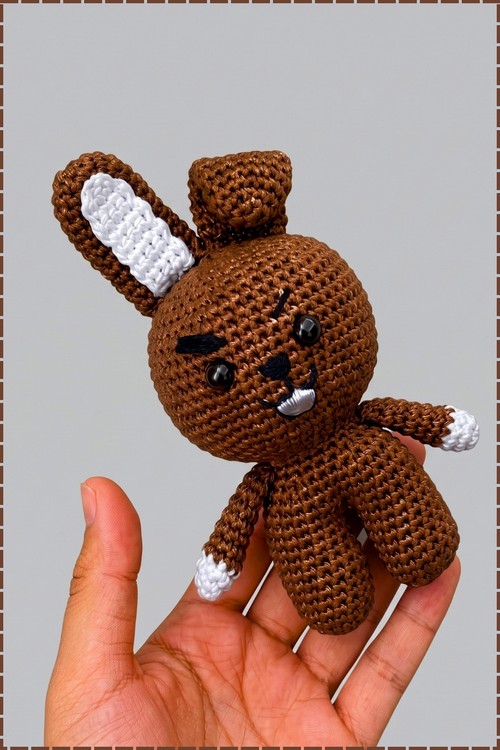
- Rounds 4 to 10: Work 1 sc in each st around for 7 rounds in brown [9 sts per round]. The arm is a short straight tube with a white tip, matching the small white paw ends visible on my finished piece.
- Stuff the lower three quarters of the arm very lightly and leave the top quarter completely unstuffed. Fold the top opening flat and close it with 3 sl st across both sides. Leave a long tail for sewing.
Ears (Make 2)
Work in chocolate brown throughout.
- Round 1: Make a MR and work 6 sc [6 sts].
- Round 2: Work 6 inc [12 sts].
- Round 3: Work (1 sc, 1 inc) 6 times [18 sts].
- Rounds 4 to 14: Work 1 sc in each st around for 11 rounds [18 sts per round]. Each ear is a long narrow tube at this point.
- Sl st into the next stitch. Do not stuff. Leave a very long tail for sewing to the head.
Inner Ear Detail (Make 1)
Work in white yarn. This piece attaches to one ear only, the folded ear on the left side of the head as seen in my photo.
- Foundation: Ch 5.
- Row 1: Starting in the 2nd chain from the hook, work 4 sc. Ch 1 and turn [4 sts].
- Rows 2 to 9: Work 4 sc. Ch 1 and turn after each row [4 sts per row].
- Row 10: Skip 1 st, 1 sc, skip 1 st, 1 sc [2 sts]. Finish with a sl st to round off the top.
- Fasten off and weave in the ends. The finished piece is a small white rectangle with a rounded top.
Assembly and Face Details
- Attach the inner ear panel: Using silicone glue, paste the white rectangle onto the front centre of one brown ear. Keep the glue slightly away from the very bottom edge so the needle can pass through freely when sewing the ear to the head.
- Sew the ears onto the top centre of the head, right around the magic ring closure. The plain brown ear sits straight up on the right side, and the ear with the white inner panel sits on the left. Sew both bases flat and firmly.
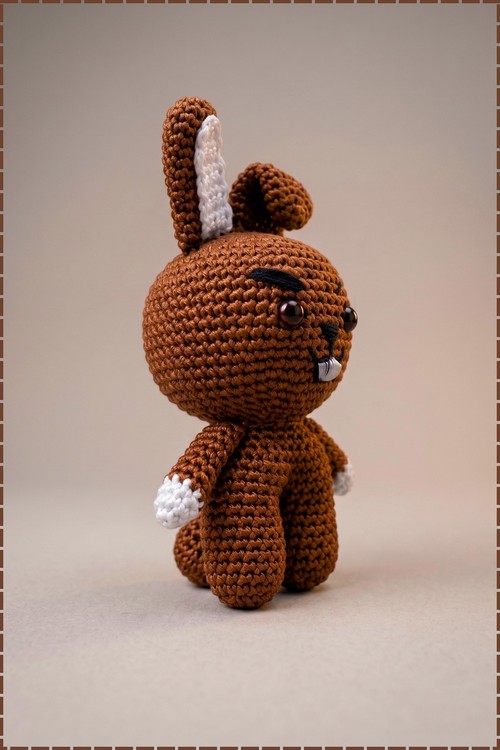
- Fold the ear: For the ear with the white panel, put a small dot of silicone glue onto the upper portion of the back and fold the top downward to create the signature bent ear. Hold it until the glue sets. In my photo the folded ear droops outward and to the left, with the white panel facing forward.
- Sew the arms to the sides of the body right at the neck area, approximately at Round 17 where the body narrows. Two to three firm stitches through the folded flat end are enough to hold each arm securely.
- Embroider the nose in black thread as a small filled upside down triangle centred between the eyes, positioned one stitch below the eye line. Build the triangle with horizontal stitches worked back and forth until it is solid.
- Embroider the mouth from the bottom point of the nose downward, forming an upside down Y or W shape. On my version a few silver white stitches sit inside the lower part of the mouth, giving the impression of teeth or a shine.
- Embroider the eyebrows above the eyes. Above the left eye, work a thicker angled brow by going over the same diagonal stitch several times. Above the right eye, work a shorter, simpler diagonal line. The mismatched brows are Cooky's most recognisable face feature and the difference between them needs to be visible from across the room.
Tips and Troubleshooting
The leg join at Round 12 is where most counts go wrong. Before you join, make sure both legs have exactly 18 stitches and your stitch marker is sitting at the start of the round on the second leg. A join that pulls tight on one side makes the body twist slightly, and that twist carries all the way up to the head if you do not catch it in the next two rounds. For the face embroidery, outline the nose triangle before filling it, since filling without an outline tends to spread wider than you intend. The mismatched eyebrows are easy to place too symmetrically by instinct, so check against the character reference and make the left brow noticeably thicker and longer than the right.
Customisation Ideas
- Make the inner ear in pink rather than white for a softer, more classic bunny look.
- Swap the safety eyes for embroidered black circles if the doll is for a young child.
- Add a small embroidered red interior to the mouth if you want the open mouth expression the pattern mentions as an option.
- Work the whole body in a lighter warm brown for a caramel version, keeping the white paws and inner ear.
- Sew a tiny hanging loop between the ears for a keychain finish, chaining until the loop is the length you want.
Frequently Asked Questions
How do I keep the leg join from looking messy? Work the slip stitch join firmly and keep your tension even through the whole of Round 12. The join stitch tends to be the loosest in the round because you are switching direction, so give the yarn an extra small tug before moving to the next stitch. The body looks twisted after the waist rounds. Is that normal? A very slight spiral is normal in amigurumi. A visible twist usually means the decreases in Rounds 16 and 17 landed in different positions on each side. Blocking the finished piece under a damp cloth corrects a mild twist. Can I skip the silicone glue on the ear fold? You can sew the fold instead. Work a few invisible stitches through the back of the ear with the brown yarn to hold the fold in position, then pull the thread through to the inside and tie off. Glue just holds instantly without any stitching visible on the surface. My embroidered face looks uneven. What helps? Work the nose first as an anchor, then build the eyebrows and mouth relative to it. Counting stitches between each feature before you commit the thread means you can plan the placement rather than adjusting by eye after the fact.