
Crochet Dolphin Amigurumi Free Pattern For Beginners
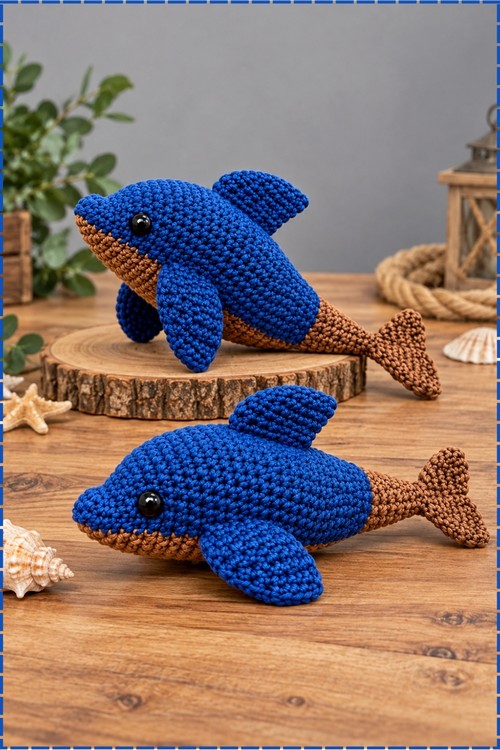
Magnets in the brown prosthetic tail let this crochet dolphin snap its fluke on and off, just like Winter. Royal blue rounds with a few hdc stitches curve the back, flatten the belly and sculpt the snout, so the whole body forms in one piece without wire.
Blue body and tan tail make the Crochet Dolphin Amigurumi Winter an easy fit for a sea themed Christmas tree or a winter gift pile. Ocean centre birthdays suit it too. Hang the Crochet Dolphin Amigurumi Winter above a cot through the cold months and the room gets its summer back.
Crochet Dolphin Amigurumi Winter
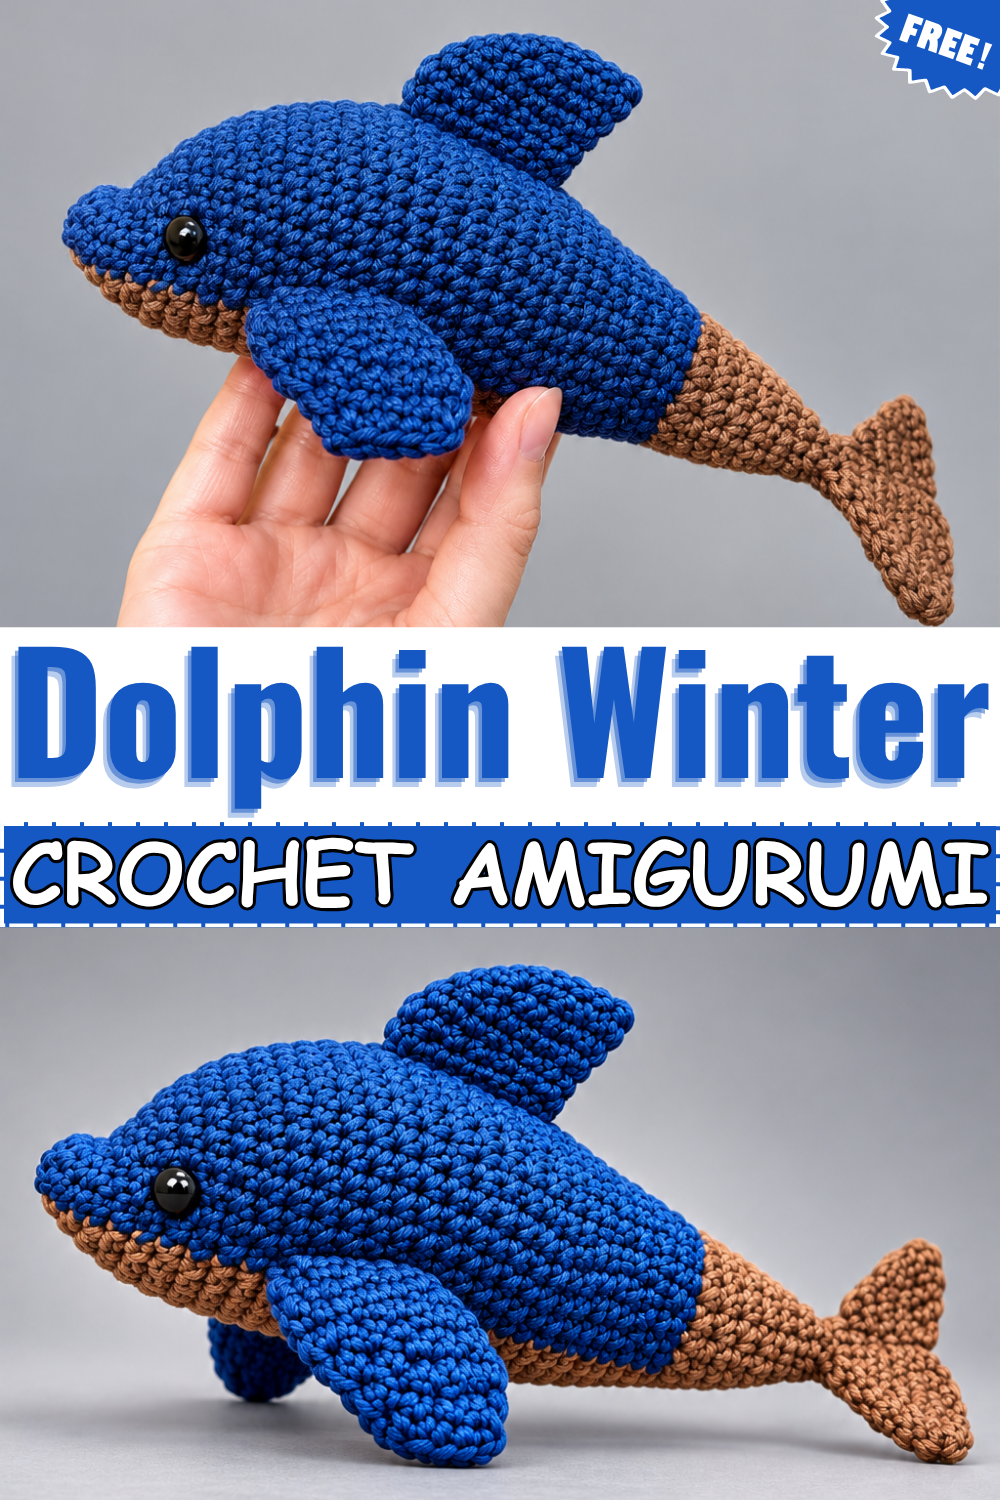
Shaped entirely in the round from nose to tail, this crochet dolphin amigurumi gets its sculpted snout from a sequence of uneven increases rather than a separate part sewn on later. Half double crochet stitches woven into otherwise plain rounds push the belly flat and the back into a curve, which is what gives the body its dolphin silhouette without any shaping wire. My version swaps sky blue for royal blue and uses warm brown for the prosthetic tail, the flukes, and the belly underside. The magnetic snap tail is the cleverest part, snapping on and off cleanly so the body reads as Winter with or without it.
Why I Love This One
Mine is the one I pick up most, because the detachable tail works every single time and makes the story feel built in rather than explained.
The Story Behind Making It
I had spent an afternoon looking at blue dolphin patterns and none of them felt right until I found this one. The asymmetric shaping in the body rounds looked strange on paper but made perfect sense once the first few rows came off the hook. The brown I chose for the tail was one shade warmer than I planned and it ended up suiting the royal blue far better than the white original would have. Placing the eyes between Rounds 7 and 8 on the narrow snout section felt almost too early, but once the body filled out around them the position was exactly where they needed to be. That is the kind of thing you cannot fully trust until you see it.
Materials and Tools
- Worsted weight yarn in royal blue for the main body, the dorsal fin, and the flippers
- Worsted weight yarn in warm brown for the prosthetic tail base, the tail fin flukes, and the belly underside
- 3.25 mm crochet hook
- Safety eyes, 10 mm, in black
- One pair of magnetic snaps for the detachable prosthetic tail
- Stitch marker, tapestry needle, polyester fiberfill stuffing, scissors
Difficulty and Time
This sits at confident intermediate. The body shaping uses mixed stitch heights within single rounds, which looks daunting in writing and settles into a rhythm on the hook. The flukes are the fiddliest part, since they fold and seam while still live on the hook. Based on my own piece, the body takes the longest evening and everything else fills out the next. Treat both as estimates since worsted tension varies a lot.
The Pattern
Part 1: Main Body, in Royal Blue
Work in continuous spiral rounds throughout.
- Round 1: Chain 2, work 6 single crochet into the second chain from the hook, or use a magic ring. (6)
- Round 2: Work 1 single crochet, then 1 increase, which is 2 single crochet in the same stitch, and repeat that sequence 3 times around. (9)
- Round 3: Work 1 single crochet in each stitch around. (9)
- Round 4: Work 4 increases, then work 1 single crochet and 1 increase twice, then 1 single crochet. The snout begins narrowing unevenly here because the increases are not evenly spaced, which is deliberate. (15)
- Round 5: Work 1 single crochet and 1 increase 3 times, then work 1 single crochet in each of the remaining 9 stitches. (18)
- Round 6: Work 1 single crochet, then 1 increase, then 2 single crochet and 1 increase twice, then single crochet to the end of the round. (21)
- Round 7: Work 3 single crochet and 1 increase 3 times, then work 9 single crochet. Insert the 10 mm safety eyes between Rounds 7 and 8 while the opening is still wide enough. On my dolphin they sit on the sides of the head near the snout, and getting them in now is much easier than trying to force them past a narrower opening later. (24)
- Round 8: Work 1 single crochet in each stitch around. (24)
- Round 9: Work 2 single crochet, then 1 increase, then 4 single crochet and 1 increase twice, then single crochet to the end. (27)
- Round 10: Work 1 single crochet in each stitch around. (27)
- Round 11: Work 6 single crochet, then 1 increase, then 3 single crochet and 1 increase twice, then 6 single crochet, then 1 increase, then 2 single crochet, then 1 increase, then single crochet in the last 2 stitches. (32)
- Rounds 12 to 16: Work 1 single crochet in each stitch around for all five rounds. The body now looks like a plump fish without any features. (32 per round)
- Round 17: Work 9 single crochet, then 7 half double crochet, then single crochet to the end. The half double crochet section is slightly taller and starts pushing the belly down and the back up, which is the shaping trick that makes the dolphin look curved without any wire. (32)
- Round 18: Work 9 single crochet, then 7 half double crochet, then 9 single crochet, then 1 decrease, then 3 single crochet, then 1 decrease in the last 2 stitches. (30)
- Round 19: Work 2 single crochet, then 1 decrease, then 3 single crochet, then 1 decrease, then 7 half double crochet, then 1 decrease and 3 single crochet twice, then 1 increase and 1 single crochet twice. (28)
- Round 20: Work 7 single crochet, then 7 half double crochet, then 7 single crochet, then 1 decrease, then 1 increase, then 1 single crochet, then 1 increase, then 1 decrease in the last 2 stitches. (28)
- Round 21: Work 6 single crochet, then 7 half double crochet, then single crochet to the end. (28)
- Rounds 22 to 23: Work 1 single crochet in each stitch around for both rounds. (28)
- Begin stuffing the body firmly with fiberfill now. Pack it from the nose back, working in small amounts with a hook end so the snout holds its point and the belly stays flat.
- Round 24: Work 1 single crochet, then 1 decrease, then 3 single crochet, then 1 decrease, then 2 single crochet and 1 decrease twice, then 3 single crochet, then 1 decrease, then 2 single crochet, then 1 increase, then 1 decrease, then 1 increase, then 1 single crochet. (24)
- Round 25: Work 6 single crochet, then 1 decrease, then 3 single crochet and 1 decrease twice, then 1 single crochet and 1 increase twice, then 2 single crochet. (23)
- Round 26: Work 4 single crochet and 1 decrease 3 times, then 3 single crochet, then 1 decrease. (19)
- Round 27: Work 1 single crochet in each stitch around. (19)
- Round 28: Work 5 single crochet, then 4 half double crochet, then single crochet to the end. (19)
- Round 29: Work 2 single crochet, then 1 decrease, then 2 single crochet, then 4 half double crochet, then 3 single crochet, then 1 decrease, then 4 single crochet. (17)
- Round 30: Work 14 single crochet, then 1 decrease, then 1 single crochet. (16)
- Round 31: Work 2 single crochet and 1 decrease 4 times around. (12)
- Round 32: Work 6 decreases around. (6)
- Fasten off leaving a 12 inch tail. Thread the tail through the back loops of the remaining 6 stitches and pull tight to close the hole.
- Sew one side of the magnetic snap securely onto the flat end of the closed body. Position it dead centre so the tail base clicks on straight.
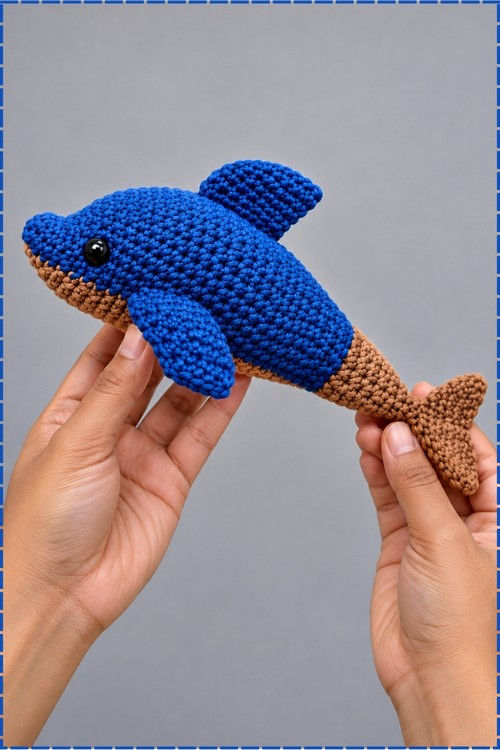
Part 2: Prosthetic Tail Base, in Brown
- Round 1: Chain 2, work 6 single crochet into the second chain from the hook. (6)
- Round 2: Work 1 single crochet in each stitch around. (6)
- Round 3: Work 1 single crochet, then 1 increase, and repeat that sequence 3 times around. (9)
- Round 4: Work 1 single crochet in each stitch around. (9)
- Round 5: Work 2 single crochet, then 1 increase, and repeat that sequence 3 times around. (12)
- Round 6: Work 1 single crochet in each stitch around. (12)
- Round 7: Work 3 single crochet, then 1 increase, and repeat that sequence 3 times around. (15)
- Round 8: Work 1 single crochet in each stitch around. (15)
- Round 9 Part A, inner core: Working in back loops only, decrease continuously around to the last stitch, then work 1 single crochet in the last stitch. (8) Fasten off, stuff the inner core lightly, and pull it closed. This inner core is what gives the socket its depth and stops the snap from pulling through the fabric.
- Round 9 Part B, outer cuff: Attach brown yarn to the unworked front loops of Round 8. Chain 1, work 1 single crochet in each front loop stitch around, then slip stitch to join and chain 1. (15)
- Round 10: Work 1 single crochet, then 3 single crochet, then 1 increase, then 4 single crochet and 1 increase twice, then slip stitch to the first stitch. (18) Fasten off leaving a tail for finishing.
- Sew the matching side of the magnetic snap inside the socket cap. Make sure both snap halves will face each other directly when the tail is clicked onto the body.
Part 3: Tail Fin Flukes, in Brown
- Round 1: Chain 2, work 6 single crochet into the second chain from the hook. (6)
- Round 2: Work 1 single crochet, then 1 increase, and repeat that sequence 3 times around. (9)
- Round 3: Work 2 single crochet, then 1 increase, and repeat that sequence 3 times around. (12)
- Round 4: Work 3 single crochet, then 1 increase, and repeat that sequence 3 times around. (15)
- Round 5: Work 4 single crochet, chain 1, fold the fin in half, then single crochet into the 12th stitch to divide the piece into two sides, then work 3 single crochet. The folding and live seaming here is the most unusual step in the pattern. Take it slowly, since the stitch you anchor into determines how symmetrical the two flukes come out. (15 total)
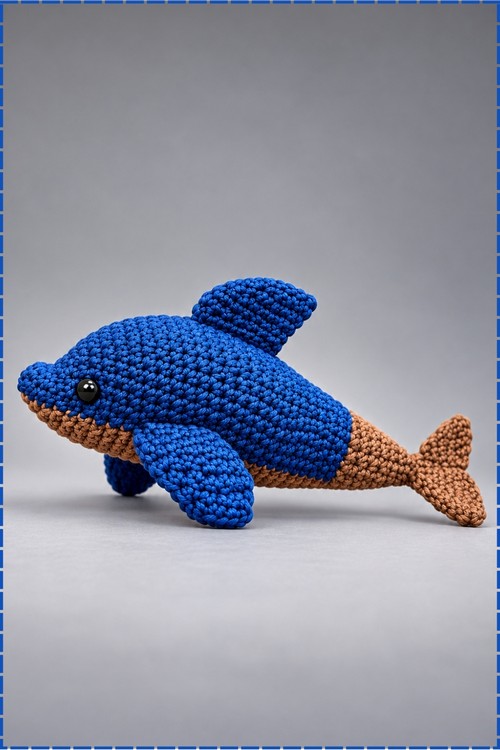
Left fluke:
- Round 6: Work 1 increase, then 3 single crochet, then 1 single crochet into the back loop of the middle chain 1, then 4 single crochet. (9)
- Round 7: Work 2 increases, then 3 single crochet, then 1 decrease, then single crochet to the end. (12)
- Round 8: Work 1 single crochet, then 4 half double crochet, then 2 single crochet, then 1 decrease. Fold the top edges flat and single crochet through both layers: work 3 single crochet, then 1 half double crochet, then 1 half double crochet and 1 double crochet in the last stitch. Chain 1 and fasten off.
Right fluke:
- Reattach brown yarn to the back middle stitch.
- Round 6: Chain 1, work 3 single crochet, then 1 increase, then 3 single crochet, then 1 single crochet into the back loop of the chain 1. (9)
- Round 7: Work 2 single crochet, then 2 increases, then 2 single crochet, then 1 decrease. (12)
- Round 8: Work 3 single crochet, then 4 half double crochet, then 2 single crochet, then 1 decrease spanning into the next round. Fold the top edges flat and single crochet through both layers: work 2 single crochet, then 1 half double crochet, then 1 half double crochet and 1 double crochet in the last stitch. Chain 1 and fasten off.
- Sew the completed tail fin to the base of the prosthetic cap, centring it so the flukes spread evenly either side.
Part 4: Dorsal Fin, in Royal Blue
- Round 1: Chain 8. Starting in the second chain from the hook, work 6 single crochet down the chain, work 3 single crochet in the last stitch to turn the corner, then work 5 single crochet back down the opposite side of the chain, then work 1 increase in the last stitch. (16)
- Round 2: Working in back loops only, work 1 single crochet in each stitch around. (16)
- Round 3: Working in both loops, work 1 single crochet in each stitch around. (16)
- Round 4: Work 5 single crochet, then 3 decreases, then 3 single crochet, then 2 increases. (15)
- Round 5: Work 1 increase, then 4 single crochet, then 1 decrease, then 6 single crochet, then 1 increase, then 1 single crochet. (16)
- Round 6: Work 3 single crochet, then 4 decreases, then 2 single crochet, then 1 decrease, then 1 increase. (12)
- Round 7: Work 3 single crochet, then 2 slip stitches. Fasten off leaving a 12 inch tail.
- Sew the open bottom edges of the dorsal fin together, then attach it centred on the upper body of the dolphin. On my piece it sits roughly above where the half double crochet shaping starts, which puts it at the highest point of the back curve.
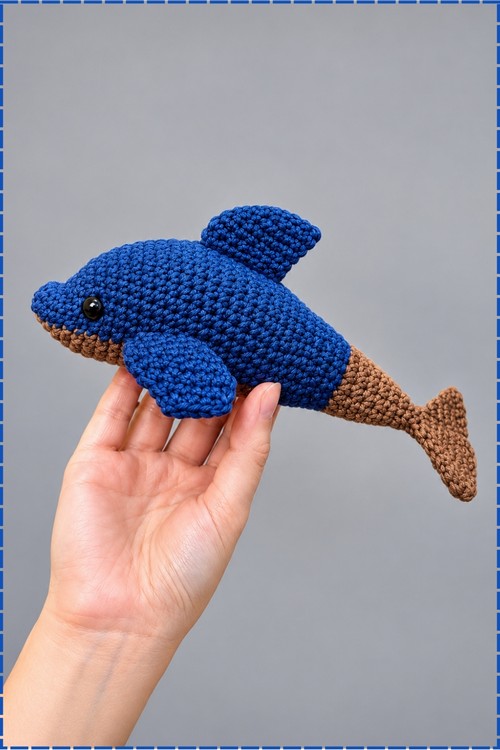
Part 5: Flippers, Make 2 in Royal Blue
- Round 1: Chain 8. Starting in the second chain from the hook, work 6 single crochet, turn and work 5 single crochet down the opposite side, then work 1 increase in the last stitch. (16)
- Round 2: Work 1 single crochet in each stitch around. (16)
- Round 3: Work 5 single crochet, then 3 decreases, then 3 single crochet, then 2 increases. (15)
- Round 4: Work 1 increase, then 3 single crochet, then 2 decreases, then 6 single crochet, then 1 increase, then 1 single crochet. (15)
- Round 5: Work 6 single crochet, then 1 decrease, then 7 single crochet. (14)
- Round 6: Work 3 single crochet, then 2 decreases. Flatten the piece and crochet through both layers: work 2 single crochet, then 2 half double crochet, then 1 half double crochet and 1 double crochet in the tip stitch. Chain 1 and fasten off leaving a long tail.
- Sew both flippers to the sides of the body approximately 3 stitches back from the eyes, angling them downward. Mine sit low enough that they do not compete with the dorsal fin visually when the dolphin is seen from above.
Tips and Troubleshooting
The mixed stitch rounds look complicated written out but make sense once you see the body shaping them. Read each of those rounds through once before you start, so you know which direction the increases or half double crochet sections are heading.
Keep going back and stuffing as the body closes. Trying to push stuffing through 6 stitches at the very end of Round 32 is nearly impossible. Start at Round 22, add more at Round 26, and top it off at Round 30.
Check the magnetic snap alignment before sewing it permanently. Click the two halves together while holding them against the body and the tail base, and make sure the dolphin sits straight and not tilted. A snap sewn a few millimetres off centre becomes very visible once the tail is on.
Flukes are sewn while still live on the hook. Go slowly through Round 5 of the tail fin and take your time picking up that 12th stitch across the fold. A missed stitch here makes one fluke smaller than the other.
Yarn Substitution
Worsted weight cotton gives a slightly heavier, denser dolphin than acrylic and holds the body shaping a little better, especially in the snout. Acrylic at the same weight works fine and is softer to hold. The 3.25 mm hook is on the smaller end for worsted, which is deliberate. Working tighter than the yarn recommends is what closes the stitches enough that stuffing does not show through the body. Do not go up in hook size even if the project feels stiff on the hook.
Customisation Ideas
The body and fins in any mid tone blue read as a generic dolphin plush rather than a specific character. A lighter sky blue and white belly bring it closer to the original Winter. Swapping both the tail and belly to white instead of brown changes the whole story the piece tells. The magnetic snap is the detail worth keeping regardless of colour, since it is what makes this one different from every other dolphin pattern. If you want a fixed tail version, sew the prosthetic base directly to the body in the same position the snap would occupy.
Frequently Asked Questions
Do I have to use a magnetic snap or can I sew the tail on permanently? You can sew it on. Omit both snaps and simply sew the prosthetic base directly to the flat end of the body. The construction of the tail base stays the same.
My body shaping looks lumpy rather than curved. What went wrong? Usually the half double crochet sections are not being placed in the same area across Rounds 17 to 21. Read those rounds together and check that the hdc section consistently lands in the same 7 stitch zone each time. The curve comes from stacking those taller stitches in the same spot round after round.
The two flukes came out different sizes. How do I fix it? This is nearly always Round 5 of the tail fin, where you pick up the 12th stitch to divide the piece. If you anchored one stitch further around on the second fluke, it gets fewer stitches to work with. Unpick back to Round 5 and try again, counting carefully to the 12th stitch before folding.
Can I use a different yarn weight? Yes. The same counts in a DK weight with a 3.0 mm hook produce a noticeably smaller dolphin. Bulky weight on a 5.0 mm hook gives a larger one. Proportions hold across yarn weights because the shaping is built into the counts.