
Crochet Fox Doll Pattern Free Amigurumi
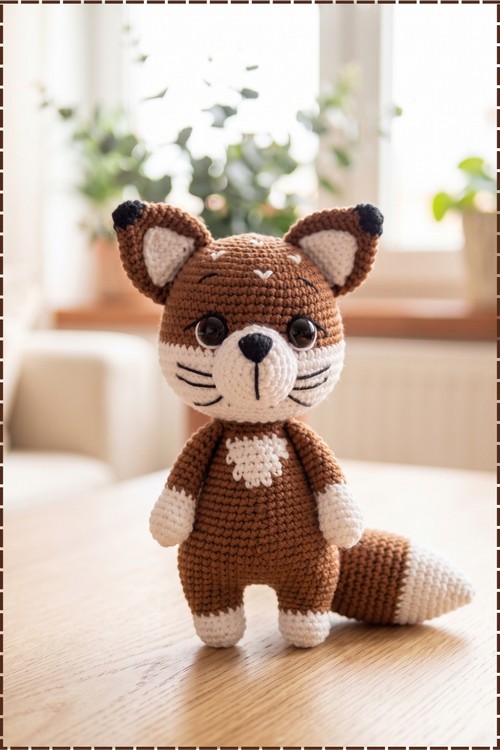
Rust brown fur, a crisp white chest and black tipped ears make this crochet fox doll a storybook favourite on any nursery shelf. Its embroidered whiskers and soft white paws turn it into a gentle cuddle buddy that stands upright on its own.
Standing dolls get requested far more than sitting ones, and the Crochet Fox Doll Amigurumi is the one people keep coming back for. It holds its own shape on a shelf. The face reads friendly without looking babyish. That mix is why the Crochet Fox Doll Amigurumi gets made again and again for older kids.
Crochet Fox Doll Amigurumi
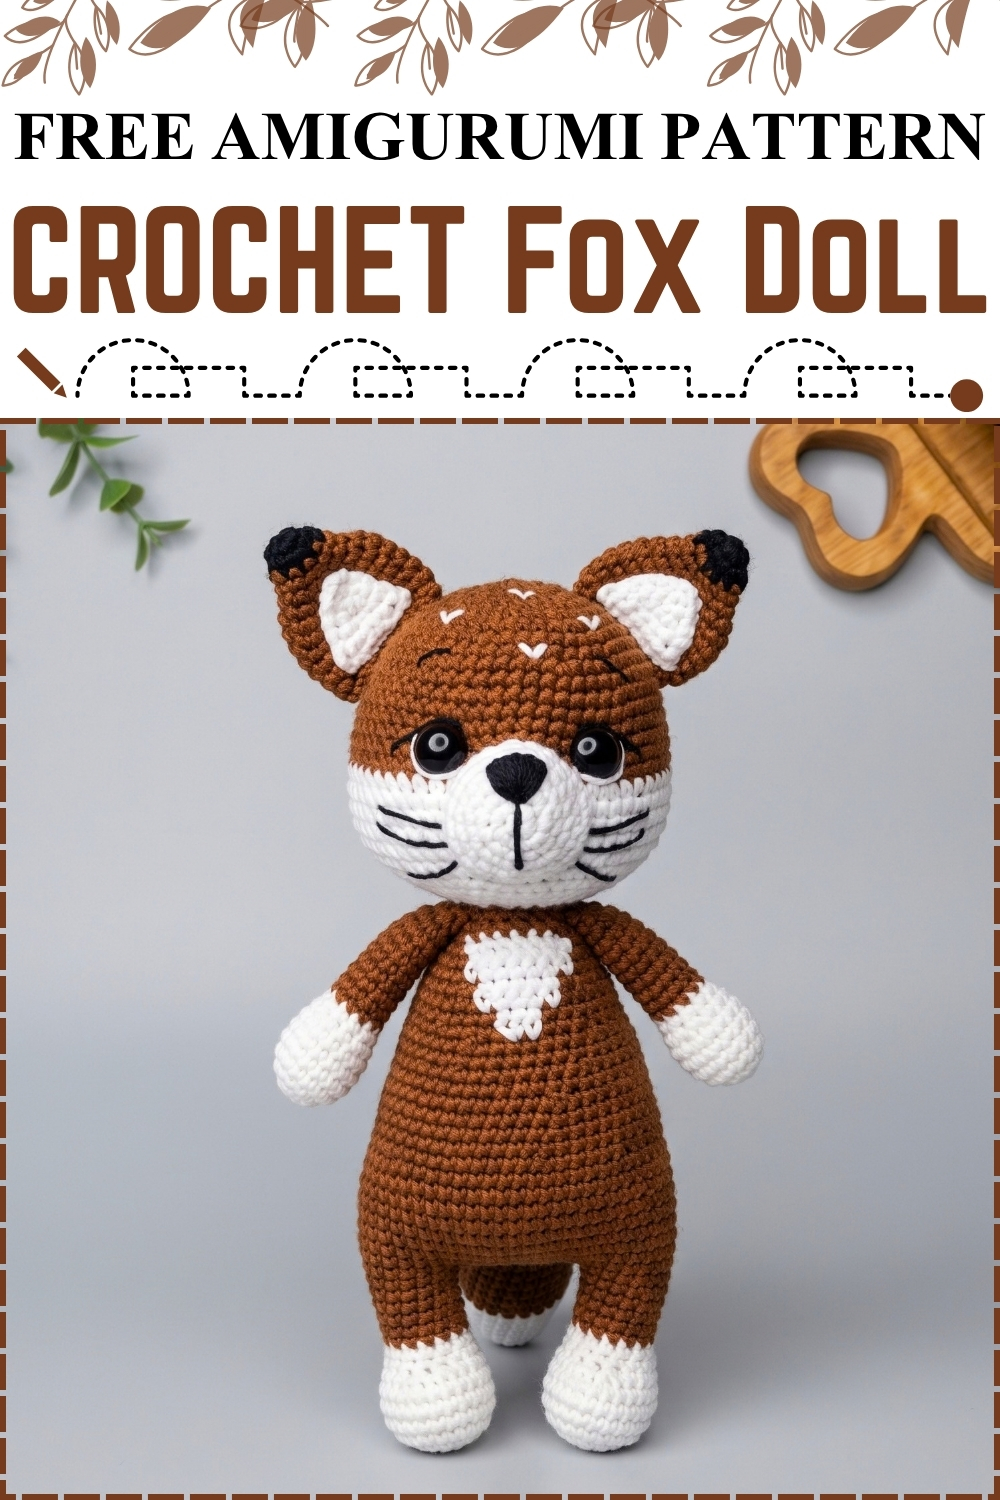
Seven separate pieces come together to make this crochet fox doll amigurumi, and every one of them uses the same handful of beginner stitches. Nothing here needs a technique harder than an increase and a decrease worked in a spiral. Rust brown yarn covers the head, body and limbs on my version, while white marks the snout, inner ears, chest, hands and feet. Black appears only at the ear tips and in the embroidered nose, mouth and whiskers. Taking your time with the sewing matters far more than crochet speed on a doll this size.
Materials and Tools
- Worsted or light worsted yarn in Rust Brown as the main colour. The original pattern calls for orange
- Worsted or light worsted yarn in White for the snout, inner ears, chest patch, hands and feet
- A small amount of Black yarn for the ear tips, nose, mouth and whiskers
- Crochet hook sized one or two below your yarn band recommendation
- Fiberfill stuffing
- Safety eyes
- Yarn needle
- Stitch markers
- Pins for positioning parts before sewing
Difficulty and Time
Beginner friendly in every stitch, though the piece count makes it a project rather than an afternoon. Nothing in it is harder than a single crochet, an increase or a decrease. From my own making this took several evenings, with most of the final one spent pinning and sewing rather than crocheting. Go in expecting the assembly to be the slow part and you will enjoy it far more.
Beginner Technique Notes
- Magic ring, written as MR, is an adjustable loop you work your first round into and then pull closed. Pull it tight before you reach round four or a small hole stays open at the centre of every piece.
- Single crochet, written as sc, makes up almost the entire doll. Every round count in this pattern refers to single crochet unless it says otherwise.
- Increase, written as inc, means working two single crochet into the same stitch. This is what makes a piece grow wider.
- Decrease, written as dec, means joining two stitches into one. Use the invisible decrease, which picks up only the front loops of both stitches, because it leaves a much smoother surface than the standard version.
- Working in continuous rounds means you never join or turn. You simply keep spiralling. Put a stitch marker in the first stitch of each round and move it up every time, or you will lose your place within three rounds.
- The number in brackets at the end of each round is how many stitches you should have when that round is finished. Count them. On a 60 stitch round this feels tedious, but one missed increase shows as a dent in the finished shape.
- A notation like (3 stitches, decrease) repeated 6 times means you work three single crochet, then one decrease, and repeat that whole sequence six times around.
- Stuff as you go on the larger pieces rather than waiting until the end. Once a round drops below about 20 stitches you can no longer fit your fingers inside to shape anything.
- Firm stuffing holds a round shape. Underfilled amigurumi goes lumpy and wrinkled at the seams, which is the single most common beginner result.
- Change colour on the final yarn over of the last stitch in the old colour, not at the start of the new one. The join disappears that way.
The Pattern
Head
- Start with Rust Brown yarn and work in continuous rounds, stuffing firmly as you go.
- R1: 6 sc in a MR [6]
- R2: inc repeated 6 times [12]
- R3: (1 sc, inc) repeated 6 times [18]
- R4: (2 sc, inc) repeated 6 times [24]
- R5: (3 sc, inc) repeated 6 times [30]
- R6: (4 sc, inc) repeated 6 times [36]
- R7: 36 sc [36]
- R8: (5 sc, inc) repeated 6 times [42]
- R9: 42 sc [42]
- R10: (6 sc, inc) repeated 6 times [48]
- R11: 48 sc [48]
- R12: (7 sc, inc) repeated 6 times [54]
- R13 to R16: 54 sc for 4 rounds [54]. The head should now be a wide round ball with straight sides.
- R17: 15 sc, (1 sc, inc) repeated 3 times, 12 sc, (1 sc, inc) repeated 3 times, 15 sc [60]. These two small increase groups widen the cheeks either side of the face, which is why the head looks slightly oval from the front on my doll.
- R18 to R20: 60 sc for 3 rounds [60]
- R21: (3 sc, dec) repeated 12 times [48]
- R22: (6 sc, dec) repeated 6 times [42]
- R23: (5 sc, dec) repeated 6 times [36]
- R24: (4 sc, dec) repeated 6 times [30]
- R25: (3 sc, dec) repeated 6 times [24]
- R26: (2 sc, dec) repeated 6 times [18]. Fasten off and leave a long tail for sewing to the body.
- Place the safety eyes between rounds 16 and 17, spaced evenly either side of the centre front. On my doll they sit just above the top edge of the snout and fairly wide apart, which gives the gentle expression. Fit them before the head gets too narrow to reach inside.
- Keep the opening at round 26 facing straight down. If it tilts, the head will lean to one side once sewn on and there is no fixing that later.
Snout
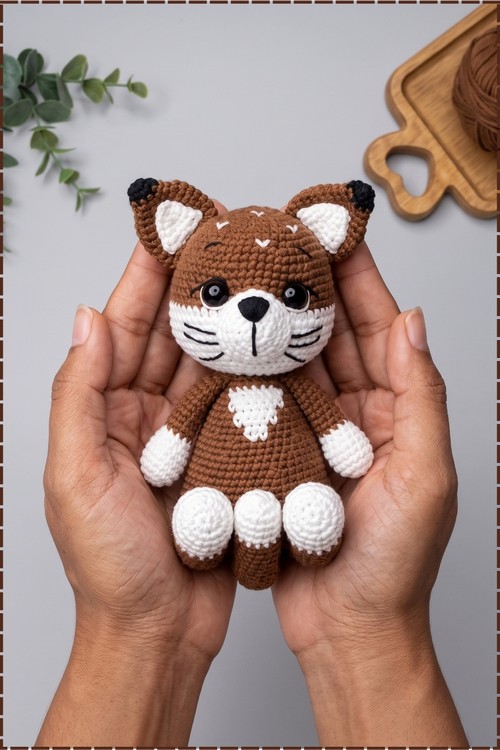
- Start with White yarn. The original pattern begins this piece in black, but my snout is white throughout with the nose embroidered on afterward.
- R1: 6 sc in a MR [6]
- R2: (1 sc, inc) repeated 3 times [9]
- R3: 9 sc [9]
- R4: (2 sc, inc) repeated 3 times [12]
- R5: (1 sc, inc) repeated 6 times [18]
- R6: (2 sc, inc) repeated 6 times [24]
- R7 to R9: 24 sc for 3 rounds [24]. The snout should look like a shallow white dome, wide and flat rather than pointed.
- Do not close this piece. The open edge gets sewn directly onto the face.
- Stuff it lightly before sewing. Too much filling makes it stick out like a ball instead of sitting flush against the head.
Ears, Make 2
- Work these flat, turning at the end of each row.
- R1: MR with 7 base stitches, then return [7]
- R2: 3 base stitches, 3 base stitches worked into one base as an increase, 3 base stitches, then return [9]
- R3: 4 base stitches, then work 1 base, 1 medium base and 1 base all into one base, then 4 base stitches, then return [11]. The piece should now be a flat triangle with a rounded point.
- On my doll the ears are rust brown on the outside with a white triangle sewn or worked on the inner face, and the very tip is finished in black.
- Use black yarn to border or embroider the tip of each ear.
- Make the inner white triangle by crocheting a small flat triangle in white to fit the front of the ear, then sewing it on. The original pattern gives no counts for this, so size it against your own finished ear.
Body
- Start with Rust Brown yarn.
- R1: 6 sc in a MR [6]
- R2: inc in every stitch [12]
- R3 to R10: continue the standard increase sequence, adding 6 stitches each round, until you reach 60 stitches [60]. Each round adds one more plain stitch between increases than the round before, so round 3 is (1 sc, inc), round 4 is (2 sc, inc), and so on.
- R11 to R13: 60 sc for 3 rounds [60]
- R14: 18 sc, dec 3 times, 33 sc [57]
- R15: 57 sc [57]
- R16: 17 sc, dec 3 times, 31 sc [54]. These offset decreases shape the front of the body, so keep them on the same side as the chest patch.
- R17: 54 sc [54]
- R18: (7 sc, dec) repeated 6 times [48]
- R19: 48 sc [48]
- R20: (6 sc, dec) repeated 6 times [42]
- R21: 42 sc [42]
- R22: (5 sc, dec) repeated 6 times [36]
- R23 to R24: 36 sc for 2 rounds [36]
- R25: (4 sc, dec) repeated 6 times [30]
- R26: 30 sc [30]
- R27: (3 sc, dec) repeated 6 times [24]
- R28: 24 sc [24]
- R29: (2 sc, dec) repeated 6 times [18]
- R30: decrease to finish. Stuff the body firmly before closing.
- Stuff this one in stages as it narrows. A tall body that is loose at the base will not hold the doll upright.
White Chest Patch
- The original pattern does not include a chest patch, so work this to fit your own body piece.
- Crochet a small flat shape in White, increasing until it reaches the width you want, then shaping it to a point at the lower end.
- Pin it to the upper front of the body, centred and sitting just below the neck opening, as on my doll.
- Sew around the edge with white yarn using small stitches so the outline stays crisp.
Tail
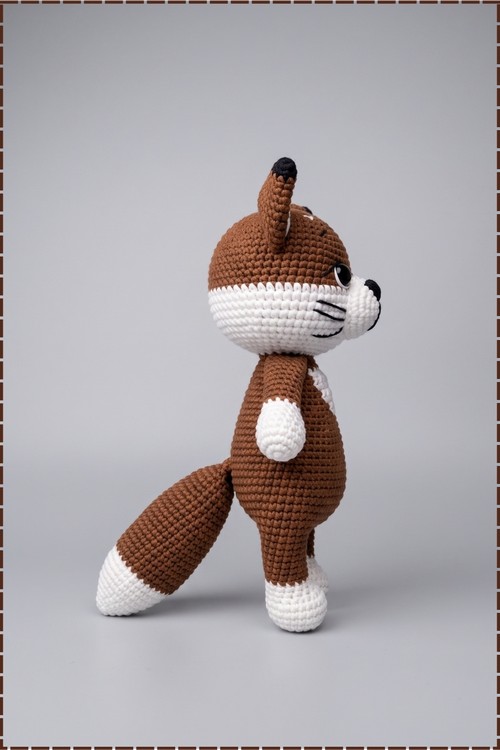
- Start with White yarn. No tail is visible in my photo, so treat this piece as optional.
- R1: 6 sc in a MR [6]
- R2: (1 sc, inc) repeated 3 times [9]
- R3: 9 sc [9]
- R4: (2 sc, inc) repeated 3 times [12]
- R5: 12 sc [12]
- R6: (1 sc, inc) repeated 6 times [18]
- R7: (5 sc, inc) repeated 3 times [21]
- Switch to Rust Brown yarn.
- R8 to R15: 21 sc for 8 rounds [21]
- R16: (5 sc, dec) repeated 3 times [18]
- R17: 18 sc [18]
- R18 to R19: decrease evenly to 12 stitches [12]
- R20: (2 sc, dec) repeated 3 times [9]
Arms, Make 2
- Start with White yarn. The original pattern begins these in black, but the hands on my doll are white.
- R1: 6 sc in a MR [6]
- R2: inc in every stitch [12]
- R3: (3 sc, inc) repeated 3 times [15]
- R4 to R5: 15 sc for 2 rounds [15]
- R6: dec, 2 sc, dec, 9 sc [13]
- R7: 2 dec, 9 sc [11]
- R8: dec, 9 sc [10]. The white section should now read as a rounded paw narrowing into the arm.
- Switch to Rust Brown yarn.
- R9 to R16: 10 sc for 8 rounds [10]
- Stuff the white paw end firmly and leave the upper arm soft, so it lies flat against the body when sewn.
Legs, Make 2
- Start with White yarn, worked in an oval around a starting chain. The original pattern begins these in black, but the feet on my doll are white.
- R1: 6 sc, inc, 3 sc, 4 sc [13]
- R2: 2 inc, 2 sc, 6 inc, 2 sc, inc [22]
- R3: 1 sc, inc twice, 2 sc, (1 sc, inc) repeated 6 times, 3 sc, inc [31]
- R4 to R6: 31 sc for 3 rounds [31]
- R7: decrease evenly to 29 stitches [29]
- R8: 7 sc, 8 dec, 7 sc [22]
- R9: 7 sc, 4 dec, 7 sc [18]
- R10: 7 sc, 2 dec, 7 sc [16]
- R11: 7 sc, dec, 7 sc [15]. The decreases down the middle form the top of the foot, so the shape should now look like a flat sole with a rounded instep.
- Switch to Rust Brown yarn.
- R12 to R20: 15 sc for 9 rounds [15]
- Stuff the white foot firmly so the doll can stand, and keep the brown leg section lighter.
Assembly
- Stuff the head, body and the tips of the arms and legs firmly. Keep the upper arms barely stuffed so they sit flat against the sides.
- Pin the snout to the lower middle of the face before sewing anything, and check it from the front at eye level. On my doll it sits centred and low, overlapping slightly below the eyes.
- Sew the snout down all the way around the open edge, adding a little stuffing just before you close the last few stitches.
- Embroider the nose in black as a small rounded triangle at the top of the snout, then run a short vertical line down from it and a gentle curve to each side for the mouth.
- Add the whiskers in black, three short straight stitches on each side of the snout, angled slightly downward.
- Sew the ears to the top of the head, angled outward, with the white inner triangles facing forward and the black tips standing up.
- Sew the head onto the neck opening of the body, working right around the join twice so it cannot wobble.
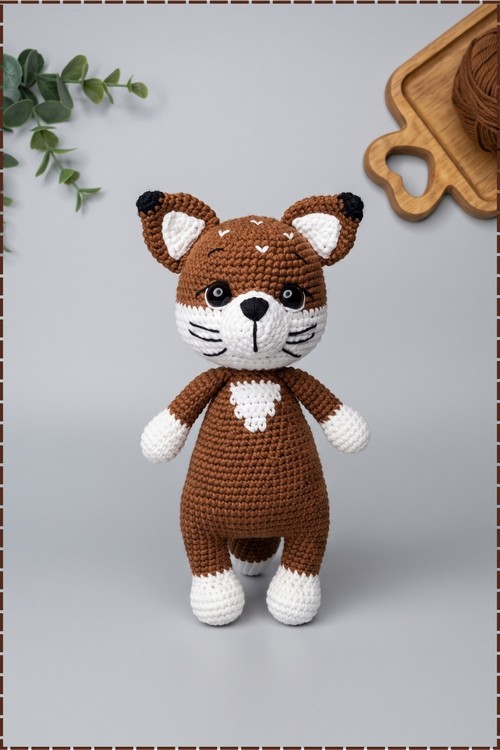
- Sew the arms to the sides of the body just below the neck, with the white paws hanging downward and slightly forward.
- Sew the legs to the bottom of the body, spaced apart and pointing straight down so the doll stands on its own rather than sitting.
- Sew the tail to the lower back if you made one.
- Embroider three small white V shapes across the forehead between the ears, which is the detail that reads as fox fur on my doll.
- Add two short curved stitches above the eyes in brown if you want the soft brow lines visible on mine.
Tips and Troubleshooting
- Pin every part before you sew. Hold the doll at arm's length and look straight at it, since a snout set slightly low or ears set unevenly is the thing you will notice forever.
- Sew the head on last, after the face is complete. Reaching around a finished body to embroider whiskers is far harder than it needs to be.
- Make both of any pair back to back. Tension drifts between sessions, and two arms of different widths are very hard to hide.
- Mark your round number on paper as you go. On a 30 round body it is easy to lose track, and the decrease sequence depends on being in the right place.
- Use a smaller hook than the yarn band suggests. Loose fabric lets stuffing show through, especially at the colour changes on the paws.
- Stand the doll up before you finish sewing the second leg. Adjust the angle until it balances, then sew.
Yarn Substitution
Smooth cotton or a cotton blend gives the crisp stitch definition visible in my photo and holds the shapes well on a doll this tall. Acrylic works and is softer for a child, though it fuzzes faster and shows less stitch detail. Avoid fluffy or chenille yarn here, since the pile hides the embroidered nose, whiskers and forehead marks completely, and those details carry the whole face. If you change yarn weight, every piece scales together, so the proportions stay correct.
Customization Ideas
- Use classic bright orange and white for a traditional red fox look.
- Work the hands and feet in black as the original pattern does for a different marking.
- Add the white tipped tail and sew it on for a fuller fox shape.
- Embroider closed sleeping eyes instead of using safety eyes for a baby safe version.
- Add a small scarf or bow tie at the neck.
- Stitch the forehead marks in cream rather than white for a softer contrast.
- Make the chest patch heart shaped instead of pointed.
Alt Text Suggestions for Photos
- Rust brown crochet fox doll amigurumi with a white snout, white paws and black ear tips standing upright
- Handmade amigurumi fox plush in brown and white yarn with embroidered whiskers and a black nose
- Crochet fox doll with a white chest patch and white forehead markings on a grey background
- Close up of the embroidered nose, mouth and whiskers on a white crochet fox snout
Frequently Asked Questions
I am new to amigurumi. Is this a reasonable first project? Yes, as long as you are comfortable with the magic ring. Every stitch in it is a single crochet, an increase or a decrease. What makes it a bigger job is the number of pieces and the sewing, not the difficulty of any one round. Make the arms first if you want a small practice piece before committing.
How do I stop a hole appearing at the centre of my magic ring? Pull the short tail firmly to close the ring as soon as you finish round 1, before you work round 2. If a gap still shows later, thread the tail onto your needle and take two small stitches across the opening from the inside. Working at a tight tension helps too.
Where exactly do the safety eyes go? Between rounds 16 and 17, spaced evenly either side of the centre front of the head. Push them in without securing the washers first, look at the face straight on, and adjust until it looks right to you. Once the washer is pushed on, it does not come off.
My doll will not stand up. What should I check? Three things. The feet need firm stuffing, the legs need to be sewn pointing straight down rather than forward, and the body base needs to be flat. If the head still pulls it over, you have underfilled the neck area of the body.
How big does it finish? Mine stands roughly the height of a forearm, though the pattern gives no measurement so that is my own experience rather than a stated size. Your result depends entirely on your yarn weight and hook, and both will scale all the pieces together.
Take your time with the face, and the rest of this one will look after itself.