
Crochet Greyhound Pattern Free Amigurumi Dog For Beginners
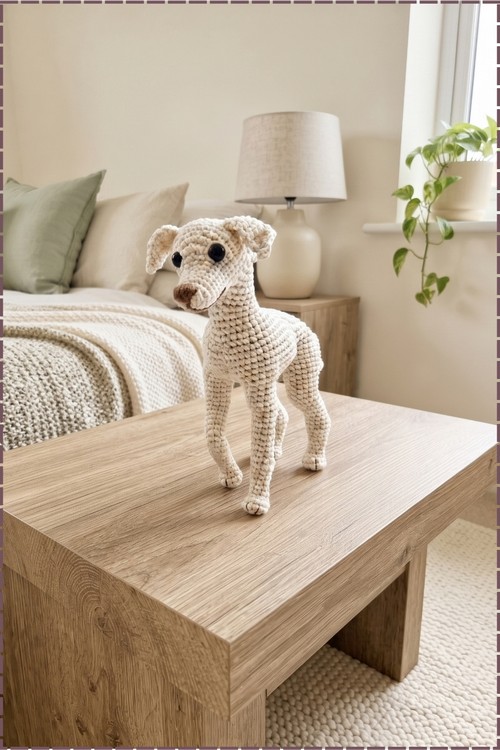
Perched on a bookshelf, the crochet greyhound amigurumi stands about 16 cm tall in cream cotton, finished with a brown muzzle and embroidered toe divisions. Give it a weekend, since the slim legs and face shaping on a 2.5 mm hook take several sittings.
Standing on four slim legs with the chest tucked high, the crochet greyhound amigurumi gets requested again and again by sighthound owners. Few patterns capture the breed shape properly. Most dog patterns come out round. Makers return to the crochet greyhound amigurumi because it actually looks like the dog on their sofa.
Crochet Greyhound Amigurumi
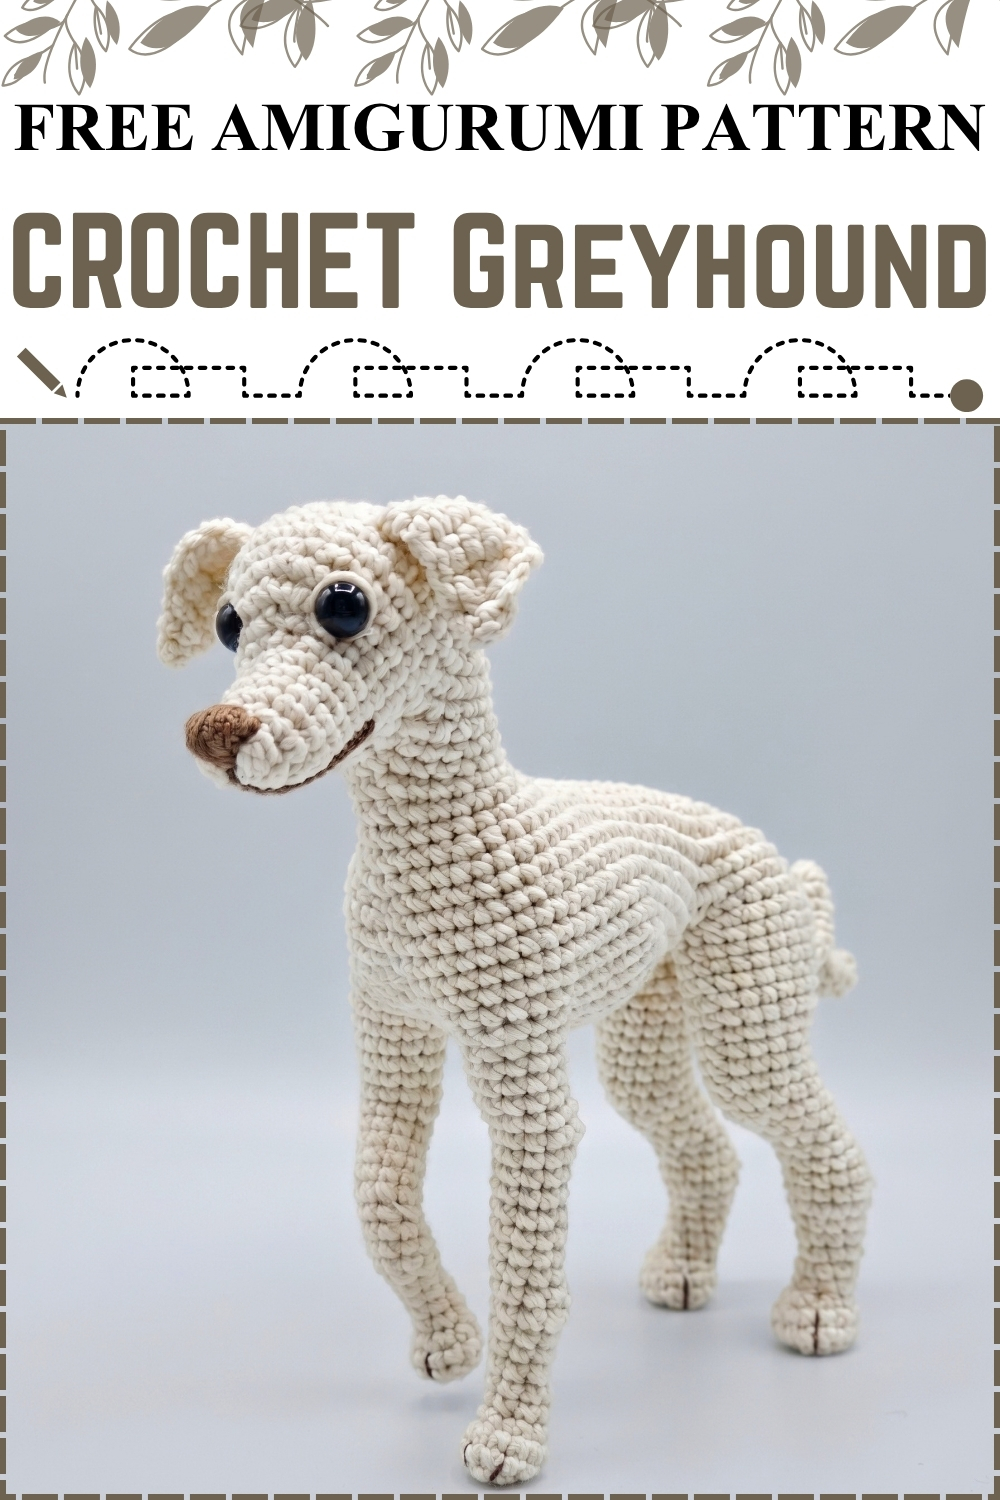
Head and body come off the hook as one continuous spiral in this crochet greyhound amigurumi, with the neck and chest shaped by increases instead of being sewn on later. Legs grow straight out of openings made in the torso, so nothing wobbles once everything is stuffed. Cream cotton covers the whole dog on mine. Brown yarn marks the muzzle and the nose. Black safety eyes sit wide and low on a long narrow face. Floppy ears fold forward at the sides of the head. Standing on all four legs, it holds its pose without any wire.
Before You Start
This one is honest work. The body is plain single crochet all the way through, so no stitch here is difficult on its own, but the shaping runs long and the leg openings need careful counting. If you have made a few amigurumi already and you are patient with a stitch marker, you can do this. If this is your very first project, make a simple ball shaped animal first and come back.
I would also say this: the source pattern leaves several shaping rounds to be worked by eye rather than by count. Those sections are marked clearly below, and I have explained what the shape should be doing at each point so you can judge it yourself rather than guessing blind.
Materials and Tools
- Roughly 2 mm weight cotton yarn in cream or natural ivory for the whole body, head, legs and tail. My dog is one colour throughout except the muzzle.
- Small amount of medium brown yarn for the muzzle and nose.
- Dark brown or black embroidery thread for the mouth line and the toe divisions on each paw.
- 2.5 mm crochet hook.
- Two black safety eyes in a small size to suit 2 mm yarn.
- Polyester fiberfill.
- Stitch markers, several of them.
- Tapestry needle and scissors.
Size and Time
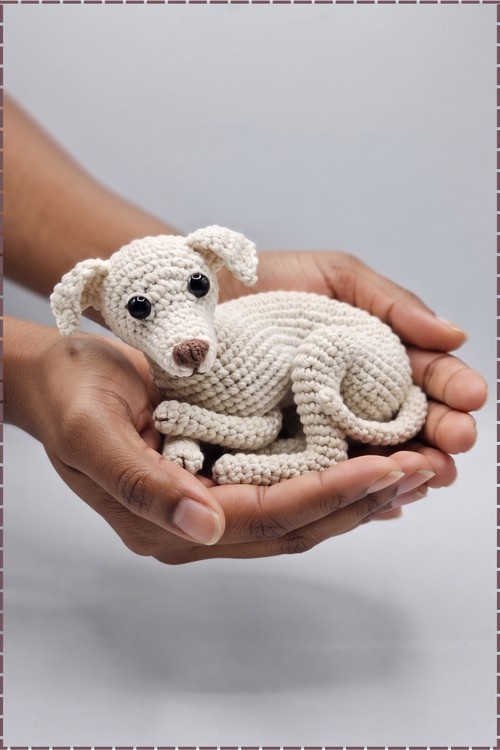
The finished dog measures roughly 14 cm from front leg to back leg and about 16 cm tall. Mine landed close to that. This is not an evening project. I spent several sittings on it, with the legs and the face shaping taking the longest, so give yourself a weekend rather than an afternoon.
Beginner Technique Notes
- SC means single crochet, INC means increase, which is two single crochets into one stitch, and DEC means decrease, which is two stitches worked together into one.
- A triple increase means three single crochets worked into the same stitch. It pushes the fabric outward sharply and is used here to build the muzzle and the chest.
- This pattern works in a continuous spiral, meaning you never join a round with a slip stitch. You just keep going round and round. Mark the first stitch of every round with a marker and move it up as you go, because in a spiral there is no visible row line to count from.
- Skipping stitches, as in round 11, means you pass over them without working into them and carry on. Those skipped stitches stay live and become the neck opening later.
- Chaining over a gap and then working back into those chains on the next round is how the leg openings are made. It feels wrong the first time, but the chains become the top edge of the shoulder.
- Picking up stitches around an opening means inserting your hook into the edge stitches of a hole you already made and working new single crochets into them, building a tube outward from the body.
- Stuff as you go on anything long and narrow. Once a leg is more than a few rounds deep you cannot get stuffing in neatly from the top.
The Pattern
Body and Head
- Round 1: 8 SC in a magic ring. Do not join. Continue in a spiral from here. (8)
- Round 2: 8 INC. (16)
- Round 3: 1 SC, 1 INC, repeated 8 times. (24)
- Round 4: 2 SC, 1 INC, repeated 8 times. (32)
- Round 5: 1 INC, 30 SC, 1 INC. (34) The two increases at opposite ends start lengthening the piece, which is what gives a greyhound its narrow head rather than a round one.
- Round 6: 34 SC. (34)
- Round 7: 3 SC, then 3 SC and 1 INC repeated 3 times, 4 SC, then 1 INC and 3 SC repeated 3 times, 3 SC. (40) The increases are mirrored on each side here, so follow the order exactly or the head goes lopsided.
- Round 8: 40 SC. (40)
- Round 9: 3 SC, 1 DEC, 7 SC, 1 INC, 14 SC, 1 INC, 7 SC, 1 DEC, 3 SC. (40) The decreases pull in the top of the skull while the increases widen the cheeks.
- Round 10: 40 SC. (40)
- Round 11: 11 SC, skip 18 stitches, 11 SC. Those 18 skipped stitches are left unworked and become the neck opening you come back to later. Place a marker at each end of the skipped section so you can find it easily.
- Round 12: 1 DEC, 1 SC, 1 DEC, 5 SC, 1 DEC, 5 SC, 1 DEC, 1 SC, 1 DEC.
- Round 13: 1 DEC, 13 SC, 1 DEC.
- Round 14: 6 SC, 1 DEC, 7 SC. Start stuffing the head firmly now, shaping the long muzzle with your fingers from the outside as you fill it.
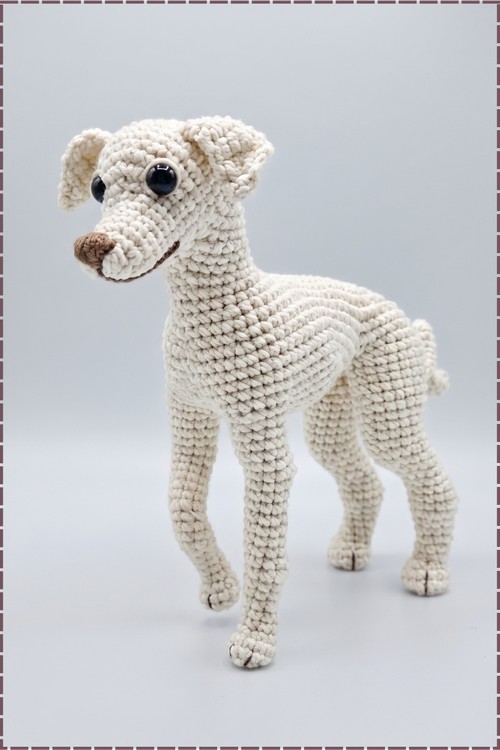
- Round 15: continue the muzzle shaping with triple increases and decreases as the shape requires, working three single crochets into one stitch where the muzzle needs to widen and decreasing where it tapers to the nose. The source does not give fixed counts for this round, so work it by eye. Aim for a narrow tapered snout that comes to a blunt rounded tip, matching the long greyhound profile. On my dog this whole muzzle section is worked in brown rather than cream, with the colour change starting where the face narrows.
Neck
- Return to the 18 skipped stitches from round 11 and attach your yarn there.
- Neck round 11: work 18 SC around the neck opening. (18)
- Neck round 10: 8 SC, 1 INC, 9 SC, 1 DEC. Keep the increase on the front of the neck and the decrease at the back, since this is what sets the forward tilt of the head.
- Neck round 13: 9 SC, 1 triple increase, 8 SC, 1 DEC.
- Neck round 14: 11 SC, then chain 16. Skip the first chain, work 1 INC in the second chain, 14 SC along the chain, 1 SC in the base, then 10 SC. That chain becomes the top line of the back, and the dog's length comes from it, so keep the chains loose and even.
- Neck rounds 15 to 17: continue working the body and chest shaping rounds with increases and decreases as the shape demands. No fixed counts are given for these. Build width at the chest and keep the back line straight.
Body and Torso
- Round 16: 24 SC, then 7 increases, then 23 SC. Those 7 increases sit together and form the deep chest, which is the defining part of a sighthound shape.
- Rounds 24 and 25: work shift rounds, stepping back one stitch at the start of each round and working 19 to 20 SC per side to shape the torso and tuck the waist. No exact counts are given here either. Stuff the chest and torso firmly as it grows, since a soft body will not hold the dog upright later.
- Round 26: chain 2, skip 9 stitches, work 18 SC, skip 17 stitches, work 18 SC, chain 2, skip 9 stitches. All four leg openings are created in this single round, so count twice before you move on. A miscount here means unpicking the entire round.
- Round 27: 2 SC, 2 SC into the chain space, 9 SC, then 1 SC, 1 DEC, 1 SC repeated 5 times, 9 SC, 2 SC into the chain space, 2 SC. Working into the chain spaces closes the corners so no holes show at the tops of the legs.
Legs, Front and Back
- Pick up stitches evenly around each leg opening, roughly 17 to 18 single crochets along the base plus about 4 corner stitches to close the gaps cleanly.
- Leg round 1: work evenly around in a spiral and mark the beginning of the round.
- Leg round 2: 8 SC, 1 DEC, 9 SC, 1 INC, 1 SC.
- Continue working down each leg, following the targeted decrease rounds including three stitch single crochet decreases, tapering steadily toward the paw. The source gives no full round by round counts for the leg length, so work until each leg reaches the proportion shown and keep all four matched.
- Stuff the legs with small amounts of fiberfill every few rounds as you build length. Greyhound legs are long and thin, so pack them firmly with tiny pinches rather than trying to fill from the top at the end.
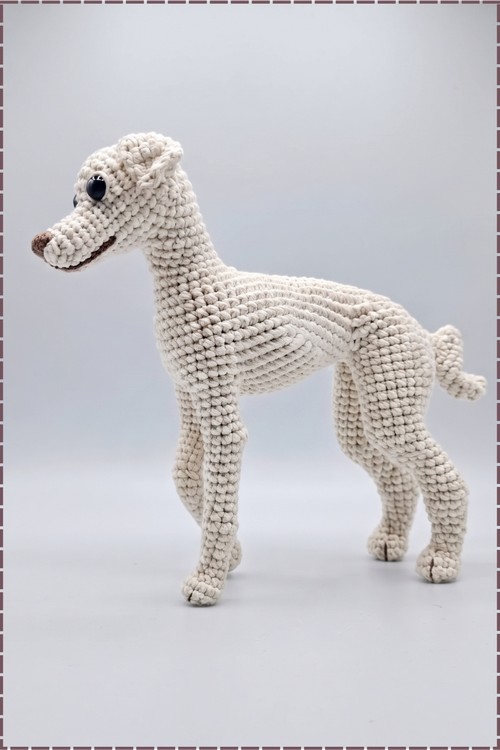
- Finish each paw by closing the final stitches and weaving the tail inside. On my dog each paw has two short embroidered lines in dark thread across the front, dividing the toes.
Tail
- Foundation: chain 2 and work 1 SC into the second chain from the hook.
- Row 2: chain 1 to turn, 1 INC.
- Row 3: chain 1 to turn, 1 SC, 1 INC.
- Row 4: 1 SC, 1 INC, 1 SC.
- Row 5: 3 SC, 1 INC.
- Row 6: 2 SC, 1 INC, 2 SC.
- Rows 7 to 9: 6 SC in each row.
- Continue in the same way until the tail reaches the length you want, then work the finishing row of 1 SC, 1 INC, 1 SC and fasten off. Do not stuff the tail. An unstuffed tail keeps that thin curved sighthound line and will not stick out stiffly.
- Sew the tail low on the rear of the body so it hangs down and curves slightly, as mine does.
Ears
- Work the two floppy ears separately as flat shaped pieces, following the ear section of the source tutorial. No written counts are provided for them.
- Sew the ears securely onto the upper sides of the head around rows 5 and 6. On my dog they sit high and quite far back, folding forward and down against the sides of the head rather than standing up. Pin them before sewing and look at the dog from the front, since ear placement changes the whole expression.
Face
- Insert the black safety eyes low and wide on the face, set on either side of the narrow skull rather than on the front. This placement is what makes the head read as a hound instead of a teddy.
- Embroider a thin mouth line in dark thread running back from the base of the brown muzzle along each side.
- The nose is worked as part of the brown muzzle on my version, with the tip shaped slightly darker and rounded rather than being embroidered separately.
Tips and Troubleshooting
- Use a different coloured marker for each leg opening in round 26. Four openings in one round is the single most error prone step in this pattern, and coloured markers make the counts visible at a glance.
- Stuff more firmly than feels right. A greyhound stands on four thin legs and carries a long neck, and any softness in the chest or legs makes the finished dog sag or tip.
- If a leg bends in the wrong direction, you probably placed the decrease round on the wrong side. Check that all four legs have their shaping running in the same orientation before you go too far down.
- Work the shaping rounds with no stated counts slowly, and stop every few rounds to stand the piece up and look at it. Shaping by eye only works if you keep checking the silhouette.
- If the neck will not hold the head up, add more stuffing into the neck specifically and pack it tight before closing. The neck does all the work on this shape.
Yarn Substitution
Any smooth cotton at a similar fine weight will give the same crisp stitch definition you can see in my photo. Cotton is the right choice here because it holds the leg shapes rigid. Acrylic works but is softer and more likely to let the legs bow under the body's weight, so go down a hook size if you use it. Avoid anything with a halo or fuzz, since the whole appeal of this dog is the clean sculpted outline. If you move to a heavier yarn the pattern still works, you just get a much larger dog and will need bigger eyes to match.
Customization Ideas
- Work the body in grey, fawn or black for other sighthound colours and keep the lighter muzzle.
- Add white socks by changing colour partway down each leg.
- Give it a brindle look by carrying a second shade loosely for a few rounds at a time.
- Add a thin crochet chain collar in a contrast colour around the neck.
- Leave the muzzle in the body colour for a single tone dog.
- Make the ears slightly larger for a softer, more puppy like face.
FAQ
What does working in a spiral mean and why does it matter? You crochet round and round without joining each round, which avoids a visible seam line. The catch is that nothing tells you where a round begins, so you must keep a marker in the first stitch and move it up each time.
How do I skip 18 stitches without ruining the piece? You simply do not work into them. Carry your yarn across and make your next stitch in the stitch after the skipped section. Those stitches stay live and you come back to them later to build the neck.
Why am I chaining in the middle of a round? Chains bridge a gap where a leg opening will be. On the next round you work into those chains, which closes the top of the opening neatly while leaving the hole for the leg itself.
Some rounds say to shape by eye. What do I actually do? Work plain single crochet and add an increase where the shape needs to get wider or a decrease where it needs to pull in, checking the piece against the photo as you go. Keep notes of what you did so the other side matches.
My dog will not stand up. How do I fix it? Nearly always under stuffing. Open the nearest seam, add more fiberfill to the chest and upper legs, and check that all four paws sit flat. A heavy base and firm legs are what let it balance.
Take it round by round and give yourself more than one sitting, and you will end up with a dog that stands on its own.