
Crochet Kitten Amigurumi Free Pattern With Sleepy Eyes
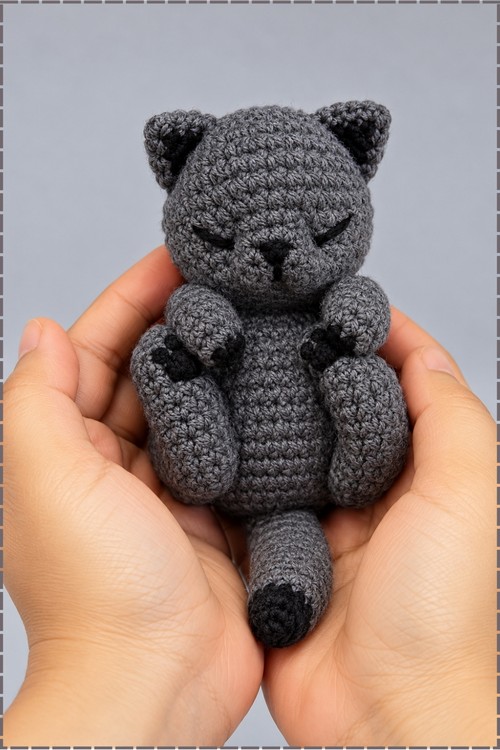
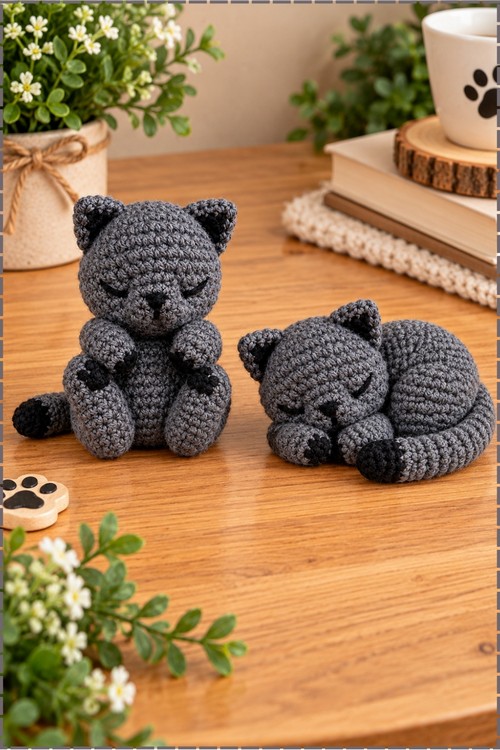
Charcoal grey yarn with black paw pads, inner ears and tail tip gives the crochet kitten amigurumi a darker coated look, while embroidered closed eyes keep it sleepy. Plan on about four hours, far longer than a quick keychain, since face sculpting eats most of it.
Eyes shut and paws resting on its belly, the crochet kitten amigurumi looks like it dozed off mid sit. Nothing hurried about it. The tail flops wherever you leave it. Crochet kitten amigurumis carry that half asleep look better than any wide eyed cat pattern does.
Crochet Kitten Amigurumi
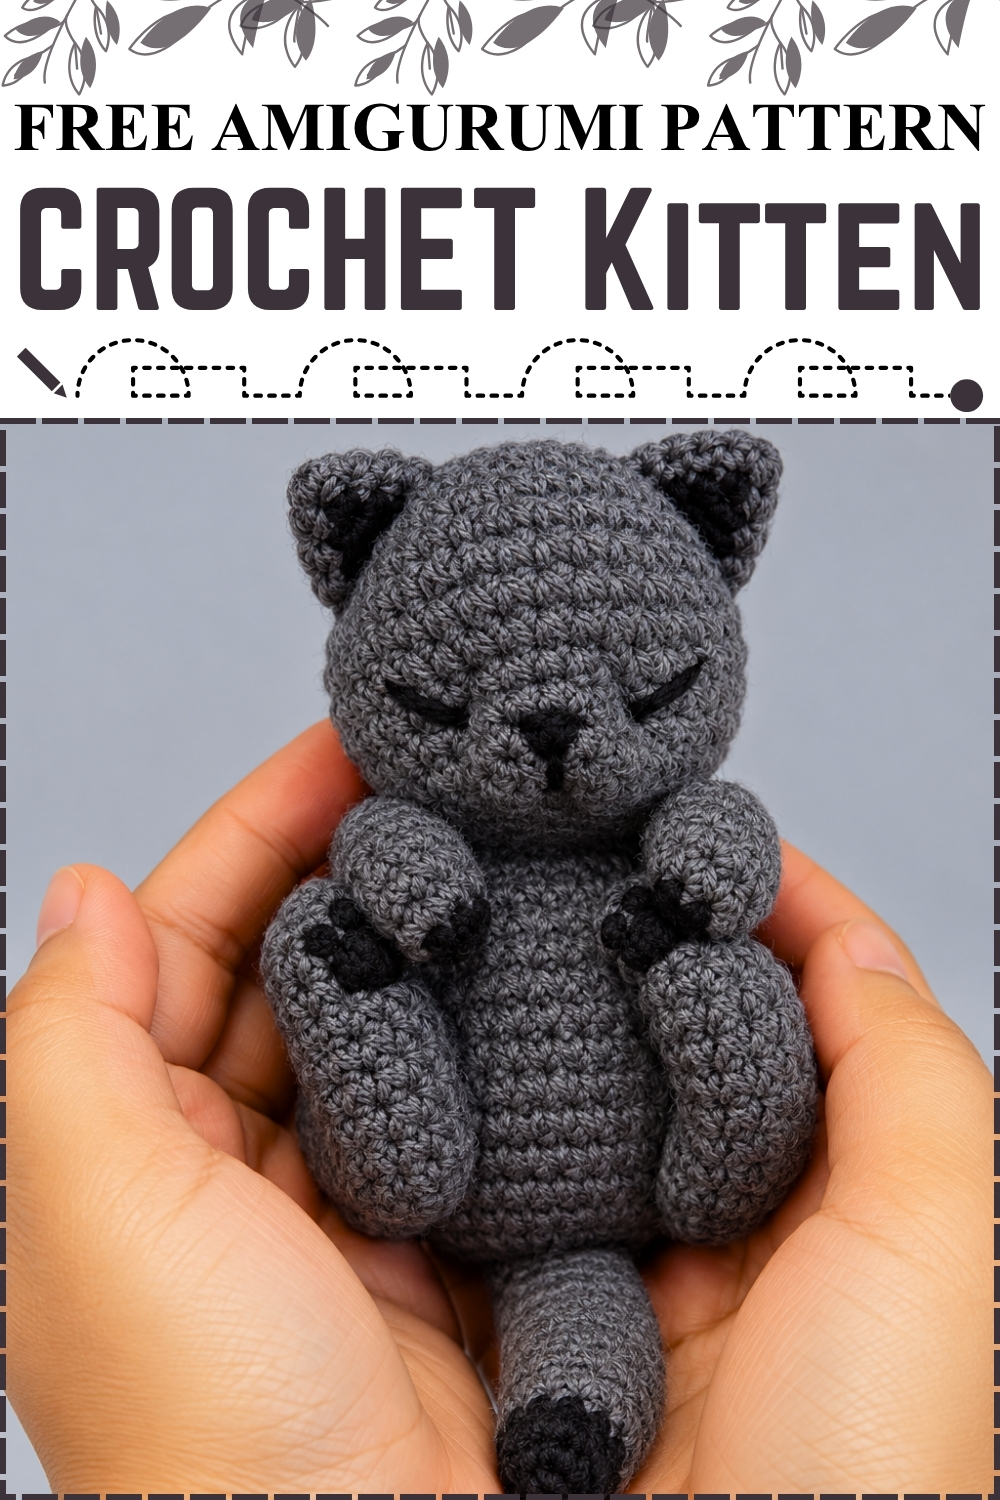
Two small circles join cheek to cheek to start this crochet kitten amigurumi, and the entire head grows outward around that seam. Ears rise straight out of round 10 in front loops, so nothing gets sewn onto the head afterwards. Grey yarn covers the kitten from nose to tail on mine. Black marks the inner ears, the paw pads, the nose and the tail tip. Closed curved eyes give it a sleepy, contented expression. Paws stay unstuffed so they bend and settle naturally. Sitting upright in two hands, the finished kitten is small enough to hold completely.
A Note Before You Begin
I will be honest about this one. The head construction caught me off guard the first time. Starting with two separate little circles and joining them before you work around the outside feels strange, and I was convinced I had done it wrong until round 5 when the muzzle suddenly appeared. Trust the process there. That join is exactly what gives this kitten a real cat face instead of the usual flat amigurumi circle, and it is the single reason this pattern looks the way it does.
Everything after the head is ordinary amigurumi. If you have made a bear or a bunny before, the body, paws and tail will feel familiar.
Materials and Tools
- Medium grey yarn for the head, body, paws and tail. Mine is a solid charcoal grey with no variegation, and the flat colour lets the sculpted face show clearly.
- Black yarn for the inner ears, paw pads, nose and tail tip. The original pattern suggests pink for these details, but my kitten uses black throughout, which reads as a darker coated cat.
- Black embroidery thread or fine black yarn for the closed eyes.
- Crochet hook to suit your yarn, one size smaller than the label suggests.
- Stitch marker.
- Tapestry needle.
- Polyester fiberfill.
- Fabric chalk, blush or eyeshadow if you want soft shading, which is optional and which I left off.
- Pet brush if you want to fluff a wool or acrylic yarn, also optional and not used on mine.
Size and Time
My kitten fills a cupped pair of hands, roughly the size of a large orange when sitting. Your yarn weight and tension will change this considerably, so treat it as a guide rather than a measurement. I spend about four hours in total, and a good portion of that goes into the face sculpting and assembly rather than the crochet.
Beginner Technique Notes
- SC means single crochet, DC means double crochet, INC means increase which is two single crochets in one stitch, DEC means decrease which is two stitches worked together, SL ST means slip stitch, and CH means chain.
- DC INC means two double crochets worked into the same stitch, which is how the ears get their height.
- FLO means front loops only and BLO means back loops only. Round 10 of the head depends entirely on this, so find the two loops at the top of each stitch and practise working into just the front one before you get there.
- This pattern joins each round with a slip stitch and a chain 1 rather than spiralling. That chain is not a stitch and you never work into it.
- Needle sculpting means passing a threaded needle right through the stuffed head and pulling to create a permanent dent. It feels destructive the first time and it is completely normal.
The Pattern
Head
The head starts as two circles that become the cheeks and muzzle. On my kitten the black nose sits directly on the seam where these two circles meet.
- Make a magic ring and work 6 SC into it, pulling tight to close. (6) Slip stitch into the first stitch, chain 1, and cut the yarn leaving a short tail. This is cheek circle one.
- Make a second magic ring with 6 SC and do not cut the yarn this time. (6) This is cheek circle two.
- Turn your work, insert the hook into the last SC you made, then pick up circle one and insert the hook into its final slip stitch.
- Work 2 SC through all four loops of both pieces at once to join them, then continue around the outside of the joined piece. Keep these two joining stitches tight, since a loose join leaves a visible gap right under where the nose will sit.
- Round 2: place a stitch marker in the first stitch, then work 2 SC over the first piece, the third SC into the joining stitch, the fourth SC into the next stitch, 2 INC, 4 SC, 2 INC, and finish with 2 SC. (16) Remove the marker, slip stitch and chain 1. The piece should look like a wide flattened peanut at this stage.
- Round 3: starting in the last stitch where the slip stitch was worked, 7 SC, 2 INC, 7 SC. (18) Slip stitch and chain 1.
- Round 4: 2 SC and 1 INC repeated 3 times, then 1 INC and 2 SC repeated 3 times. (24) Slip stitch and chain 1. The two halves of this round are deliberately mirrored, so do not collapse them into one repeat or the face pulls to one side.
- Round 5: 3 SC and 1 INC repeated 3 times, then 1 INC and 3 SC repeated 3 times. (30) Slip stitch and chain 1. The muzzle should now be clearly visible as a raised area at the front.
- Rounds 6 to 9: work 4 rounds of 30 SC. (30) The head is now a rounded dome with the muzzle standing proud.
- Round 10: work 10 SC normally. For the first ear, working in front loops only, work 1 SC, 1 DC INC, chain 1, 1 DC INC, 1 SC. Work 5 SC through both loops across the forehead. For the second ear, working in front loops only, work 1 SC, 1 DC INC, chain 1, 1 DC INC, 1 SC. Finish the remaining 7 SC normally. (36 counting the ear chains) Slip stitch and chain 1. Keep the two ear sections pointed and upright as you work them, since on a cat these should come to a clear triangular tip rather than a rounded one.
- Round 11: 10 SC, then 4 SC into the unworked back loops behind the first ear. Skip 7 stitches, work 5 SC, then work 4 SC behind the second ear. Skip 7 stitches and work the last 7 SC normally. (30) Slip stitch and chain 1. The ears now sit free of the head while the head continues underneath them.
- Round 12: 30 SC around. (30) Slip stitch and chain 1.
- Round 13: 3 SC and 1 DEC repeated 6 times. (24) Slip stitch and chain 1.
- Round 14: 1 SC, 1 DEC, 1 SC repeated 6 times. (18) Slip stitch and chain 1. Start stuffing the head firmly here while the opening is still wide enough to work with.
- Round 15: 1 SC and 1 DEC repeated 6 times. (12) Slip stitch and chain 1. Add more stuffing and press the muzzle outward from inside so it keeps its shape.
- Round 16: 6 DEC. (6) Slip stitch, chain 1, and cut the yarn leaving a tail of about 20 cm.
- Close the head by threading the tail onto a tapestry needle, weaving through the front loops of the final 6 stitches, and pulling tight. Hide the end inside.
- Fill the inner ears with black. On my kitten the front face of each ear is black while the back stays grey. Work this with a few flat satin stitches in black yarn across the inner ear surface, keeping the stitches close together so no grey shows through.
Body
- Round 1: magic ring with 6 SC, closed. (6)
- Round 2: 6 INC, placing a marker in the first stitch. (12)
- Round 3: 1 SC and 1 INC repeated 6 times. (18)
- Round 4: 1 SC, 1 INC, 1 SC repeated 6 times. (24)
- Round 5: 3 SC and 1 INC repeated 6 times. (30)
- Rounds 6 to 10: work 5 rounds of 30 SC. (30) The body is a straight sided barrel at this point.
- Round 11: 3 SC and 1 DEC repeated 3 times, then 15 SC. (27) All the decreases sit on one side, and that side becomes the back. The flatter side is the belly, which faces forward on my kitten.
- Round 12: 27 SC around. (27)
- Round 13: 2 SC and 1 DEC repeated 3 times, then 15 SC. (24)
- Round 14: 24 SC around. (24)
- Round 15: 1 SC and 1 DEC repeated 3 times, then 15 SC. (21)
- Round 16: 21 SC around. (21)
- Round 17: 3 DEC, then 15 SC. (18)
- Round 18: 15 SC, then 3 SL ST. (18)
- Round 19: remove the marker and work 6 SL ST, 8 SC, 1 SL ST. Chain 1 and cut the yarn leaving a long tail of about 30 cm for assembly. Stuff the body firmly before you sew anything, because this kitten sits upright and a soft body slumps forward.
Front Paws, Make Two
- Round 1: magic ring with 6 SC, closed. (6)
- Round 2: 2 SC and 1 INC repeated 2 times. (8)
- Rounds 3 to 10: work 8 rounds of 8 SC. (8)
- Round 11: 3 SC, 2 DC, 3 SC. (8) The two double crochets create the slight bend that becomes the wrist.
- Round 12: 1 SL ST, 2 SC, 2 DC, 2 SC, 1 SL ST. (8) Chain 1 and cut a long tail for sewing.
- Leave these unstuffed so they stay flexible. On my kitten both front paws curl inward toward the chest, which only works because they are empty.
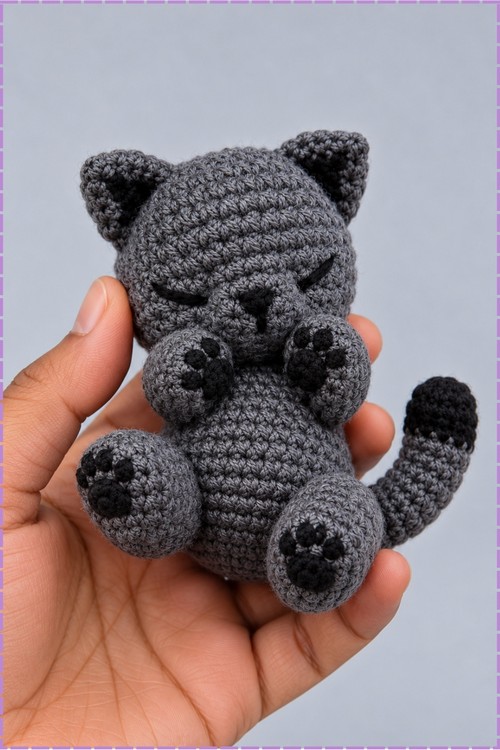
- Embroider the toe pads on the lower front of each paw. Mine are black rather than pink, worked as three small raised bumps close together with a short line between them, clearly visible because the paws face forward.
Back Paws, Make Two
- Foundation: chain 8.
- Round 1: starting in the second chain from the hook, work 1 INC, 5 SC, 3 SC in the last chain, then turn and work 6 SC along the opposite side. (16) You should have a flat oval sole.
- Round 2: 2 INC, 5 SC, 3 INC, 5 SC, 1 INC. (22)
- Round 3: 22 SC around. (22) Embroider the paw pad details on the bottom of the foot now while it is flat and easy to reach. Mine are black.
- Round 4: 2 DEC, 5 SC, 3 DEC, 5 SC, 1 DEC. (16)
- Round 5: 1 INC, 2 SC, 1 INC, skip 9 stitches, then in the tenth stitch work 1 INC, 2 SC. (10) Skipping those stitches creates the ankle bend that tips the foot forward. Count carefully here, as this is the fiddliest round in the whole pattern.
- Round 6: 2 INC, 3 SC, 2 INC, 3 SC. (14)
- Round 7: 1 SC, 2 INC, 5 SC, 2 INC, 4 SC. (18)
- Rounds 8 to 10: work 3 rounds of 18 SC. (18)
- Round 11: 1 SC and 1 DEC repeated 6 times. (12)
- Round 12: 6 DEC. Work 1 SL ST, chain 1, and cut a long tail of about 30 cm.
- Leave the back paws unstuffed and close the top opening flat with a tapestry needle. Flat tops are what let the legs sit snugly against the body in a sitting pose.
- Make a second identical back paw, mirroring the shaping so the two feet point slightly outward rather than both the same way.
Tail
- Round 1: magic ring with 6 SC, marker placed, ring closed. (6)
- Round 2: 6 SC around. (6)
- Round 3: 1 INC, 5 SC. (7)
- Rounds 4 and 5: work 2 rounds of 7 SC. (7)
- Round 6: 1 INC, 6 SC. (8)
- Rounds 7 to 9: work 3 rounds of 8 SC. (8)
- Round 10: 1 INC, 7 SC. (9)
- Rounds 11 to 14: work 4 rounds of 9 SC. (9) Work 1 SL ST, chain 1, and cut a long tail for sewing.
- Stuff the tail only lightly so it stays bendable. A firmly stuffed tail sticks out straight and ruins the relaxed look.
- The tip of my tail is black. Change to black yarn for the final rounds at the wide end, which becomes the visible tip once the tail is attached, and carry the grey behind rather than cutting it if you prefer a cleaner inside.
Face and Assembly
- Pin the indentation points on the head where the eyes will sit, roughly 4 rounds below the base of the ears.
- Thread a needle with grey yarn and pass it through the head at those marked points, pulling to create the eye and cheek contours, then knot securely and hide the ends. This sculpting is what gives the face depth, and skipping it leaves a flat ball with features drawn on.
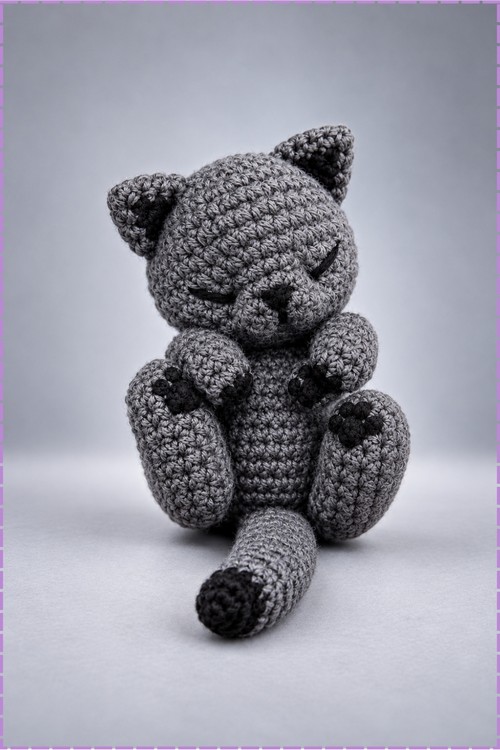
- Embroider the eyes at the indented points using black thread. Mine are closed sleepy eyes, worked as two shallow downward curves rather than open eyes, which is what makes this kitten look like it is dozing.
- Stitch a small black nose right on the seam where the two original circles meet, worked as a small triangle with the point facing down. Add two short lines running down and outward from the base of the nose for the mouth.
- Shading with chalk or blush on the inner ears and cheeks is optional. I left mine unshaded and the black inner ears do that job instead.
- Sew the head onto the body with the flatter belly side of the body facing forward. Mine sits almost upright with only a slight forward tilt, giving that sleepy upright pose. Add a pinch more stuffing through the gap just before closing the seam.
- Sew the front paws to either side of the upper body directly below the head seam, angled so both paws curl inward toward the chest as mine do.
- Sew the back paws to the lower sides of the belly, spanning roughly rounds 4 to 12 of the body, with the soles facing forward and the feet tipped slightly outward so the kitten sits stable.
- Sew the tail at the lower back between rounds 1 and 4, centred between the hind legs. On mine the tail curves forward and rests on the surface in front of the body rather than standing up behind.
Tips and Troubleshooting
- Work the two cheek circles at the same tension. If one is looser than the other, the muzzle sits crooked and no amount of sculpting fixes it later.
- Count the skipped stitches twice in round 11 of the head and round 5 of the back paws. These are the only two places in the pattern where a miscount is invisible until several rounds later.
- Sculpt the face before you embroider anything. The pulling shifts the surface stitches, and eyes stitched first will end up in the wrong place.
- Stuff the head and body firmly but the paws and tail not at all or barely. The contrast between rigid core and soft limbs is what makes the sitting pose hold.
- Pin all four paws and the tail before sewing a single stitch, then stand the kitten up and look at it from the front and the side. Small placement errors are much easier to see while everything is still on pins.
Yarn Substitution
Any smooth worsted or DK cotton or acrylic will work here and will give you a clean surface for the sculpted face. Cotton holds the muzzle shape more sharply, which I prefer on this pattern, while acrylic is softer and brushes up well if you want a fluffier cat. If you do want fluff, choose acrylic and brush gently with a pet slicker after assembly, taking care around the embroidered face. Avoid chenille and velvet yarns here, since the pile hides the needle sculpting completely and the whole character of this kitten lives in those contours. Keep the black accent yarn the same weight as the main colour so the paw pads and nose sit flush rather than bulging.
Customization Ideas
- Work the body in cream, ginger or pure black and keep the darker accents for different breeds.
- Add white socks by changing colour on the last few rounds of each paw.
- Embroider open eyes instead of closed ones with a small white highlight for an alert kitten.
- Keep the pink accents from the original pattern for the nose and pads if you want a softer look than my black.
- Add a thin chain collar in a contrast colour with a small bead for a tag.
- Make the tail longer by repeating the final straight rounds before you fasten off.
- Work the inner ears in pale pink against grey for a more traditional cat look.
FAQ
Why does the head start with two separate circles? They become the two sides of the muzzle. Joining them before working around the outside creates a raised, divided snout, which is why this kitten has a real cat profile instead of a flat round face.
Can I use safety eyes instead of embroidering? You can, but you would lose the sleepy expression. If you want open eyes, insert safety eyes at the sculpted indentation points before you close the head, since the backings cannot be reached afterwards.
Why are the paws left unstuffed? Flexibility. Unstuffed paws bend where you want them, which lets the front paws curl in and the back feet sit flat. Stuffed paws stick out stiffly and the kitten will not sit properly.
My ears are floppy. What went wrong? Either the front loop stitches in round 10 were worked too loosely, or the head is under stuffed behind them. Try firming the stuffing at the top of the head first, and if that does not fix it, a few small stitches at the base of each ear will stand them up.
How do I get the kitten to sit without tipping? The back paws must be sewn far enough forward and apart to make a stable base, and the body needs firm stuffing at the bottom. If it still tips backward, move the tail attachment slightly lower so it acts as a third contact point.